android自定义控件实现及其完整的生命周期(一)
最近打算总结一下自己学习的android技术,就打算写一系列的android学习博客,这是起始篇。
在学习的过程中参考了多位大神的博客,包括:http://blog.csdn.net/lmj623565791/article/details/24252901;http://www.imooc.com/qadetail/117026。
内容可能存在错误的地方,欢迎各位大神指出并留言,不胜感激!!
本篇博客分为两个部分,第一部分就是主要介绍自定义控件的过程;第二部分就是主要介绍自定义控件的生命周期以及加载的过程。
下面介绍第一部分的内容,也就是自定义控件具体的实现过程:
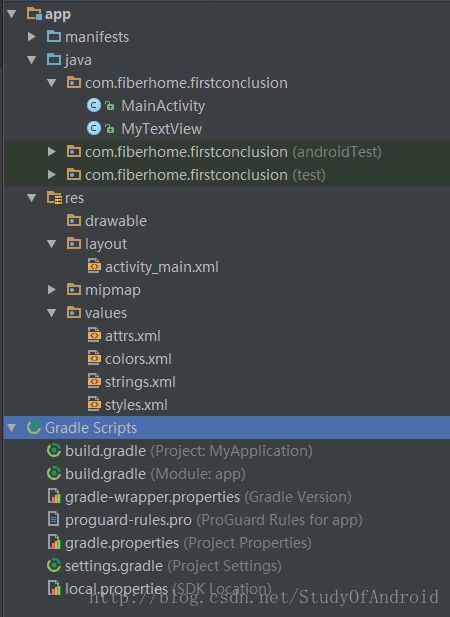
整个应用的结构如图所示:
1.自定义控件首先需要定义一个类,我的类是MyTextView,然后重载三个构造函数
public MyTextView(Context context) {
        this(context, null);
        Log.i(TAG,"MyTextView 1");
    }

    public MyTextView(Context context, @Nullable AttributeSet attrs) {
        this(context, attrs, 0);
        Log.i(TAG,"MyTextView 2");
    }

    public MyTextView(Context context, @Nullable AttributeSet attrs, int defStyleAttr) {
        super(context, attrs, defStyleAttr);
        Log.i(TAG,"MyTextView 3");

    }
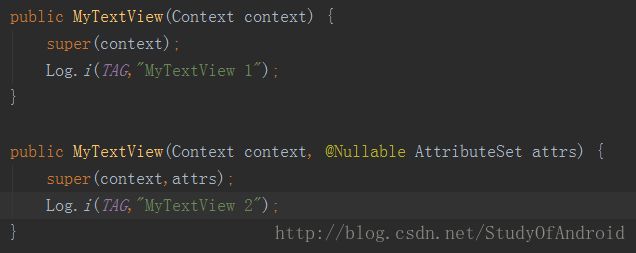
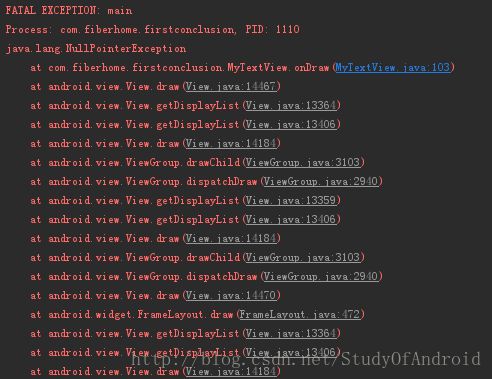
这里需要注意的是:如果在前两个构造函数中,是没有改为this,仍然使用的super,就会导致出现空指针异常,是因为只调用的第二个构造函数,第三个定义的构造函数没有被调用,没有new出需要的画笔。
2.在values文件夹下自定义一个attrs.xml资源文件,具体代码如下:
<resources>
    <attr name="Text" format="string"/>
    <attr name="TextColor" format="color"/>
    <attr name="TextSize" format="dimension"/>

    <declare-styleable name="MyTextView">
        <attr name="Text"/>
        <attr name="TextColor"/>
        <attr name="TextSize"/>
    declare-styleable>

resources>
3.在布局文件中使用自定义控件
"http://schemas.android.com/apk/res/android"
    xmlns:app="http://schemas.android.com/apk/res-auto"
    xmlns:tools="http://schemas.android.com/tools"
    android:layout_width="match_parent"
    android:layout_height="match_parent"
    android:orientation="vertical"
    tools:context="com.fiberhome.firstconclusion.MainActivity">

    <com.fiberhome.firstconclusion.MyTextView
        android:layout_width="wrap_content"
        android:layout_height="wrap_content"
        app:Text="Hello Definition"
        app:TextColor="@android:color/holo_orange_dark"
        app:TextSize="25sp"
        android:layout_centerInParent="true"
        />
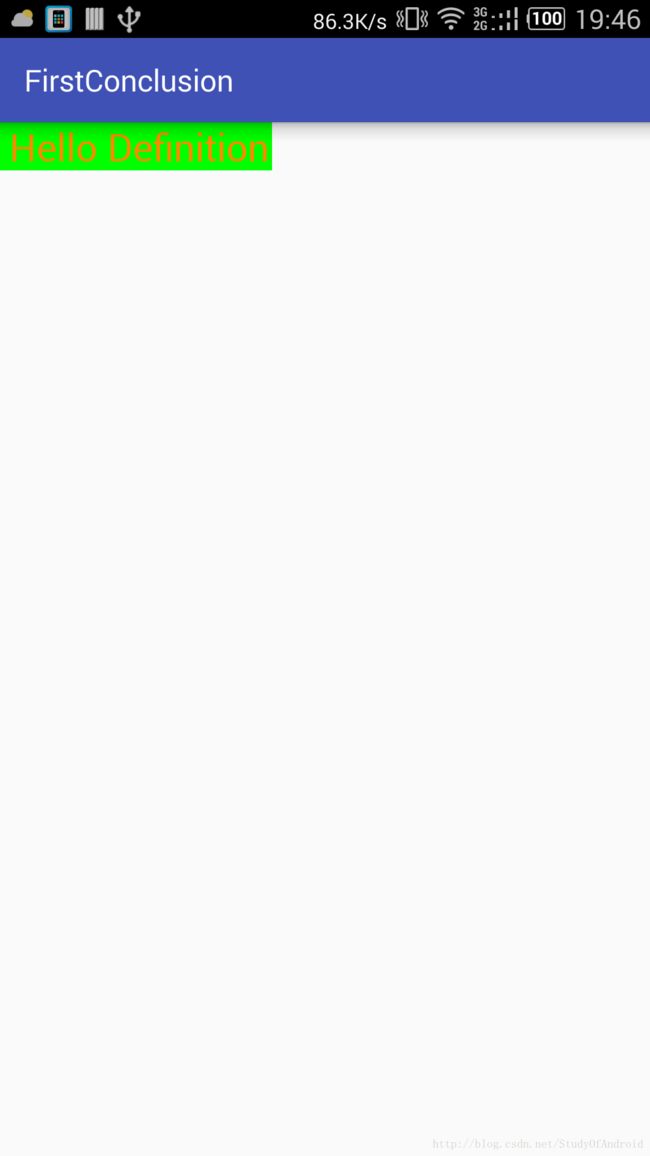
4.在控件中获取属性值,并且将控件显示出来:
在MyTextView中主要是三个方法的重写:分别是onMeasure()、onSizeChanged()、 onLayout()、 onDraw()。
onMeasure()方法主要是来确定控件的大小;onSizeChanged()方法是当控件大小改变的时候被调用; onLayout()方法主要是确定控件在父视图中的布局位置; onDraw()就是将最终的效果显示出来,还要显示控件的内容。
public class MyTextView extends View {


    private static final String TAG = "MyTextView";

    /**
     * 文本内容
     */
    private String text;
    /**
     * 文本颜色
     */
    private int color;
    /**
     * 文本大小
     */
    private int size;

    private Paint mPaint;
    /**
     * 控制绘图的范围
     */
    private Rect mBound;


    public MyTextView(Context context) {
        this(context, null);
//        super(context);
        Log.i(TAG,"MyTextView 1");
    }

    public MyTextView(Context context, @Nullable AttributeSet attrs) {
//        super(context,attrs);
        this(context, attrs, 0);
        Log.i(TAG,"MyTextView 2");
    }

    public MyTextView(Context context, @Nullable AttributeSet attrs, int defStyleAttr) {
        super(context, attrs, defStyleAttr);
        Log.i(TAG,"MyTextView 3");

        TypedArray typedArray = context.getTheme().obtainStyledAttributes(attrs,R.styleable.MyTextView,defStyleAttr,0);
        color = typedArray.getColor(R.styleable.MyTextView_TextColor, Color.BLUE);
        text = typedArray.getString(R.styleable.MyTextView_Text);

        size = typedArray.getDimensionPixelSize(R.styleable.MyTextView_TextSize, (int) TypedValue.applyDimension(
                TypedValue.COMPLEX_UNIT_SP, 16, getResources().getDisplayMetrics()));


        typedArray.recycle();

        mPaint = new Paint();
        mPaint.setTextSize(size);
        mBound = new Rect();
        mPaint.getTextBounds(text, 0, text.length(), mBound);
    }

    @Override
    protected void onMeasure(int widthMeasureSpec, int heightMeasureSpec) {
        Log.i(TAG,"MyTextView onMeasure");
        super.onMeasure(widthMeasureSpec, heightMeasureSpec);

        //重新设置大小
        int widthMode = MeasureSpec.getMode(widthMeasureSpec);
        int widthSize = MeasureSpec.getSize(widthMeasureSpec);
        int heigthMode = MeasureSpec.getMode(heightMeasureSpec);
        int heightSize = MeasureSpec.getSize(heightMeasureSpec);

        int width = 100;
        int height = 50;
        //根据Mode的类型判断值
        switch (widthMode){
            case MeasureSpec.EXACTLY:
                width = getPaddingLeft() + getPaddingRight() + widthSize;
                break;
            case MeasureSpec.AT_MOST:
                width = getPaddingLeft() + getPaddingRight() + mBound.width()+30;

                break;
            case MeasureSpec.UNSPECIFIED: //想要多大给多大,一般无法实现
               width = getPaddingLeft() + getPaddingRight() + mBound.width();
                break;
        }

        switch (heigthMode){
            case MeasureSpec.EXACTLY:
                height = getPaddingTop() + getPaddingBottom() + heightSize;
                break;
            case MeasureSpec.AT_MOST:
                height = getPaddingTop() + getPaddingBottom() + mBound.height()+30;

                break;
            case MeasureSpec.UNSPECIFIED:
               height = getPaddingTop() + getPaddingBottom() + mBound.height();
                break;
        }

        setMeasuredDimension(width,height);
    }

    @Override
    protected void onLayout(boolean changed, int left, int top, int right, int bottom) {
        Log.i(TAG,"MyTextView onLayout");
        super.onLayout(changed, left, top, right, bottom);
    }

    @Override
    protected void onSizeChanged(int w, int h, int oldw, int oldh) {
        Log.i(TAG,"MyTextView onSizeChanged");
        super.onSizeChanged(w, h, oldw, oldh);
    }

    @Override
    protected void onDraw(Canvas canvas) {
        Log.i(TAG,"MyTextView onDraw");
        super.onDraw(canvas);

        mPaint.setColor(Color.GREEN);
        canvas.drawRect(0,0,getMeasuredWidth(),getMeasuredHeight(),mPaint);

        Log.i(TAG,"text = "+text);
        mPaint.setColor(color);
        canvas.drawText(text,getWidth()/2 - mBound.width()/2, getHeight()/2 + mBound.height()/2,mPaint);

    }

}介绍完第一部分之后,介绍第二部分,也就是自定义控件的生命周期过程及其分析:
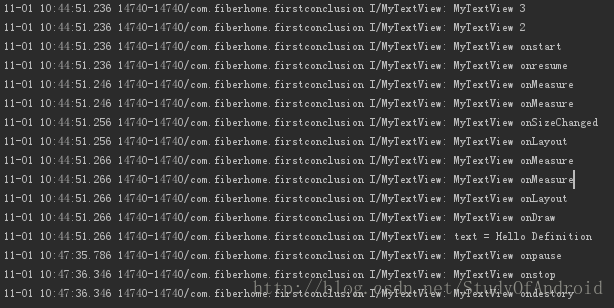
1.看一下从activity开始到最后destroy的整个过程的log:

这是在线性布局下的生命周期过程。
从其中发现,MyTextView是在onCreate之后new出来的,但是整个控件的展示确是在activity执行onResume方法之后才开始执行,也就是可以和用户进行交互之后才开始将整个控件画出来显示,而且在这个过程中执行了两次onMeasure和onLayout的方法,只执行了一次onDraw方法。
这是因为当线性布局开始加载的时候,默认是没有子控件的,这时候线性布局开始计算宽和高,然后检测到子控件,调用子控件的onMeasure和onLayout方法计算子控件的宽和高,然后调整自己的宽和高;这时候子控件的大小发生了变化,是由开始的0,0变化为赋值的属性值,这个时候重新调整布局位置,然后再一次调用子控件的onMeasure和onLayout方法计算子控件的大小和最后的位置,然后通过onDraw方法,最终显示出来。
过程图:

2.当时如果是相对布局的时候,整个过程会发生变化:
布局文件:
"http://schemas.android.com/apk/res/android"
    xmlns:app="http://schemas.android.com/apk/res-auto"
    xmlns:tools="http://schemas.android.com/tools"
    android:layout_width="match_parent"
    android:layout_height="match_parent"
    tools:context="com.fiberhome.firstconclusion.MainActivity">

    <com.fiberhome.firstconclusion.MyTextView
        android:layout_width="wrap_content"
        android:layout_height="wrap_content"
        app:Text="Hello Definition"
        app:TextColor="@android:color/holo_orange_dark"
        app:TextSize="25sp"
        android:layout_centerInParent="true"
        />
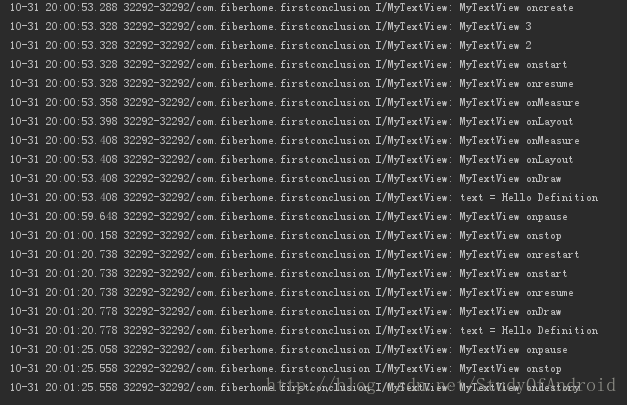
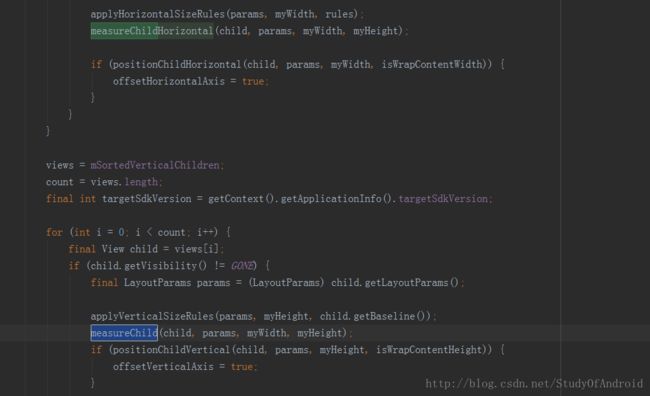
从上面可以看出,每次都是执行了两次onMeasure方法之后才执行一次onLayout方法,也就是执行了四次onMeasure方法和两次onLayout方法。这是因为相对布局加载执行onMeasure方法的时候,源代码中会调用两次子控件的onMeasure方法,分别是measureChildHorizontal和measureChild两个方法,都调用了child.measure这个方法,所以才会执行两次onMeasure方法,一次onLayout方法。至于两次onLayout方法是和之前的线性布局是一样的原理。
第一次进入的时候,和之前的执行顺序是一样的,但是当第二次进入的时候,只执行了onDraw方法,并没有执行之前的onMeasure和onLayout方法,是因为之前的布局已经记住了,所以不需要再次进行重新定义大小和位置。
到这里基本总结完毕,之后会总结自定义ViewGroup的东西。
