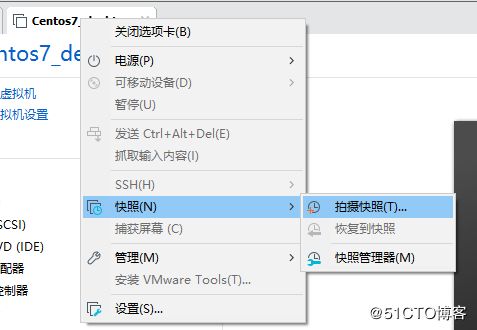
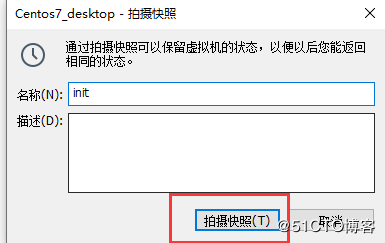
windows环境是win10 专业版 64位系统
虚拟机软件:VMware WorkStations 15pro
镜像:CentOS-7-x86_64-DVD-1908
1、运行VMware
2、点击创建新的虚拟机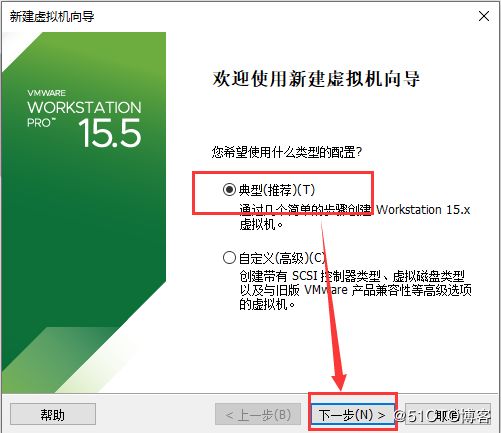
3、选择稍后安装操作系统
4、客户机操作系统选择Linux,版本选择CentOS 7 64位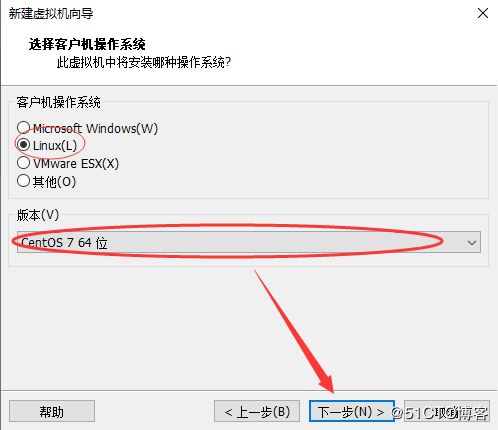
5、给新创建的虚拟机起个名字,并选择保存在windows的位置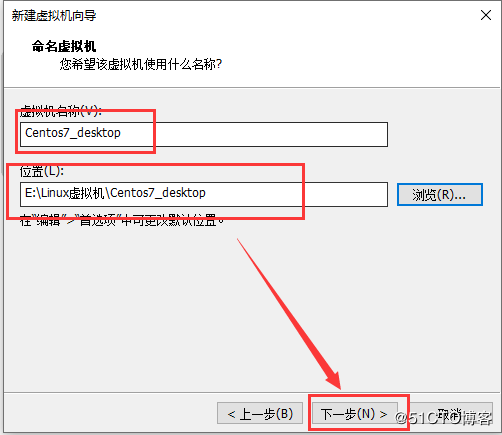
6、给此虚拟机划分多大的存储,以及选择将虚拟磁盘存储为单个文件(这样方便迁移)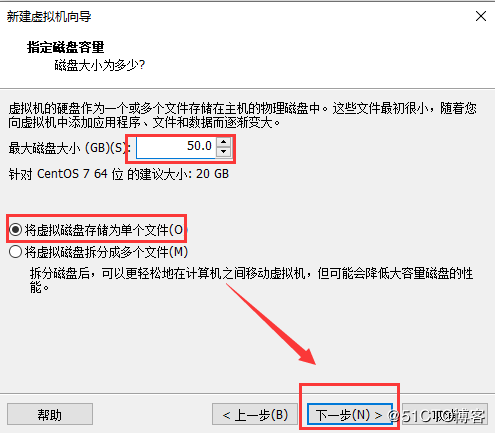
7、完成
8、装载光盘,硬件调配,选择编辑虚拟机设置。注意,安装Centos7至少需要1.5G内存,而且我这里是准备装图形界面所有我给2G,处理器可根据自身电脑配置自行定义,网络适配器的设定最好选择桥接

9,启动;选择Install CentOS 7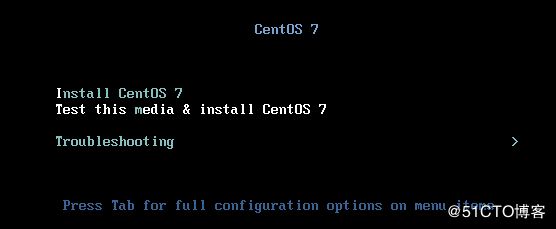
10、默认选择英文
11、需要调整时区、安装包、分区和网络
12、调整时区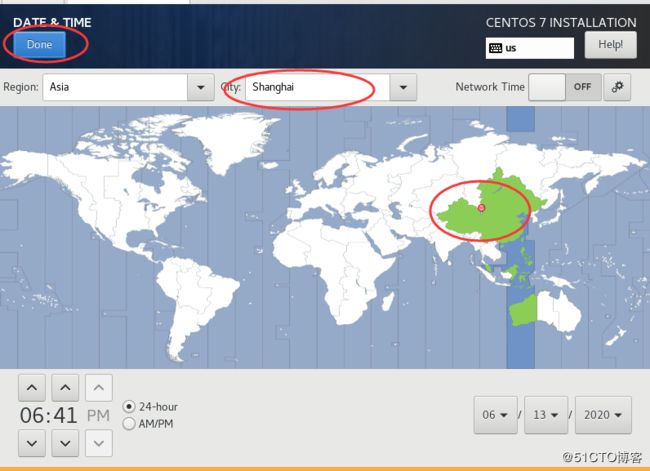
13、调整安装包,暂时只安装桌面即可,不需要再加上额外的环境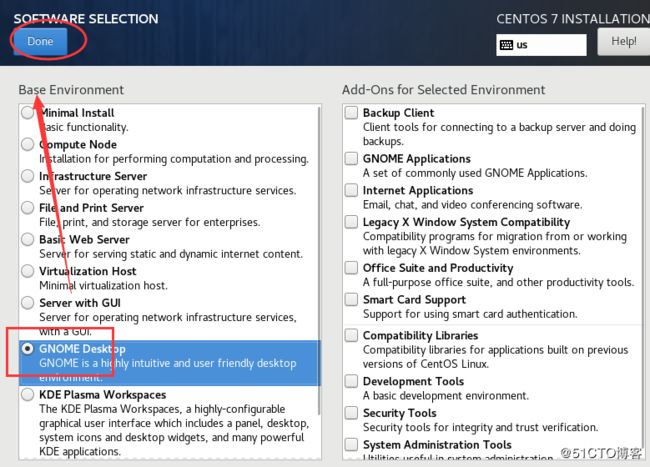
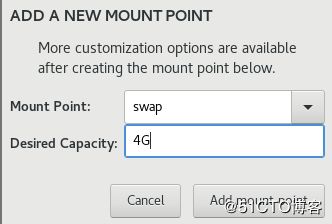
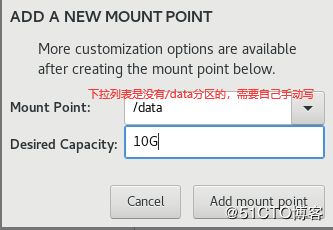
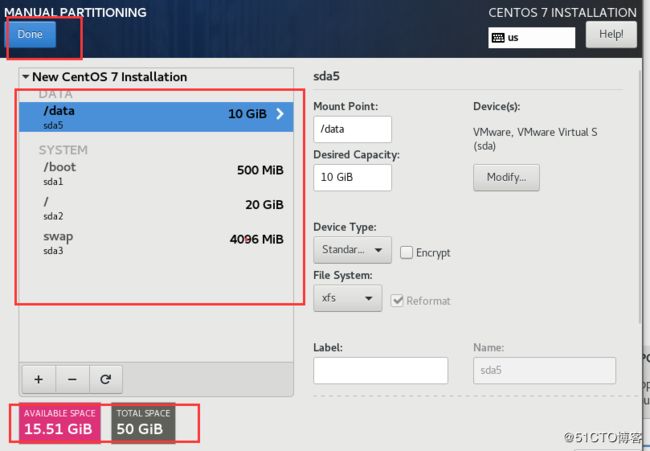
14、调整分区,默认是系统自动分区,我们需要选择手动更改,并且是标准分区格式而非逻辑卷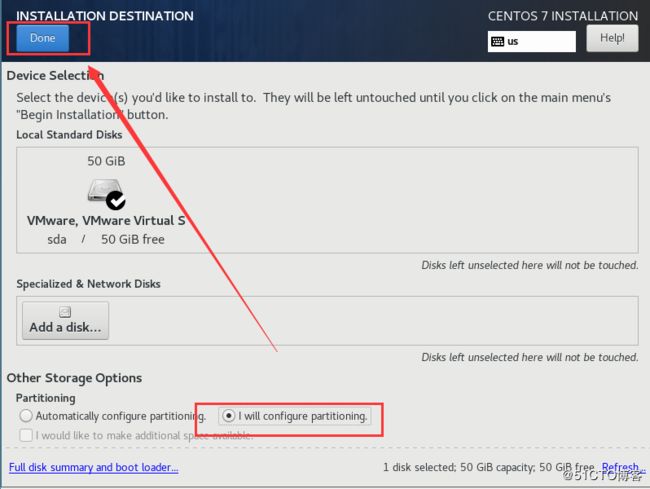
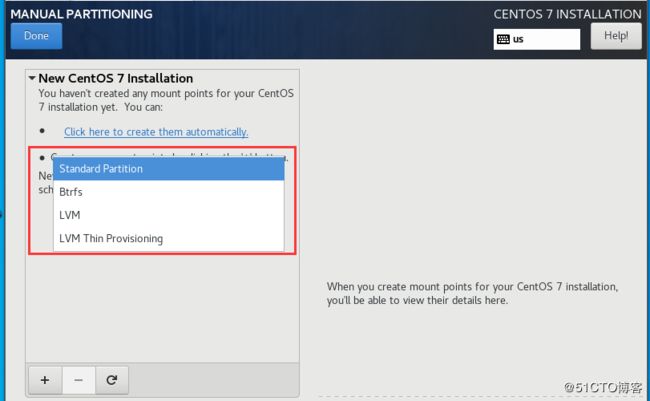
15、/boot分区500M,SWAP分区是4G,/分区是20G,/data分区是10G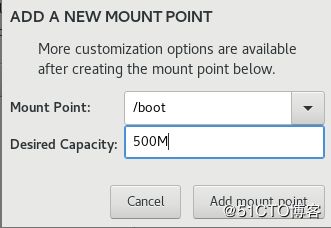

16、格式化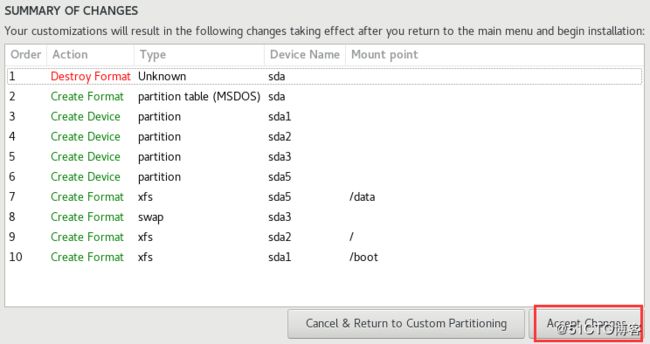
17、配置网络,在里面还有主机名,也可以直接配置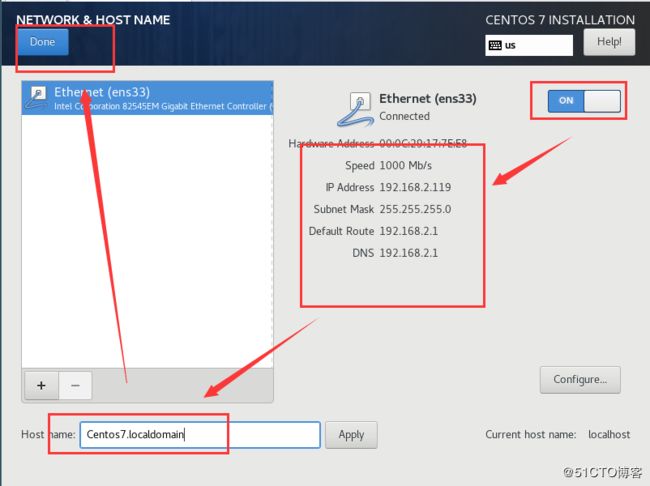
18、安装
19、配置root的密码和创建一个普通用户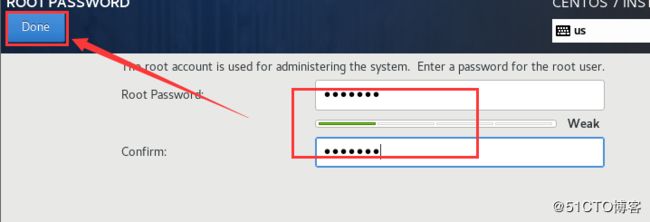

20、配置完成,坐等安装结束
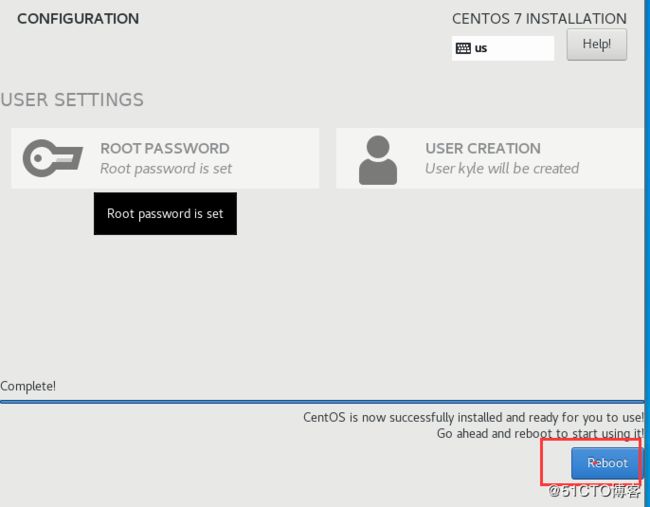

21、使用root用户连接
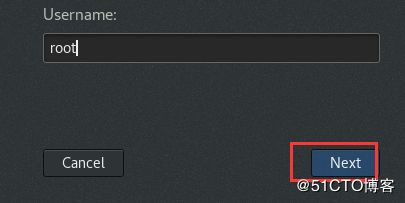
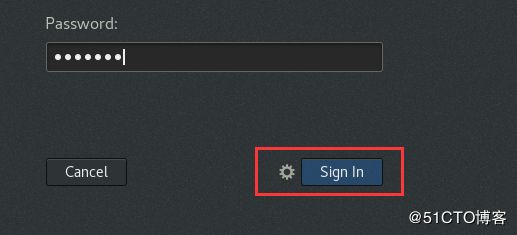
22、进入图形界面登录后会有简单的配置,根据自己需求
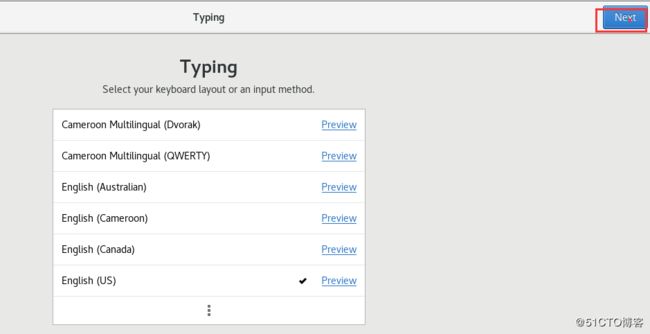
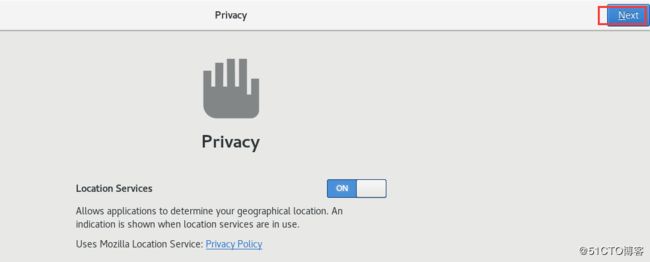


23、大功告成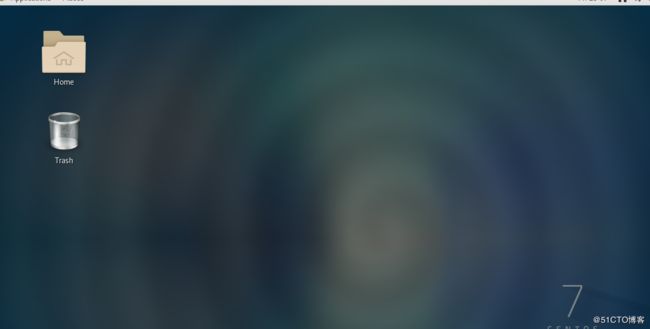
接下来就是配置环境,比如:关闭防火墙,关闭selinux,同步时间等
使用xshell连接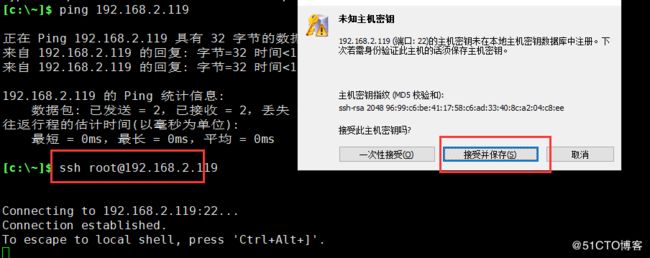
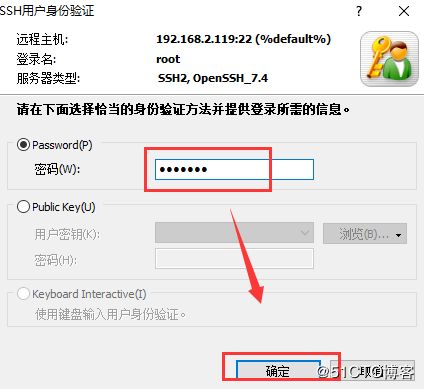
[root@Centos7 ~]#关闭防火墙
[root@Centos7 ~]# systemctl disable firewalld
Removed symlink /etc/systemd/system/multi-user.target.wants/firewalld.service.
Removed symlink /etc/systemd/system/dbus-org.fedoraproject.FirewallD1.service.
[root@Centos7 ~]# systemctl stop firewalld
[root@Centos7 ~]#
关闭seLinx
[root@Centos7 ~]# getenforce
Enforcing

[root@Centos7 ~]# cat /etc/selinux/config

# This file controls the state of SELinux on the system.
# SELINUX= can take one of these three values:
#     enforcing - SELinux security policy is enforced.
#     permissive - SELinux prints warnings instead of enforcing.
#     disabled - No SELinux policy is loaded.
SELINUX=enforcing
# SELINUXTYPE= can take one of three values:
#     targeted - Targeted processes are protected,
#     minimum - Modification of targeted policy. Only selected processes are protected.
#     mls - Multi Level Security protection.
SELINUXTYPE=targeted

[root@Centos7 ~]# sed -i.bak 's/SELINUX=enforcing/SELINUX=disabled/' /etc/selinux/config
[root@Centos7 ~]# cat /etc/selinux/config

# This file controls the state of SELinux on the system.
# SELINUX= can take one of these three values:
#     enforcing - SELinux security policy is enforced.
#     permissive - SELinux prints warnings instead of enforcing.
#     disabled - No SELinux policy is loaded.
SELINUX=disabled
# SELINUXTYPE= can take one of three values:
#     targeted - Targeted processes are protected,
#     minimum - Modification of targeted policy. Only selected processes are protected.
#     mls - Multi Level Security protection.
SELINUXTYPE=targeted

[root@Centos7 ~]# ls /etc/selinux/config*
/etc/selinux/config  /etc/selinux/config.bak
[root@Centos7 ~]#
配置YUM源,挂载光盘(其实这里可以不用配置,只需要安装aotufs即可),但是为了新手玩家,还是说下如何配置yum源
配置本地YUM源,首先要保证光盘是已经在处于连接状态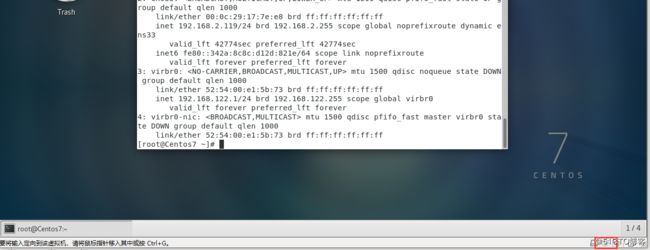

![]()
[root@Centos7 ~]# ls /etc/yum.repos.d/
CentOS-Base.repo  CentOS-Debuginfo.repo  CentOS-Media.repo    CentOS-Vault.repo
CentOS-CR.repo    CentOS-fasttrack.repo  CentOS-Sources.repo
[root@Centos7 ~]# mkdir /etc/yum.repos.d/CentOS7
[root@Centos7 ~]# mv /etc/yum.repos.d/*.repo /etc/yum.repos.d/CentOS7
[root@Centos7 ~]# ls /etc/yum.repos.d/
CentOS7

[root@Centos7 ~]# cat > /etc/yum.repos.d/local.repo < [base]
> name=local
> baseurl=file:///mnt
> gpgcheck=0
> EOF
[root@Centos7 ~]# cat /etc/yum.repos.d/local.repo
[base]
name=local
gpgcheck=0

[root@Centos7 ~]# mount /dev/sr0 /mnt
mount: /dev/sr0 is write-protected, mounting read-only
[root@Centos7 ~]# df -Th
Filesystem     Type      Size  Used Avail Use% Mounted on
devtmpfs       devtmpfs  895M     0  895M   0% /dev
tmpfs          tmpfs     910M     0  910M   0% /dev/shm
tmpfs          tmpfs     910M   11M  900M   2% /run
tmpfs          tmpfs     910M     0  910M   0% /sys/fs/cgroup
/dev/sda2      xfs        20G  4.6G   16G  23% /
/dev/sda5      xfs        10G   33M   10G   1% /data
/dev/sda1      xfs       497M  172M  325M  35% /boot
tmpfs          tmpfs     182M  4.0K  182M   1% /run/user/42
tmpfs          tmpfs     182M   52K  182M   1% /run/user/0
/dev/sr0       iso9660   4.4G  4.4G     0 100% /mnt

[root@Centos7 ~]# yum repolist
Loaded plugins: fastestmirror, langpacks
Loading mirror speeds from cached hostfile
base                                                                                                  | 3.6 kB  00:00:00
Not using downloaded base/repomd.xml because it is older than what we have:
  Current   : Wed Apr 22 07:37:50 2020
  Downloaded: Thu Sep 12 02:48:39 2019
repo id                                                     repo name                                                  status
base                                                        local                                                      10,070
repolist: 10,070

[root@Centos7 ~]# echo "/dev/sr0 /mnt iso9660 defaults 0 0" >> /etc/fstab

[root@Centos7 ~]# umount /mnt
[root@Centos7 ~]# mount -a
设置时间同步,本来是想设置的,但是想到后面我自己要搭建时间chrony服务器,所以这里就不配置,接下来就是配置网卡显示名
[root@Centos7 ~]# ip a
1: lo:  mtu 65536 qdisc noqueue state UNKNOWN group default qlen 1000
    link/loopback 00:00:00:00:00:00 brd 00:00:00:00:00:00
    inet 127.0.0.1/8 scope host lo
       valid_lft forever preferred_lft forever
    inet6 ::1/128 scope host
       valid_lft forever preferred_lft forever
2: ens33:  mtu 1500 qdisc pfifo_fast state UP group default qlen 1000
    link/ether 00:0c:29:17:7e:e8 brd ff:ff:ff:ff:ff:ff
    inet 192.168.2.119/24 brd 192.168.2.255 scope global noprefixroute dynamic ens33
       valid_lft 41700sec preferred_lft 41700sec
    inet6 fe80::342a:8c8c:d12d:821e/64 scope link noprefixroute
       valid_lft forever preferred_lft forever
centos7显示的网卡名为ens33,并不是centos6显示的eth0,所以我们需要更改过,操作如下
[root@Centos7 ~]# cat /etc/default/grub
GRUB_TIMEOUT=5
GRUB_DISTRIBUTOR="$(sed 's, release .*$,,g' /etc/system-release)"
GRUB_DEFAULT=saved
GRUB_DISABLE_SUBMENU=true
GRUB_TERMINAL_OUTPUT="console"
GRUB_CMDLINE_LINUX="crashkernel=auto spectre_v2=retpoline rhgb quiet"
GRUB_DISABLE_RECOVERY="true"
[root@Centos7 ~]# sed -r -i.bak '/GRUB_CMDLINE_LINUX/s@(.*)"$@\1 net.ifnames=0"@' /etc/default/grub
[root@Centos7 ~]# cat /etc/default/grub
GRUB_TIMEOUT=5
GRUB_DISTRIBUTOR="$(sed 's, release .*$,,g' /etc/system-release)"
GRUB_DEFAULT=saved
GRUB_DISABLE_SUBMENU=true
GRUB_TERMINAL_OUTPUT="console"
GRUB_CMDLINE_LINUX="crashkernel=auto spectre_v2=retpoline rhgb quiet net.ifnames=0"
GRUB_DISABLE_RECOVERY="true"

[root@Centos7 ~]# grub2-mkconfig -o /etc/grub2.cfg
Generating grub configuration file ...
Found linux image: /boot/vmlinuz-3.10.0-1062.el7.x86_64
Found initrd image: /boot/initramfs-3.10.0-1062.el7.x86_64.img
Found linux image: /boot/vmlinuz-0-rescue-e68f4da9c7d3416791b9baed72b2342b
Found initrd image: /boot/initramfs-0-rescue-e68f4da9c7d3416791b9baed72b2342b.img
done

[root@Centos7 ~]# grep "net.ifnames=0" /etc/grub2.cfg
    linux16 /vmlinuz-3.10.0-1062.el7.x86_64 root=UUID=ade8a943-3891-49bd-8a1e-73c5c710c72f ro crashkernel=auto spectre_v2=retpoline rhgb quiet net.ifnames=0
    linux16 /vmlinuz-0-rescue-e68f4da9c7d3416791b9baed72b2342b root=UUID=ade8a943-3891-49bd-8a1e-73c5c710c72f ro crashkernel=auto spectre_v2=retpoline rhgb quiet net.ifnames=0
重启验证是否生效,然后关机快照
[root@Centos7 ~]# getenforce
Disabled
[root@Centos7 ~]# systemctl status firewalld
● firewalld.service - firewalld - dynamic firewall daemon
   Loaded: loaded (/usr/lib/systemd/system/firewalld.service; disabled; vendor preset: enabled)
   Active: inactive (dead)
     Docs: man:firewalld(1)
[root@Centos7 ~]# ip a
1: lo:  mtu 65536 qdisc noqueue state UNKNOWN group default qlen 1000
    link/loopback 00:00:00:00:00:00 brd 00:00:00:00:00:00
    inet 127.0.0.1/8 scope host lo
       valid_lft forever preferred_lft forever
    inet6 ::1/128 scope host
       valid_lft forever preferred_lft forever
2: eth0:  mtu 1500 qdisc pfifo_fast state UP group default qlen 1000
    link/ether 00:0c:29:17:7e:e8 brd ff:ff:ff:ff:ff:ff
    inet 192.168.2.119/24 brd 192.168.2.255 scope global noprefixroute dynamic eth0
       valid_lft 43162sec preferred_lft 43162sec
    inet6 fe80::393d:7c6:8030:20ea/64 scope link noprefixroute
       valid_lft forever preferred_lft forever
设置ssh服务,关闭UseDNS 和 GSSAPIAuthentication
[root@Centos7 ~]# vim /etc/ssh/sshd_config
UseDNS no
GSSAPIAuthentication no
[root@Centos7 ~]# systemctl restart sshd
[root@Centos7 ~]#
关机,快照
[root@Centos7 ~]# shutdown -h now