用Vim完成BashShell脚本编写(bash-support : Bash IDE)
作为一名运维工程师,BashShell脚本编写必不可少。然而,大家会发现专门用来编写BashShell脚本的IDE少之又少。但是,即使这样也阻止不了我们自己通过vim来打造一款属于自己的BashShell脚本开发环境。通过以下命令及设置,我们可以很方便的完成BashShell脚本开发环境的搭建,难免疏漏,望指正。
[BashShell@Geeklp-BashShell ~]$ mkdir .vim #如果没有该目录则创建
[BashShell@Geeklp-BashShell ~]$ cd .vim
[BashShell@Geeklp-BashShell .vim]$ curl -C - -o bash-support.zip https://vim.sourceforge.io/scripts/download_script.php?src_id=24452
[BashShell@Geeklp-BashShell .vim]$ sudo yum -y install vim
[BashShell@Geeklp-BashShell .vim]$ sudo yum -y install unzip
[BashShell@Geeklp-BashShell .vim]$ unzip bash-support.zip
[BashShell@Geeklp-BashShell .vim]$ rm -rf bash-support.zip
[BashShell@Geeklp-BashShell .vim]$ cd ~
[BashShell@Geeklp-BashShell ~]$ echo -e "filetype plugin on\nset nu">>.vimrc #此处很多文章介绍写的都是filetype plug-in on,经本人验证,这样写在当前版本中不支持
通过以上步骤,我们初步实现了bash-support的安装与设置。接下来我们来开始自定义设置,尽情享受便捷工具带来的乐趣吧!
第一步:将vi的别名设置为vim,这样每次我们输入vi时进入的就是vim了。
[BashShell@Geeklp-BashShell ~]$ alias vi='vim'第二步:个性化配置。
(1)新建任意一个.sh文件,使用vi编辑。
[BashShell@Geeklp-BashShell ~]$ vi test.sh
退出插入模式:
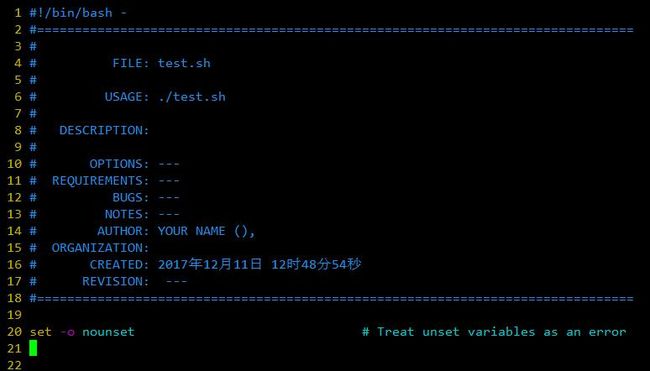
输入\ntw(依次输入这四个字符):
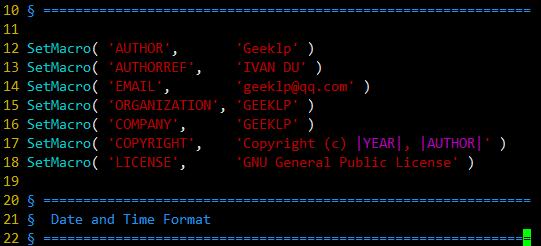
选择3,连续按下2次回车键,填入自定义个人信息,保存退出。
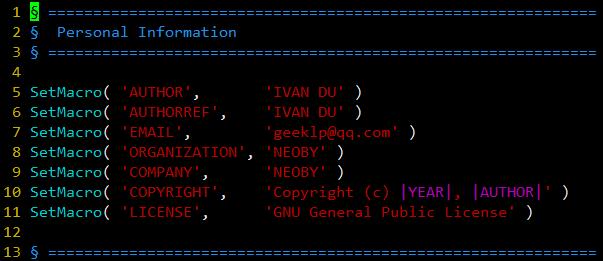
(2)使用示例。
- 插入注释。在普通模式下输入:\cfr,输入完毕之后按回车键。

- 插入语句(n – 普通模式, i – 插入模式,v - 可视模式)。
\sc – case in … esac (n, i)
\sei – elif then (n, i)
\sf – for in do done (n, i, v)
\sfo – for ((…)) do done (n, i, v)
\si – if then fi (n, i, v)
\sie – if then else fi (n, i, v)
\ss – select in do done (n, i, v)
\su – until do done (n, i, v)
\sw – while do done (n, i, v)
\sfu – function (n, i, v)
\se – echo -e “…” (n, i, v)
\sp – printf “…” (n, i, v)
\sa – array element, ${.[.]} (n, i, v) 更多数组特征。
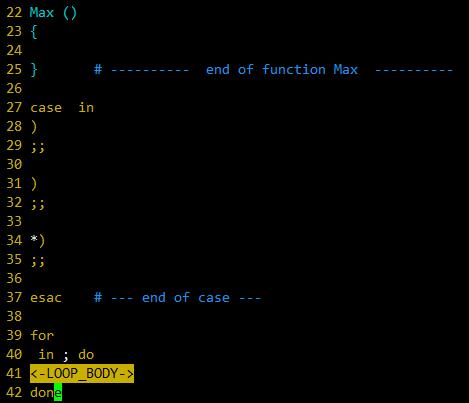
更多按键映射详见下图:
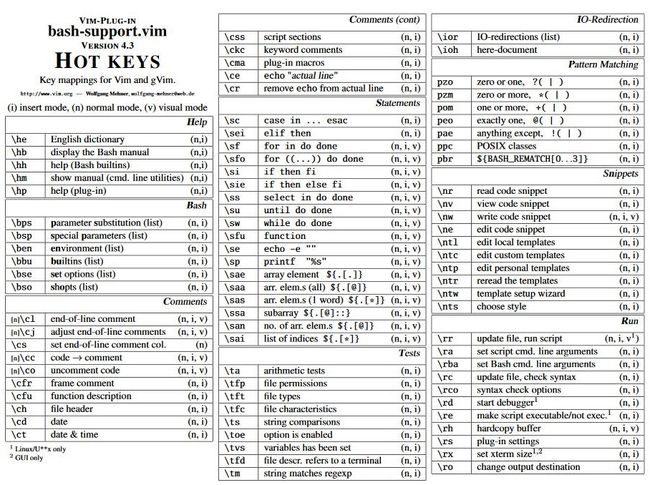
(3)在 Vi 编辑器中使用运行操作。
下面是一些运行操作键映射的列表:
\rr – 更新文件,运行脚本(n, i)
\ra – 设置脚本命令行参数 (n, i)
\rc – 更新文件,检查语法 (n, i)
\rco – 语法检查选项 (n, i)
\rd – 启动调试器(n, i)
\re – 使脚本可/不可执行(*) (n, i)
执行时无需提前在文件上新增执行权限。如果需要给文件新增执行权限请输入\re,按一次回车键,输入O或者不输入直接回车键。

(4)在脚本中使用预定义代码片段。预定义代码片段是为了特定目的包含了已写好代码的文件。为了添加代码段,输入 \nr 和 \nw 读/写预定义代码段。输入下面的命令列出默认的代码段:
[BashShell@Geeklp-BashShell ~]$ ll .vim/bash-support/codesnippets/
总用量 68
-rw-r--r--. 1 BashShell BashShell  132 11月  6 2013 basename+pathname
-rw-r--r--. 1 BashShell BashShell   88 11月  6 2013 check-for-signed-integer
-rw-r--r--. 1 BashShell BashShell   74 11月  6 2013 check-for-unsigned-integer
-rw-r--r--. 1 BashShell BashShell  257 11月  6 2013 check-number-of-command-line-arguments
-rw-r--r--. 1 BashShell BashShell   75 11月  6 2013 create-tempfile
-rw-r--r--. 1 BashShell BashShell  886 12月 12 2013 create-tempfile-in-secure-manner
-rw-r--r--. 1 BashShell BashShell  505 11月  6 2013 create-tempfile-with-trap
drwxr-xr-x. 2 BashShell BashShell  140 12月 12 2013 debugging
-rw-r--r--. 1 BashShell BashShell  448 11月  6 2013 free-software-comment
-rw-r--r--. 1 BashShell BashShell   85 11月  6 2013 timestamp
-rw-r--r--. 1 BashShell BashShell  834 11月  6 2013 _trap_DEBUG
-rw-r--r--. 1 BashShell BashShell  676 11月  6 2013 _trap_ERR
-rw-r--r--. 1 BashShell BashShell  593 11月  6 2013 _trap_EXIT
-rw-r--r--. 1 BashShell BashShell  736 11月  6 2013 _trap_RETURN
-rw-r--r--. 1 BashShell BashShell  947 11月  6 2013 usage-and-command-line-arguments.noindent
-rw-r--r--. 1 BashShell BashShell  302 11月  6 2013 use-file-descriptor-read
-rw-r--r--. 1 BashShell BashShell  278 11月  6 2013 use-file-descriptor-write
-rw-r--r--. 1 BashShell BashShell 1193 11月  6 2013 well-behaved-script
为了使用代码段,例如 create-tempfile,输入 \nr 并使用自动补全功能选择它的名称,然后输入回车键:

我们也可以在~/.vim/bash-support/codesnippets/目录下编写你自己的代码段。另外,还可以从你正常的脚本代码中创建你自己的代码段:选择想作为代码段的部分代码,然后输入 \nw 并给它一个相近的文件名。

参考资料:
https://wolfgangmehner.github.io/vim-plugins/bashsupport.html
https://www.tecmint.com/use-vim-as-bash-ide-using-bash-support-in-linux/