小小回顾
上一篇分析了项目的大体框架和跑步模块一些关键技术的实现。今天这篇是Running Life源码分析的第二篇,主要探讨以下问题:
1、HealthKit框架的使用;
2、贝塞尔曲线+帧动画实现优雅的数据展示界面;
3、实现一个view的复用机制解决内存暴涨的问题;
HealthKit
2014年6月2日召开的年度开发者大会上,苹果发布了一款新的移动应用平台,可以收集和分析用户的健康数据,苹果命名为“Healthkit ”。它管理着用户得健康数据,包括用户走路的步数、消耗的卡路里、体重、身高等等。相信大多数微信用户都知道微信运动这个功能,每天和好友PK自己的走路的步数,其实在iOS端的微信不做步数统计,它的数据源来自Healthkit。
那如何引入这个框架呢?
首先你要在你的App ID设置那里选择支持HealthKit,然后在Xcode做相应的设置:

这样基本的配置工作就结束了,接下就是码代码了:
我将SDK和框架的相关注册工作分离到“SDKInitProcess.h”这个文件,这样做是为了方便对SDK注册管理,此外还可以给AppDelegate瘦身。注册如下:
-(void)initHealthKitSetting{
    if (![HKHealthStore isHealthDataAvailable]) {
        NSLog(@"设备不支持healthKit");
    }

    HKObjectType *walkingRuningDistance = [HKObjectType quantityTypeForIdentifier:HKQuantityTypeIdentifierDistanceWalkingRunning];

    NSSet *healthSet = [NSSet setWithObjects:walkingRuningDistance, nil];

    //从健康应用中获取权限
    [self.healthStore requestAuthorizationToShareTypes:nil readTypes:healthSet completion:^(BOOL success, NSError * _Nullable error) {
        if (success)
        {
            NSLog(@"获取距离权限成功");
        }
        else
        {
            NSLog(@"获取距离权限失败");
        }
    }];

}

-(HKHealthStore *)healthStore{
    if (!_healthStore) {
        _healthStore = [[HKHealthStore alloc]init];
    }
    return _healthStore;
}
HKObjectType是你想从HealthKit框架获取的数据类型,针对我们的项目,我们需要获取距离数据。
我将获取HealthKit数据封装在工具类的HealthKitManager中,代码如下:
typedef void(^completeBlock)(id);

typedef void(^errorBlock)(NSError*);

/**
 *  健康数据管理对象
 */
@interface HealthKitManager : NSObject

/**
 *  全局管理类
 *
 *  @return
 */
+ (HealthKitManager *)shareManager;

/**
 *  获取某年某月的健康数据中路程数据(原生数据)
 *
 *  @param year       年份
 *  @param month      月份
 *  @param block      成功回调
 *  @param errorBlock 失败回调
 */
- (void)getDistancesWithYear:(NSInteger)year
                       month:(NSInteger)month
                    complete:(completeBlock) block
               failWithError:(errorBlock)errorBlock;


/**
 *  获取某年某月的卡路里数据(计算数据)
 *
 *  @param weight     体重
 *  @param year       年份
 *  @param month      月份
 *  @param block      成功回调
 *  @param errorBlock 失败回调
 */
- (void)getKcalWithWeight:(float)weight
                     year:(NSInteger)year
                    month:(NSInteger)month
                 complete:(completeBlock) block
            failWithError:(errorBlock)errorBlock;

@end
第一个方法是从HealthKit获取每个月份的距离数据,我来带大家看具体的实现代码:
- (void)getDistancesWithYear:(NSInteger)year
                       month:(NSInteger)month
                    complete:(completeBlock) block
               failWithError:(errorBlock)errorBlock{

    //想获取的数据类型,我们项目需要的是走路+跑步的距离数据
    HKSampleType* sampleType = [HKQuantityType quantityTypeForIdentifier:HKQuantityTypeIdentifierDistanceWalkingRunning];

    //按数据开始日期排序
    NSSortDescriptor* start = [NSSortDescriptor sortDescriptorWithKey:HKSampleSortIdentifierStartDate ascending:NO];

    //以下操作是为了将字符串的日期转化为NSDate对象
    NSDateFormatter* formatter = [[NSDateFormatter alloc]init];
    [formatter setDateFormat:@"yy-MM-dd"];
    NSString* startDateStr = [NSString stringWithFormat:@"%ld-%ld-%ld",(long)year,(long)month,(long)1];

    //每个月第一天
    NSDate* startDate = [formatter dateFromString:startDateStr];

    //每个月的最后一天
    NSDate* endDate = [[NSDate alloc]initWithTimeInterval:31*24*60*60-1 sinceDate:startDate];

    //定义一个谓词逻辑,相当于sql语句,我猜测healthKit底层的数据存储应该用的也是CoreData
    NSPredicate* predicate = [HKQuery predicateForSamplesWithStartDate:startDate endDate:endDate options:HKQueryOptionNone];

    //定义一个查询操作
    HKSampleQuery* query = [[HKSampleQuery alloc]initWithSampleType:sampleType predicate:predicate limit:HKObjectQueryNoLimit sortDescriptors:@[start] resultsHandler:^(HKSampleQuery * _Nonnull query, NSArray<__kindof HKSample *> * _Nullable results, NSError * _Nullable error) {
        if (error) {
            if (errorBlock) {
                errorBlock(error);
            }
        }else{
            //一个字典,键为日期,值为距离
            NSMutableDictionary* multDict = [NSMutableDictionary dictionaryWithCapacity:30];

            //遍历HKQuantitySample数组,遍历计算每一天的距离数据,然后放进multDict
            for (HKQuantitySample* sample in results) {
                NSString* dateStr = [formatter stringFromDate:sample.startDate] ;
                if ([[multDict allKeys]containsObject:dateStr]) {
                    int distance = (int)[[multDict valueForKey:dateStr] doubleValue];
                    distance = distance + [sample.quantity doubleValueForUnit:[HKUnit meterUnit]];
                    [multDict setObject:@(distance) forKey:dateStr];
                }else{
                    int distance = (int)[sample.quantity doubleValueForUnit:[HKUnit meterUnit]];
                    [multDict setObject: @(distance) forKey:dateStr];
                }
            }

            NSArray* arr = multDict.allKeys;

            //multDict的键值按日期来排序:1号~31号
            arr = [arr sortedArrayUsingComparator:^NSComparisonResult(id  _Nonnull obj1, id  _Nonnull obj2) {
                NSString* str1 = [NSString stringWithFormat:@"%@",obj1];
                NSString* str2 = [NSString stringWithFormat:@"%@",obj2];
                int num1 = [[str1 substringFromIndex:6] intValue];
                int num2 = [[str2 substringFromIndex:6] intValue];
                if (num1
第一个方法相关讲解我已经写在注释里;
第二个方法是根据healthKit获取的距离数据计算出卡路里数据,它是根据以下公式计算得的:
卡路里(kcal) = 公里数(km) * 体重(kg) * 1.036
那么HealthKit的相关讲解就到这里,想了解更多内容可以戳这里
数据展示界面
效果如下:
上面的日历控件不难实现,由NSCalendar + UICollectionView实现,就不展开讲了。这里主要分析的下面那个坐标图以及动画效果如何实现。
实现的关键点:CAShapeLayer、UIBezierPath、CABasicAnimation
实现的代码在"RecordShowView.m"这个类中:
坐标系的绘画:
- (void)drawBaseView {
    CGFloat W = self.frame.size.width;
    CGFloat H = self.frame.size.height;

    CGFloat smallPathAlign = (W-40)/(5*7);
    CGFloat smallPathLineH = 4;
    UIBezierPath* smallPath = [UIBezierPath bezierPath];
    for (int i = 1; i<=35; i++) {
        [smallPath moveToPoint:CGPointMake(20+smallPathAlign*i, H-20)];
        [smallPath addLineToPoint:CGPointMake(20+smallPathAlign*i, H-20-smallPathLineH)];
    }
    CAShapeLayer* smallPathLayer = [CAShapeLayer layer];
    smallPathLayer.path = smallPath.CGPath;
    smallPathLayer.strokeColor = [UIColor lightGrayColor].CGColor;
    smallPathLayer.lineWidth = 2;
    [self.layer addSublayer:smallPathLayer];


    UIBezierPath* frameworkPath = [UIBezierPath bezierPath];
    [frameworkPath moveToPoint:CGPointMake(20, 0)];
    [frameworkPath addLineToPoint:CGPointMake(20, H-20)];
    [frameworkPath moveToPoint:CGPointMake(20, H-20)];
    [frameworkPath addLineToPoint:CGPointMake(W-20, H-20)];

    CGFloat bigPathAlign = (W-40)/5;
    CGFloat bigPathLineH = 5;
    for (int i = 1; i<=4; i++) {
        [frameworkPath moveToPoint:CGPointMake(20+bigPathAlign*i, H-20)];
        [frameworkPath addLineToPoint:CGPointMake(20+bigPathAlign*i, H-20-bigPathLineH)];
    }

    [frameworkPath moveToPoint:CGPointMake(20, 20)];
    [frameworkPath addLineToPoint:CGPointMake(20+10, 20)];

    CAShapeLayer* frameworkLayer = [CAShapeLayer layer];
    frameworkLayer.path = frameworkPath.CGPath;
    frameworkLayer.strokeColor = [UIColor grayColor].CGColor;
    frameworkLayer.lineWidth = 2;
    [self.layer addSublayer:frameworkLayer];

    _textLayer = [CATextLayer layer];
    _textLayer.string = @"1200卡路里";
    _textLayer.fontSize = 12;
    _textLayer.bounds = CGRectMake(0, 0, 100, 100);
    _textLayer.foregroundColor = UIColorFromRGB(0x43B5FE).CGColor;
    _textLayer.contentsScale = [UIScreen mainScreen].scale;
    _textLayer.position = CGPointMake(20+10+55,60);
    [self.layer addSublayer:_textLayer];

}
CAShapeLayer本身没有形状,它的形状来源于你给定的一个路径,我们可以通过UIBezierPath指定路径绘画出各种各样的形状。我们实现的效果只需要通过画线就可以完成,moveToPoint方法指定线的起点,addLineToPoint指定线的终点,这样就可以确定一条线。最后将CAShapeLayer添加到父view的图层就可以显示出来了。
柱状图的绘画
实现代码如下:
/**
 *  绘画柱状图
 *
 *  @param values    数值数组
 *  @param lineColor 柱状图颜色
 *
 *  @return 柱状图layer
 */
-(CAShapeLayer *)drawRecordValue:(NSArray *)values lineColor:(UIColor *)lineColor{
    CGFloat W = self.frame.size.width;
    CGFloat H = self.frame.size.height;

    CGFloat lineHight = H- 20 * 2;
    CGFloat lineWidth = W- 40;
    CGFloat aliginW = lineWidth/(5*7);
    UIBezierPath* recordPath = [UIBezierPath bezierPath];
    CAShapeLayer *layer = [CAShapeLayer layer];
    for (int i = 1; i self.frame.size.height -20? self.frame.size.height - 20:[values[i] intValue]*lineHight/1200;

        [recordPath moveToPoint:CGPointMake(20+aliginW*i, H-20)];
        [recordPath addLineToPoint:CGPointMake(20+aliginW*i, H-20-recordH)];
    }
    layer.path = recordPath.CGPath;
    layer.strokeColor =  lineColor.CGColor;
    layer.lineWidth = 4;
    layer.lineCap = kCALineCapRound;

    //设置帧动画
    CABasicAnimation *animation = [CABasicAnimation animationWithKeyPath:@"strokeEnd"];
    animation.fromValue = @(0.0);
    animation.toValue = @(1.0);
    animation.autoreverses = NO;
    animation.duration = 0.8;

    [layer addAnimation:animation forKey:nil];

    return layer;
}
遍历数组计算出每个柱状图的高度,根据高度设置绘画的路径,路径确定后,给layer添加一个动画效果,这个动画其实就是柱状图的绘画过程,注意这里动画keyPath是strokeEnd。
这个方法外部不能直接调用,而是通过设置柱状图的数值数组来间接调用。大家可以看下数值数组的setter方法,这里又有一个要注意的点,就是设置新的柱状图的时候,要移除旧的柱状图:
/**
 *  走路+跑步卡路里数据
 *
 *  @param normalRecords
 */
- (void)setNormalRecords:(NSArray *)normalRecords {
    if (_normalLayer) {
        [_normalLayer removeFromSuperlayer];
    }
    _normalRecords = [normalRecords copy];
    _normalLayer = [self drawRecordValue:normalRecords lineColor:UIColorFromRGB(0x43B5FE)];
    [self.layer addSublayer:_normalLayer];
}

/**
 *  跑步卡路里数据
 *
 *  @param specialRecords
 */
- (void)setSpecialRecords:(NSArray *)specialRecords {
    if (_specialLayer) {
        [_specialLayer removeFromSuperlayer];
    }
    _specialRecords = [specialRecords copy];
    _specialLayer = [self drawRecordValue:specialRecords lineColor:UIColorFromRGB(0X2E38AD)];
    [self.layer addSublayer:_specialLayer];
}
设计View复用机制
应用有这样一个使用场景,用户可以点击日历的某一天查看那一天的跑步记录,每次记录都会生成一张小卡片,左右滑动可以查看每一次跑步记录:
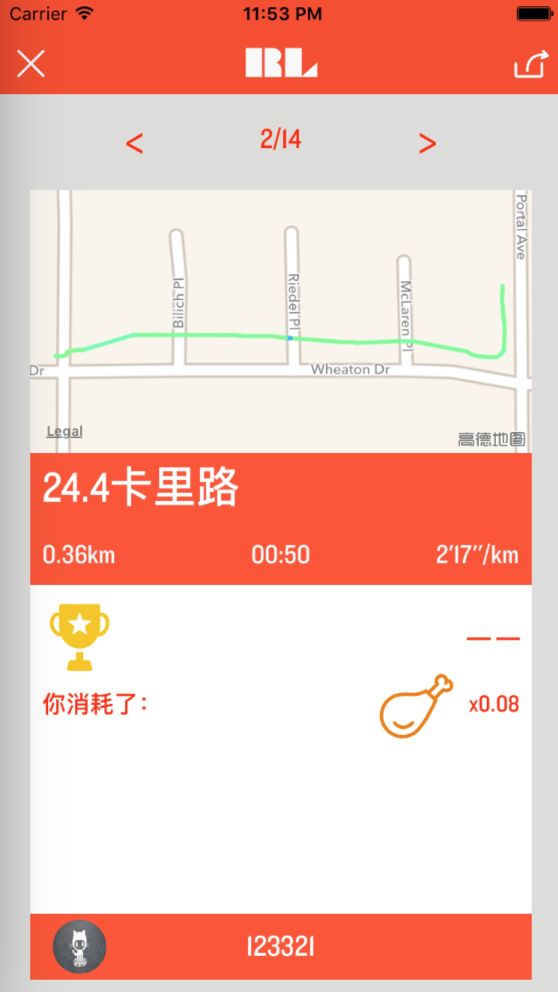
如果卡片视图是直接根据记录new出来,当记录一多就会造成内存暴涨,严重时会crash。所以我设计了一个View的复用机制,解决这种多page视图复用的问题。
源码在"XDPageView.m"文件中,大家可以看下头文件提供方法,已做注释:
@interface XDPageView : UIView

/**
 *  当前页下标
 */
@property (nonatomic, assign, readwrite) NSInteger currentPageIndex;

/**
 *  自定义page视图,使用的时候判断是否有dequeueView,如果有就直接dequeueView,没有再实例化一个新视图,可以参考tableView cell 复用机制的使用
 */
@property (nonatomic, copy, readwrite) UIView *(^loadViewAtIndexBlock)(NSInteger pageIndex,UIView *dequeueView);
@property (nonatomic, copy, readwrite) UIView *(^loadViewAtIndexBlock)(NSInteger pageIndex,UIView *dequeueView);

/**
 *  page的数量
 */
@property (nonatomic, copy, readwrite) NSInteger(^pagesCount)();


@end
以下设计思路:
1、创建两个容器,一个用于装可见视图,最大容量为2,我们假设当前页面和下一页面属于可见;一个用于装复用视图,最大容量为1。为了记录可见视图的下标(方便判断页面状态,页面是属于当前页、上一页还是下一页),装可视图的容器,我使用字典来设计;对于复用池里的视图无需考虑页面的状态和顺序,所以我使用集合来设计:
/**
 *  可见视图以及下标,可见视图最大数量为2
 */
@property (nonatomic, strong, readwrite) NSMutableDictionary *visibleViewsItemMap;

/**
 *  容量最大为1的复用池
 */
@property (nonatomic, strong, readwrite) NSMutableSet *dequeueViewPool;
2、每当滑进一个页面,滑出的页面装入复用容器,当前页面和下一页面装入可见容器(下一页属于即将可见,它复用“复用容器”里的视图,复用视图一旦被使用就移出“复用容器”):
- (void)loadViewsForNeed {
    CGFloat itemW = _pageSize.width;
    if (itemW) {
        CGFloat W = self.bounds.size.width;
        //当前页的下标
        NSInteger startIndex = floorf((float)_scrollView.contentOffset.x / _pageSize.width);

        //如果page数大于1则设置可见item数为2,如果只有一页,那么可见就只有1个
        NSInteger numberOfVisibleItems = (_scrollView.contentOffset.x/W) == 0.0 ? 1 : 2;
        numberOfVisibleItems = MIN(numberOfVisibleItems, _pageCount);

        //当前页和它的下一页设置为可见的
        NSMutableSet *visibleIndexs = [NSMutableSet set];
        for (int i = 0; i < numberOfVisibleItems; i++) {
            NSInteger index = startIndex + i;
            [visibleIndexs addObject:@(index)];
        }

        for (NSNumber *num in [_visibleViewsItemMap allKeys]) {
            //对于已不可见的视图,移出可见视图加入复用池
            if (![visibleIndexs containsObject:num]) {
                UIView *view = _visibleViewsItemMap[num];
                [self queueInPoolWithView:view];
                [view removeFromSuperview];
                [_visibleViewsItemMap removeObjectForKey:num];
            }
        }

        for (NSNumber *num in visibleIndexs) {
            UIView *view = _visibleViewsItemMap[num];
            //加载新的可见视图,加载完成后加入可视图容器中
            if (view == nil) {
                view = [self loadItemViewAtIndex:[num integerValue]];

                _visibleViewsItemMap[num] = view;

                [_scrollView addSubview:view];
            }
        }
    }
}
小结
项目的主要细节已经分析完,大家有什么的地方不懂或者有疑问的,可以在github issue 我或者在评论区提出。
项目地址:github.com/caixindong/Running-Life---iOS。
下一篇博文预告:XDNetworking网络框架的设计及源码分析。