Android开发自己的桌面应用,Luancher原来也是如此简单(上)
最近研究了下开发桌面应用,在这里跟大家分享下,废话不多说,先来看下基本的效果图。
应用列表
点击图标,打开应用
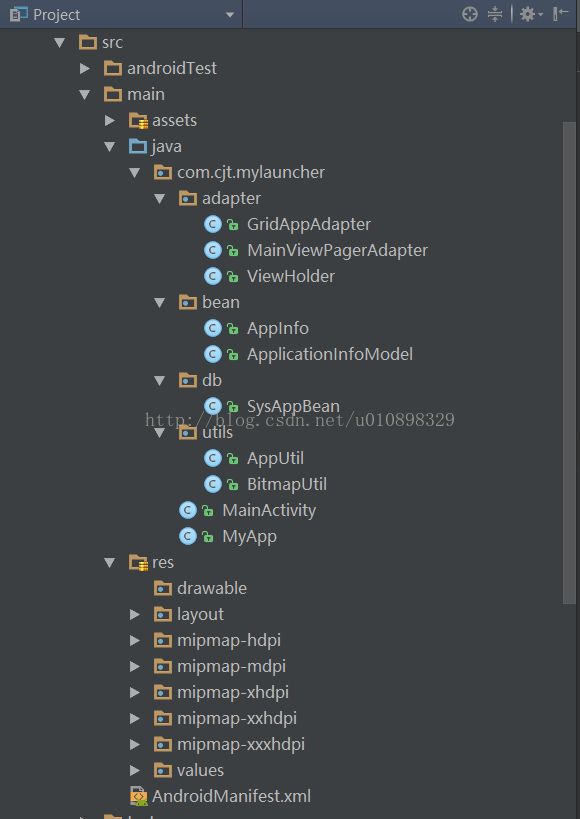
又是我的华为5S出镜,基本实现,列表展示各个应用图标和应用名称,点击后打开对应的应用,至此自己的Android桌面的雏形已经基本具备了,下面开始撸代码。先看下到这一步的代码结构。
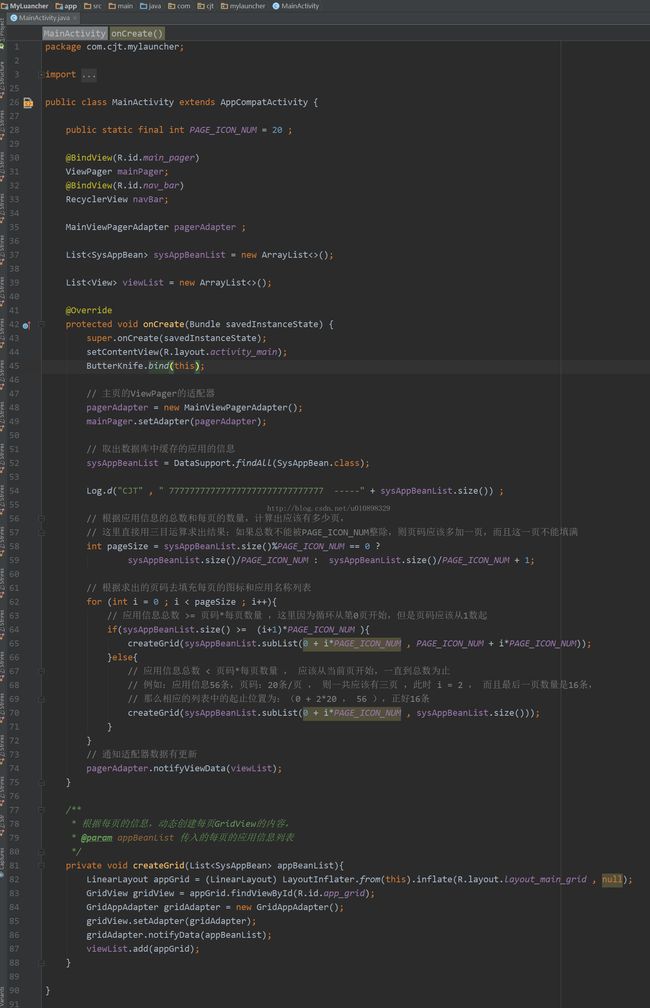
看了下结构,文件并不多,主页面我采用的是ViewPager 嵌套 GridView , 每页固定的数量为20个图标,通过左右滑动来进行翻页操作,项目中还用到了数据库,用的是郭婶的Litepal,主要是存放手机已经安装的应用的信息,信息里面包括图标哦,稍后会讲到的。下面先看MainActivity.java
看下main_activity.xml的写法:
xml version="1.0" encoding="utf-8"?>
xmlns:android="http://schemas.android.com/apk/res/android"
    xmlns:app="http://schemas.android.com/apk/res-auto"
    xmlns:tools="http://schemas.android.com/tools"
    android:layout_width="match_parent"
    android:layout_height="match_parent"
    android:background="@mipmap/bg"
    tools:context="com.cjt.mylauncher.MainActivity">

            android:id="@+id/main_layout"
        android:layout_width="0dp"
        android:layout_height="0dp"
        app:layout_constraintHorizontal_weight="1"
        app:layout_constraintVertical_weight="1"
        android:layout_marginBottom="0dp"
        android:layout_marginLeft="0dp"
        android:layout_marginRight="0dp"
        android:layout_marginTop="25dp"
        app:layout_constraintBottom_toTopOf="@+id/nav_layout"
        app:layout_constraintLeft_toLeftOf="parent"
        app:layout_constraintRight_toRightOf="parent"
        app:layout_constraintTop_toTopOf="parent">

                    android:padding="16dp"
            android:id="@+id/main_pager"
            android:layout_width="match_parent"
            android:layout_height="match_parent" />


            android:id="@+id/nav_layout"
        android:layout_width="0dp"
        android:layout_height="80dp"
        app:layout_constraintBottom_toBottomOf="parent"
        app:layout_constraintHorizontal_bias="0.0"
        android:padding="5dp"
        app:layout_constraintLeft_toLeftOf="parent"
        app:layout_constraintRight_toRightOf="parent">

                    android:id="@+id/nav_bar"
            android:layout_width="match_parent"
            android:layout_height="match_parent" />
是的,你没有看错,在主页面的布局中,我采用的是约束布局,其实感觉这个布局玩熟练了不输RelativeLayout,这里也算一中尝试,大家不妨也试下。另外我在项目中使用了ButterKnife框架,至于这个怎么使用,大家可以自行百度学习。我也会把我的依赖文件给出来,在这里的createGrid()这个方法中我是根据传入的应用实体的数量去动态添加每一页的GridView布局的,下面给出gridview布局文件和相应的Adapter的写法:
首先是layout_grid_main.xml
xml version="1.0" encoding="utf-8"?>
xmlns:android="http://schemas.android.com/apk/res/android"
    android:orientation="vertical"
    android:gravity="center"
    android:layout_width="wrap_content"
    android:layout_height="match_parent">

            android:id="@+id/app_grid"
        android:numColumns="4"
        android:layout_gravity="center"
        android:horizontalSpacing="25dp"
        android:verticalSpacing="5dp"
        android:layout_width="match_parent"
        android:layout_height="match_parent" />
非常简单的一个GridView布局,固定了每行的数量为4,感觉这个处理不好,后面会根据实际使用做相应的调整,不用GridView了,打算后期改成RecycleView试下效果。
public class GridAppAdapter extends BaseAdapter { ListsysAppBeanList = new ArrayList<>(); @Override public int getCount() { return sysAppBeanList.size(); } @Override public SysAppBean getItem(int i) { return sysAppBeanList.get(i); } @Override public long getItemId(int i) { return i; } @Override public View getView(int i, View view, ViewGroup viewGroup) { view = LayoutInflater.from(viewGroup.getContext()).inflate(R.layout.item_grid_icon , viewGroup ,false); TextView name = ViewHolder.get(view , R.id.app_name); ImageView icon = ViewHolder.get(view , R.id.app_icon); name.setText(getItem(i).getAppName()); icon.setImageBitmap(BitmapUtil.byteToBitmap(getItem(i).getAppIcon())); view.setOnClickListener(new itemClick(viewGroup.getContext() , getItem(i))); return view; } public void notifyData(List appBeanList){ this.sysAppBeanList = appBeanList ; this.notifyDataSetChanged(); } class itemClick implements View.OnClickListener { private SysAppBean bean ; private Context context ; public itemClick(Context context, SysAppBean item) { this.context = context ; this.bean = item ; } @Override public void onClick(View view) { AppUtil.openAppByPackageName(context , bean.getPackageName()); } } }
关于Adapter的这种写法,我之前的博文也有提到,单个itemView设置点击事件,并且对外暴露一个notifyData()的公共方法,这种写法其实很节省代码的,而且避免了很多不必要的参数应用,例如通常的写法中Adapter会传入List
这里在onClick方法中,表示点击了该图标,调用的是打开该图标对应的应用的方法,我把这个方法提到了一个公共类AppUtil.java中,如下
public class AppUtil { /** * 通过指定的包名启动应用 * @param context 上下文 * @param packageName 指定启动的包名 */ public static void openAppByPackageName(Context context , String packageName) { Log.d("CJT","openAppByPackageName --00-- "+packageName); if (checkApplication(context , packageName)) { Log.d("CJT","openAppByPackageName --11-- "+packageName); Intent localIntent = new Intent("android.intent.action.MAIN", null); localIntent.addCategory("android.intent.category.LAUNCHER"); List其实这个作为一个公共工具类,我觉得对大家也是比较有用的,有用的话大家可以收藏下,拿走不谢。appList = context.getPackageManager().queryIntentActivities(localIntent, 0); for (int i = 0; i < appList.size(); i++) { ResolveInfo resolveInfo = appList.get(i); String packageStr = resolveInfo.activityInfo.packageName; String className = resolveInfo.activityInfo.name; Log.d("CJT","openAppByPackageName --22-- packageName :"+packageName + " -- packageStr : " + packageStr); if (packageStr.equals(packageName)) { Log.d("CJT","openAppByPackageName --7777777777777777-- packageName :"+packageName + " -- packageStr : " + packageStr); // 这个就是你想要的那个Activity ComponentName cn = new ComponentName(packageStr, className); Intent intent = new Intent(Intent.ACTION_MAIN); intent.addCategory(Intent.CATEGORY_LAUNCHER); intent.setFlags(Intent.FLAG_ACTIVITY_NEW_TASK); intent.setComponent(cn); context.startActivity(intent); Log.d("CJT" , "openApp-----111---打开完成!!"); } } }else{ Toast.makeText(context , "未安装此应用" , Toast.LENGTH_LONG).show(); } } /** * 卸载指定应用的包名 * @param context 上下文 * @param packageName 指定的应用包名 */ public static void unInstall(Context context ,String packageName) { if (checkApplication(context , packageName)) { Uri packageURI = Uri.parse("package:" + packageName); Intent intent = new Intent(Intent.ACTION_DELETE); intent.setData(packageURI); context.startActivity(intent); Log.d("CJT" , "unInstall -- 删除成功!" + packageName); } } /** * 判断该包名的应用是否安装 * @param context 上下文 * @param packageName 应用包名 * @return 是否安装 */ public static boolean checkApplication(Context context, String packageName) { if (packageName == null || "".equals(packageName)) { return false; } try { context.getPackageManager().getApplicationInfo(packageName, PackageManager.GET_UNINSTALLED_PACKAGES); return true; } catch (PackageManager.NameNotFoundException e) { return false; } } }
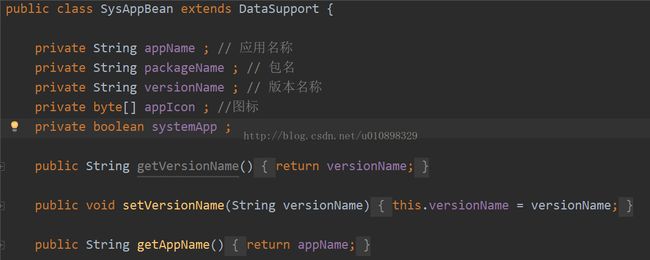
实体类SysAppBean.java也比较简单,该类继承自DataSupport(不明白的同学可以去学习下郭霖的Litepal)如下:
实体类中图标的保存使用的byte数组,所以呢顺带给大家一个转换方法,BitmapUtil.java,这里转换的时候可能会有坑,注释中给大家讲明白了。
public class BitmapUtil {

    public static byte[] drawableToByte(Drawable drawable) {
        // 第一步,将Drawable对象转化为Bitmap对象 , 使用下面的方法,防止VectorDrawable cannot be cast to Drawable
        int w = drawable.getIntrinsicWidth();
        int h = drawable.getIntrinsicHeight();
        Bitmap bitmap = Bitmap.createBitmap(w, h, Bitmap.Config.ARGB_8888);
        //注意,下面三行代码要用到,否则在View或者SurfaceView里的canvas.drawBitmap会看不到图
        Canvas canvas = new Canvas(bitmap);
        drawable.setBounds(0, 0, w, h);
        drawable.draw(canvas);
        //第二步,声明并创建一个输出字节流对象
        ByteArrayOutputStream os = new ByteArrayOutputStream();
        //第三步,调用compress将Bitmap对象压缩为PNG格式,第二个参数为PNG图片质量,第三个参数为接收容器,即输出字节流os
        bitmap.compress(Bitmap.CompressFormat.PNG, 100, os);
        return os.toByteArray();
    }

    public static Drawable byteToDrawable(byte[] bytes) {
        //第一步,从数据库中读取出相应数据,并保存在字节数组中
        //第二步,调用BitmapFactory的解码方法decodeByteArray把字节数组转换为Bitmap对象
        Bitmap bmp = BitmapFactory.decodeByteArray(bytes, 0, bytes.length);
        //第三步,调用BitmapDrawable构造函数生成一个BitmapDrawable对象,该对象继承Drawable对象,所以在需要处直接使用该对象即可
//        Bitmapdrawable bd = new BitmapDrawable(bmp);
        return new BitmapDrawable(bmp);
    }

    public static Bitmap byteToBitmap(byte[] bytes) {
        return BitmapFactory.decodeByteArray(bytes, 0, bytes.length);
    }
}
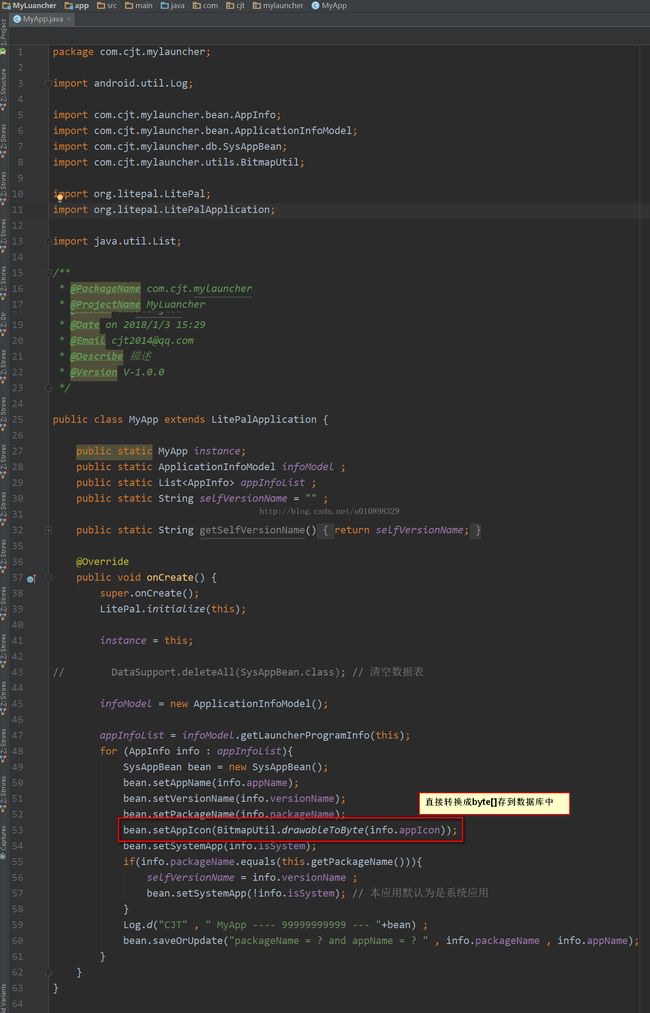
一定要用到创建cavas的三行代码,否则你会看到很神奇的事情发生,至于是什么事情,留给有心人自己去见证。这个类提供了bitmap和byte[]互相转换的方法,这就给我们保存图标到数据库提供了可能,看下是怎么使用的。在MyApp.java中。
好了,代码撸到这里大概就讲完了雏形的搭建,但是现在还只是个应用,如何真正使得这个应用变成桌面呢,需要在AndroidManifest.xml中进行一个简单的设置,
    android:name=".MainActivity"
    android:screenOrientation="portrait">

        android:name="android.intent.action.MAIN" />

        android:name="android.intent.category.HOME" />
        android:name="android.intent.category.DEFAULT" />
        android:name="android.intent.category.LAUNCHER" />
这样才是一个真正的桌面应用了,下一章我们学习下,拖动图标以及建立桌面菜单分类,可能会改下界面结构的。
差点忘了,这个是目前写到这里使用的依赖文件,至于源码啥的,等这个系列结束会一并上传,敬请期待。谢谢大家捧场!
dependencies {
    compile fileTree(dir: 'libs', include: ['*.jar'])
    androidTestCompile('com.android.support.test.espresso:espresso-core:2.2.2', {
        exclude group: 'com.android.support', module: 'support-annotations'
    })
    compile 'com.jakewharton:butterknife:8.5.1'
    compile 'com.jakewharton:butterknife-compiler:8.5.1'
    compile 'com.android.support:appcompat-v7:26.+'
    compile 'com.android.support.constraint:constraint-layout:1.0.2'
    compile 'org.litepal.android:core:1.6.0'
    testCompile 'junit:junit:4.12'
    compile 'com.android.support:recyclerview-v7:26.+'
}


