Eclipse创建Spring Boot项目
当Eclipse安装了的STS(SpringSource Tool Suite)插件,能很方便的创建SpringBoot项目,
具体安装过程点击打开链接
在安装STS过程中,需要注意你的Eclipse版本号,最好是Eclipse4.5以上版本,这就是我在安装过程中遇到的坑,我本地Eclipse版本是4.4.1安装了对应的STS插件后,编辑application.properties或者application.yml文件的时候都没有提示等功能,很是郁闷,最后查官网,才发现 STS 3.7.0 才提供提示功能
New in STS 3.7.0: Spring Boot Yaml Editor
The Spring Boot Yaml editor is built on top of YEdit. STS adds boot-specific content-assist, validation, hover-infos and hyperlink detectors.
具体可以看我的另一篇博文:点击打开链接
我的开发环境是Eclipse Mars.2 Release (4.5.2) + STS 3.7.3
1. New->Spring Starter Project 点击next
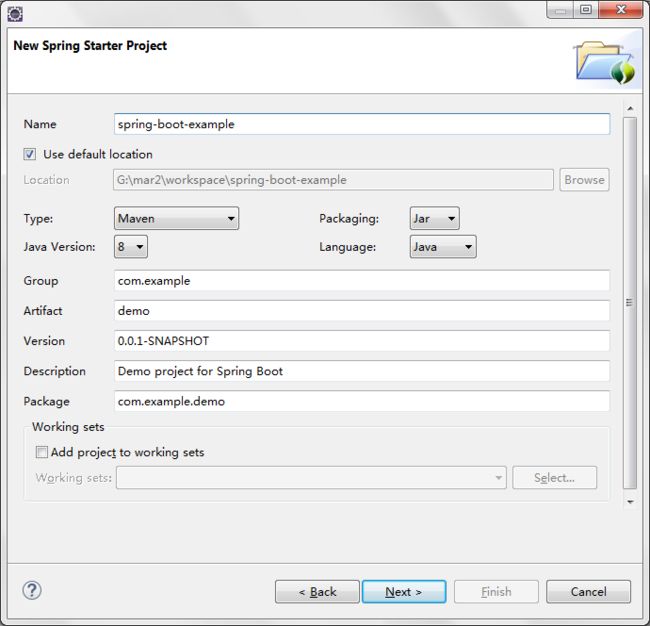
2. 填写一下 项目名称,修改一些配置,group artifact, version,package等,点击next
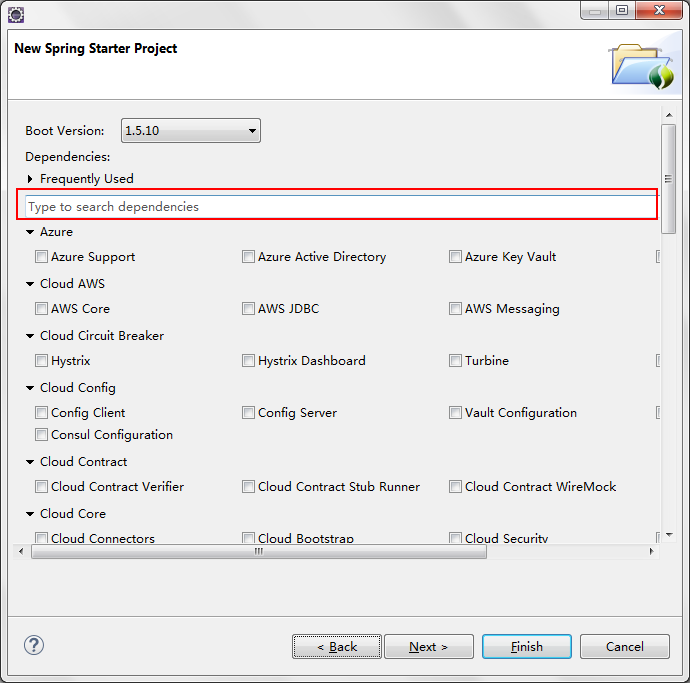
3. 这里选择Boot Version 1.5.10,并添加web依赖(在文本框中输入web,并勾选 web ),点击next
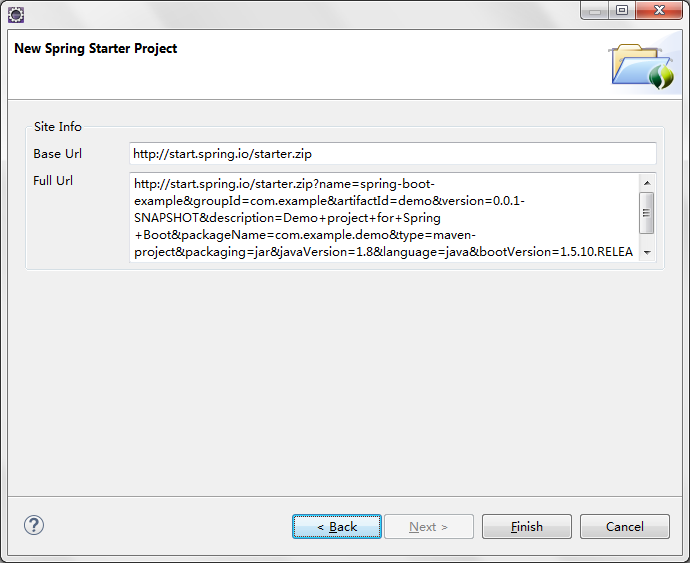
4. 点击finish, Spring Boot项目创建完成
5. 新建的Spring Boot项目目录结构如下
其中,SpringBootExampleApplication为启动类。
src/main/resources目录下的。
static文件夹用于保存js,css,images等静态文件。
templates文件夹用于保存页面。
application.properties为配置文件,可以改为application.yml文件,yml文件为常用。
删除mvnw,mvnw.cmd文件。
6. 在SpringBootExampleApplication中添加一些代码 ,启动一下
代码如下
@RestController
@SpringBootApplication
public class SpringBootExampleApplication {

	@GetMapping("/hello")
	public String hello(){
		return "Hello Spring Boot";
	}

	public static void main(String[] args) {
		SpringApplication.run(SpringBootExampleApplication.class, args);
	}
}
启动一下 ,右键单击启动类,Run as -> Spring Boot App
如果有如下信息
s.b.c.e.t.TomcatEmbeddedServletContainer : Tomcat started on port(s): 8080 (http)
c.e.demo.SpringBootExampleApplication: Started SpringBootExampleApplication in 6.076 seconds (JVM running for 7.699)
会启动一个内嵌的Tomcat应用服务器,默认端口为8080
访问一下页面
http://localhost:8080/hello
说明启动成功。


