2019.07.30 微信小程序学习总结
总结一下这两天学到的微信小程序方面的知识,并记录一下走过的几个坑《>_<》
1.底部分页(tabBar)
(1)首先,第一个分栏必须是首页index
这个要是选择了你自己的其他页面会无法显示效果
问:怎么显示自己的页面?在哪里配置?
目前我也不知道,后续用到再贴出来

(2)要对不同的tab分页显示不同的标题
定义通用的标题,在app.json里写
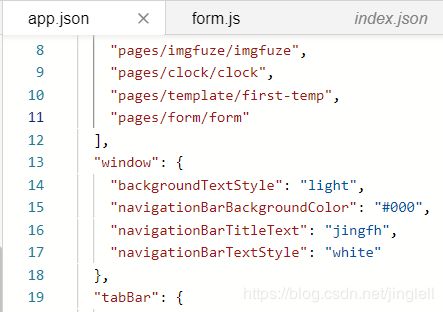
效果

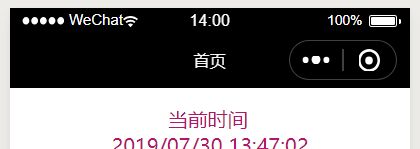
要显示每个页面特殊的标题,就在每个页面对应的.json文件里写,这个会覆盖app.json的设置

效果
2.{{}}
类似与我前不久的实训用到的handlebars.js,微信小程序采用了类似的模板思想,动态生成页面元素,语法略有不同
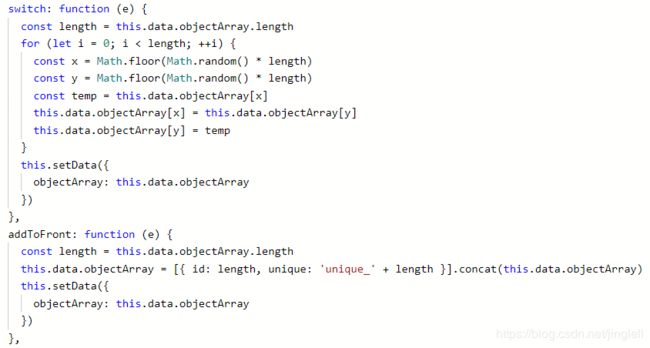
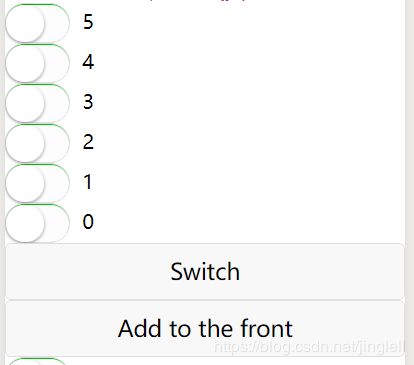
switch wx:for wx:key 动态生成
单纯取值
这就很方便了,直接用bindtap里的js方法,为js的data里定义的数值动态赋值,而在前台,直接用{{}}获取data里的数值,相较于原始的js交互方式,省去了修改后再为html元素重新赋值的操作,
.wxml

.js
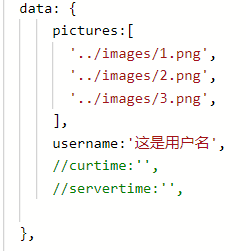
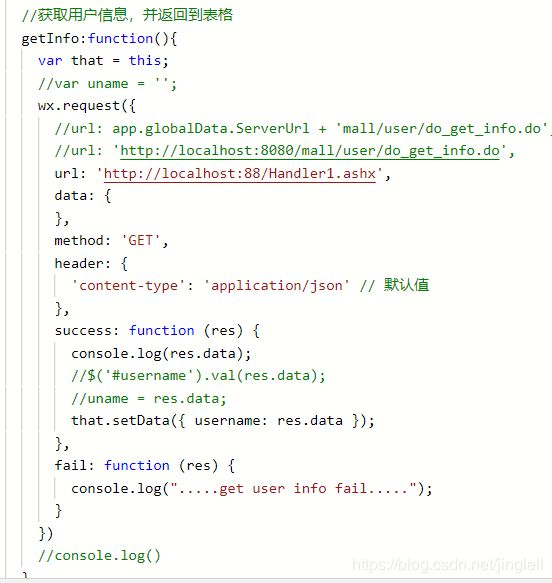
3.请求后台接口
这次我“抛弃了”用了3年的Java,直接用新学的IIS+.NET的快速搭建网站的模式
(1)微信本地开发
这个问题在上个周我找了三种方法解决:
1.购买云服务器
我买了一台阿里的轻量级应用服务器之前博客有说过,¥9.5/月,以及一个¥9/年的域名,
由于我买的服务器时长不足3个月,所以域名最后没有备案成功,暂时用不上
服务器数据库和.NET都配置好了,暂时闲置
2.内网穿透
我一开始用的ngrok官网版本,穿透后各种超时,当时猜测是官网版本将本地映射到了外国服务器上,然后因为众所周知的原因所以超时,当晚我和舍友要了他们实训时老师给的ngrok工具,还没有测试,在网上也有花生壳还是坚果壳等本国化的ngrok,不过也看到好多帖子反映有很多问题,这个方法以我个人来看不太可取,若是在校学生,买个阿里或是腾讯的学生服务器也不贵性能够用很划算,就业后公司肯定会有自己的更高性能的服务器
3.关闭微信开发工具的域名校验选项
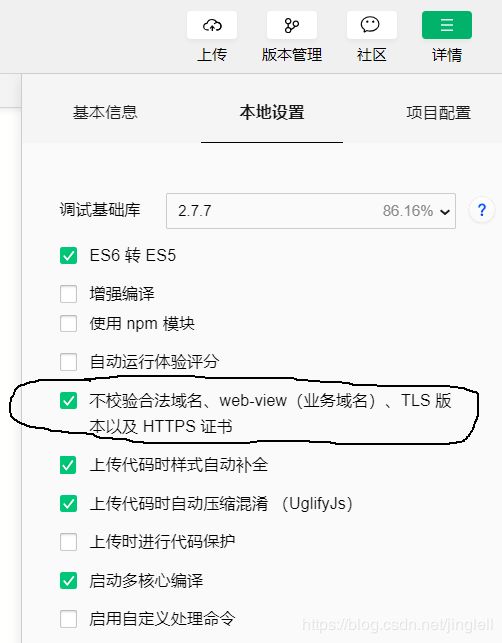
这个在本地调试时很适合,上面的
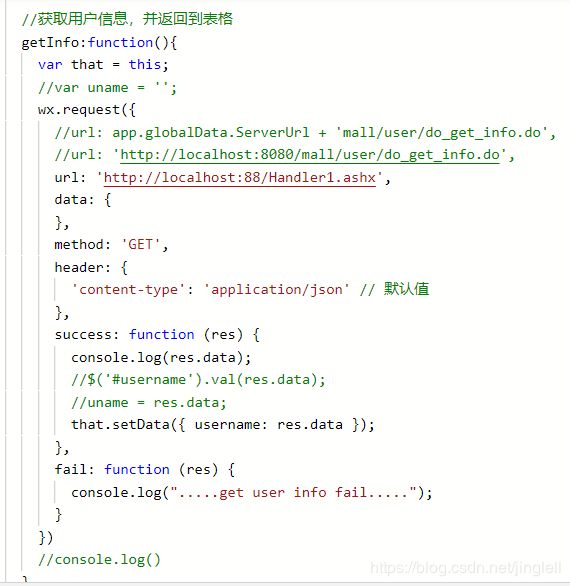
这里能看到就是直接用的localhost端口
(2)POST
post请求和get请求大有不同,上面的请求就是GET请求
而下面的是POST请求

1.首先是header{}里的内容不同,
GET:
header: {
       'content-type': 'application/json' // 默认值
},
POST:
 header: {
        'content-type': 'application/x-www-form-urlencoded;charset=utf-8'
        //"Content-Type": "application/x-www-form-urlencoded"
 },
2.其次是method{}
可能由于我写的.NET后台接口少了什么声明,我在POST时,按照网上千篇一律的教程教的改了header{}之后,还是传不了参数,最后我鬼使神差将method:'POST'去掉之后,竟然传过去了
初学,问题很多,出现这种问题的同学可以参考我的方法试一试
4.form表单
这是重点,前后台交互离不开表单信息的前后台传递
.wxml
.js
// pages/form/form.js
const app = getApp();
Page({

  //初始化数据
  data: {
    region: ['北京市', '北京市', '东城区'],
    //index: 0,
    date: '2018-10-20',
    time: '00:01',
    uploadImg: 'http://imageserver.lab.com/deimg.png',
    productInfo: {},
    allValue: '',
  },

  //表单提交按钮
  formSubmit: function (e) {
    var alldata = e.detail.value;
    console.log('form发生了submit事件,携带数据为:', alldata);
    this.setData({
      allValue: alldata,
    });
    //数据重构
    var subdata = {};
    subdata.name = alldata.inputName;
    if (alldata.radioGender == '男'){
      //console.log('是男的');
      subdata.gender = 1;
    }else{
      subdata.gender = 0;
    }
    subdata.age = alldata.sliderAge;
    subdata.phone = alldata.inputPhone;
    subdata.addr = '';
    for(var i=0;i<3;i++){ subdata.addr += this.data.region[i]; }
    subdata.img = this.data.uploadImg;
    console.log(subdata);
    console.log('gender='+subdata.gender);
    console.log('age='+subdata.age);
    //请求后台接口
    wx.request({
      url: 'http://localhost:88/Handler3.ashx',
      data: subdata
      /*'name='+subdata.name+
      '&gender='+subdata.gender+
      '&age='+subdata.age+
      '&phone='+subdata.phone+
      '&addr='+subdata.addr+
      '&img='+subdata.img
      {
        name:subdata.name,
        gender:subdata.gender,
        age:subdata.age,
        phone:subdata.phone,
        addr:subdata.addr,
        img:subdata.img
      }*/
      ,
      //method: 'POST',
      header: {
        //'content-type': 'application/json' // 默认值
        'content-type': 'application/x-www-form-urlencoded;charset=utf-8'
        //"Content-Type": "application/x-www-form-urlencoded"
      },
      success: function (res) {
        console.log("result:"+res.data);
        //console.log('test:'+subdata.name);
      },
      fail: function (res) {
        console.log(res);
      }
    })
  },

  //表单重置按钮
  formReset: function (e) {
    console.log('form发生了reset事件,携带数据为:', e.detail.value)
    this.setData({
      region: ['北京市', '北京市', '东城区'],
      date: '2018-10-20',
      time: '00:01',
      uploadImg: 'http://imageserver.lab.com/deimg.png',
      productInfo: {},
      allValue: ''
    })
  },

  //地区选择
  bindPickerChange: function (e) {
    //console.log('picker发送选择改变,携带值为', e.detail.value)
    this.setData({
      region: e.detail.value
    });
  },

  //日期选择
  bindDateChange: function (e) {
    this.setData({
      date: e.detail.value
    })
  },

  //时间选择
  bindTimeChange: function (e) {
    this.setData({
      time: e.detail.value
    })
  },

  //图片上传
  imgUpload: function () {
    let that = this;
    var loadimg = '../images/loading01.gif';
    wx.chooseImage({
      count: 1,  //最多可以选择的图片总数
      sizeType: ['compressed'], // 可以指定是原图还是压缩图,默认二者都有
      sourceType: ['album', 'camera'], // 可以指定来源是相册还是相机,默认二者都有
      success: function (res) {
        let tempFilePaths = res.tempFilePaths;
        wx.showLoading({
          title: '图片上传中...',
          image:loadimg
        });
        //wx.showToast({
          //title: '图片上传中...',
          //icon: loadimg,
          //icon: 'loading',
          //mask: true,
          //duration: 10000
        //});
        wx.uploadFile({
          url: 'http://localhost:88/Handler2.ashx',
          filePath: tempFilePaths[0],
          name: 'uploadfile_ant',
          formData: {
          },
          header: {
            "Content-Type": "multipart/form-data"
          },
          success: function (res) {
            var data = JSON.parse(res.data);
            //服务器返回格式: { "Catalog": "testFolder", "FileName": "1.jpg", "Url": "https://test.com/1.jpg" }
            console.log(data);
            that.setData({
              uploadImg: data.Url,
              //'orderData.image': res.data,
            });
            //wx.hideToast();
            wx.hideLoading();
          },
          fail: function (res) {
            //wx.hideToast();
            wx.hideLoading();
            wx.showModal({
              title: '错误提示',
              content: '上传图片失败',
              showCancel: false,
              success: function (res) { }
            })
          }
        });
      }
    })
  },

})
.wxss
/* pages/form/form.wxss */

.btn-area{
  display: flex;
  flex-direction: row;
  margin-bottom:10rpx;
}

.img{
  width:400rpx;
  height:400rpx;
}
效果

这里还用到了上传图片功能,下面贴上参考.NET后台代码
[HttpPost]
public string UploadFileNew(HttpRequest re)
{
UploadFile model = new UploadFile();
HttpFileCollection files = re.Files;
HttpPostedFile file = files["uploadfile_ant"];
if (file != null)
{
//公司编号+上传日期文件主目录
model.Catalog = DateTime.Now.ToString("yyyyMMdd");
//获取文件后缀
string extensionName = System.IO.Path.GetExtension(file.FileName);
//文件名
model.FileName = System.Guid.NewGuid().ToString("N") + extensionName;
//保存文件路径
string filePathName = System.IO.Path.Combine(GetConfigValue("ImageAbsoluteFolderTemp"), model.Catalog);
if (!System.IO.Directory.Exists(filePathName))
{
System.IO.Directory.CreateDirectory(filePathName);
}
//相对路径
string relativeUrl = GetConfigValue("ImageRelativeFolderTemp");
file.SaveAs(System.IO.Path.Combine(filePathName, model.FileName));
//获取临时文件相对完整路径
model.Url = System.IO.Path.Combine(relativeUrl, model.Catalog, model.FileName).Replace("\\", "/");
}
return Newtonsoft.Json.JsonConvert.SerializeObject(model);
}
#region 获取配置文件Key对应Value值
///
/// 获取配置文件Key对应Value值
///
///
/// 注意:配置自己的IIS作为图片服务器
参考资料
1.微信小程序
https://blog.csdn.net/qq_38191191?t=1
2.图片上传
https://blog.csdn.net/feter1992/article/details/77877659#


