搭建属于自己的GitLab
一:硬件需求
存储
存储空间的大小主要取决于你将存储的Git仓库的大小。但根据 rule of thumb(经验法则) 你应该考虑多留一些空间用来存储Git仓库的备份。
如果你想使用弹性的存储空间,你可以考虑在分配分区的时候使用LVM架构,这样可以在后期需要的清空下添加硬盘在增加存储空间。
除此之外你还可以挂在一个支持NFS的分卷,比如NAS、 SAN、AWS、EBS。
如果你的服务器有足够大的内存和CPU处理性能,GitLab的响应速度主要受限于硬盘的寻道时间。 使用更快的硬盘(7200转)或者SSD硬盘会很大程度的提升GitLab的响应速度。
CPU
- 1 核心CPU最多支持100个用户,所有的workers和后台任务都在同一个核心工作这将导致GitLab服务响应会有点缓慢。
- 2核心 支持500用户,这也是官方推荐的最低标准。
- 4 核心支持2,000用户。
- 8 核心支持5,000用户。
- 16 核心支持10,000用户。
- 32 核心支持20,000用户。
- 64 核心支持40,000用户。
- 如果想支持更多用户,可以使用 集群式架构
Memory
安装使用GitLab需要至少4GB可用内存(RAM + Swap)! 由于操作系统和其他正在运行的应用也会使用内存, 所以安装GitLab前一定要注意当前服务器至少有4GB的可用内存. 少于4GB内存会导致在reconfigure的时候出现各种诡异的问题, 而且在使用过程中也经常会出现500错误.
- 1GB 物理内存 + 3GB 交换分区 是最低的要求,但我们 强烈反对 使用这样的配置。 查看下面unicorn worker章节获取更多建议。
- 2GB 物理内存 + 2GB 交换分区 支持100用户,但服务响应会很慢。
- 4GB 物理内存 支持100用户,也是 官方推荐 的配置。
- 8GB 物理内存 支持 1,000 用户。
- 16GB 物理内存 支持 2,000 用户。
- 32GB 物理内存 支持 4,000 用户。
- 64GB 物理内存 支持 8,000 用户。
- 128GB 物理内存 支持 16,000 用户。
- 256GB 物理内存 支持 32,000 用户。
- 如果想支持更多用户,可以使用 集群式架构
官网 https://about.gitlab.com/downloads/
二:"git" 家族的成员
首先解决一个容易混淆的问题,我也经常搞混:
| git | 是一种版本控制系统,是一个命令,是一种工具 |
| gitlib | 是用于实现git功能的开发库 |
| github | 是一个基于git实现的在线代码托管仓库,包含一个网站界面,向互联网开放 |
| gitlab | 是一个基于git实现的在线代码仓库托管软件,你可以用gitlab自己搭建一个类似于github一样的系统,一般用于在企业、学校等内部网络搭建git私服 |
三:官方推荐安装
1、安装依赖包
yum 方式:
如想使用Postfix来发送邮件,在安装期间请选择’Internet Site’. 您也可以用sendmai或者 配置SMTP服务 并 使用SMTP发送邮件.在 Centos 6 系统上, 下面的命令将在系统防火墙里面开放HTTP和SSH端口.
yum install curl policycoreutils openssh-server openssh-clients

 确保sshd启动(正常情况下, sshd是启动的)
systemctl enable sshd  &&  systemctl start sshd

yum install postfix

systemctl enable postfix  &&  systemctl start postfix

永久设置http服务开放
firewall-cmd --permanent --add-service=http

也可关闭防火墙
停止firewall
systemctl stop firewalld.service
禁止firewall开机启动
systemctl disable firewalld.service

更新防火墙规则
systemctl reload firewalld
查看防火墙状态
firewall-cmd --state
apt方式:
sudo apt-get install curl openssh-server ca-certificates postfix
2、安装 gitlab-ce 社区版 (ee是企业版,收费)
yum方式:
curl -sS https://packages.gitlab.com/install/repositories/gitlab/gitlab-ce/script.rpm.sh |sudo bash
yum install gitlab-ce
apt 方式:
curl https://packages.gitlab.com/install/repositories/gitlab/gitlab-ce/script.deb.sh | sudo bash
sudo apt-get install gitlab-ce
下面是yum方式
[root@aliyun ~]# yum install gitlab-ce -y
已加载插件:fastestmirror
Loading mirror speeds from cached hostfile
正在解决依赖关系
--> 正在检查事务
---> 软件包 gitlab-ce.x86_64.0.10.3.3-ce.0.el7 将被 安装
--> 解决依赖关系完成

依赖关系解决

==================================================================================================================================================================================
 Package                                 架构                                 版本                                           源                                              大小
==================================================================================================================================================================================
正在安装:
 gitlab-ce                               x86_64                               10.3.3-ce.0.el7                                gitlab_gitlab-ce                               377 M

事务概要
==================================================================================================================================================================================
安装  1 软件包

总下载量:377 M
安装大小:1.1 G
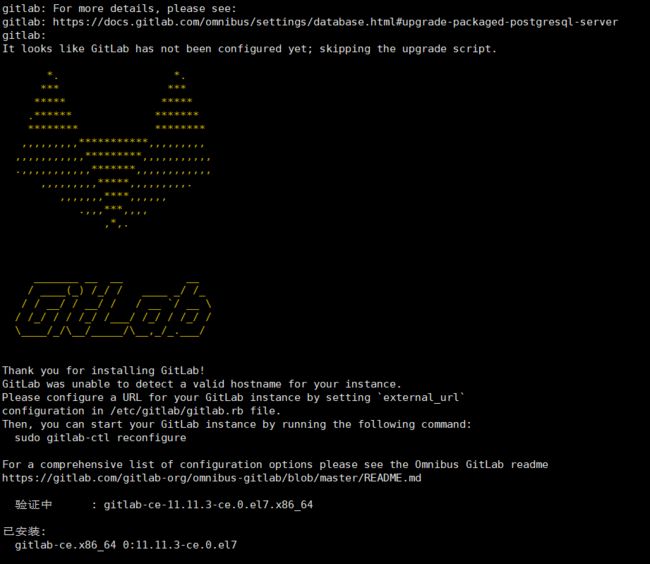
成功安装 gitlab-ce-10.3.3-ce.0.el7.x86_64
2、安装 gitlab-ce 社区版(rpm包安装方式)
wget [https://packages.gitlab.com/gitlab/gitlab-ce/packages/el/7/gitlab-ce-XXX.rpm/download](https://packages.gitlab.com/gitlab/gitlab-ce/packages/el/7/gitlab-ce-XXX.rpm/download)

rpm -i gitlab-ce-XXX.rpm
3、可更换国内源
如果下载速度慢可更换国内源,详细见: Centos7 更换国内的yum源
4、配置并开启 gitlab
如果设备配置比较低, 会在启动过程中卡死, 建议最低双核2G内存
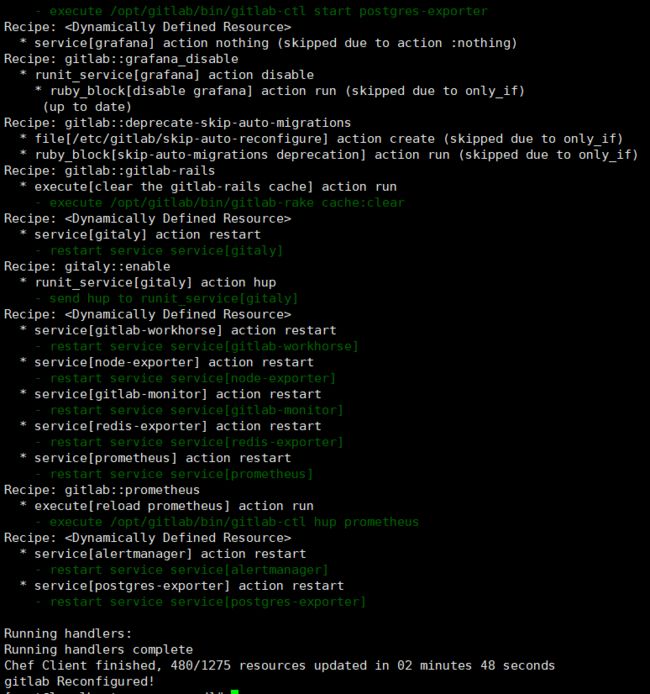
gitlab-ctl reconfigure //此时会输入如下很多信息,并启动好多服务
5、检查状态
[root@db01 src]# gitlab-ctl status
run: gitaly: (pid 23978) 37s; run: log: (pid 23342) 134s
run: gitlab-monitor: (pid 23998) 37s; run: log: (pid 23576) 122s
run: gitlab-workhorse: (pid 23958) 38s; run: log: (pid 23067) 152s
run: logrotate: (pid 23245) 140s; run: log: (pid 23244) 140s
run: nginx: (pid 23156) 146s; run: log: (pid 23155) 146s
run: node-exporter: (pid 23518) 128s; run: log: (pid 23517) 128s
run: postgres-exporter: (pid 24042) 34s; run: log: (pid 23757) 104s
run: postgresql: (pid 22636) 220s; run: log: (pid 22635) 220s
run: prometheus: (pid 24021) 35s; run: log: (pid 23688) 110s
run: redis: (pid 22503) 226s; run: log: (pid 22502) 226s
run: redis-exporter: (pid 23632) 116s; run: log: (pid 23631) 116s
run: sidekiq: (pid 22998) 158s; run: log: (pid 22997) 158s
run: unicorn: (pid 22930) 164s; run: log: (pid 22929) 164s
[root@db01 src]#
6、测试访问
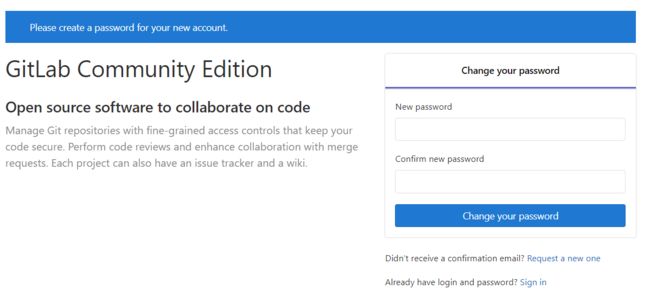
首次登陆会跳出设置密码的界面,设置完后自动跳转到登录界面,默认用户名root。
登陆进去后,可以更改用户名、密码等。
 ifconfig eth0|awk -F '[ :]+' 'NR==2{print $4}'
# 获取网卡地址
7、说明
缺点:这种方式虽然说简单方便,但是定制型很差,默认只能使用postgre和nginx
主配置文件:/etc/gitlab/gitlab.rb   //可以自定义一些邮件服务等

日志地址:/var/log/gitlab/    // 对应各服务

服务地址:/var/opt/gitlab/   // 对应各服务的主目录

仓库地址:/var/opt/gitlab/git-data //记录项目仓库等提交信息

重置配置:gitlab-ctl reconfigure    //不要乱用,会重置为最原始的配置的

重启服务:gitlab-ctl  stop/start/restart  //启动命令

默认安装:postgres、nginx、redis、unicorn ......
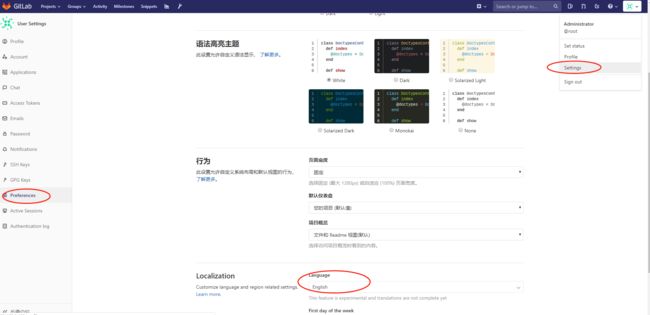
四:安装汉化包
4.1 准备环境
[root@db01 ~]# cd /data/src/
[root@db01 src]# git clone https://gitlab.com/xhang/gitlab.git
-bash: git: command not found
[root@db01 src]# yum -y install git
[root@db01 src]# git clone https://gitlab.com/xhang/gitlab.git
4.2 停止gitlab
[root@db01 ~]# gitlab-ctl stop
4.3 汉化操作
# 查看改汉化补丁版本
[root@db01 src]# head -1 /opt/gitlab/version-manifest.txt
gitlab-ce 10.8.4

也可以
[root@db01 src]# cat gitlab/VERSION
10.8.4
4.4 获取gitlab汉化包
[root@db01 src]# cd gitlab/
[root@db01 gitlab]# git diff v10.8.4 v10.8.4-zh > /tmp/10.8.4.diff
[root@db01 gitlab]#
4.5 更新补丁到gitlab中
[root@db01 gitlab]# yum -y install patch
[root@db01 gitlab]# cd /tmp/
[root@db01 tmp]# patch -d/opt/gitlab/embedded/service/gitlab-rails -p1 < 10.8.4.diff
注意:可能会出来该情况 一路回车跳过即可!
4.6 重新配置gitlab
[root@db01 tmp]# gitlab-ctl reconfigure
[root@db01 tmp]# gitlab-ctl start
五、gitlal管理设置
5.1 设置管理密码
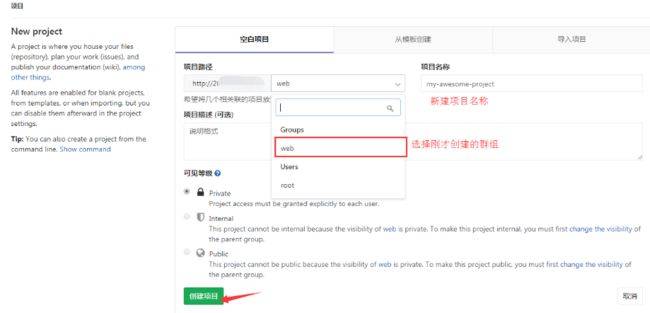
5.2 创建gitlab群组
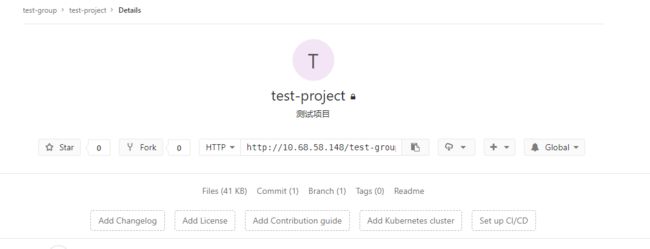
5.3 给群组创建项目
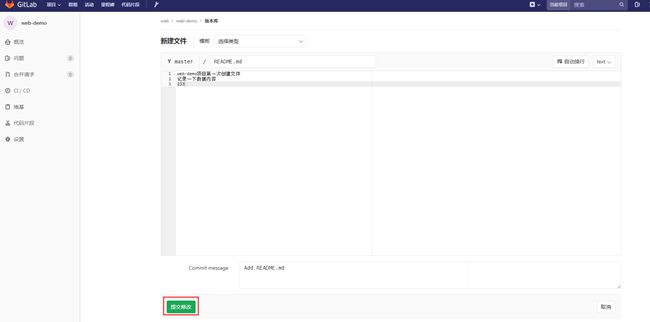
创建完成之后它提示我们可以创建一个key对它进行管理
我们点击上面的README然后我们随便在里面写点东西
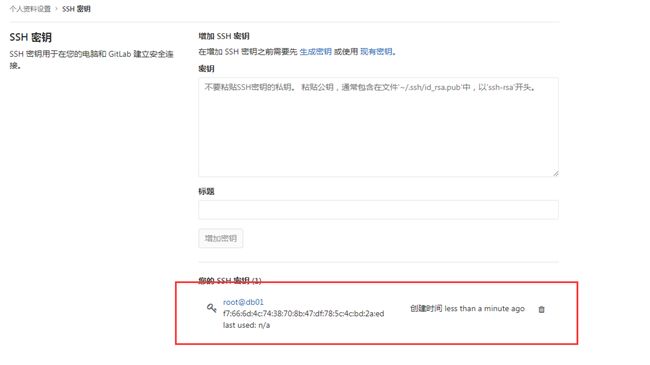
5.4 添加密钥
[root@db01 ~]# ssh-keygen -t rsa
Generating public/private rsa key pair.
Enter file in which to save the key (/root/.ssh/id_rsa):
Created directory '/root/.ssh'.
Enter passphrase (empty for no passphrase):
Enter same passphrase again:
Your identification has been saved in /root/.ssh/id_rsa.
Your public key has been saved in /root/.ssh/id_rsa.pub.
The key fingerprint is:
f7:66:6d:4c:74:38:70:8b:47:df:78:5c:4c:bd:2a:ed root@db01
The key's randomart image is:
+--[ RSA 2048]----+
|            . oo+|
|             = *=|
|            . B B|
|             o = |
|        S . . o  |
|         . o *   |
|            * +  |
|           o E   |
|                 |
+-----------------+
[root@db01 ~]#
查看公共密钥
[root@db01 ~]# cat .ssh/id_rsa.pub
ssh-rsa AAAAB3NzaC1yc2EAAAABIwAAAQEAqgVmWXspLgcvmhKfXk83Hj14n5EXE1GHzIc7FD747jH2wTGgRUCcaHIJ4QAwmAqta312SM2vlZQiuNaaZYDa01QBlnpZbimxcQolbvcFISH3HB/O5iPX/Hri4nEKnfSL72N9QTQMDTVJhCDuv6rP1ptusuNGliXyQRvaypWqUlfBkFIUc3gB8fhhXLrxNxeYdmLfCB7ZqyJSpELTxunDtUo68taA3bJADVYbhRzY+85YT1BW3ggtVlzyYBqsWboO+QNGGNUmJ/tvVh9tFez5zgqJSMlTqGLbfrv+rCKIDZVpGotooxMzMDsDZnW26NcfRJeDV6E7C4hOODg6l3XQ4Q== root@db01
[root@db01 ~]#
5.5 添加免密验证
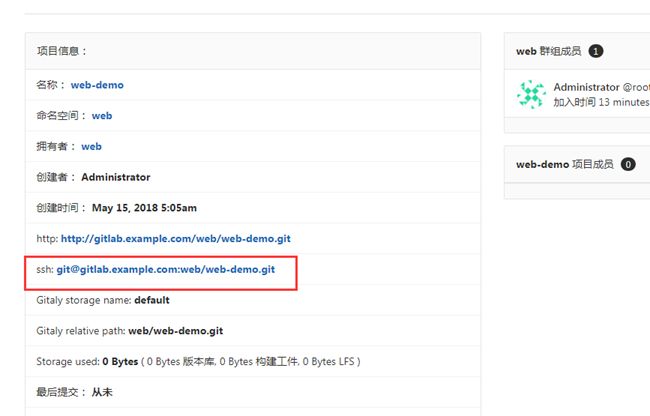
5.6 拉取代码
5.6.1 创建代码目录
[root@db01 ~]# mkdir /data/code -p
[root@db01 ~]# cd /data/code/
[root@db01 code]#
5.6.2 git拉取代码
没有安装git直接yum
yum  -y install  git
[root@db01 code]# git clone [email protected]:web/web-demo.git
Initialized empty Git repository in /data/code/web-demo/.git/
The authenticity of host 'gitlab.example.com (2x7.xxx.3x.xxx)' can't be established.
RSA key fingerprint is 58:61:9a:f3:c9:b0:cf:xx:16:7e:d3:8c:xx:d9:aa:xx.
Are you sure you want to continue connecting (yes/no)? yes
Warning: Permanently added 'gitlab.example.com,2x7.xxx.xx.xxx' (RSA) to the list of known hosts.
warning: You appear to have cloned an empty repository.
[root@db01 code]# ll
total 4
drwxr-xr-x. 3 root root 4096 May 15 13:21 web-demo
[root@db01 code]#
5.6.3 先hosts修改制定一下域名,后续修改成地址
[root@db01 code]# tail -1 /etc/hosts
2xx.xxx.xx.xxx      gitlab.example.com
[root@db01 code]# ping gitlab.example.com
PING gitlab.example.com (xx.xxx.xx.xxx) 56(84) bytes of data.
64 bytes from gitlab.example.com (2xx.xxx.xx.xxx): icmp_seq=1 ttl=64 time=0.012 ms
5.7 提交代码
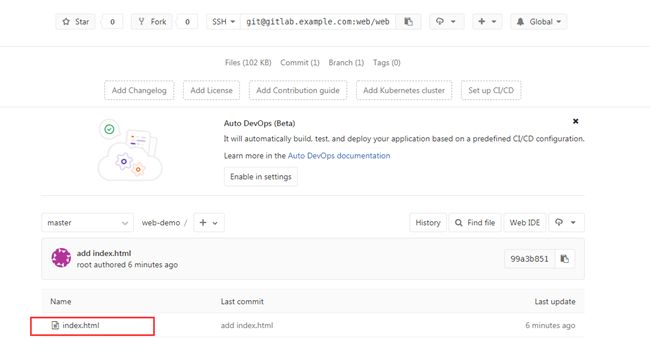
5.7.1 新建文件
[root@db01 code]# cat web-demo/index.html
hello word

创建第一个index.html文件
由于测试提交代码
[root@db01 code]#git add .
[root@db01 code]#git commit -m 'add index.html'
5.7.2 添加别名
[root@db01 web-demo]# git remote add origin [email protected]:web/web-demo.git
fatal: remote origin already exists.
[root@db01 web-demo]# git pull origin master
fatal: Couldn't find remote ref master
fatal: The remote end hung up unexpectedly
[root@db01 web-demo]# git push origin master
Counting objects: 3, done.
Delta compression using up to 8 threads.
Compressing objects: 100% (2/2), done.
Writing objects: 100% (3/3), 281 bytes, done.
Total 3 (delta 0), reused 0 (delta 0)
To [email protected]:web/web-demo.git
 * [new branch]      master -> master
[root@db01 web-demo]#
5.8 修改gitlab主机名
#改成相应的IP地址或者域名即可
[root@db01 web-demo]#vim /etc/gitlab/gitlab.rb
[root@db01 web-demo]#gitlab-ctl reconfigure
#提示:修改完需要从新配置才会生效
参考文献:
https://about.gitlab.com/installation/#centos-7
http://blog.51cto.com/bigboss/2129284
