最新IDEA2019.3.3编译Spring5源码(Spring-framework5.1或5.0)
文章目录
- 编译源码最重要的就是版本一致性!!!
- 编译源码最重要的就是版本一致性!!!
- 编译源码最重要的就是版本一致性!!!
- 1. 配置JDK
- 2. Gradle环境(根据源码确定)
- 确定gradle版本
- 配置gradle环境
- 配置环境变量
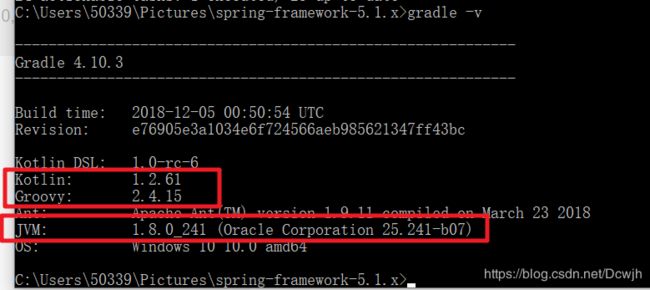
- 便签1 记住以下信息:这就是等会在源码里面要修改的信息,保持版本一致。还会再来看的
- 3. 源码配置
- 若你在此刻已经导入IDEA,没关系
- 版本一致:
- 去除源码无关内容(可以不做)
- 修改根目录下的`gradle.properties`,修改如下:
- 源码下配置远程仓库
- 4. IDEA配置
- 导入IDEA
- 5. 测试源码
- 6. 注意
- 参考文献
折腾了三天编译Spring5源码(安装IDEA三次,装了三个不同版本的JDK,安装gradle三次),最终成功编译成功了。最后发现其实和IDEA没关系,记录一些坑吧(网上的教程不能全信,信了你就得费几天时间),编译源码最重要的就是环境问题,一定要确保版本的一致性,就可以一次性编译成功。下面就介绍一下。
环境介绍:gradle-4.10.3-bin-zip, IDEA2019.3.3, JDK8u241
编译源码最重要的就是版本一致性!!!
编译源码最重要的就是版本一致性!!!
编译源码最重要的就是版本一致性!!!
1. 配置JDK
可以选择自己的版本,官网现在给的版本1.8的好像就只要8u241了(日期2020.2.24)
jdk8u241
配置环境变量此处不再赘述自己百度
2. Gradle环境(根据源码确定)
确定gradle版本
-
我的建议是,先下载Spring-framework5.1(下载5.的操作一样)
github地址: (慢)
码云地址: (快) -
根据源码确定gradle环境
打开你下载的目录\spring-framework-5.1.x\gradle\wrapper\gradle-wrapper.properties:

由此确定我的gradle版本,但是你可以把这里的版本改一下,比如你的版本是gradle-4.9.1-bin.zip:
那你就修改:distributionUrl=https\://services.gradle.org/distributions/gradle-4.9.1-bin.zip
看见一行和第四行的信息了吗?distributionBase=GRADLE_USER_HOME和zipStoreBase=GRADLE_USER_HOME, 我看好多教程上这个环境变量都没有配置,但是这里一定要配置GRADLE_USER_HOME就是等会要下载的依赖文件的位置,文件的具体位置在GRADLE_USER_HOME/wrapper/dists/ -
确定gradle版本之后那就下载吧:
官网(慢):
下载地址(快):
根据版本确定你自己下载的,官网上的版本比较全,找不到去官网找,我的就是在官网上找到的gradle-4.10.3-bin.zip
配置gradle环境
下载解压
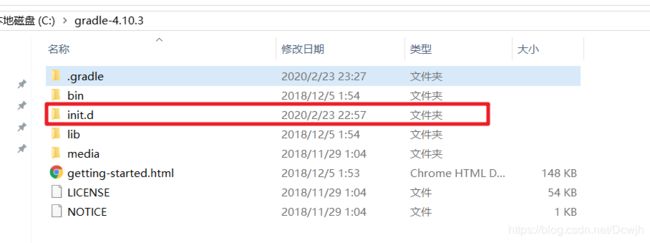
配置环境变量
- 新建环境变量
GRADLE_HOME
C:\gradle-4.10.3   ## 修改为自己的路径
GRADLE_USER_HOME
C:\gradle-4.10.3\.gradle
%GRADLE_HOME%\bin
%GRADLE_USER_HOME%\bin
便签1 记住以下信息:这就是等会在源码里面要修改的信息,保持版本一致。还会再来看的
查看环境变量是否更改成功
win+R->cmd->输入gradle -v:显示如下信息
allprojects{
    repositories {
        def REPOSITORY_URL = 'http://maven.aliyun.com/nexus/content/groups/public/'
        all { ArtifactRepository repo ->
            def url = repo.url.toString()
            if ((repo instanceof MavenArtifactRepository) && (url.startsWith('https://repo1.maven.org/maven2') || url.startsWith('https://jcenter.bintray.com'))) {
                project.logger.lifecycle 'Repository ${repo.url} replaced by $REPOSITORY_URL .'
                remove repo
            }
        }
        maven {
            url REPOSITORY_URL
        }
    }
}
3. 源码配置
先不急导入,简单配置源码,让版本保持一致并且下载的速度更快。
若你在此刻已经导入IDEA,没关系
- 若已经导入,忘记修改做以下步骤
- 关闭IDEA
- 打开命令行(cmd)
- 按下命令
gradle clean运行,直到看到BUILD SUCESSFUL - 然后在配置如下信息
版本一致:
查看便签1
编辑源码根目录下的build.gradle
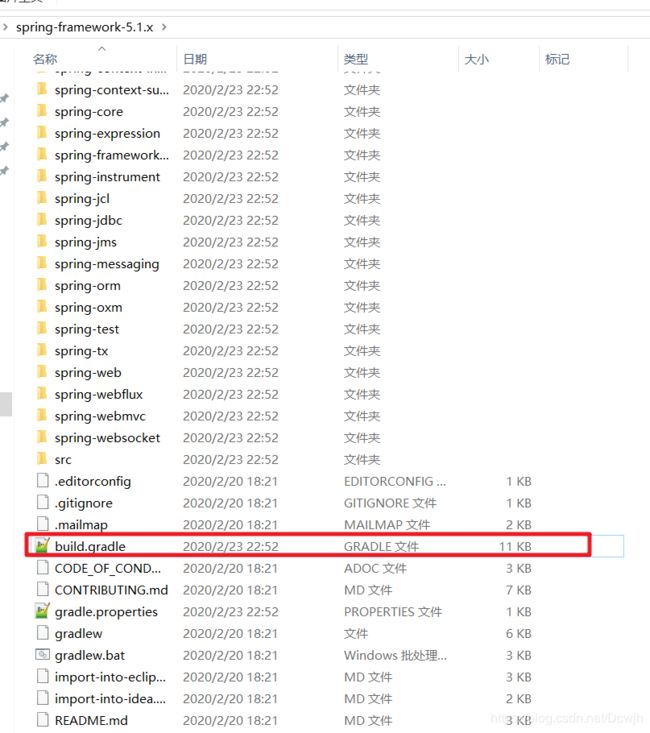
修改文件
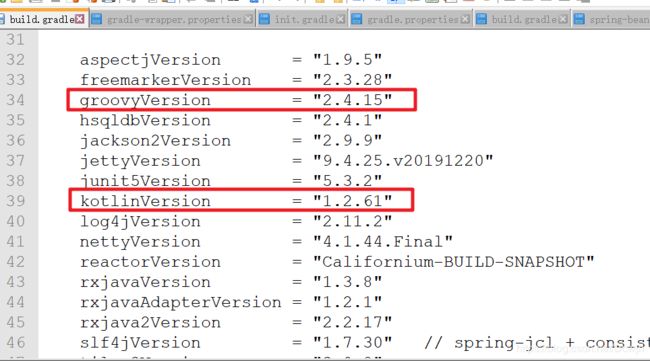
去除源码无关内容(可以不做)
- 修改docs.gradle文件
打开文件spring-framework-5.1.x\gradle\docs.gradle
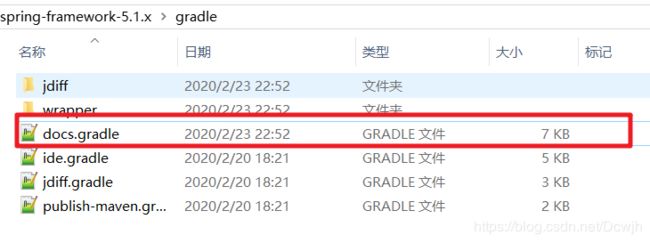
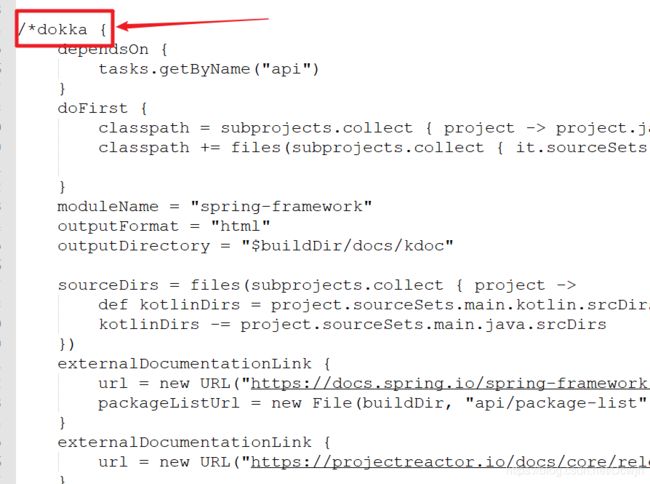
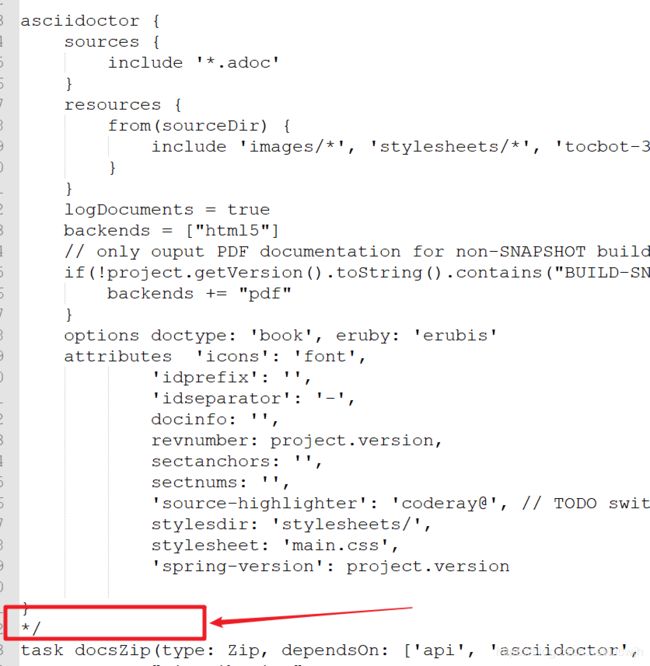
注释掉dokka和asciidoctor两个配置项:
这两个任务主要是用来生成文档使用,对主流程并没有任何影响
- 替换docs.gradle文件中的task schemaZip配置
在gradle的构建脚本,只针对Linux系统做了适配,需要把task schemaZip替换成下面代码,因为原有代码的路径符号“/”是针对Linux的,windows使用会有问题,在windows环境需要替换成"\",否则会出现如下异常:
* What went wrong:
Failed to capture snapshot of input files for task ':distZip' property 'rootSpec$1$3' during up-to-date check.
> Failed to create MD5 hash for file 'D:\repository\spring-framework-5.0.8.RELEASE\build\distributions\spring-framework-5.0.8.RELEASE-schema.zip'.

* Try:
Run with --stacktrace option to get the stack trace. Run with --info or --debug option to get more log output. Run with --scan to get full insights.

* Get more help at https://help.gradle.org

BUILD FAILED in 1m 43s
254 actionable tasks: 3 executed, 251 up-to-date
参考如下代码,注释部分是原有的代码:
//task schemaZip(type: Zip) {
//  group = "Distribution"
//  baseName = "spring-framework"
//  classifier = "schema"
//  description = "Builds -${classifier} archive containing all " +
//          "XSDs for deployment at http://springframework.org/schema."
//  duplicatesStrategy 'exclude'
//  moduleProjects.each { subproject ->
//      def Properties schemas = new Properties();
//
//      subproject.sourceSets.main.resources.find {
//          it.path.endsWith("META-INF/spring.schemas")
//      }?.withInputStream { schemas.load(it) }
//
//      for (def key : schemas.keySet()) {
//          def shortName = key.replaceAll(/http.*schema.(.*).spring-.*/, '$1')
//          assert shortName != key
//          File xsdFile = subproject.sourceSets.main.resources.find {
//              it.path.endsWith(schemas.get(key))
//          }
//          assert xsdFile != null
//          into (shortName) {
//              from xsdFile.path
//          }
//      }
//  }
//}
task schemaZip(type: Zip) {
    group = "Distribution"
    baseName = "spring-framework"
    classifier = "schema"
    description = "Builds -${classifier} archive containing all " +
            "XSDs for deployment at http://springframework.org/schema."
    duplicatesStrategy 'exclude'
    moduleProjects.each { subproject ->
        def Properties schemas = new Properties();

        subproject.sourceSets.main.resources.find {
            it.path.endsWith("META-INF\\spring.schemas")
        }?.withInputStream { schemas.load(it) }

        for (def key : schemas.keySet()) {
            def shortName = key.replaceAll(/http.*schema.(.*).spring-.*/, '$1')
            assert shortName != key
            File xsdFile = subproject.sourceSets.main.resources.find {
                it.path.endsWith(schemas.get(key).replaceAll('\\/','\\\\'))
            }
            assert xsdFile != null
            into (shortName) {
                from xsdFile.path
            }
        }
    }
}
修改根目录下的gradle.properties,修改如下:
org.gradle.daemon=true
org.gradle.jvmargs=-Xmx2048m -XX:MaxPermSize=512m -XX:+HeapDumpOnOutOfMemoryError -Dfile.encoding=UTF-8
org.gradle.parallel=true
org.gradle.configureondemand=true
源码下配置远程仓库
若是你在gradle可能配置错了,导致不能从阿里云远程仓库下载,没关系,我们这里在本项目下配置远程仓库链接,原则是:本地项目配置>用户环境配置
根目录下的build.gradle:
添加信息
maven{ url 'http://maven.aliyun.com/nexus/content/groups/public/'}
4. IDEA配置
导入IDEA
File -> New -> Project from Existing Sources -> 找到选择spring-framework源码 -> 选择build.gradle
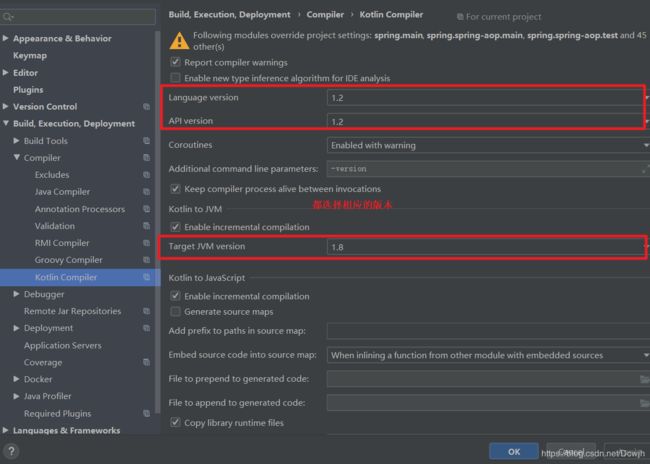
idea配置gradle: File->setting->gradle
便签1:gradle -v

选择JDK
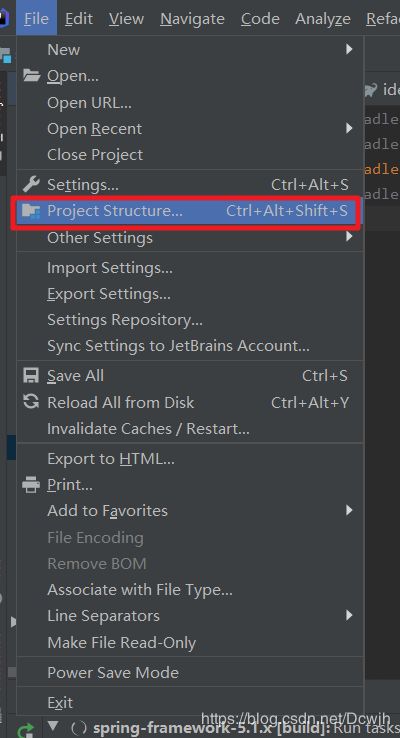
选择对应的JDK

现在可以下载依赖了

下载依赖,等待时间取决你的网速。下载完成标志:

依赖下载完了根据根目录下的介绍import-into-idea.md
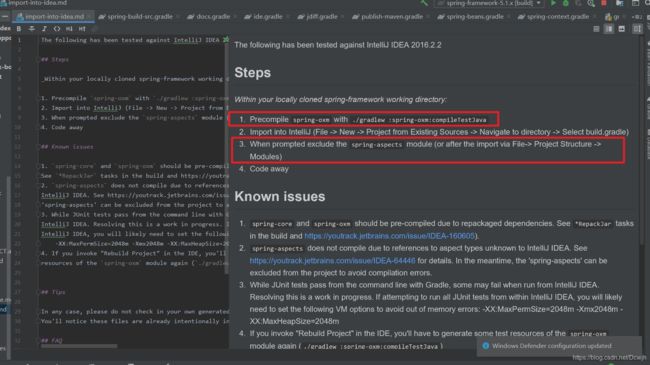
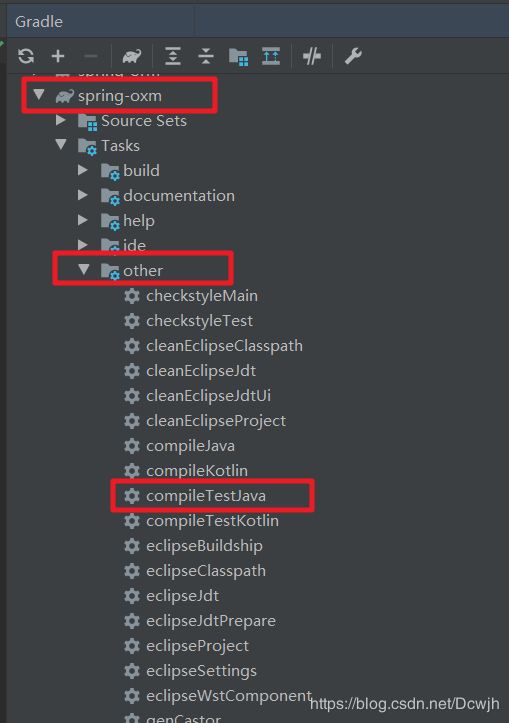
Precompile spring-oxm with ./gradlew :spring-oxm:compileTestJava
compileTestJava
对应操作就是就是执行compileTestJava

- 就是导入项目(我们就是先导入的,用的自己配置的gradle构建项目,如果按照我上面的步骤构建,那就忽略该步骤)
如果你没有先导入项目,上来就是遵循步骤一的Precompile spring-oxm with ./gradlew :spring-oxm:compileTestJava使用cmd到spring源码下:执行gradlew :spring-oxm:compileTestJava。这样其实出现的错误不好解决,因为版本信息不好确定的。 When prompted exclude the spring-aspects module (or after the import via File-> Project Structure -> Modules)这个步骤简而言之就是去掉该moudle, 鼠标右键spring-aspects,操作如下:没有删除该文件,只是从Spring项目中移除这个模块。

做完这就就是构建整个项目了,操作如下
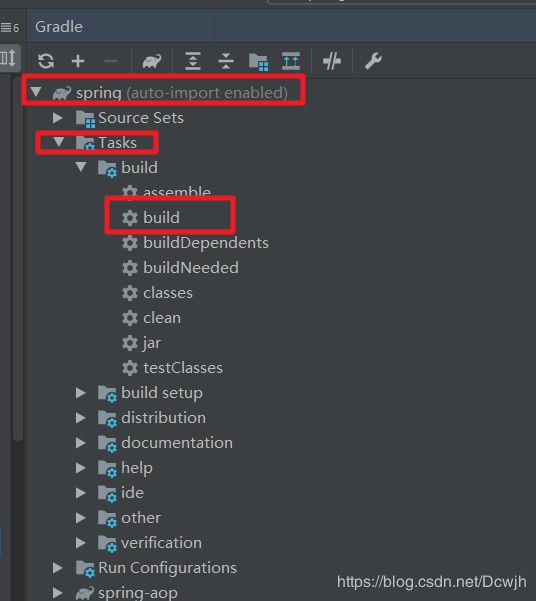
这时候你需要等很长时间,取决你的CPU。
长时间没有反应,怕是卡住了的话,可以查看编译详情。

如果项目构建成功了(这里知识源码编译成功了,能否用还不知道),还要测试通过才说明源码可以用了。
构建成功如下所示:

一共编译了差不多3到4个小时,因为编译过程中终止过重新编译过,所以才导致的5m编译成功。
按照我上面的做,基本都是一次性编译成功,JDK版本都要保持一致,基本都可以(其他说的有的JDK不行的原因,是因为版本都没有保持一致的原因,只要是8版本的基本都可以,官网没有特别说明是哪一个版本)。
有的人按照其他人的教程编译的一遍,别人成功了,你却没有成功,不要查百度,90%的原因是因为你的版本没有保持一致。所有环境配置好了,基本都可以一次性成功。
5. 测试源码
在源码项目new一个moudle,类型为gradle的管理的java项目即可

选择对应的JDK版本(8u241)
项目创建完成后
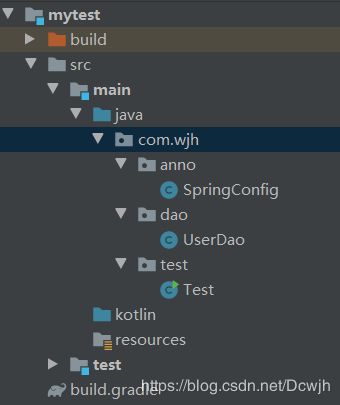
该项目下build.gradle添加compile project(":spring-context")
dependencies {
    testCompile group: 'junit', name: 'junit', version: '4.12'
    compile project(":spring-context")
}
UserDao.java
package com.wjh.dao;

import org.springframework.stereotype.Repository;

@Repository("dao")
public class UserDao {
	public void pringInfo(){
		System.out.println("User dao");
	}
}
SpringConfig.java
package com.wjh.anno;


import org.springframework.context.annotation.ComponentScan;
import org.springframework.context.annotation.Configuration;

@Configuration
@ComponentScan("com")
public class SpringConfig {
}
Test.java
package com.wjh.test;

import com.wjh.anno.SpringConfig;
import com.wjh.dao.UserDao;
import org.springframework.context.annotation.AnnotationConfigApplicationContext;

public class Test {
	public static void main(String[] args) {
		AnnotationConfigApplicationContext annotationConfigApplicationContext = new AnnotationConfigApplicationContext(SpringConfig.class);
		UserDao dao = (UserDao) annotationConfigApplicationContext.getBean("dao");
		dao.pringInfo();

	}

}
运行Test.java,出现下图即证明spring5.1.x项目完美部署成功!

6. 注意
网上有的教程要求:spring-bean项目下的spring-beans.gradle配置下需要注释

这里不需要,若注释掉,会报错误
Circular dependency between the following tasks:
:spring-beans:compileGroovy
\--- :spring-beans:compileJava
     \--- :spring-beans:compileKotlin
          \--- :spring-beans:compileGroovy (*)
参考文献
Spring5.x 源码环境搭建
源码学习:IDEA成功导入、编译、调试SPRING5源码项目
spring源码阅读环境(几分钟下载包)
使用idea和gradle编译spring5源码
idea2019.2最快捷编译spring5.0.x源码
IntelliJ IDEA 统一设置编码为utf-8编码


