搭建基于瓦片的离线地图应用
文章目录
- 1、瓦片名称
- 2、地图精度的等级
- 3、坐标计算
- 4、根据经纬度获取瓦片编号
- 5、获取指定地图范围的全部瓦片
- 6、离线地图应用
1、瓦片名称
瓦片的命名约定
- 瓦片是一个个精度为 256x256 像素的 PNG 文件;
- 瓦片文件存储路径的格式为:/zoom-level/x/y.png;
提供瓦片的服务称为瓦片服务器,不同的瓦片服务器,获取瓦片文件的 url 会有些差异,但整体相似,例如:
| 瓦片服务 | URL 格式 | zoom 等级 |
|---|---|---|
| OSM ‘standard’ style | http://[abc].tile.openstreetmap.org/zoom/x/y.png | 0-19 |
| OpenCycleMap | http://[abc].tile.thunderforest.com/cycle/zoom/x/y.png | 0-22 |
| Thunderforest Transport | http://[abc].tile.thunderforest.com/transport/zoom/x/y.png | 0-22 |
| MapQuest As of July 11, 2016, direct tile access has been discontinued. | http://otile[1234].mqcdn.com/tiles/1.0.0/osm/zoom/x/y.jpg (“otile1-s.mqcdn.com” etc. for https) | 0-18 |
| MapQuest Open Aerial, As of July 11, 2016, direct tile access has been discontinued. | http://otile[1234].mqcdn.com/tiles/1.0.0/sat/zoom/x/y.jpg | 0-11 globally, 12+ in the U.S. |
| Stamen Terrain | http://tile.stamen.com/terrain-background/zoom/x/y.jpg | 4-18, US-only (for now) |
有些瓦片服务器,如 OSM,OpenCycleMap,会提供多个域名,比如 a.tile.openstreetmap.org, b.tile.openstreetmap.org, c.tile.openstreetmap.org,这样可以提高瓦片获取的效率。
2、地图精度的等级
URL 中的 zoom 参数用来指定地图的精度等级:
| zoom level | tile coverage | number of tiles | tile size(*) in degrees |
|---|---|---|---|
| 0 | 1 tile covers whole world | 1 tile | 360° x 170.1022° |
| 1 | 2 × 2 tiles | 4 tiles | 180° x 85.0511° |
| 2 | 4 × 4 tiles | 16 tiles | 90° x [variable] |
| n | 2n × 2n tiles | 22n tiles | 360/2n° x [variable] |
| 12 | 4096 x 4096 tiles | 16 777 216 | 0.0879° x [variable] |
| 16 | 232 ≈ 4 295 million tiles | ||
| 17 | 17.2 billion tiles | ||
| 18 | 68.7 billion tiles | ||
| 19 | Maximum zoom for Mapnik layer | 274.9 billion tiles |
(*) 每个瓦片所占据的地图的宽度(经度)是常数,为 360 ° 2 n \frac{360°}{{2}^n} 2n360°,但是瓦片所占据的高度并不如此,一般来说,同一维度的瓦片具有相同的高度,但是从赤道往两极,瓦片占有的高度会不断增大。

详细情况可参考:Zoom levels
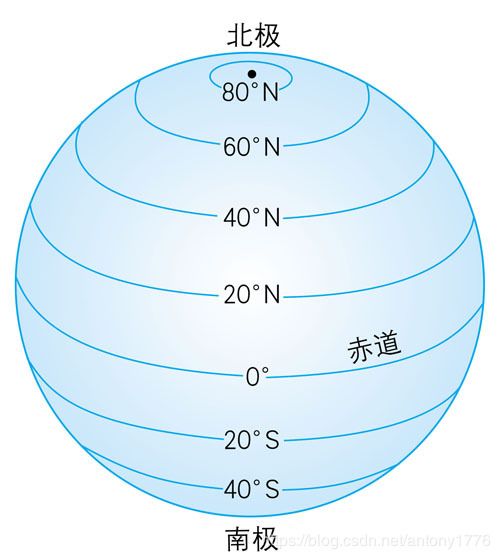
地球经度范围为 [-180°, 180°], 维度范围 [-90°, 90°]。
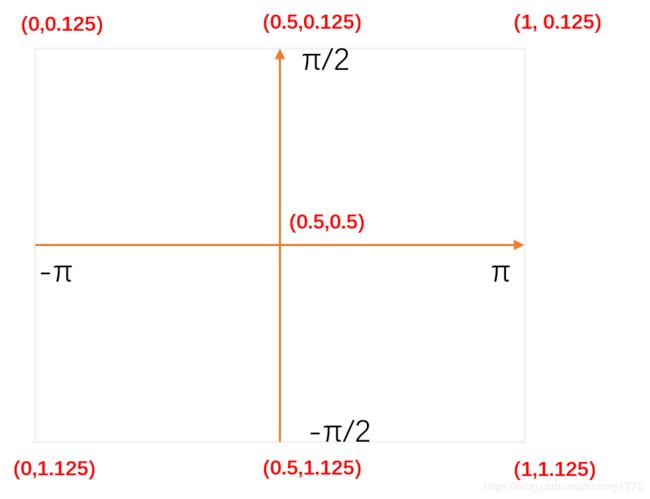
3、坐标计算
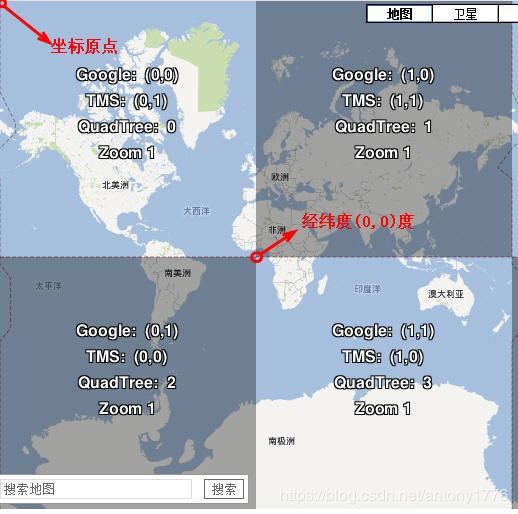
在墨卡托投影坐标系中:x 的取值从 0 (西经180°) 到 2 z o o m − 1 2^{zoom}-1 2zoom−1 (东经180°);y 的取值从 0(北纬 85°)到 2 z o o m − 1 2^{zoom}-1 2zoom−1 (南纬85°)。那么,如何根据经纬度来确定瓦片的编号呢?
以从 WGS84(经纬度坐标系 EPSG:4326 )到伪墨卡托投影投影坐标系(EPSG:3857)投影为例:
EPSG:4326 坐标为 (x, y), x 为坐标的经度,y 为纬度;
经纬度转瓦片编号:
import math
def deg2num(lat_deg, lon_deg, zoom):
  lat_rad = math.radians(lat_deg)
  n = 2.0 ** zoom
  xtile = int((lon_deg + 180.0) / 360.0 * n)
  ytile = int((1.0 - math.asinh(math.tan(lat_rad)) / math.pi) / 2.0 * n)
  return (xtile, ytile)
瓦片编号转经纬度:
import math
def num2deg(xtile, ytile, zoom):
  n = 2.0 ** zoom
  lon_deg = xtile / n * 360.0 - 180.0
  lat_rad = math.atan(math.sinh(math.pi * (1 - 2 * ytile / n)))
  lat_deg = math.degrees(lat_rad)
  return (lat_deg, lon_deg)
4、根据经纬度获取瓦片编号
1、将经纬度转换为弧度: 弧 度 = 度 ∗ π 180 弧度 = \frac{度* π}{180} 弧度=180度∗π
2、弧度转换为墨卡托投影:
x = 坐标x的弧度
y = arsinh(tan(lat)) = log[tan(lat) + sec(lat)] = log(tan(lat) + 1/cos(lat))
# python
# y_radian 为纬度对应的弧度
y = math.log(math.tan(y_radian) + 1/math.cos(y_radian))
例如:坐标点 (90°, 45°) 对应的 墨卡托坐标为 (1.57, 0.87)
3、根据墨卡托坐标,求解瓦片编号:
# python
import math
def deg2num(lon_deg, lat_deg, zoom):
  lat_rad = math.radians(lat_deg)
  n = 2.0 ** zoom
  xtile = int((lon_deg + 180.0) / 360.0 * n)
  ytile = int((1.0 - math.asinh(math.tan(lat_rad)) / math.pi) / 2.0 * n)
  return (xtile, ytile)
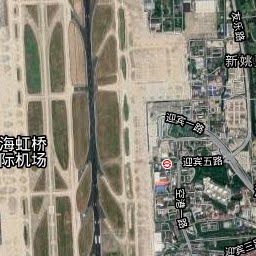
比如上海的经纬度坐标 (121.3457, 31.200),根据上面的函数可求:
| x | y | zoom |
|---|---|---|
| 6 | 3 | 3 |
| 13 | 6 | 4 |
| 26 | 13 | 5 |
| 53 | 26 | 6 |
| 857 | 418 | 10 |
| 219433 | 107138 | 18 |
请求相应的瓦片:
http://mt2.google.cn/vt/lyrs=y&hl=zh-CN&gl=cn&x=13714&y=6696&z=14
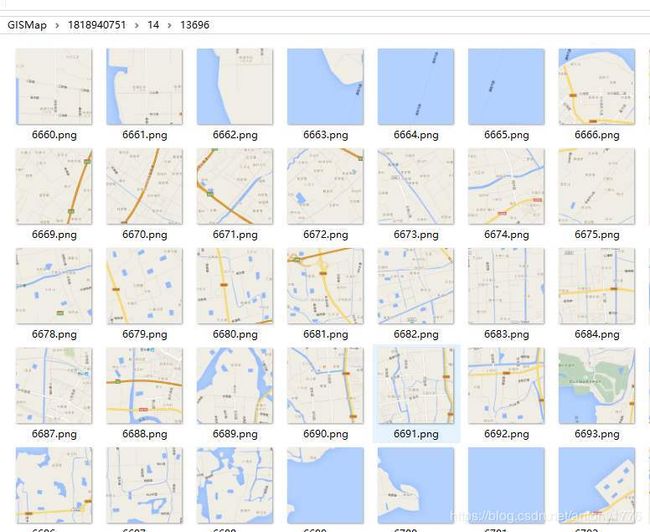
5、获取指定地图范围的全部瓦片
下面示例,可以获取经纬度范围在: [105.5108, 105.9285 ], [30.2358, 30.40] 的 zoom 等级为 13 的全部瓦片。需要自己根据经纬度计算瓦片的编号范围。
瓦片服务使用谷歌卫星地图:"http://mt2.google.cn/vt/lyrs=y&hl=zh-CN&gl=cn&x=%d&y=%d&z=%d"
github
示例代码:
private static int zoom = 13;
	private static int xMin = 6496;
	private static int xMax = 6506;
	private static int yMin = 3369;
	private static int yMax = 3373;
	private static String URL = "http://mt2.google.cn/vt/lyrs=y&hl=zh-CN&gl=cn&x=%d&y=%d&z=%d";
	private static AtomicInteger request = new AtomicInteger(0);
	private static AtomicInteger response = new AtomicInteger(0);

	public static void main(String[] args) {
		load13();
		sleep();
	}

	private static String getURL(int x, int y, int z) {
		return String.format(URL, x,y,z);
	}

	public static void sleep() {
		while (request.get() == 0 || request.get() != response.get()) {
			try {
				Thread.sleep(500);
				System.out.print(". ");
			} catch (InterruptedException e) {
				e.printStackTrace();
			}
		}
	}

	public static void load13() {
		for (int i = xMin; i <= xMax; i++) {
			File dir = new File("tiles/13/" + i);
			if (!dir.exists())
			{
				dir.mkdirs();
			}

			for (int j = yMin; j < yMax; j++) {
				request.incrementAndGet();
				final int y = j;
				WebClient.create().get()
						.uri(getURL(i, j, 13))
						.accept(MediaType.IMAGE_PNG)
						.retrieve()
						.bodyToMono(Resource.class)
						.subscribe((resource)-> {
							try {
								String image = String.format("%s/%d.png", dir.getPath(), y);
								System.out.println(image);
								BufferedImage bufferedImage = ImageIO.read(resource.getInputStream());
								ImageIO.write(bufferedImage, "png", new File(image));
								response.incrementAndGet();
							} catch (IOException e) {
								e.printStackTrace();
							}
						});
			}
		}
	}
6、离线地图应用
使用 openlayers3 来构建离线地图 web 应用。
<html>
<head>
    <meta charset="utf-8" />
    <title>openlayers3title>
    <link rel="stylesheet" href="ol.css" />
    <script type="text/javascript" src="ol.js">script>
	<style>
	html{
		height: 100%;
       width: 100%;
	   padding:0;
	   margin:0;
	}
	body{
		height: 100%;
       width: 100%;
	   padding:0;
	   margin:0;
	}
    .map {
       height: 100%;
       width: 100%;
     }
	style>
head>

<body>
    <div id="map" class="map">div>
<script>
	// http://a.tile.openstreetmap.org/{z}/{x}/{y}.png
	// 谷歌卫星地图: http://mt2.google.cn/vt/lyrs=y&hl=zh-CN&gl=cn&x={x}&y={y}&z={z}
	// 谷歌街道地图: http://mt2.google.cn/vt/lyrs=m&hl=zh-CN&gl=cn&x={x}&y={y}&z={z}
	// https://{a-c}.tile.thunderforest.com/cycle/{z}/{x}/{y}.png?apikey=0e6fc415256d4fbb9b5166a718591d71
	// https://tile.thunderforest.com/transport/{z}/{x}/{y}.png?apikey=0e6fc415256d4fbb9b5166a718591d71
	// https://tile.thunderforest.com/landscape/{z}/{x}/{y}.png?apikey=0e6fc415256d4fbb9b5166a718591d71
	// https://tile.thunderforest.com/outdoors/{z}/{x}/{y}.png?apikey=0e6fc415256d4fbb9b5166a718591d71
	// https://a.basemaps.cartocdn.com/rastertiles/voyager_nolabels/{z}/{x}/{y}{r}.png
	// https://a.basemaps.cartocdn.com/rastertiles/voyager/{z}/{x}/{y}{r}.png
	// https://tile.opentopomap.org/{z}/{x}/{y}.png
	// https://a.basemaps.cartocdn.com/light_all/{z}/{x}/{y}{r}.png
	// https://a.basemaps.cartocdn.com/light_nolabels/{z}/{x}/{y}{r}.png
	// 高德地图 http://wprd01.is.autonavi.com/appmaptile?x={x}&y={y}&z={z}&lang=zh_cn&size=1&scl=1&style=7

	let tile = new ol.layer.Tile({
		// extent: ol.proj.transformExtent([121.185, 31.117, 121.745, 31.375], "EPSG:4326", "EPSG:3857"),
		source: new ol.source.XYZ({
			url: 'tiles/{z}/{x}/{y}.png',
			tilePixelRatio: 1,
			minZoom:10,
			maxZoom:20
		})
	})

	var sate = new ol.layer.Group({
		layers: [tile]
	});

	var map = new ol.Map({
        view: new ol.View({
			center: ol.proj.fromLonLat([105.67, 30.28]),
			// center: [121.469, 31.226],
			zoom: 13,
			minZoom: 10,
			maxZoom: 20
		}),
        layers: [
            sate
        ],
        target: 'map'
    });
script>
body>
html>
将瓦片目录 tiles 与上面的页面放在同一目录下,然后用浏览器打开,就可以使用离线地图了。