Grails3使用SpringSecurity的简单教程
首先新建项目,这里采用的是idea中Application Forge方式创建grails应用
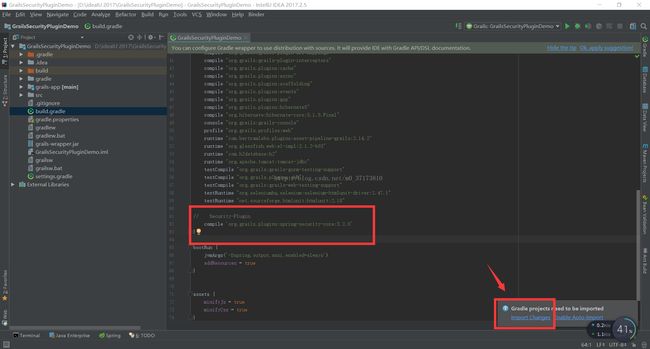
接下来在build.gradle中添加security plugin插件,添加完成后点Import Changes,等待下载完成
代码如下
compile 'org.grails.plugins:spring-security-core:3.2.0'插件其实已经自带了建立demo的指令,我们只需要输入相应指令,稍作修改就行了
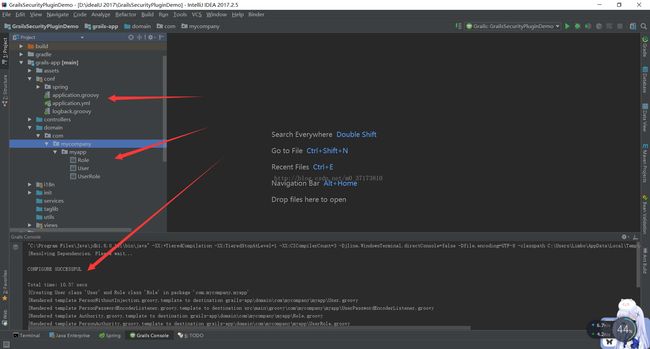
按Ctrl+Alt+G打开Grails指令窗,输入
s2-quickstart com.mycompany.myapp User Role接下来创建Controller,指令
create-controller com.mycompany.myapp.Secure最后一步,在init/BootStrap中添加测试用户
package grailssecurityplugindemo

import com.mycompany.myapp.Role
import com.mycompany.myapp.User
import com.mycompany.myapp.UserRole

class BootStrap {

    def init = { servletContext ->

        def adminRole = new Role(authority: 'ROLE_ADMIN').save()

        def testUser = new User(username: 'me', password: 'password').save()

        UserRole.create testUser, adminRole

        UserRole.withSession {
            it.flush()
            it.clear()
        }

        assert User.count() == 1
        assert Role.count() == 1
        assert UserRole.count() == 1
    }
    def destroy = {
    }
}
输入我们刚刚设置的默认用户名(me)和密码(password),这时候你会发现提示没有权限
这是因为在默认配置下,所有的url访问都是被拒绝的,因此我们需要做相应的修改
给刚刚生成的控制器加上注释,这边注释的意思就是ROLE_ADMIN权限的用户才可以访问index页面
package com.mycompany.myapp

import org.springframework.security.access.annotation.Secured

class SecureController {
    @Secured('ROLE_ADMIN')
    def index() {
        render 'Secure access only'
    }
}
通过这个demo,可以了解到security的基本使用方式,然后根据自身需求进行相应的改进


