大流量架构(二)之nginx篇
大流量架构之nginx篇
Openresty Nginx + Lua
Nginx是一个主进程配合多个工作进程的工作模式,每个进程由单个线程来处理多个连接。
在生产环境中,我们往往会把cpu内核直接绑定到工作进程上,从而提升性能。
安装
预编译安装
以CentOS举例 其他系统参照:http://openresty.org/cn/linux-packages.html
你可以在你的 CentOS 系统中添加 openresty 仓库,这样就可以便于未来安装或更新我们的软件包(通过 yum update 命令)。运行下面的命令就可以添加我们的仓库:
-
yum install yum-utils
-
yum-config-manager --add-repo https://openresty.org/package/centos/openresty.repo
然后就可以像下面这样安装软件包,比如 openresty:
- yum install openresty
如果你想安装命令行工具 resty,那么可以像下面这样安装 openresty-resty 包:
- sudo yum install openresty-resty
源码编译安装
下载源码
- 解压:
tar -xzvf openresty-VERSION.tar.gz - 然后在进入
openresty-VERSION/目录, 然后输入以下命令配置:./configure
默认, --prefix=/usr/local/openresty 程序会被安装到/usr/local/openresty目录。
依赖 gcc openssl-devel pcre-devel zlib-devel
安装:yum install gcc openssl-devel pcre-devel zlib-devel postgresql-devel
可以指定各种选项,比如
./configure --prefix=/opt/openresty \

            --with-luajit \

            --without-http_redis2_module \

            --with-http_iconv_module \

            --with-http_postgres_module
试着使用 ./configure --help 查看更多的选项。
- 进行编译和安装
make && make install
服务命令
启动
service openresty start
停止
service openresty stop
检查配置文件是否正确
nginx -t
重新加载配置文件
service openresty reload
查看已安装模块和版本号
nginx -V
测试lua脚本
# 在nginx.conf 中写入
location /lua {
default_type text/html;
content_by_lua '
ngx.say("Hello, World!
")
';
}
lua-nginx-module
创建配置文件lua.conf
   server {
        listen       80;
        server_name  localhost;
   location /lua {
        default_type text/html;
        content_by_lua_file conf/lua/hello.lua;
         }
}
在nginx.conf下引入lua配置
include lua.conf;
创建外部lua脚本
conf/lua/hello.lua
内容:
Hello, World!ngx.say("
获取Nginx uri中的单一变量
     location /nginx_var {
          default_type text/html;
          content_by_lua_block {
             ngx.say(ngx.var.arg_a)
         }
     }
获取Nginx uri中的所有变量
location /nginx_all_var {
                default_type text/html;
                content_by_lua_block {
                        local uri_args = ngx.req.get_uri_args()
                        for k, v in pairs(uri_args) do
                            if type(v) == "table" then
                                ngx.say(k, " : ", table.concat(v, ", "), "
")
                            else
                                ngx.say(k, ": ", v, "
")
                            end
                        end
               }
     }
获取Nginx请求头信息
 location /nginx_head_var {
                   default_type text/html;
                   content_by_lua_block {
                         local headers = ngx.req.get_headers()
                         ngx.say("Host : ", headers["Host"], "
")
                         ngx.say("user-agent : ", headers["user-agent"], "
")
                         ngx.say("user-agent : ", headers.user_agent, "
")
                         for k,v in pairs(headers) do
                             if type(v) == "table" then
                                 ngx.say(k, " : ", table.concat(v, ","), "
")
                             else
                                 ngx.say(k, " : ", v, "
")
                             end
                         end
                   }
         }
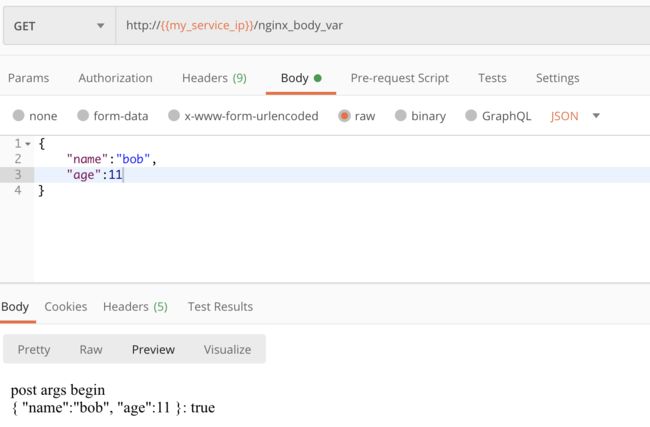
获取body请求参数
 location /nginx_body_var {
                   default_type text/html;
                   content_by_lua_block {
                         ngx.req.read_body()
                         ngx.say("post args begin", "
")
                         local post_args = ngx.req.get_post_args()
                         for k, v in pairs(post_args) do
                             if type(v) == "table" then
                                 ngx.say(k, " : ", table.concat(v, ", "), "
")
                             else
                                 ngx.say(k, ": ", v, "
")
                             end
                         end
                   }
              }
http协议版本
ngx.say("ngx.req.http_version : ", ngx.req.http_version(), "
")
请求方法
ngx.say("ngx.req.get_method : ", ngx.req.get_method(), "
")
原始的请求头内容
ngx.say("ngx.req.raw_header : ",  ngx.req.raw_header(), "
")
body内容体
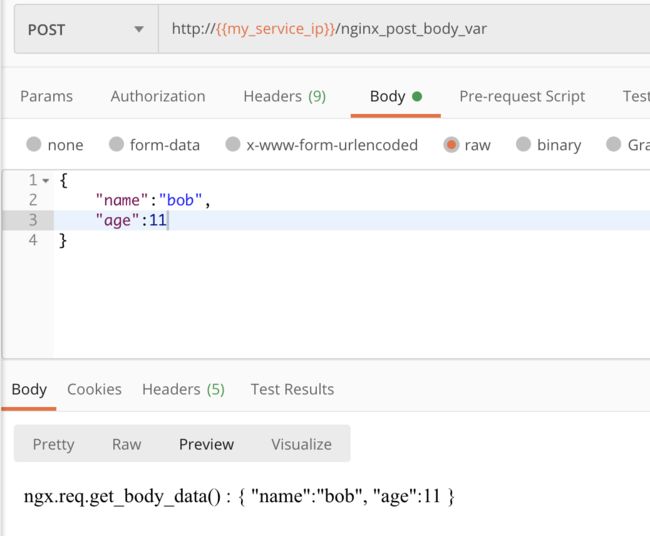
但默认情况下可能会得到一个nil的结果。这是因为之前nginx的定位是消息转发,而不是处理消息体。若需要获取消息体,需要在打开获取消息体的开关。增加一行代码:lua_need_request_body on;
server {
       ....
				lua_need_request_body on;
       ....
				location /nginx_post_body_var {
				                  default_type text/html;
				                  content_by_lua_block {
				                        ngx.say("ngx.req.get_body_data() : ", ngx.req.get_body_data(), "
")
				                }
				            }
}


