使用神经网络进行数据预测(TensorFlow+包含数据预处理过程+train+test+predict)(文末有github源代码+数据链接)
0.总览
神经网络、数据预处理、分类问题的入门教程。使用TensorFlow搭建基本的网络,使用one-hot对于数据进行预处理,通过神经网络对数据进行训练,最终取得较好的分类效果,accuracy>97%.
1.数据来源
数据来源于可穿戴传感器健康老年人动作识别,在网站注册后即可下载(偶然的机会找到的网站),这是一个十万级的数据集。
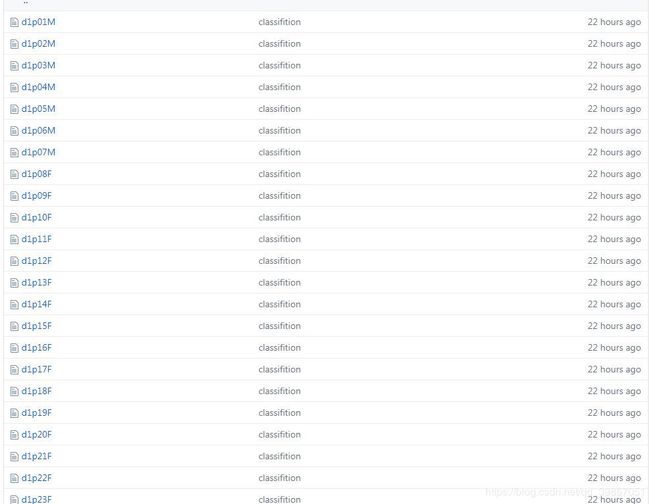
下载后的截图如下,数据的github下载链接
![]()
文件夹S1_Dataset中的数据们
2.数据预处理
下面开始数据预处理啦,直接上代码:
file_dir = "data_try/S1_Dataset"

def pre_data():
    data_num_total = 0
    with open('train.csv', 'w',newline='') as f:
        f_csv = csv.writer(f)
        f_csv.writerow(headers)
        for root, dirs, files in os.walk(file_dir):
            #print(root) #当前目录路径
            #print(dirs) #当前路径下所有子目录
            print(files) #当前路径下所有非目录子文件
        for i in range(len(files)):
            #print(len(files))
            sex = files[i][-1]
            print(sex,i)
            if sex == 'M':
                sex = 1
            elif sex == 'F':
                sex = 0

            input_file = 'data_try/S1_Dataset/' + files[i]
            reader = open(input_file, 'r')

            while True:
                line = reader.readline()
                if len(line) == 0:
                    print("Finish!","Total num of the data is: ",data_num_total)
                    break
                data_num_total = data_num_total + 1
                line = line.replace('\n','')
                line = line.replace(',', ' ')

                data_pre = line.split(' ')

                for i in range(len(data_pre)):
                    data_pre[i] = float(data_pre[i])
                data = data_pre[1:8]
                data.insert(0,sex)
                result = int(data_pre[-1])
                data.insert(8, result)
                f_csv.writerow(data)
                print(data)
    f.close()
    print("finish!!!!")
这段代码作用是将data_try/S1_Dataset文件夹中的所有数据都读出来并保存到train.csv中,csv文件是一种逗号分隔符文件,用Excel便可以进行编辑。
因为这次的数据中“sex”特征是在文件名中体现的,文件名的最后一个字符是“M”为男性,“F”为女性,所以我在代码中也进行了提取,并作为一个特征保存到了csv文件中。
最终生成的train.csv是这样滴。

接下来我们就可以处理train.csv中的数据啦~
3.one-hot编码
在真正的训练之前,以为本次一共有8个离散型的特征,所以我们可以one-hot编码的方式对于数据进行进一步的处理。大家可以通过这个博文进一步了解one-hot编码,写的很好,也感谢这位博主!
下面是实现one-hot编码的代码~
def convert2onehot(data):
    # covert data to onehot representation

    return pd.get_dummies(data,columns=headers )


def save_new_onehot_csv():
    data = pd.read_csv("train.csv")
    new_data = convert2onehot(data)
    #print(new_data)

    #print(data.head())
    #print("\nNum of data: ", len(data), "\n")  # 1728
    # view data values
    #for name in data.keys():
    #    print(name, pd.unique(data[name]))
    #print("\n", new_data.head(2))
    new_data.to_csv("train_onehot.csv", index=False)
    print("\n\n\n\nfinish convert to onehot!!\n\n\n\n")
最终的结果保存为了train_onehot.csv文件。其中的index参数True代表显示前面的序号,False为不显示前面的序号,为了后面的网络输入提取数据方便,这里index = False。
生成的train_one.csv是这样滴(0,1编码)。

4.搭建神经网络
这里使用TensorFlow搭建神经网络,因为这个分类预测问题比较简单,所以简单的网络即可实现比较好的效果~,代码如下:
INPUT_NODE = 4449
OUTPUT_NODE = 4
LAYER1_NODE = 512
LAYER2_NODE = 32
BATCH_SIZE = 7000
LEARNING_RATE_BASE = 0.001
LEARNING_RATE_DECAY = 0.9995
REGULARIZER = 0.0001
STEPS = 1000
MOVING_AVERAGE_DECAY = 0.99
TEST_INTERVAL_SECS = 10
MODEL_SAVE_PATH="check_point"
MODEL_NAME="data_model"


def get_weight(shape, regularizer):
    w = tf.Variable(tf.truncated_normal(shape, stddev=0.1,mean=0))
    #损失函数loss含正则化regularization
    if regularizer != None: tf.add_to_collection('losses', tf.contrib.layers.l2_regularizer(regularizer)(w))
    return w


def get_bias(shape):
    b = tf.Variable(tf.zeros(shape))
    return b


def forward(x, regularizer):
    w1 = get_weight([INPUT_NODE, LAYER1_NODE], regularizer)
    b1 = get_bias([LAYER1_NODE])
    y1 = tf.nn.relu(tf.matmul(x, w1) + b1)

    w2 = get_weight([LAYER1_NODE, LAYER2_NODE], regularizer)
    b2 = get_bias([LAYER2_NODE])
    y2 = tf.nn.relu(tf.matmul(y1, w2) + b2)

    w3 = get_weight([LAYER2_NODE, OUTPUT_NODE], regularizer)
    b3 = get_bias([OUTPUT_NODE])
    y = tf.matmul(y2, w3) + b3
    tf.add_to_collection('pred_network', y)  # 用于加载模型获取要预测的网络结构
    return w1,b1,y1,w2,b2,y
我使用的是单隐层的网络,使用relu作为激活函数 ,因为单隐层的网络可以以任意精度拟合有界连续函数,所以这里的单隐层理论上可以达到很好的效果。
代码的最一开始是定义的网络结构参数和网络的训练参数。大家可以根据英文很明显的看出来参数的含义。
这里INPUT_NODE为4449是因为one-hot编码后,一共有4449个特征量;OUTPUT_NODE为4是因为最终数据分为4类。
5.训练神经网络
对于TensorFlow了解的同学应该对于以下代码已经十分熟悉了。
def backward(new_data):
    step_train = 0


    new_data = new_data.as_matrix()

    new_data = new_data.astype(np.float32)  # change to numpy array and float32
    np.random.shuffle(new_data)


    x = tf.placeholder(tf.float32, [None, INPUT_NODE],name='x')
    y_ = tf.placeholder(tf.float32, [None, OUTPUT_NODE])

    w1, b1, y1, w2, b2,y = forward(x, REGULARIZER)
    global_step = tf.Variable(0, trainable=False)

    #损失函数loss含正则化regularization
    ce = tf.nn.sparse_softmax_cross_entropy_with_logits(logits=y, labels=tf.argmax(y_, 1))
    cem = tf.reduce_mean(ce)
    loss = cem + tf.add_n(tf.get_collection('losses'))

    #指数衰减学习率
    learning_rate = tf.train.exponential_decay(
        LEARNING_RATE_BASE,
        global_step,
        len(new_data) / BATCH_SIZE,
        LEARNING_RATE_DECAY,
        staircase=True)


    train_step = tf.train.AdamOptimizer(learning_rate).minimize(loss, global_step=global_step)

    #滑动平均
    ema = tf.train.ExponentialMovingAverage(MOVING_AVERAGE_DECAY, global_step)
    ema_op = ema.apply(tf.trainable_variables())

    with tf.control_dependencies([train_step, ema_op]):
        train_op = tf.no_op(name='train')

    saver = tf.train.Saver()

    with tf.Session() as sess:
        init_op = tf.global_variables_initializer()
        sess.run(init_op)

        ckpt = tf.train.get_checkpoint_state(MODEL_SAVE_PATH)
        if ckpt and ckpt.model_checkpoint_path:
            saver.restore(sess, ckpt.model_checkpoint_path)

        for i in range(STEPS):
            #每次读入BATCH_SIZE组数据和标签

            if(step_train > len(new_data)):
                step_train = 0

                continue
            else:
                xs = new_data[step_train:step_train+BATCH_SIZE,:4449]

                ys = new_data[step_train:step_train+BATCH_SIZE,4449:]
            step_train = step_train + BATCH_SIZE


            _, loss_value, step = sess.run([train_op, loss, global_step], feed_dict={x: xs, y_: ys})

            if i % 30 == 0:

                print("%s : after %d training step(s), loss on training batch is %.6f, learning rate is %f." % (datetime.now(),step, loss_value,learning_rate.eval()))
                #print("w1 = ", (sess.run(w1)))

                saver.save(sess, os.path.join(MODEL_SAVE_PATH, MODEL_NAME), global_step=global_step)
    print("finish!")
使用滑动平均、正则化、指数衰减学习率,model实时保存等方式,进一步优化了模型。
6.测试神经网络
不多说直接上代码啦(应该很容易理解吧~)
def test(new_data):
    new_data = new_data.as_matrix()
    #print(type(new_data))
    new_data = new_data.astype(np.float32)  # change to numpy array and float32
    with tf.Graph().as_default() as g:
        x = tf.placeholder(tf.float32, [None, INPUT_NODE])
        y_ = tf.placeholder(tf.float32, [None, OUTPUT_NODE])
        w1, b1, y1, w2, b2, y = forward(x, None)

        xs = new_data[:, :4449]

        ys = new_data[:, 4449:]

        ema = tf.train.ExponentialMovingAverage(MOVING_AVERAGE_DECAY)
        ema_restore = ema.variables_to_restore()
        saver = tf.train.Saver(ema_restore)

        correct_prediction = tf.equal(tf.argmax(y, 1), tf.argmax(y_, 1))
        accuracy = tf.reduce_mean(tf.cast(correct_prediction, tf.float32))

        while True:
            with tf.Session() as sess:
                ckpt = tf.train.get_checkpoint_state(MODEL_SAVE_PATH)
                if ckpt and ckpt.model_checkpoint_path:
                    saver.restore(sess, ckpt.model_checkpoint_path)
                    global_step = ckpt.model_checkpoint_path.split('/')[-1].split('-')[-1]
                    accuracy_score = sess.run(accuracy, feed_dict={x: xs, y_: ys})
                    print("After %s training step(s), test accuracy = %g" % (global_step, accuracy_score))
                else:
                    print('No checkpoint file found')
                    return
            time.sleep(TEST_INTERVAL_SECS)
7.对数据进行预测评估
还是直接上代码喽~,最后把结果存到了predict_data.csv里面。
def predict(new_data):

    new_data = new_data.as_matrix() #numpy.ndarray格式

    new_data = new_data.astype(np.float32)  # change to numpy array and float32

    with tf.Graph().as_default() as tg:
        x = tf.placeholder(tf.float32, [None, INPUT_NODE])
        w1, b1, y1, w2, b2, y = forward(x, None)


        preValue = tf.argmax(y, 1)

        print("type of prevalue = ",type(preValue))

        variable_averages = tf.train.ExponentialMovingAverage(MOVING_AVERAGE_DECAY)
        variables_to_restore = variable_averages.variables_to_restore()
        saver = tf.train.Saver(variables_to_restore)

        with tf.Session() as sess:
            init_op = tf.global_variables_initializer()
            sess.run(init_op)
            ckpt = tf.train.get_checkpoint_state(MODEL_SAVE_PATH)
            if ckpt and ckpt.model_checkpoint_path:
                saver.restore(sess, ckpt.model_checkpoint_path)
                xs = new_data[:, 0:INPUT_NODE]
                preValue = sess.run(preValue, feed_dict={x: xs})
                print(type(preValue),len(preValue))
                #return preValue

                preValue = preValue + 1

                print(preValue)
                data1 = DataFrame(preValue)
                data1.to_csv('predict_data.csv')
                print("finish!!!")

            else:
                print("No checkpoint file found")
                return -1
8.load_data函数和主函数:
def load_data(files_):

    # use pandas to view the data structure
    #data = pd.read_csv("train2.csv", names=headers)
    if files_ == "train":
        data1 = pd.read_csv("train_onehot.csv")
    elif files_ == "test":
        data1 = pd.read_csv("test_onehot.csv")
    elif files_ == "predict":
        data1 = pd.read_csv("predict_onehot.csv")
    return data1
def main():
#mnist = input_data.read_data_sets("./data/", one_hot=True)
#backward(mnist)
#pre_data()
#print("beginning!!")
#save_new_onehot_csv()
#data = load_data("train")
#backward(data)
#data = load_data("test")
#test(data)
data = load_data("predict")
predict(data)
#After 9278 training step(s), test accuracy = 0.9738
if __name__ == '__main__':
main()经过训练(GPU GTX1080 ti),step = 1000时loss基本就收敛到小于0.01了, 最终在test上的accuracy是97.38%(一共5400多个待测数据),70000个训练数据。效果不错~~
9.源码+数据链接
代码+数据直接可以从我的github上下载:数据+源码链接
我的github上有很多更好玩的东西哦~ 我的github网址 CSDN中也有哦~ 我的CSDN博客 我的CSDN资料
希望大家都有所收获,有问题可以随时问我,我们多多交流,谢谢大噶~~~