Unity Tolua# & Ulua & LuaFramework 热更新框架的入门,小白跟着做一遍就懂了
这个人也是小白,不对的地方请指出他好更改。
1.热更新是干什么用的?
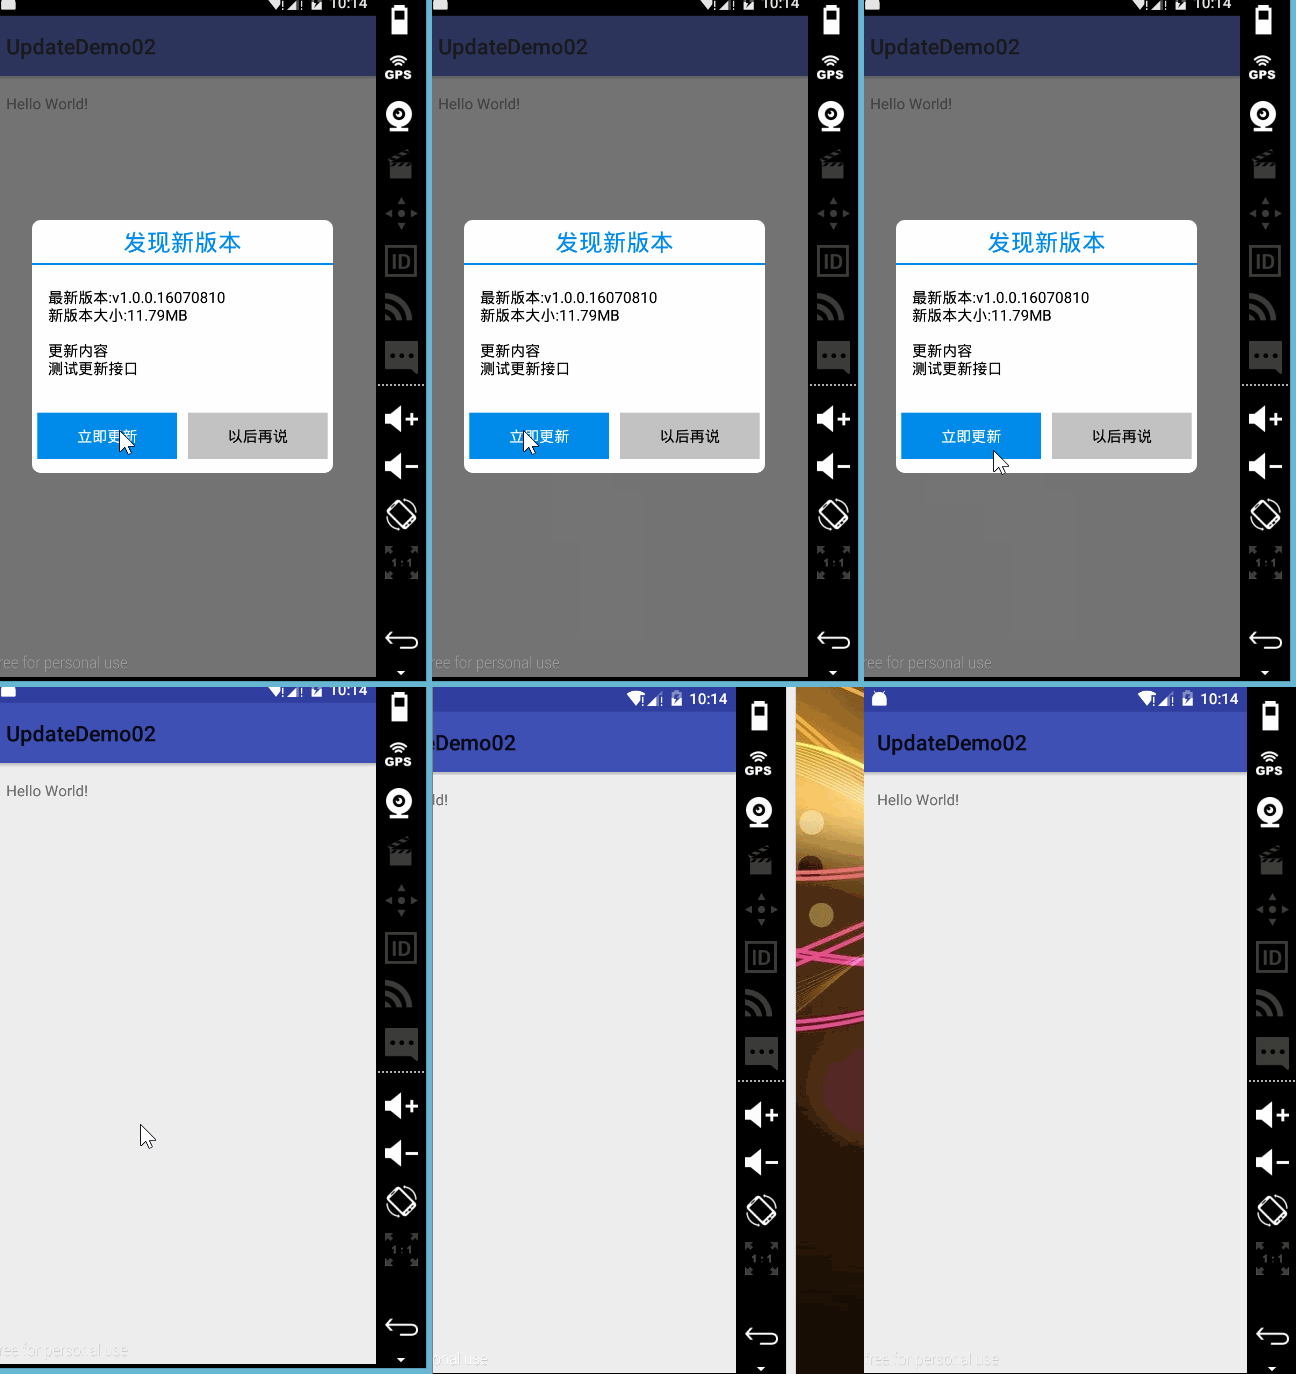
我们拿Android手机的APP为例,假如一个一二十M的APP更新了版本,一般是叫用户重新下载一个最新版本的APK文件重新安装。
但是我们手机游戏客户端APK文件动辄几百M,一G两个G的,假如一个小更新就让玩家重新下载过一遍客户端再安装,那就很麻烦。 热更新就是让游戏客户端更新的时候不需要重新安装游戏的技术,读个条加载一些资源就完成了游戏的更新。
玩家不需要重新下载一个客户端
2.热更新的大概步骤
2.1 大概原理
更新游戏时,更新的东西无非是两类,1.代码文件 2.图像音频模型等资源文件。游戏更新时,直接把代码文件和资源文件从服务器上下载到游戏目录,这样更新时就不用重新下载安装包重新安装了。
2.2 图象音频资源文件的热更新大概步骤
平时给朋友传文件时,一般用rar把文件打包成压缩包再传过去。
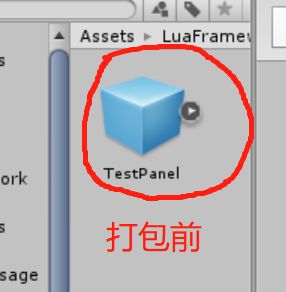
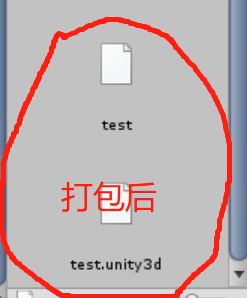
热更新中把服务器上的资源发送给玩家,也得打个包再发送过去,但是不是用rar,而是用的Unity自带的AssetBundle进行打包。这个可以百度一下AssetBundle打包解包的使用方法。
2.3 代码文件的热更新大概步骤
我们Unity的代码,无非就是*.cs后缀的C#脚本文件。那按照之前的思路,游戏更新时,直接把*.cs后缀的C#脚本文件,也就是游戏中的代码文件,全部也AssetBundle打包一下,从服务器上下载给玩家客户端,然后解压缩不就可以了。然而,Unity不支持这样搞,因为AssetBundle不让打包*.cs后缀的C#脚本文件。
那咋办呢?目前常用的方法是:*.cs后缀的C#脚本文件不能打包,那换成*.lua后缀的Lua脚本文件,就能打包了。
什么意思呢,就是我把更新的代码不写在*.cs后缀的C#脚本文件里,而是写在*.lua后缀的Lua脚本文件里,这样支持AssetBundle打包的Lua脚本文件就能和资源文件那样的方法进行热更新了。那问题来了,玩家把Lua脚本更新过来,Unity能看的懂Lua脚本不?答案是能,通过一个叫toLua的Unity开源的组件,Unity就能读取和识别Lua脚本中的代码并运行,和C#脚本没啥区别。
3.实现LuaFramework热更新的入门操作
游戏客户端将从服务器下载AssetBundle打好的资源包文件,解包成代码并执行,或者解包成资源并显示。
3.1 简易热更新一行LUA脚本代码
步骤一:
下载框架地址: https://github.com/jarjin/LuaFramework_UGUI ,把压缩包解压并用Unity打开
步骤二:
LuaFramework框架搭建流程,走一遍。
1.单击菜单Lua/Generate All (生成Wrap文件)
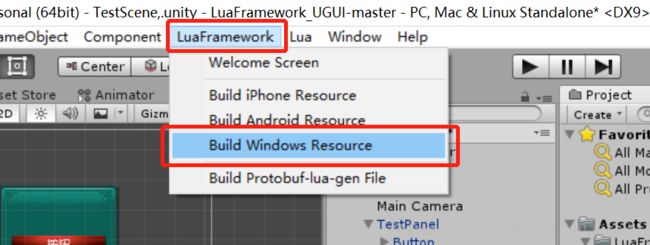
2.单击菜单LuaFramework/Build Windows Resources (根据不同平台生成AssetBundle资源(必须),这里选的Windows)
3.单击菜单Lua/Clear Wrap Files (改完注册到Lua的C#类,需清除文件缓存,重新生成)
4.单击菜单Lua/Encode LuaFile with UTF-8 (Lua需要统一的UTF-8文件编码)
5.打开场景main,资源文件目录LuaFramework/Scenes/main ,点击运行
步骤三:
添加自己的Lua代码,打开资源文件目录LuaFramework/Lua/Main.lua ,这是框架运行时会自动执行的Lua代码文件,在function Main()函数中添加语句:LuaFramework.Util.Log("LLLLLLLLLLLLLLLLLLL") --这是个弹Log的函数,内容是“LLLLLLLLLLLLLLLLLLLL”。
并点击菜单LuaFramework/Build Windows Resources,把资源和代码打包生成相应的AssetBundle文件,这些文件全部存放在StreamingAssets目录,热更新就是从服务器上更新这些AssetBundle文件,然后解包成代码、资源并做出相应的执行。
步骤四:
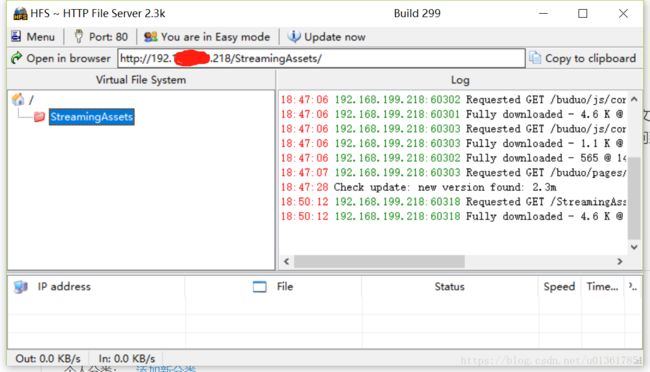
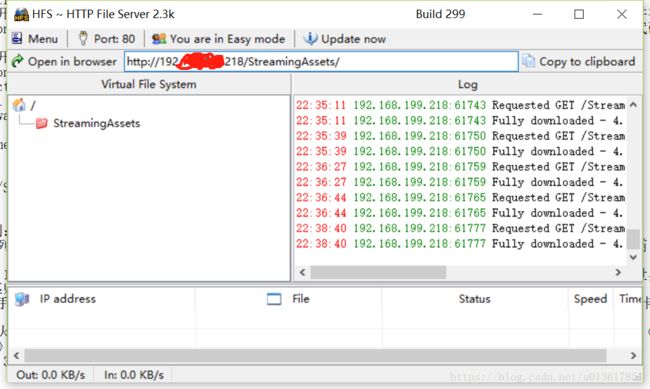
把/StreamingAssets目录以及里面的AssetBundle文件,放到服务器里,这里可以在本地先搞个简易版本的文件服务器。这里我用的网上找的一个叫HFS的HTTP文件服务器软件,把StreamingAssets文件夹拖进去就行,通过浏览器就能访问到里面的文件。(HFS下载地址:http://www.rejetto.com/hfs/?f=dl)
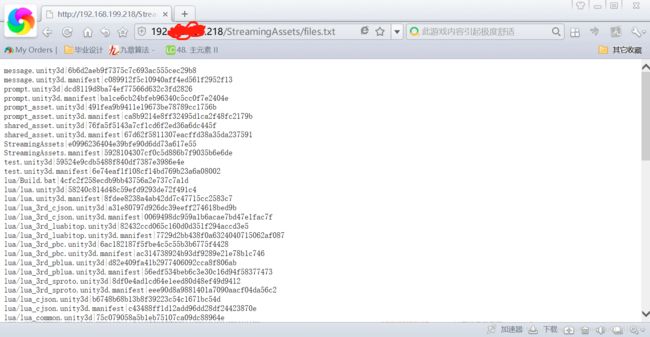
搭建好了测试从浏览器里访问StreamingAssets目录里的files.txt文件
步骤五:
配置热更新地址,并运行测试。
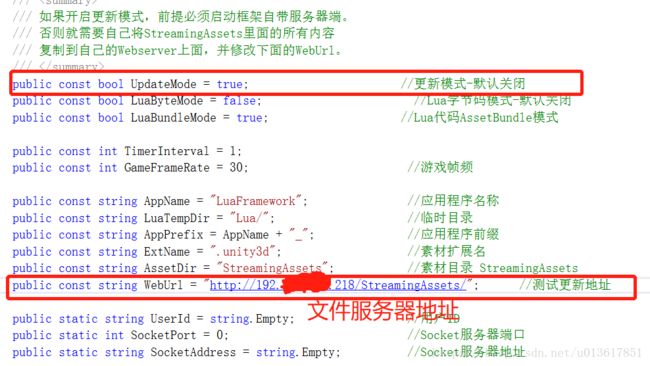
打开App配置文件目录:LuaFramework/Scrips/ConstDefine/AppConst.cs ,找到这几行修改一下。
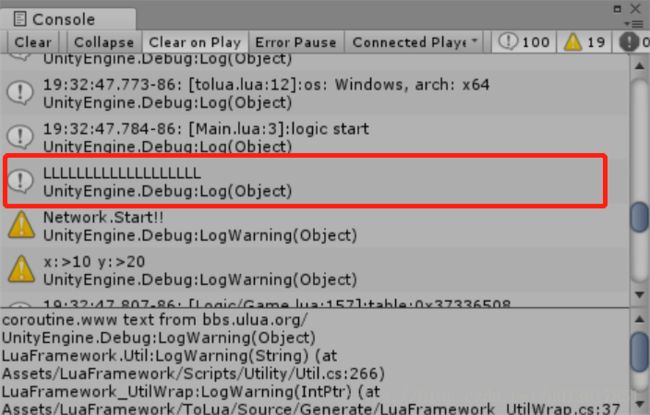
运行工程,此时客户端自动下载服务器上/StreamingAssets目录里的所有AssetBundle文件,并解包和执行,我们打开Console窗口,可以找到我们Lua写的Log也被解包和执行了:
3.2 热更新一个面板并显示出来
步骤一:搭建初始场景
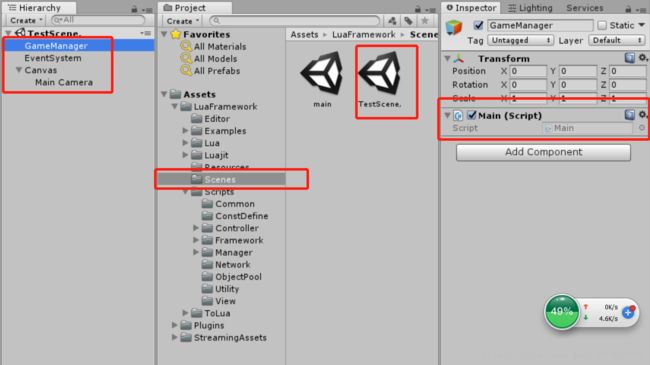
新建一个Scene,我这叫TestScene,放在文件目录:LuaFramework/Scenes/
在TestScene中添加一个GameObject,命名为GameManager,为这个对象添加上Main脚本(目录:LuaFramework/Scripts/Main ,内容是热更新框架的启动)
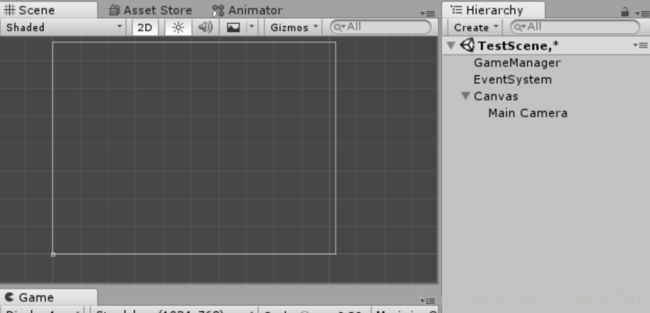
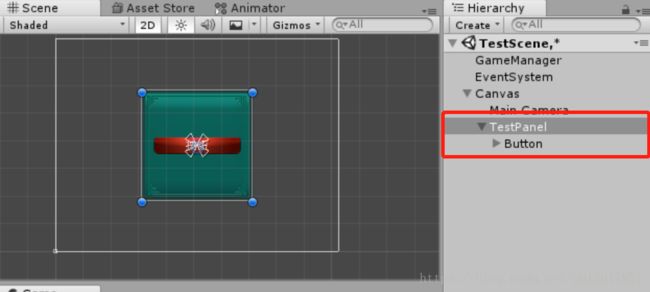
创建一个UI/Canvas 对象,并把Main Camera对象放到其子目录,总体目录结构如下图:
最后,给Main Camera组件加上一个名叫GuiCamera的Tag,注意这个必须的不然会报错。
步骤二:创建一个UGUI的界面框,并制成prefab,以及生成相应的AssetBundle打好的包
用UI/Image和UI/Button生成一个界面框,起名为TestPanel,如图
在:/LuaFramework/Examples/Builds/ 目录建立一个文件夹叫Test,并把场景中的TestPanel拖入到Test文件夹生成一个预设体prefab,如图:

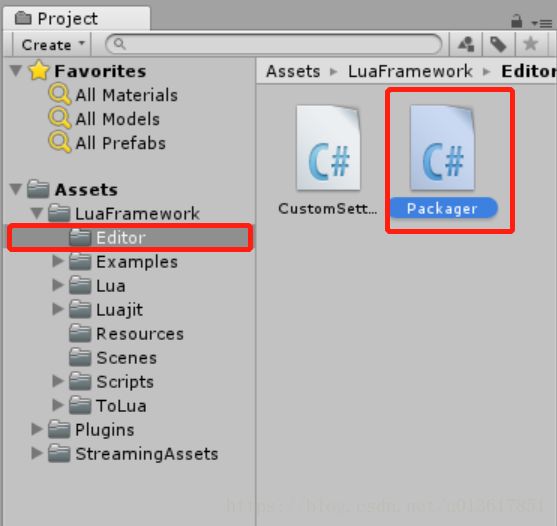
打开/LuaFramework/Editor/Packager.cs,找到static void HandleExampleBundle() 函数(位置大概在中间),在函数中加入这行AddBuildMap("test" + AppConst.ExtName, "*.prefab", "Assets/LuaFramework/Examples/Builds/Test"); //加了这行之后,假如点击Build Windows Resources之后,就会生成相应的Test的AssetBundle包了。

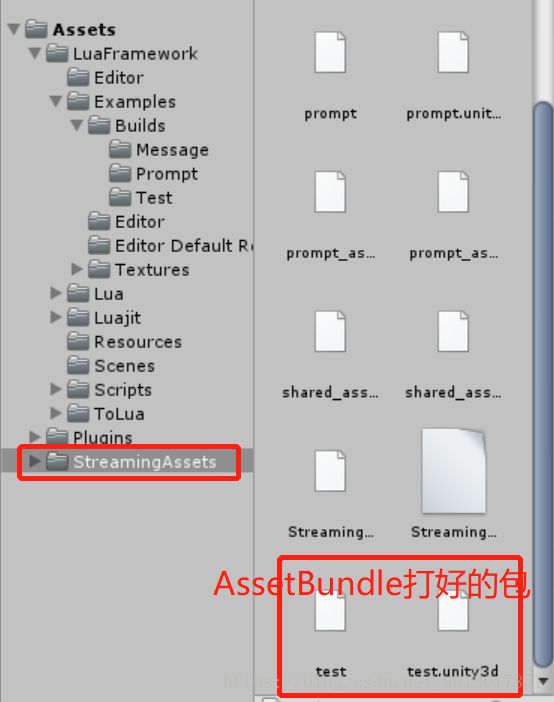
点击菜单LuaFramework/Build Windows Resources,之后便能够在目录:/StreamingAssets/ 找到test的AssetBundle包
删除掉场景视图中TestPanel组件,之后我们会利用prefab和热更新重新加载出来。
步骤三:用Lua脚本以MVC框架的规则构建出TestPanel组件
以MVC框架的格式增加一个组件,其中包括5步骤
1.新建/LuaFramework/Lua/Controller/TestCtrl.lua
2.新建/LuaFramework/Lua/View/TestPanel.lua
3./LuaFramework/Lua/Common/define.lua 增加条目
4./LuaFramework/Lua/Logic/CtrlManager.lua 增加条目
5.在/LuaFramework/Lua/Logic/Game.lua 中加上我们组件的运行的代码
一条一条来,首先新建文件/LuaFramework/Lua/Controller/TestCtrl.lua ,其中的内容为规定格式:
--这是TestCtrl.lua的代码
require "Common/define"
require "3rd/pblua/login_pb"
require "3rd/pbc/protobuf"

local sproto = require "3rd/sproto/sproto"
local core = require "sproto.core"
local print_r = require "3rd/sproto/print_r"

TestCtrl = {};
local this = TestCtrl;


local panel;
local test;
local transform;
local gameObject;

--构建函数--
function TestCtrl.New()
	logWarn("TestCtrl.New--->>");
	return this;
end

function TestCtrl.Awake()
	logWarn("TestCtrl.Awake--->>");
	panelMgr:CreatePanel('Test', this.OnCreate);
end


--启动事件--
function TestCtrl.OnCreate(obj)
	gameObject = obj;
	transform = obj.transform;
	logWarn("Start lua--->>"..gameObject.name);
end
然后是新建/LuaFramework/Lua/View/TestPanel.lua,其中的内容是规定格式:
--这是TestPanel.lua的代码

local transform;
local gameObject;

TestPanel = {};
local this = TestPanel;

--启动事件--
function TestPanel.Awake(obj)
	gameObject = obj;
	transform = obj.transform;

	this.InitPanel();
	logWarn("Awake lua--->>"..gameObject.name);
end

--初始化面板--
function TestPanel.InitPanel()
end

--单击事件--
function TestPanel.OnDestroy()
	logWarn("OnDestroy---->>>");
end
打开/LuaFramework/Lua/Common/define.lua ,在开头的CtrlNames,PanelNames表里添加上Test = "TestCtrl"与"TestPanel"。define.lua代码如下:
--这是define.lua修改后的代码
CtrlNames = {
	Prompt = "PromptCtrl",
	Message = "MessageCtrl",
	Test = "TestCtrl",     --新增的条行
}

PanelNames = {
	"PromptPanel",
	"MessagePanel",
	"TestPanel",           --新增的条行
}

--协议类型--
ProtocalType = {
	BINARY = 0,
	PB_LUA = 1,
	PBC = 2,
	SPROTO = 3,
}
--当前使用的协议类型--
TestProtoType = ProtocalType.BINARY;

Util = LuaFramework.Util;
AppConst = LuaFramework.AppConst;
LuaHelper = LuaFramework.LuaHelper;
ByteBuffer = LuaFramework.ByteBuffer;

resMgr = LuaHelper.GetResManager();
panelMgr = LuaHelper.GetPanelManager();
soundMgr = LuaHelper.GetSoundManager();
networkMgr = LuaHelper.GetNetManager();

WWW = UnityEngine.WWW;
GameObject = UnityEngine.GameObject;
打开/LuaFramework/Lua/Logic/CtrlManager.lua ,在开头添加上require "Controller/TestCtrl" ,并在function CtrlManager.Init()中添加上ctrlList[CtrlNames.Test] = TestCtrl.New();语句,CtrlManager代码如下:
--这是CtrlManager.lua修改后的代码

require "Common/define"
require "Controller/PromptCtrl"
require "Controller/MessageCtrl"
require "Controller/TestCtrl"     --新增的条行

CtrlManager = {};
local this = CtrlManager;
local ctrlList = {};	--控制器列表--

function CtrlManager.Init()
	logWarn("CtrlManager.Init----->>>");
	ctrlList[CtrlNames.Prompt] = PromptCtrl.New();
	ctrlList[CtrlNames.Message] = MessageCtrl.New();
	ctrlList[CtrlNames.Test] = TestCtrl.New();           --新增的条行
	return this;
end

--添加控制器--
function CtrlManager.AddCtrl(ctrlName, ctrlObj)
	ctrlList[ctrlName] = ctrlObj;
end

--获取控制器--
function CtrlManager.GetCtrl(ctrlName)
	return ctrlList[ctrlName];
end

--移除控制器--
function CtrlManager.RemoveCtrl(ctrlName)
	ctrlList[ctrlName] = nil;
end

--关闭控制器--
function CtrlManager.Close()
	logWarn('CtrlManager.Close---->>>');
end
打开/LuaFramework/Lua/Logic/Game.lua ,引用部分加上 require "Controller/TestCtrl" ,在function Game.OnInitOK()中加入代码:(启动我们的TestPanel组件)
local ctrl = CtrlManager.GetCtrl(CtrlNames.Test);
if ctrl ~= nil and AppConst.ExampleMode == 1 then
ctrl:Awake();
end
Game.lua代码如下:
--这是Game.lua修改后的代码

require "3rd/pblua/login_pb"
require "3rd/pbc/protobuf"

local lpeg = require "lpeg"

local json = require "cjson"
local util = require "3rd/cjson/util"

local sproto = require "3rd/sproto/sproto"
local core = require "sproto.core"
local print_r = require "3rd/sproto/print_r"

require "Logic/LuaClass"
require "Logic/CtrlManager"
require "Common/functions"
require "Controller/PromptCtrl"
require "Controller/TestCtrl"         --新增的条行

--管理器--
Game = {};
local this = Game;

local game;
local transform;
local gameObject;
local WWW = UnityEngine.WWW;

function Game.InitViewPanels()
	for i = 1, #PanelNames do
		require ("View/"..tostring(PanelNames[i]))
	end
end

--初始化完成,发送链接服务器信息--
function Game.OnInitOK()
    AppConst.SocketPort = 2012;
    AppConst.SocketAddress = "127.0.0.1";
    networkMgr:SendConnect();

    --注册LuaView--
    this.InitViewPanels();

    this.test_class_func();
    this.test_pblua_func();
    this.test_cjson_func();
    this.test_pbc_func();
    this.test_lpeg_func();
    this.test_sproto_func();
    coroutine.start(this.test_coroutine);

    CtrlManager.Init();
    local ctrl = CtrlManager.GetCtrl(CtrlNames.Prompt);
    if ctrl ~= nil and AppConst.ExampleMode == 1 then
        ctrl:Awake();
    end

    local ctrl = CtrlManager.GetCtrl(CtrlNames.Test);           --新增的条行
    if ctrl ~= nil and AppConst.ExampleMode == 1 then           --新增的条行
        ctrl:Awake();                                           --新增的条行
    end                                                         --新增的条行


    logWarn('LuaFramework InitOK--->>>');
end

--测试协同--
function Game.test_coroutine()
    logWarn("1111");
    coroutine.wait(1);
    logWarn("2222");

    local www = WWW("http://bbs.ulua.org/readme.txt");
    coroutine.www(www);
    logWarn(www.text);
end

--测试sproto--
function Game.test_sproto_func()
    logWarn("test_sproto_func-------->>");
    local sp = sproto.parse [[
    .Person {
        name 0 : string
        id 1 : integer
        email 2 : string

        .PhoneNumber {
            number 0 : string
            type 1 : integer
        }

        phone 3 : *PhoneNumber
    }

    .AddressBook {
        person 0 : *Person(id)
        others 1 : *Person
    }
    ]]

    local ab = {
        person = {
            [10000] = {
                name = "Alice",
                id = 10000,
                phone = {
                    { number = "123456789" , type = 1 },
                    { number = "87654321" , type = 2 },
                }
            },
            [20000] = {
                name = "Bob",
                id = 20000,
                phone = {
                    { number = "01234567890" , type = 3 },
                }
            }
        },
        others = {
            {
                name = "Carol",
                id = 30000,
                phone = {
                    { number = "9876543210" },
                }
            },
        }
    }
    local code = sp:encode("AddressBook", ab)
    local addr = sp:decode("AddressBook", code)
    print_r(addr)
end

--测试lpeg--
function Game.test_lpeg_func()
	logWarn("test_lpeg_func-------->>");
	-- matches a word followed by end-of-string
	local p = lpeg.R"az"^1 * -1

	print(p:match("hello"))        --> 6
	print(lpeg.match(p, "hello"))  --> 6
	print(p:match("1 hello"))      --> nil
end

--测试lua类--
function Game.test_class_func()
    LuaClass:New(10, 20):test();
end

--测试pblua--
function Game.test_pblua_func()
    local login = login_pb.LoginRequest();
    login.id = 2000;
    login.name = 'game';
    login.email = '[email protected]';

    local msg = login:SerializeToString();
    LuaHelper.OnCallLuaFunc(msg, this.OnPbluaCall);
end

--pblua callback--
function Game.OnPbluaCall(data)
    local msg = login_pb.LoginRequest();
    msg:ParseFromString(data);
    print(msg);
    print(msg.id..' '..msg.name);
end

--测试pbc--
function Game.test_pbc_func()
    local path = Util.DataPath.."lua/3rd/pbc/addressbook.pb";
    log('io.open--->>>'..path);

    local addr = io.open(path, "rb")
    local buffer = addr:read "*a"
    addr:close()
    protobuf.register(buffer)

    local addressbook = {
        name = "Alice",
        id = 12345,
        phone = {
            { number = "1301234567" },
            { number = "87654321", type = "WORK" },
        }
    }
    local code = protobuf.encode("tutorial.Person", addressbook)
    LuaHelper.OnCallLuaFunc(code, this.OnPbcCall)
end

--pbc callback--
function Game.OnPbcCall(data)
    local path = Util.DataPath.."lua/3rd/pbc/addressbook.pb";

    local addr = io.open(path, "rb")
    local buffer = addr:read "*a"
    addr:close()
    protobuf.register(buffer)
    local decode = protobuf.decode("tutorial.Person" , data)

    print(decode.name)
    print(decode.id)
    for _,v in ipairs(decode.phone) do
        print("\t"..v.number, v.type)
    end
end

--测试cjson--
function Game.test_cjson_func()
    local path = Util.DataPath.."lua/3rd/cjson/example2.json";
    local text = util.file_load(path);
    LuaHelper.OnJsonCallFunc(text, this.OnJsonCall);
end

--cjson callback--
function Game.OnJsonCall(data)
    local obj = json.decode(data);
    print(obj['menu']['id']);
end

--销毁--
function Game.OnDestroy()
	--logWarn('OnDestroy--->>>');
end
步骤四:点击菜单LuaFramework/Build Windows Resources,重新在目录:/StreamingAssets/ 生成AssetBundle包。重新把/StreamingAssets/文件夹,包括里面的这些AssetBundle包文件,扔服务器里,运行项目。
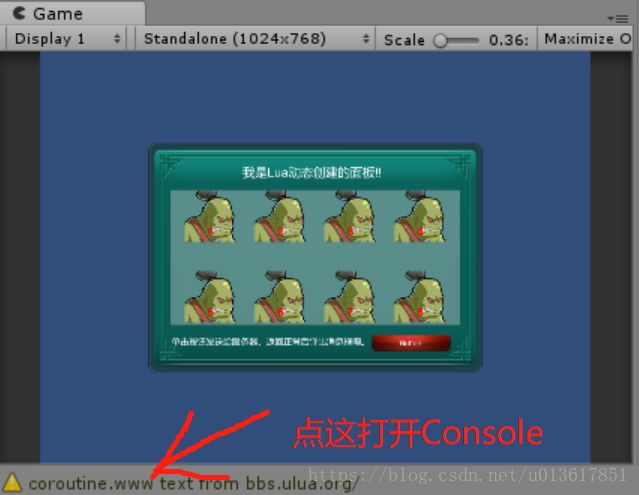
把/StreamingAssets/文件夹丢HFS文件服务器里后,运行Unity项目,此时客户端从服务器的/StreamingAssets目录下载里面所有的AssetBundle资源包,解包并执行,发现此时我们的TestPanel已经被生成了:
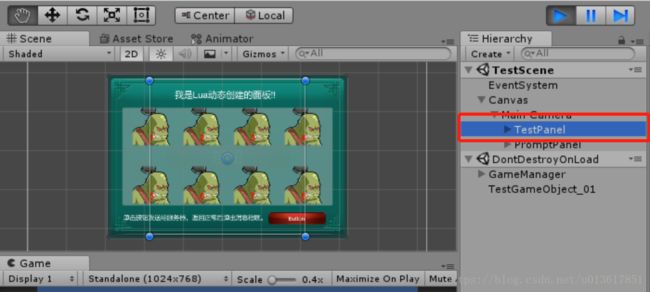
把PromptPanel屏蔽掉之后我们的TestPanel界面框就出来了:

至于如何用代码把框架自带的演示PromptPanel屏蔽掉,在/LuaFramework/Lua/Logic/Game.lua中把这一段屏蔽掉,重新Build Windows Resources,重新把/StreamingAssets/文件夹扔服务器里再运行就没有这个了。
4.热更新框架LuaFramework的详细原理与结构
在简单粗暴的学习了LuaFramework框架使用方法后,接着就是更加系统的学习LuaFramework框架的原理与结构了,接下来的内容今天先不写了,下次再写。
