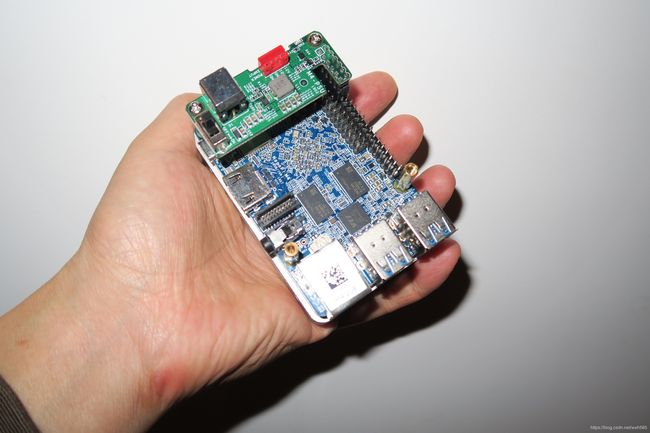
基于国产arm64 cpu+海之舟大数据操作系统建立大数据库
海之舟大数据操作系统,是个商业操作系统,预置了大量软件,便于用户快速建立大数据库。随操作系统的服务器高效,便宜。基于debian9改良,大数据库基于postgresql-xl改良。
192.168.1.125 gtm 20001
所有节点在一个设备上。
coordinator1 30001 coordinator2 30002
pooler_port 30011 pooler_port 30012
datanode1 40001 datanode2 40002 datanode3 50001
pooler_port 40011 pooler_port 40012 pooler_port 50011
zs@bigdataA:~$ pgxc_ctl
/bin/bash
Installing pgxc_ctl_bash script as /home/zs/pgxc_ctl/pgxc_ctl_bash.
Installing pgxc_ctl_bash script as /home/zs/pgxc_ctl/pgxc_ctl_bash.
Reading configuration using /home/zs/pgxc_ctl/pgxc_ctl_bash --home /home/zs/pgxc_ctl --configuration /home/zs/pgxc_ctl/pgxc_ctl.conf
Finished reading configuration.
******** PGXC_CTL START ***************
Current directory: /home/zs/pgxc_ctl
PGXC prepare config empty
PGXC exit
zs@bigdataA:~$ cd h-soft
zs@bigdataA:~/h-soft$ ls
apt-get apt-key bashrc_bk deb java jsp logo.jpg logos pgxc_ctl.conf-all-in-one pgxc_ctl.conf-init php py sources-list.list
复制配置范例
zs@bigdataA:~/h-soft$ cp pgxc_ctl.conf-all-in-one /home/zs/pgxc_ctl/pgxc_ctl.conf
设置ssh免密码登陆
zs@bigdataA:~/h-soft$ ssh-keygen -t rsa
Generating public/private rsa key pair.
Enter file in which to save the key (/home/zs/.ssh/id_rsa):
Created directory ‘/home/zs/.ssh’.
Enter passphrase (empty for no passphrase):
Enter same passphrase again:
Your identification has been saved in /home/zs/.ssh/id_rsa.
Your public key has been saved in /home/zs/.ssh/id_rsa.pub.
The key fingerprint is:
SHA256:aGBHHqYu3C6aM7ygKemfz4uz4OhrnB4wWvJgN/+GjSc zs@bigdataA
The key’s randomart image is:
±–[RSA 2048]----+
| + |
| = . |
| + o |
| . + o . |
|=.+oo o S |
|+*.oo. |
|=++ …+ |
|XOoo+E.+ |
|%X+=++=. |
±—[SHA256]-----+
zs@bigdataA:~/h-soft$ cat ~/.ssh/id_rsa.pub >> ~/.ssh/authorized_keys
zs@bigdataA:~/h-soft$ chmod 600 ~/.ssh/authorized_keys
zs@bigdataA:~/h-soft$ scp ~/.ssh/authorized_keys zs@datanode1:~/.ssh/
The authenticity of host ‘datanode1 (192.168.1.125)’ can’t be established.
ECDSA key fingerprint is SHA256:x9G1q0gI34qnEyWmhF/f922w0vzNz7TfTITJohFNdMs.
Are you sure you want to continue connecting (yes/no)? yes
Warning: Permanently added ‘datanode1,192.168.1.125’ (ECDSA) to the list of known hosts.
authorized_keys 100% 393 207.3KB/s 00:00
初始化数据库
zs@bigdataA:~/h-soft$ pgxc_ctl -c /home/zs/pgxc_ctl/pgxc_ctl.conf init all
/bin/bash
Installing pgxc_ctl_bash script as /home/zs/pgxc_ctl/pgxc_ctl_bash.
Installing pgxc_ctl_bash script as /home/zs/pgxc_ctl/pgxc_ctl_bash.
Reading configuration using /home/zs/pgxc_ctl/pgxc_ctl_bash --home /home/zs/pgxc_ctl --configuration /home/zs/pgxc_ctl/pgxc_ctl.conf
Finished reading configuration.
******** PGXC_CTL START ***************
Current directory: /home/zs/pgxc_ctl
Initialize GTM master
The authenticity of host ‘gtm (192.168.1.125)’ can’t be established.
ECDSA key fingerprint is SHA256:x9G1q0gI34qnEyWmhF/f922w0vzNz7TfTITJohFNdMs.
Are you sure you want to continue connecting (yes/no)? yes
The files belonging to this GTM system will be owned by user “zs”.
This user must also own the server process.
fixing permissions on existing directory /home/zs/data/gtm … ok
creating configuration files … ok
creating control file … ok
Success.
Done.
Start GTM master
server starting
Initialize all the coordinator masters.
Initialize coordinator master coord1.
Initialize coordinator master coord2.
The authenticity of host ‘datanode2 (192.168.1.125)’ can’t be established.
ECDSA key fingerprint is SHA256:x9G1q0gI34qnEyWmhF/f922w0vzNz7TfTITJohFNdMs.
Are you sure you want to continue connecting (yes/no)? yes
The files belonging to this database system will be owned by user “zs”.
This user must also own the server process.
The database cluster will be initialized with locale “en_US.UTF-8”.
The default database encoding has accordingly been set to “UTF8”.
The default text search configuration will be set to “english”.
Data page checksums are disabled.
fixing permissions on existing directory /home/zs/data/coord_master.1 … ok
creating subdirectories … ok
selecting default max_connections … 100
selecting default shared_buffers … 128MB
selecting dynamic shared memory implementation … posix
creating configuration files … ok
running bootstrap script … ok
performing post-bootstrap initialization … creating cluster information … ok
syncing data to disk … ok
freezing database template0 … ok
freezing database template1 … ok
freezing database postgres … ok
WARNING: enabling “trust” authentication for local connections
You can change this by editing pg_hba.conf or using the option -A, or
–auth-local and --auth-host, the next time you run initdb.
Success.
The files belonging to this database system will be owned by user “zs”.
This user must also own the server process.
The database cluster will be initialized with locale “en_US.UTF-8”.
The default database encoding has accordingly been set to “UTF8”.
The default text search configuration will be set to “english”.
Data page checksums are disabled.
fixing permissions on existing directory /home/zs/data/coord_master.2 … ok
creating subdirectories … ok
selecting default max_connections … 100
selecting default shared_buffers … 128MB
selecting dynamic shared memory implementation … posix
creating configuration files … ok
running bootstrap script … ok
performing post-bootstrap initialization … creating cluster information … ok
syncing data to disk … ok
freezing database template0 … ok
freezing database template1 … ok
freezing database postgres … ok
WARNING: enabling “trust” authentication for local connections
You can change this by editing pg_hba.conf or using the option -A, or
–auth-local and --auth-host, the next time you run initdb.
Success.
Done.
Starting coordinator master.
Starting coordinator master coord1
Starting coordinator master coord2
2019-09-25 21:03:52.847 CST [2197] LOG: listening on IPv4 address “0.0.0.0”, port 30001
2019-09-25 21:03:52.848 CST [2197] LOG: listening on IPv6 address “::”, port 30001
2019-09-25 21:03:52.887 CST [2197] LOG: listening on Unix socket “/tmp/.s.PGSQL.30001”
2019-09-25 21:03:52.966 CST [2197] LOG: redirecting log output to logging collector process
2019-09-25 21:03:52.966 CST [2197] HINT: Future log output will appear in directory “pg_log”.
2019-09-25 21:03:52.832 CST [2192] LOG: listening on IPv4 address “0.0.0.0”, port 30002
2019-09-25 21:03:52.832 CST [2192] LOG: listening on IPv6 address “::”, port 30002
2019-09-25 21:03:52.868 CST [2192] LOG: listening on Unix socket “/tmp/.s.PGSQL.30002”
2019-09-25 21:03:52.945 CST [2192] LOG: redirecting log output to logging collector process
2019-09-25 21:03:52.945 CST [2192] HINT: Future log output will appear in directory “pg_log”.
Done.
Initialize all the datanode masters.
Initialize the datanode master dn1.
Initialize the datanode master dn2.
The files belonging to this database system will be owned by user “zs”.
This user must also own the server process.
The database cluster will be initialized with locale “en_US.UTF-8”.
The default database encoding has accordingly been set to “UTF8”.
The default text search configuration will be set to “english”.
Data page checksums are disabled.
fixing permissions on existing directory /home/zs/data/dn_master.1 … ok
creating subdirectories … ok
selecting default max_connections … 100
selecting default shared_buffers … 128MB
selecting dynamic shared memory implementation … posix
creating configuration files … ok
running bootstrap script … ok
performing post-bootstrap initialization … creating cluster information … ok
syncing data to disk … ok
freezing database template0 … ok
freezing database template1 … ok
freezing database postgres … ok
WARNING: enabling “trust” authentication for local connections
You can change this by editing pg_hba.conf or using the option -A, or
–auth-local and --auth-host, the next time you run initdb.
Success.
The files belonging to this database system will be owned by user “zs”.
This user must also own the server process.
The database cluster will be initialized with locale “en_US.UTF-8”.
The default database encoding has accordingly been set to “UTF8”.
The default text search configuration will be set to “english”.
Data page checksums are disabled.
fixing permissions on existing directory /home/zs/data/dn_master.2 … ok
creating subdirectories … ok
selecting default max_connections … 100
selecting default shared_buffers … 128MB
selecting dynamic shared memory implementation … posix
creating configuration files … ok
running bootstrap script … ok
performing post-bootstrap initialization … creating cluster information … ok
syncing data to disk … ok
freezing database template0 … ok
freezing database template1 … ok
freezing database postgres … ok
WARNING: enabling “trust” authentication for local connections
You can change this by editing pg_hba.conf or using the option -A, or
–auth-local and --auth-host, the next time you run initdb.
Success.
Done.
Starting all the datanode masters.
Starting datanode master dn1.
Starting datanode master dn2.
2019-09-25 21:04:07.794 CST [2876] LOG: listening on IPv4 address “0.0.0.0”, port 40001
2019-09-25 21:04:07.794 CST [2876] LOG: listening on IPv6 address “::”, port 40001
2019-09-25 21:04:07.844 CST [2876] LOG: listening on Unix socket “/tmp/.s.PGSQL.40001”
2019-09-25 21:04:07.933 CST [2876] LOG: redirecting log output to logging collector process
2019-09-25 21:04:07.933 CST [2876] HINT: Future log output will appear in directory “pg_log”.
2019-09-25 21:04:07.756 CST [2871] LOG: listening on IPv4 address “0.0.0.0”, port 40002
2019-09-25 21:04:07.756 CST [2871] LOG: listening on IPv6 address “::”, port 40002
2019-09-25 21:04:07.794 CST [2871] LOG: listening on Unix socket “/tmp/.s.PGSQL.40002”
2019-09-25 21:04:07.897 CST [2871] LOG: redirecting log output to logging collector process
2019-09-25 21:04:07.897 CST [2871] HINT: Future log output will appear in directory “pg_log”.
Done.
ALTER NODE coord1 WITH (HOST=‘gtm’, PORT=30001);
ALTER NODE
CREATE NODE coord2 WITH (TYPE=‘coordinator’, HOST=‘datanode2’, PORT=30002);
CREATE NODE
CREATE NODE dn1 WITH (TYPE=‘datanode’, HOST=‘gtm’, PORT=40001, PRIMARY, PREFERRED);
CREATE NODE
CREATE NODE dn2 WITH (TYPE=‘datanode’, HOST=‘datanode2’, PORT=40002);
CREATE NODE
SELECT pgxc_pool_reload();
pgxc_pool_reload
t
(1 row)
CREATE NODE coord1 WITH (TYPE=‘coordinator’, HOST=‘gtm’, PORT=30001);
CREATE NODE
ALTER NODE coord2 WITH (HOST=‘datanode2’, PORT=30002);
ALTER NODE
CREATE NODE dn1 WITH (TYPE=‘datanode’, HOST=‘gtm’, PORT=40001, PRIMARY);
CREATE NODE
CREATE NODE dn2 WITH (TYPE=‘datanode’, HOST=‘datanode2’, PORT=40002, PREFERRED);
CREATE NODE
SELECT pgxc_pool_reload();
pgxc_pool_reload
t
(1 row)
Done.
EXECUTE DIRECT ON (dn1) ‘CREATE NODE coord1 WITH (TYPE=’‘coordinator’’, HOST=’‘gtm’’, PORT=30001)’;
EXECUTE DIRECT
EXECUTE DIRECT ON (dn1) ‘CREATE NODE coord2 WITH (TYPE=’‘coordinator’’, HOST=’‘datanode2’’, PORT=30002)’;
EXECUTE DIRECT
EXECUTE DIRECT ON (dn1) ‘ALTER NODE dn1 WITH (TYPE=’‘datanode’’, HOST=’‘gtm’’, PORT=40001, PRIMARY, PREFERRED)’;
EXECUTE DIRECT
EXECUTE DIRECT ON (dn1) ‘CREATE NODE dn2 WITH (TYPE=’‘datanode’’, HOST=’‘datanode2’’, PORT=40002, PREFERRED)’;
EXECUTE DIRECT
EXECUTE DIRECT ON (dn1) ‘SELECT pgxc_pool_reload()’;
pgxc_pool_reload
t
(1 row)
EXECUTE DIRECT ON (dn2) ‘CREATE NODE coord1 WITH (TYPE=’‘coordinator’’, HOST=’‘gtm’’, PORT=30001)’;
EXECUTE DIRECT
EXECUTE DIRECT ON (dn2) ‘CREATE NODE coord2 WITH (TYPE=’‘coordinator’’, HOST=’‘datanode2’’, PORT=30002)’;
EXECUTE DIRECT
EXECUTE DIRECT ON (dn2) ‘CREATE NODE dn1 WITH (TYPE=’‘datanode’’, HOST=’‘gtm’’, PORT=40001, PRIMARY, PREFERRED)’;
EXECUTE DIRECT
EXECUTE DIRECT ON (dn2) ‘ALTER NODE dn2 WITH (TYPE=’‘datanode’’, HOST=’‘datanode2’’, PORT=40002, PREFERRED)’;
EXECUTE DIRECT
EXECUTE DIRECT ON (dn2) ‘SELECT pgxc_pool_reload()’;
pgxc_pool_reload
------------------ t
(1 row)
Done.
zs@bigdataA:~/h-soft z s @ b i g d a t a A : / h − s o f t zs@bigdataA:~/h-soft zs@bigdataA: /h−soft su root
Password:
root@bigdataA:/home/zs/h-soft# nano /etc/rc.local
…
su - zs -c’/md1/apache-tomcat-8.5.35/bin/startup.sh’
#sleep 5
#su - zs -c’pgxc_ctl -c /home/zs/pgxc_ctl/pgxc_ctl.conf start all’
#/etc/init.d/apache2 start
#/etc/init.d/mysql start
#/etc/init.d/bind9 start
#/etc/init.d/postgresql start
#/etc/init.d/vsftpd start
#/etc/init.d/xinetd start
#/etc/init.d/ntp start
exit 0
把下面一行的#去掉,开机自动启动
su - zs -c’pgxc_ctl -c /home/zs/pgxc_ctl/pgxc_ctl.conf start all’
root@bigdataA:/home/zs/h-soft# netstat -an |more
Active Internet connections (servers and established)
Proto Recv-Q Send-Q Local Address Foreign Address State
tcp 0 0 0.0.0.0:30001 0.0.0.0:* LISTEN
tcp 0 0 0.0.0.0:30002 0.0.0.0:* LISTEN
tcp 0 0 0.0.0.0:22 0.0.0.0:* LISTEN
tcp 0 0 0.0.0.0:40001 0.0.0.0:* LISTEN
tcp 0 0 0.0.0.0:20001 0.0.0.0:* LISTEN
tcp 0 0 0.0.0.0:40002 0.0.0.0:* LISTEN
tcp 0 0 192.168.1.125:20001 192.168.1.125:48452 ESTABLISHED
tcp 0 0 192.168.1.125:48594 192.168.1.125:20001 TIME_WAIT
tcp 0 0 192.168.1.125:20001 192.168.1.125:48344 ESTABLISHED
tcp 0 0 192.168.1.125:48446 192.168.1.125:20001 ESTABLISHED
tcp 0 0 192.168.1.125:22 192.168.1.6:50950 ESTABLISHED
tcp 0 0 192.168.1.125:20001 192.168.1.125:48444 ESTABLISHED
tcp 0 0 192.168.1.125:48588 192.168.1.125:20001 TIME_WAIT
tcp 0 0 192.168.1.125:20001 192.168.1.125:48346 ESTABLISHED
tcp 0 0 192.168.1.125:48346 192.168.1.125:20001 ESTABLISHED
tcp 0 0 192.168.1.125:48590 192.168.1.125:20001 TIME_WAIT
tcp 0 0 192.168.1.125:20001 192.168.1.125:48348 ESTABLISHED
tcp 0 64 192.168.1.125:22 192.168.1.6:50775 ESTABLISHED
tcp 0 0 192.168.1.125:20001 192.168.1.125:48342 ESTABLISHED
tcp 0 0 192.168.1.125:20001 192.168.1.125:48350 ESTABLISHED
tcp 0 0 192.168.1.125:48350 192.168.1.125:20001 ESTABLISHED
tcp 0 0 192.168.1.125:48348 192.168.1.125:20001 ESTABLISHED
tcp 0 0 192.168.1.125:48340 192.168.1.125:20001 ESTABLISHED
tcp 0 0 192.168.1.125:20001 192.168.1.125:48448 ESTABLISHED
tcp 0 0 192.168.1.125:48342 192.168.1.125:20001 ESTABLISHED
tcp 0 0 192.168.1.125:20001 192.168.1.125:48454 ESTABLISHED
tcp 0 0 192.168.1.125:48452 192.168.1.125:20001 ESTABLISHED
tcp 0 0 192.168.1.125:48344 192.168.1.125:20001 ESTABLISHED
tcp 0 0 192.168.1.125:48450 192.168.1.125:20001 ESTABLISHED
tcp 0 0 192.168.1.125:48444 192.168.1.125:20001 ESTABLISHED
tcp 0 0 192.168.1.125:20001 192.168.1.125:48340 ESTABLISHED
tcp 0 0 192.168.1.125:48454 192.168.1.125:20001 ESTABLISHED
tcp 0 0 192.168.1.125:20001 192.168.1.125:48446 ESTABLISHED
tcp 0 0 192.168.1.125:20001 192.168.1.125:48450 ESTABLISHED
tcp 0 0 192.168.1.125:48448 192.168.1.125:20001 ESTABLISHED
tcp 0 0 192.168.1.125:48592 192.168.1.125:20001 TIME_WAIT
tcp6 0 0 :::8080 ::? LISTEN
tcp6 0 0 :::30001 ::? LISTEN
tcp6 0 0 :::30002 ::? LISTEN
tcp6 0 0 :::22 ::? LISTEN
tcp6 0 0 :::40001 ::? LISTEN
tcp6 0 0 :::20001 ::? LISTEN
tcp6 0 0 :::40002 ::? LISTEN
tcp6 0 0 127.0.0.1:8005 ::? LISTEN
tcp6 0 0 :::8009 ::? LISTEN
udp 0 0 192.168.1.125:123 0.0.0.0:*
udp 0 0 127.0.0.1:123 0.0.0.0:*
udp 0 0 0.0.0.0:123 0.0.0.0:*
udp6 0 0 ::1:53812 ::1:53812 ESTABLISHED
udp6 0 0 ::1:48885 ::1:48885 ESTABLISHED
udp6 0 0 ::1:50269 ::1:50269 ESTABLISHED
udp6 0 0 fe80::a8c4:51ff:fe3:123 ::?
udp6 0 0 ::1:123 ::?
udp6 0 0 :::123 ::?
udp6 0 0 ::1:48327 ::1:48327 ESTABLISHED
显示30001,30002等端口已开启,正常。
在windows 7电脑上安装pgadmin4.4,打开,做相关设置,即可见到四个节点coord1,coord2,data1,data2.

打开即可建立表、索引等。
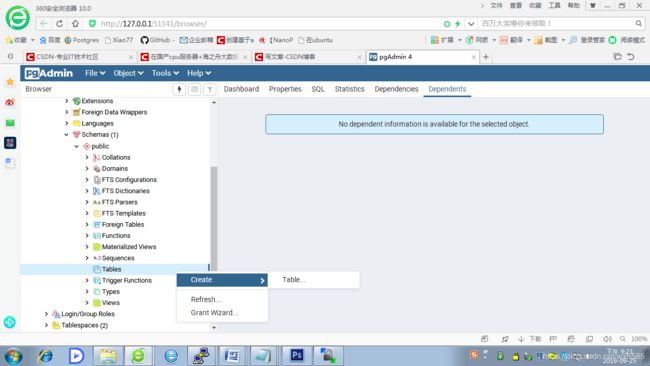
按照说明,建立了表t1,
CREATE TABLE t1(bid serial not null,id integer,xm varchar(255),zh varchar(255),nr bytea,tjsj timestamp DEFAULT now());

操作系统开发了部分接口范例,下面为jsp接口范例打开浏览器,
http://192.168.1.125:8080/d.jsp
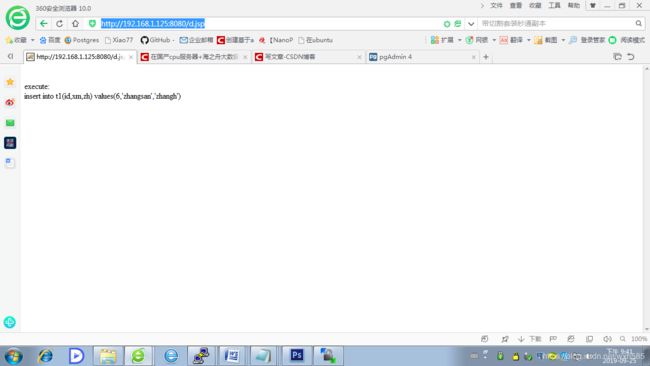
插入了一行记录,
http://192.168.1.125:8080/c.jsp
显示记录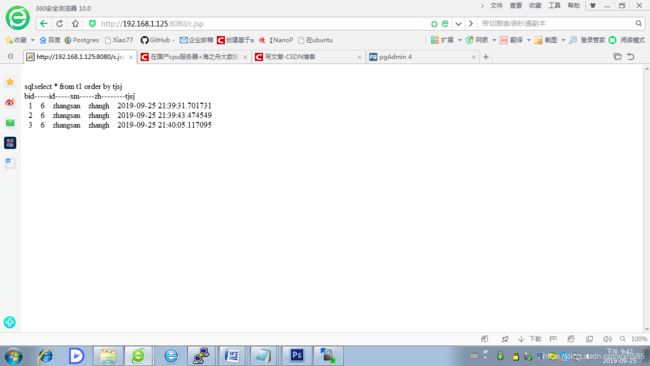
jsp源码
<%@ page contentType=“text/html;charset=UTF-8”%>
<%@ page import=“java.sql."%>
<%@ page import="java.util.”%>
<%@ page import=“java.io."%>
<%@ page import="java.net.”%>
String id=request.getParameter(“id”);
String sql=“select * from t1 order by tjsj”;
ResultSet rs=stmt.executeQuery(sql);
String ss="";
int c=0;
out.print(“
sql:”+sql);
out.print(“
bid-----id-----xm-----zh--------tjsj”);
while(rs.next())
{
out.print("
“+rs.getInt(1));
out.print(” “+rs.getString(2));
out.print(” “+rs.getString(3));
out.print(” “+rs.getString(4));
out.print(” "+rs.getString(6));
}
//c=Integer.parseInt(ss);
rs.close();
stmt.close();
conn.close();
%>
以下是python连接大数据库的接口范例,源码
zs@bigdataA:~/h-soft/py$ ./c.py
Opened database successfully
bid= 1
id= 6
xm= zhangsan
zh= zhangh
Operation done successfully
SELECT * from t1 where bid=1
以下是python的接口源码
zs@bigdataA:~/h-soft/py$nano ./c.py
#!/usr/bin/python
import psycopg2
sql=“SELECT * from t1 where bid=1”
conn=psycopg2.connect(database=“postgres”,user=“zs”,password=“1234”,host=“coordinator1”,port=“30002”)
print “Opened database successfully”
cur = conn.cursor()
cur.execute(sql)
rows = cur.fetchall()
for row in rows:
print “bid=”,row[0]
print “id=”,row[1]
print “xm=”,row[2]
print “zh=”,row[3], “\n”
print “Operation done successfully”;
print sql;
conn.close()
java的接口范例
zs@bigdataA:~/h-soft$ cd java
zs@bigdataA:~/h-soft/java$ ls
hello.class jdbc1.class jdbc2.class jdbc3.class jdbc4.java MyXMLReader.java
hello.java jdbc1.java jdbc2.java jdbc3.java MyXMLReader.class webconfig.xml
zs@bigdataA:~/h-soft/java$ java jdbc2
INSERT INTO t1(id,xm,zh) VALUES (4, ‘Mark’, ‘Rich’)
zs@bigdataA:~/h-soft/java$ java jdbc3
Opened database successfully
UPDATE t1 set xm=‘ZhangSan’ where id=6;
bid id xm zh tjsj
1 6 ZhangSan zhangh 2019-09-25 21:39:31.701731
2 6 ZhangSan zhangh 2019-09-25 21:39:43.474549
3 6 ZhangSan zhangh 2019-09-25 21:40:05.117095
4 4 Mark Rich 2019-09-25 21:52:38.727645
SELECT * FROM t1 order by tjsj;
Operation done successfully
java 接口源码,jdbc。
zs@bigdataA:~/h-soft/java$$ nano jdbc3.java
import java.sql.Connection;
import java.sql.DriverManager;
import java.sql.ResultSet;
import java.sql.Statement;
public class jdbc3 {
public static void main( String args[] )
{
Connection c = null;
Statement stmt = null;
try {
Class.forName(“org.postgresql.Driver”);
c = DriverManager.getConnection(“jdbc:postgresql://coordinator1:30002/postgres”,“zs”, “1234”);
c.setAutoCommit(false);
System.out.println(“Opened database successfully”);
     stmt = c.createStatement();
     String sql = "UPDATE t1 set xm='ZhangSan' where id=6;";
     stmt.executeUpdate(sql);
     c.commit();
     System.out.println(sql);
     sql= "SELECT * FROM t1 order by tjsj;";
     ResultSet rs = stmt.executeQuery(sql);
     System.out.printf( "\n%-8s%-8s%-16s%-16s%-13s ","bid","id","xm","zh","tjsj");
     while ( rs.next() ) {
        int bid = rs.getInt("bid");
        int id = rs.getInt("id");
        String  xm= rs.getString("xm");
        String zh  = rs.getString("zh");
        String  tjsj = rs.getString("tjsj");
        System.out.printf( "\n%-8d%-8d%-16s%-16s%-13s ",bid,id,xm,zh,tjsj);
     }
     rs.close();
     stmt.close();
     c.close();
     System.out.println("\n"+sql);