elasticsearch实战之xpack安装、head加密与xpack解密
一、介绍
X-Pack是一个弹性堆栈扩展,提供安全性、警报、监视、报告、机器学习和许多其他功能。默认情况下,当您安装Elasticsearch时,将安装X-Pack。从6.3版本开始, X-Pack 默认包含在 Elasticsearch、Kibana 和 Logstash 中,所以无须单独安装了
二、启动xpack
1、启用xpack前,查看es日志显示license 为basic
2、执行以下命令,再次查看es日志显示license 已变为trial
curl -H "Content-Type:application/json" -XPOST http://192.168.171.129:9200/_xpack/license/start_trial?acknowledge=true
3、elasticsearch-setup-passwords命令用法
此命令仅用于Elasticsearch安全特性的初始配置期间。它使用弹性引导密码运行用户管理API请求。为elastic用户设置密码后,引导程序密码将不再活动,不能再次使用此命令。
第一次执行./elasticsearch-setup-passwords interactive报错,需要在elasticsearch.yml添加配置
xpack.security.enabled: true #默认为false;然后重启es服务
4、在ES的bin目录下执行./elasticsearch-setup-passwords interactive
启动预留用户elastic、apm_system、kibana、logstash_system、beats_system、remote_monitoring_user的密码设置,在此过程中,系统会提示您输入密码。

密码都为12345678
5、如果执行过一次就不能再执行了,你可以从Kibana中的管理>用户UI或使用安全用户API更新密码。
6、elasticsearch-users用户用法
bin/elasticsearch-users
[useradd <username>] [-p <password>] [-r <roles>]  #添加用户
[list] <username>                                  #查看用户
[passwd <username>] [-p <password>]          #用户修改密码
[roles <username>] [-a <roles>] [-r <roles>] #用户设定规则,-a添加用户角色,-r删除某些角色
[userdel <username>])                        #删除用户
cd /u01/isi/application/index/elasticsearch-6.5.1/bin
./elasticsearch-users useradd wkx -p 654321 -r network,monitoring
cd /u01/isi/application/index/elasticsearch-6.5.1/bin
./elasticsearch-users list
./elasticsearch-users passwd wkx
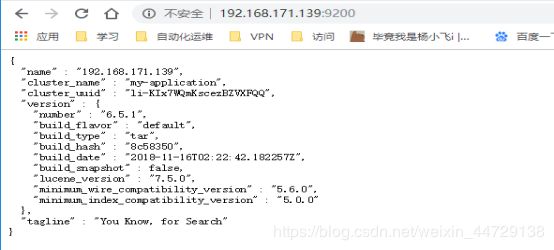
三、访问测试
http://192.168.171.139:9200/
四、head插件加密访问
1、在elasticsearch.yml中添加配置,重启es集群
http.cors.allow-headers: Authorization,X-Requested-With,Content-Length,Content-Type
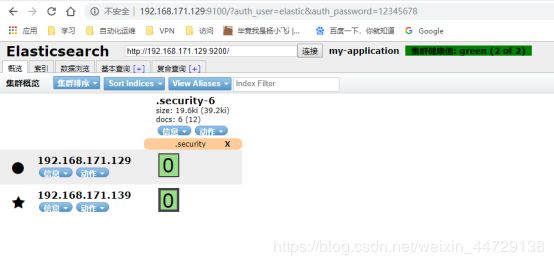
2、访问测试
http://192.168.171.129:9100/?auth_user=elastic&auth_password=12345678
五、破解xpack
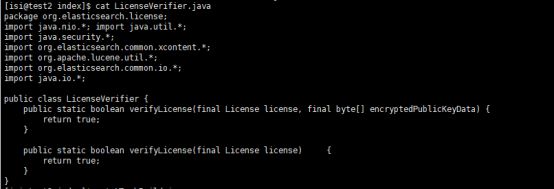
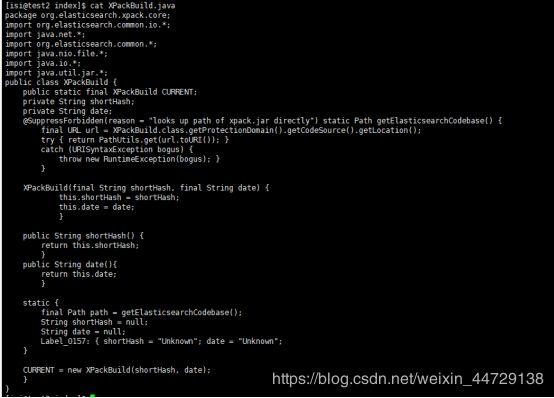
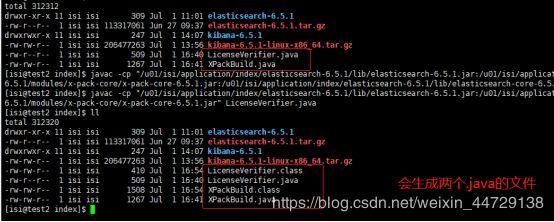
1、重写x-pack下的2个类:LicenseVerifier.java和XPackBuild.java
cd /u01/isi/application/index/
cat LicenseVerifier.java
package org.elasticsearch.license;
import java.nio.*; import java.util.*;
import java.security.*;
import org.elasticsearch.common.xcontent.*;
import org.apache.lucene.util.*;
import org.elasticsearch.common.io.*;
import java.io.*;

public class LicenseVerifier {
    public static boolean verifyLicense(final License license, final byte[] encryptedPublicKeyData) {
        return true;
    }

    public static boolean verifyLicense(final License license)     {
        return true;
    }
}
cd /u01/isi/application/index/
cat XPackBuild.java
package org.elasticsearch.xpack.core;
import org.elasticsearch.common.io.*;
import java.net.*;
import org.elasticsearch.common.*;
import java.nio.file.*;
import java.io.*;
import java.util.jar.*;
public class XPackBuild {
    public static final XPackBuild CURRENT;
    private String shortHash;
    private String date;
    @SuppressForbidden(reason = "looks up path of xpack.jar directly") static Path getElasticsearchCodebase() {
        final URL url = XPackBuild.class.getProtectionDomain().getCodeSource().getLocation();
        try { return PathUtils.get(url.toURI()); }
        catch (URISyntaxException bogus) {
            throw new RuntimeException(bogus); }
        }

    XPackBuild(final String shortHash, final String date) {
            this.shortHash = shortHash;
            this.date = date;
            }

    public String shortHash() {
        return this.shortHash;
        }
    public String date(){
        return this.date;
        }

    static {
        final Path path = getElasticsearchCodebase();
        String shortHash = null;
        String date = null;
        Label_0157: { shortHash = "Unknown"; date = "Unknown";
    }

    CURRENT = new XPackBuild(shortHash, date);
    }
}
2、编译class文件
cd  /u01/isi/application/index
javac -cp "/u01/isi/application/index/elasticsearch-6.5.1/lib/elasticsearch-6.5.1.jar:/u01/isi/application/index/elasticsearch-6.5.1/lib/lucene-core-7.5.0.jar:/u01/isi/application/index/elasticsearch-6.5.1/modules/x-pack-core/x-pack-core-6.5.1.jar:/u01/isi/application/index/elasticsearch-6.5.1/lib/elasticsearch-core-6.5.1.jar"  XPackBuild.java
javac -cp "/u01/isi/application/index/elasticsearch-6.5.1/lib/elasticsearch-6.5.1.jar:/u01/isi/application/index/elasticsearch-6.5.1/lib/lucene-core-7.5.0.jar:/u01/isi/application/index/elasticsearch-6.5.1/modules/x-pack-core/x-pack-core-6.5.1.jar" LicenseVerifier.java
3、覆盖原来的jar包
1.找到目标jar包 elasticsearch-6.5.1\modules\x-pack\x-pack-core\x-pack-core-6.3.1.jar
2.用LicenseVerifier.class 覆盖x-pack-core-6.5.1.jar\org\elasticsearch\license目录下的同名文件
3.同理用 XPackBuild.class 覆盖 x-pack-core-6.5.1.jar\org\elasticsearch\xpack\core 目录下的同名文件
4.有兴趣的可以点开了解下具体修改了什么内容
cd  /u01/isi/application/index
mkdir tempJar
cp elasticsearch-6.5.1/modules/x-pack-core/x-pack-core-6.5.1.jar tempJar/
cd tempJar/
jar -xf x-pack-core-6.5.1.jar
cp -f ../LicenseVerifier.class org/elasticsearch/license/
cp -f ../XPackBuild.class org/elasticsearch/xpack/core/
rm -f x-pack-core-6.5.1.jar
jar -cvf x-pack-core-6.5.1.jar *
cd ..
cp elasticsearch-6.5.1/modules/x-pack-core/x-pack-core-6.5.1.jar elasticsearch-6.5.1/modules/x-pack-core/x-pack-core-6.5.1.jar.bak
cp tempJar/x-pack-core-6.5.1.jar elasticsearch-6.5.1/modules/x-pack-core/
4、去官网申请license证书
官方链接:https://license.elastic.co/registration
1.邮箱认真写,用来接收json文件的
2.country写china,其它都可以随便写
3.点击申请后邮箱马上会收到一个邮件
5、修改申请到的证书
主要修改这两个地方
1.“type”:“basic” 替换为 “type”:"platinum"    # 基础版变更为铂金版
2.“expiry_date_in_millis”:1561420799999 替换为 “expiry_date_in_millis”:3107746200000   #1年变为50年
好好保存,修改后的文件可以重复使用到其它ES服务器
6、上传证书
1.上传前准备,确保elasticsearch.yml 配置文件加入 xpack.security.enabled: false
2.打开elasticsearch服务 和 kibana服务
3.进入kibana后台 localhost:5601,进入到如下图所示的页面:
4.上传证书,就是那个json文件 upload license
5.上传成功.到此破解x-pack已经成功了.如图所示续命到了2068年,可以随意使用ES X-pack的一些付费功能 机器学习 安全登录
curl -XPUT -u elastic 'http://192.168.171.129:9200/_xpack/license' -H "Content-Type: application/json" -d @license.json
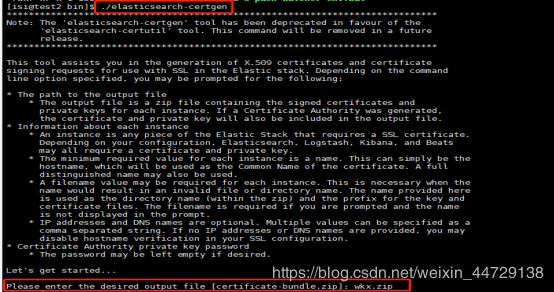
7、SSL(用于集群内部通信认证)
cd /u01/isi/application/index/elasticsearch-6.5.1/bin
./elasticsearch-certgen
mkdir ../../elastic-ssl
mv wkx.zip ../../elastic-ssl
cd ../../elastic-ssl
unzip wkx.zip
cp ca/ ../elasticsearch-6.5.1/config/
cp ca/* ../elasticsearch-6.5.1/config/
cp elastic/* ../elasticsearch-6.5.1/config/
同时将ca和elastic文件分发到其他集群的节点中去

所有节点配置文件添加如下配置项:
xpack.security.transport.ssl.enabled: true     #在做xpack时也可以将此配置加入
xpack.ssl.key: elasticsearch.key
xpack.ssl.certificate: elasticsearch.crt
xpack.ssl.certificate_authorities: ca.crt
六、Xpack排错
1、自动设置密码报错
cd /u01/isi/application/index/elasticsearch-6.5.1/bin
./elasticsearch-setup-passwords auto

原因是未开启xpack的功能,需要在配置中添加,然后重启es
xpack.security.enabled: true
2、手动设置密码报错

原因是仅仅是在配置中配置开启xpack了,但并未开启使用xpack,需要执行下面命令
curl -H "Content-Type:application/json" –XPOST http://192.168.171.129:9200/_xpack/license/start_trial?acknowledge=true
3、Cannot install a [PLATINUM] license unless TLS is configured or security is desabled
![]()
原因是在启动xpack时没有添加xpack.security.transport.ssl.enabled配置项,此配置项用于集群内部通过认证
解决办法,添加此配置项目,重启集群即可
xpack.security.transport.ssl.enabled: true


