Note When the security appliance is configured for Clientless SSL ×××, you cannot enable security contexts (also called firewall multimode) or Active/Active stateful failover. Therefore, these features become unavailable.
In a clientless SSL ××× connection, the security appliance acts as a proxy between the end user web browser and target web servers. When a user connects to an SSL-enabled web server, the security appliance establishes a secure connection and validates the server SSL certificate. The end user browser never receives the presented certificate, so therefore cannot examine and validate the certificate.
The current implementation of clientless SSL ××× on the security appliance does not permit communication with sites that present expired certificates. Nor does the security appliance perform trusted CA certificate validation. Therefore, users cannot analyze the certificate an SSL-enabled web-server presents before communicating with it.
The security appliance does not support the following features for clientless SSL ××× connections
? Inspection features under the Modular Policy Framework
? Functionality the filter configuration commands provide, including the ***-filter command.
? ××× connections from hosts with IPv6 addresses ,8.0(2)开始才支持IPV6
? NAT
? PAT
? QoS
? Connection limits, checking either via the static or the Modular Policy Framework set connection command.
? The established command, allowing return connections from a lower security host to a higher security host if there is already an established connection from the higher level host to the lower level host.
Clientless SSL ××× uses SSL and its successor, TLS1 to provide a secure connection between remote users and specific, supported internal resources at a central site.
Beginning with Version 8.0(2), the security appliance supports both clientless SSL ××× sessions and ASDM administrative sessions simultaneously on Port 443 of the outside interface.
The security appliance can terminate HTTPS connections and forward HTTP and HTTPS requests to proxy servers. These servers act as intermediaries between users and the Internet. Requiring Internet access via a server that the organization controls provides another opportunity for filtering to assure secure Internet access and administrative control.
When configuring support for HTTP and HTTPS proxy services, you can assign preset credentials to send with each request for basic authentication. You can also specify URLs to exclude from HTTP and HTTPS requests.
You can specify a proxy autoconfiguration (PAC) file to download from an HTTP proxy server, however, you may not use proxy authentication when specifying the PAC file.
SSL uses digital certificates for authentication. The security appliance creates a self-signed SSL server certificate when it boots; or you can install in the security appliance an SSL certificate that has been issued in a PKI context. For HTTPS, this certificate must then be installed on the client. You need to install the certificate from a given security appliance only once.
Restrictions for authenticating users with digital certificates include the following:
? Application Access does not work for users of clientless SSL ××× who authenticate using digital certificates.
? E-mail clients such as MS Outlook, MS Outlook Express, and Eudora lack the ability to access the certificate store.
Single sign-on support lets users of clientless SSL ××× enter a username and password only once to access multiple protected services and web servers. In general, the SSO mechanism either starts as part of the AAA process or just after successful user authentication to a AAA server. The clientless SSL ××× server running on the security appliance acts as a proxy for the user to the authenticating server. When a user logs in, the clientless SSL ××× server sends an SSO authentication request, including username and password, to the authenticating server using HTTPS. If the server approves the authentication request, it returns an SSO authentication cookie to the clientless SSL ××× server. The security appliance keeps this cookie on behalf of the user and uses it to authenticate the user to secure websites within the domain protected by the SSO server.
Use the auto-signon command in any of three modes: web*** configuration, web*** group-policy mode, or web*** username mode. Username supersedes group, and group supersedes global. The mode you choose depends upon scope of authentication you want:
When the client negotiates an SSL ××× connection with the security appliance, it connects using Transport Layer Security (TLS), and optionally, Datagram Transport Layer Security (DTLS). DTLS avoids latency and bandwidth problems associated with some SSL connections and improves the performance of real-time applications that are sensitive to packet delays.
Datagram Transport Layer Security (DTLS) allows the AnyConnect client establishing an SSL ××× connection to use two simultaneous tunnels-an SSL tunnel and a DTLS tunnel. Using DTLS avoids latency and bandwidth problems associated with SSL connections and improves the performance of real-time applications that are sensitive to packet delays.
By default, DTLS is enabled when SSL ××× access is enabled on an interface. If you disable DTLS, SSL ××× connections connect with an SSL ××× tunnel only.
Note In order for DTLS to fall back to a TLS connection, Dead Peer Detection (DPD) must be enabled. If you do not enable DPD, and the DTLS connection experiences a problem, the connection terminates instead of falling back to TLS.
By default, compression for all SSL ××× connections is enabled on the security appliance, both at the global level and for specific groups or users.
To prepare a security appliance for certificates, perform the following steps:
Step 1 Ensure that the hostname and domain name of the security appliance are configured correctly.
Step 2 Be sure that the security appliance clock is set accurately before configuring the CA.
Note Many SSL connections using identity certificates with RSA key pairs that exceed 1024 bits can cause a high CPU usage on the security appliance and rejected clientless logins.
For example, to let a host on the inside interface with an address of 192.168.1.2 access the security appliance, enter the following command:
hostname(config)# telnet 192.168.1.2 255.255.255.255 inside
hostname(config)# telnet timeout 30
To allow all users on the 192.168.3.0 network to access the security appliance on the inside interface, enter the following command:
hostname(config)# telnet 192.168.3.0 255.255.255.0 inside
For example, to generate RSA keys and let a host on the inside interface with an address of 192.168.1.2 access the security appliance, enter the following command:
hostname(config)# crypto key generate rsa modulus 1024
hostname(config)# write mem
hostname(config)# ssh 192.168.1.2 255.255.255.255 inside
hostname(config)# ssh timeout 30
To allow all users on the 192.168.3.0 network to access the security appliance on the inside interface, the following command:
hostname(config)# ssh 192.168.3.0 255.255.255.0 inside
By default SSH allows both version one and version two. To specify the version number enter the following command:
hostname(config)# ssh version version_number
The version_number can be 1 or 2.
Note Serial access is not included in management authorization, so if you configure aaa authentication serial console, then any user who authenticates can access the console port.
The following are important points to consider when implementing command authorization with multiple security contexts:
? AAA settings are discrete per context, not shared between contexts.
? New context sessions started with the changeto command always use the default “enable_15” username as the administrator identity, regardless of what username was used in the previous context session.
Note The system execution space does not support AAA commands; therefore, command authorization is not available in the system execution space.
To view the files in Flash memory, enter the following command:
hostname# dir [flash: | disk0: | disk1:]
The flash: keyword represents the internal Flash memory on the PIX 500 series security appliance. You can enter flash: or disk0: for the internal Flash memory on the ASA 5500 series adaptive security appliance. The disk1: keyword represents the external Flash memory on the ASA. The internal Flash memory is the default.
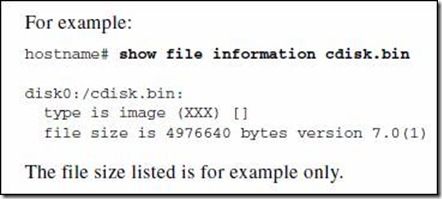
To view extended information about a specific file, enter the following command:
hostname# show file information [path:/]filename
The default path is the root directory of the internal Flash memory (flash:/ or disk0:/).
? To configure the application image to boot, enter the following command: hostname(config)# boot system url
? To configure the ASDM image to boot, enter the following command: hostname(config)# asdm image {flash:/ | disk0:/ | disk1:/}[path/]filename
By default, the security appliance boots from a startup configuration that is a hidden file. You can alternatively set any configuration to be the startup configuration by entering the following command: hostname(config)# boot config {flash:/ | disk0:/ | disk1:/}[path/]filename
The SNMP agent that runs on the adaptive security appliance performs two functions:
? Replies to SNMP requests from NMSs.
? Sends traps (event notifications) to NMSs.
SNMP traps are sent on UDP port 162 by default
syslog server 监听log端口默认The default UDP port is 514. The default TCP port is 1470.
Note The security appliance only shows ICMP debug messages for pings to the security appliance interfaces, and not for pings through the security appliance to other hosts.


