linux学习笔记(十三)
##1.samba服务器的安装及访问调试##
yum install samba-client samba-common.x86_64 samba.x86_64 -y
systemctl start smb
systemctl stop firewalld.service
setsebool -P samba_enable_home_dirs on
getsebool -a | grep samba
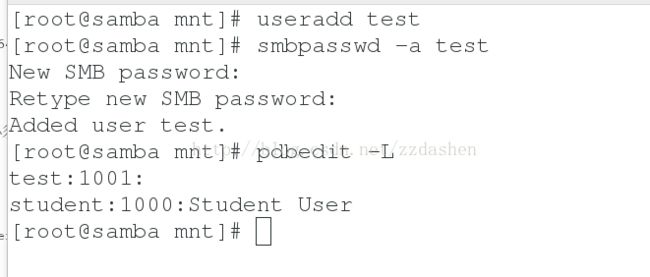
smbpasswd -a student ##student必须是本机存在的用户
pdbedit -L ##查看用户

测试:
smbclient -L //172.25.254.120 -U student

smbclient //172.25.254.120/student -U student

##2.samba共享目录
mkdir westos
touch westos/westosfile{1..5}
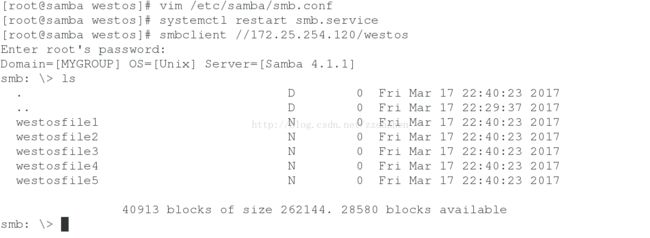
vim /etc/samba/smb.conf
##########################
321 [westos] ##共享名称
322 comment = local directory westos ##共享说明
323 path = /westos ##共享目录路径
##########################

semanage fcontext -a -t samba_share_t '/westos/(/.*)?'
restorecon -FvvR /westos/
共享目录自建立目录上需要修改selinux属性,此方式修改只针对修改目录
测试:smbclient //172.25.254.120/westos -U student

mkdir linux
vim /etc/samba/smb.conf
########################################
324 [linux]
325 comment = local directory linux
326 path = /linux
#########################################

setsebool -P samba_export_all_rw on ##可以读写
setsebool -P samba_export_all_ro on ##只读
共享系统建立目录要修改linux属性,此方式修改针对所有目录,一旦开放,selinux不保护目录访问
测试:smbclient //172.25.254.120/linux -U student

##3.samba匿名访问##
vim /etc/samba/smb.conf
###################################
125 map to guest = bad user ##把匿名用户映射成guest
321 [westos]
322 comment = local directory westos
323 path = /westos
324 guest ok = yes
###################################

systemctl restart smb.service
测试:smbclient //172.25.254.120/westos
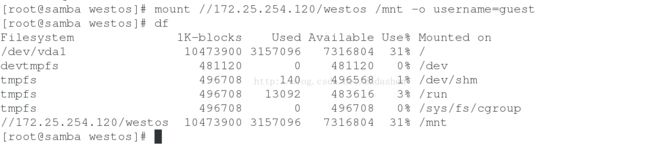
匿名挂载:
##4.samba共享目录的管理参数##
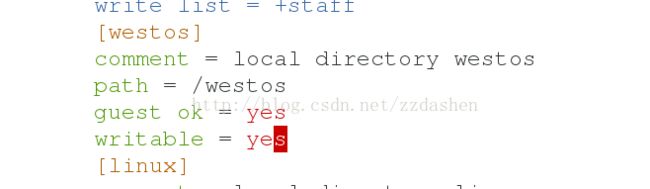
vim /etc/samba/smb.conf
###############################
[westos]
comment = local directory westos
path = /westos
guest ok = yes
writable = yes
write list = +test
valid users = test
valid users = @test
browseable = no
admin users = test
#################################
作用:
1.
 、
、
普通用户登陆时不可写文件,输入writable = yes后可以对文件进行写操作

2.

当输入write list = test时,只有test用户可写,其余用户会提示Read-only file system

3.
当输入当输入write list = @test时,只有test组成员可写

4.

当输入valid users = test时,只有test用户可以挂载

5.


当在westos下输入browseable = no时,westos不可被浏览

6.
输入admin users = test时,test会以root的身份写文件,此时test用户不需要写的权限

##5.smb多用户挂载##
yum insatll cifs-utils
vim /root/passfile
##################
username=smb用户
password=smb用户密码
###################
su - test ##与smb用户同名
ls /mnt
cifscreds add 172.25.254.120
ls /mnt 查看成功
su - linux ##与amd用户不同名
ls /mnt
cifscreds add 72.25.254.120
ls/ mnt 不成功
####ISCSI####
##iSCSI概念##
iSCSI(Internet SCSI)支持从客户端(发起端)通过IP向远程服务器上的SCSI存储设备(目标)发送SCSI命令。iSCSI限定名称用于确定发起端和目标,并采用iqn.yyyy-mm.{reverse domain}:label的格式。默认情况下,网络通信是至iSCSI目标上的端口3260/tcp的明文。
iSCSI发起端:需要访问原始SAN存储的客户端。
iSCSI目标:从iSCSI服务器提供的远程硬盘磁盘,或“目标门户”
iSCSI目标门户:通过网络向发起端提供目标的服务器。
IQN:“iSCSI限定名称”。每个发起端和目标需要唯一名称进行标识,
最好的做法是使用一个在Internet上可能独一无二的名称。
[root@samba ~]# fdisk -l
[root@samba ~]# fdisk /dev/vdb ##创建一个共享的新分区
[root@samba ~]# yum install targetcli.noarch ##安装iSCSI目标软件包##
[root@samba ~]# systemctl start target
[root@samba ~]# systemctl enable target
[root@samba ~]# systemctl stop firewalld
[root@samba ~]# targetcli ##进入iSCSI目标交互式配置模式
######################################
targetcli shell version 2.1.fb34
Copyright 2011-2013 by Datera, Inc and others.
For help on commands, type 'help'.
#######################################
/> ls
################################################
o- / ..................................................................... [...]
o- backstores .......................................................... [...]
| o- block .............................................. [Storage Objects: 0]
| o- fileio ............................................. [Storage Objects: 0]
| o- pscsi .............................................. [Storage Objects: 0]
| o- ramdisk ............................................ [Storage Objects: 0]
o- iscsi ........................................................ [Targets: 0]
o- loopback ..................................................... [Targets: 0]
###################################################
/> /backstores/block create westos:storage1 /dev/vdb1 ##将 vdb1 重命名为 westos:storage1
##############################################################
Created block storage object westos:storage1 using /dev/vdb1.
############################################################
/> /iscsi create iqn.2017-03.com.westos:storage1 ##以iqn这种方式共享
iqn:ISCSI限定名称
##########################################
Created target iqn.2017-03.com.westos:storage1.
Created TPG 1.
##########################################
/> /iscsi/iqn.2017-03.com.westos:storage1/tpg1/acls create iqn.2017-03.com.westos:key1 ##创建钥匙
###############################
Created Node ACL for iqn.2017-03.com.westos:key1
################################
/> /iscsi/iqn.2017-03.com.westos:storage1/tpg1/luns create /backstores/block/westos:storage1 ##钥匙和设备匹配
#########################
Created LUN 0.
Created LUN 0->0 mapping in node ACL iqn.2017-03.com.westos:key1
##########################
/> /iscsi/iqn.2017-03.com.westos:storage1/tpg1/portals create 172.25.254.120 ##开启设备端口
########################
Using default IP port 3260
Created network portal 172.25.254.120:3260.
#######################
/> exit
#################################
Global pref auto_save_on_exit=trueLast 10 configs saved in /etc/target/backup.
Configuration saved to /etc/target/saveconfig.json
##################################
退出之后会将所做的设定保存在/etc/target/backup.和/etc/target/saveconfig.json 中
客户端:
[root@maillinux yum.repos.d]# yum install iscsi-initiator-utils.x86_64 -y
[root@maillinux yum.repos.d]# systemctl restart iscsid
[root@maillinux yum.repos.d]# vim /etc/iscsi/initiatorname.iscsi
InitiatorName=iqn.2017-03.com.westos:key1 ## 用唯一名称标识客户端和服务器认证
[root@maillinux yum.repos.d]# iscsiadm -m discovery -t st -p 172.25.254.120
-m:动作
-t:type
st:sendtargets
172.25.254.120:3260,1 iqn.2017-03.com.westos:storage1
[root@maillinux yum.repos.d]# iscsiadm -m node -T iqn.2017-03.com.westos:storage1 -p 172.25.254.120 -l ##登陆
[root@maillinux ~]# fdisk -l
[root@maillinux ~]# fdisk /dev/sda
[root@maillinux ~]# partprobe
[root@maillinux ~]# mkfs.xfs /dev/sda1
[root@maillinux ~]# mount /dev/sda1 /mnt ##实现直接访问服务器存储器
[root@maillinux ~]# umount /mnt
[root@maillinux ~]# iscsiadm -m node -T iqn.2017-03.com.westos:storage1 -u ##退出登陆
##################################
Logging out of session [sid: 3, target: iqn.2017-03.com.westos:storage1, portal:
172.25.254.120,3260]
Logoutof[sid:3,target:iqn.2017-03.com.westos:storage1,portal:172.25.254.120,3260] successful
#################################
[root@maillinux ~]# fdisk -l
[root@maillinux ~]# iscsiadm -m node -T iqn.2017-03.com.westos:storage1 -o delete ##删除记录
#################################################
iscsiadm: This command will remove the record [iface: default,
target:
iqn.2017-03.com.westos:storage1, portal:
172.25.254.120,3260], but a
session is using it. Logout
session then rerun command to remove record.
iscsiadm: Could not execute operation on all records: session exists
##################################################
[root@maillinux ~]# systemctl restart iscsi ##所有相关的服务重启
[root@maillinux ~]# fdisk -l
####Firewalld####
动态防火墙后台程序 firewalld 提供了一个 动态管理的防火墙,用以支持网络 “ zones” ,以分配对一个网络及其相关链接和界面一定程度的信任。它具备对 IP v4 和 IP v6 防火墙设置的支持。它支持以太网桥,并有分离运行时间和永久性配置选择。它还具备一个通向服务或者应用程序以直接增加防火墙规则的接口。
####管理防火墙####
安装防火墙软件:
yum install -y firewalld firewall-config
启动和禁用防火墙:
systemctl start firewalld ; systemctl enable firewalld
systemctl disable firewalld ; systemctl stop firewalld
##使用图形方式配置防火墙##
firewall-config
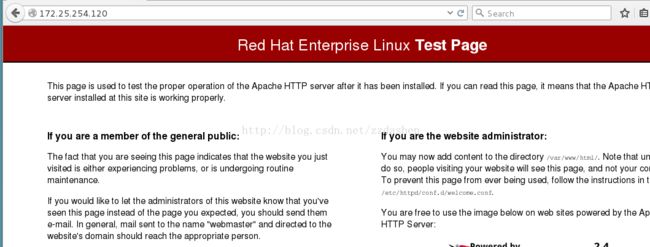
在public中选中http,https,点击Reload Firewalld重新加载防火墙
测试:在勾选前与选中后分别在浏览器中输入172.25.254.120

在public-Ports中输入80/tcp,在浏览器中输入172.25.254.120

使用iptables服务:
yum install -y iptables-services
systemctl start iptables ; systemctl start ip6tables
systemctl enable iptables ; systemctl enable ip6tables
iptables与firewalld只能开启一个,推荐使用firewalld服务,firewalld服务更智能
firewalld和iptables service 之间最本质的不同是:
• iptables service 在 /etc/sysconfig/iptables 中储存配置,而 firewalld将配置储存在/usr/lib/firewalld/ 和 /etc/firewalld/ 中的各种XML文件里.
• 使用 iptables service每一个单独更改意味着清除所有旧有的规则和从/etc/sysconfig/iptables里读取所有新的规则,然而使用 firewalld却不会再创建任何新的规则;仅仅运行规则中的不同之处。因此,firewalld可以在运行时间内,改变设置而不丢失现行连接
####使用命令行接口配置防火墙####
firewall-cmd --state ##查看firewalld的状态##
firewall-cmd --get-active-zones ##查看当前活动的区域,并附带一个目前分配给它们的接口列表##
firewall-cmd --get-default-zone ##查看默认区域##

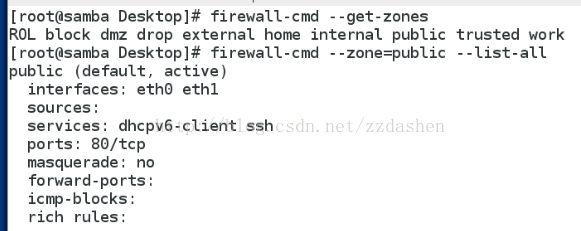
firewall-cmd --get-zones ##查看所有可用区域##
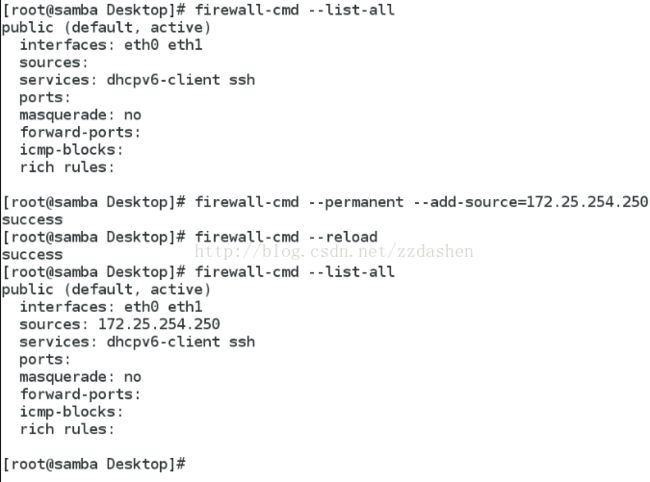
firewall-cmd --zone=public --list-all ##列出指定域的所有设置##
firewall-cmd --get-services ##列出所有预设服务##
##这样将列出 /usr/lib/firewalld/services/ 中的服务器名称。注意:配置文件是以服务本身命名的service-name. xml

firewall-cmd --list-all-zones ##列出所有区域的设置##
firewall-cmd --set-default-zone=dmz ##设置默认区域##

firewall-cmd --permanent --zone=internal --add-source=172.25.0.0/24 ##设置网络地址到指定的区域##
(--permanent参数表示永久生效设置,如果没有指定--zone参数,那么会加入默认区域)

firewall-cmd --permanent --zone=internal --remove-source=172.25.0.0/24 ##删除指定区域中的网路地址##
firewall-cmd --permanent --zone=internal --add-interface=eth0 ##添加网络接口##
firewall-cmd --permanent --zone=internal --change-interface=eth0 ##改变网络接口##

firewall-cmd --permanent --zone=internal --remove-interface=eth0 ##删除网络接口##
添加,更改,删除网络接口时,需要systemctl restart firewalld重启服务
firewall-cmd --permanent --zone=public --add-service=http ##添加服务##
firewall-cmd --permanent --zone=public --remove-service=https ##删除服务##

firewall-cmd --zone=public --list-ports 列出端口
firewall-cmd --permanent --zone=public --add-port=80/tcp ##添加端口##
firewall-cmd --permanent --zone=public --remove-port=80/tcp ##删除端口##

firewall-cmd --reload ##重载防火墙##
(注意:这并不会中断已经建立的连接,如果打算中断,可以使用 --complete-reload选项)firewalld的规则被保存在/etc/firewalld目录下的文件中,你也可以直接编辑这些文件达到配置防火墙的目的。/usr/lib/firewalld目录下的内容是不可以被编辑的,但可以用做默认模板。
ip addr show br0 ##显示br0的ip地址

####Direct Rules####
通过 firewall-cmd 工具,可以使用 --direct 选项在运行时间里增加或者移除链。
如果不熟悉 iptables ,使用直接接口非常危险,因为您可能无意间导致防火墙被入侵。
直接端口模式适用于服务或者程序,以便在运行时间内增加特定的防火墙规则。
直接端口模式添加的规则优先应用。
iptables -nL -t nat ##
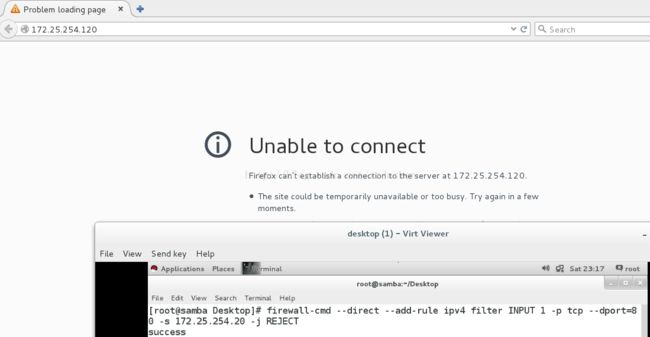
firewall-cmd --direct --add-rule ipv4 filter INPUT 1 -p tcp --dport=80 -s 172.25.254.20 -j REJECT ##添加规则(开启80端口并拒绝172.25.254.20连接)##


firewall-cmd --direct --remove-rule ipv4 filter INPUT 1 -p tcp --dport=80 -s 172.25.254.250 -j REJECT ##删除规则##
-p :所使用的网络协议i
-s:数据的来源
-j:动作
firewall-cmd --direct --get-all-rules ##列出规则##
##端口转发##
systemctl stop firewalld
systemctl start iptables
iptable -F
iptables -t nat -nL
iptable -t nat -A POSTROUTING -o eth0 -j SNAT --to-source=172.25.254.120
-A:添加
-o:出去
在客户端将网关修改为172.25.0.,此时客户端应当拥有两个ip,一个为172.25.0.,另一个为172.25.254.


此时,用户172.25254.可以ping通172.25.0.的ip

##添加端口##
vim /etc/httpd/conf/httpd.conf
#############
42 Listen 83
#############
![]()
systemctl restart httpd
semanage port -a -t http_port_t -p tcp 83 ##添加端口标签
semanage port -l | grep http ##列出http的端口标签

semanage port -d -t http_port_t -p tcp 83 ##删除端口标签
####NFS####
网络文件系统(NFS)是Unix系统和网络附加存储文件管理器常用的网络文件系统,允许多个客户端通过网络共享文件访问。它可用于提供对共享二进制目录的访问,也可用于允许用户在同一工作组中从不同客户端访问其文件。
yum insatll nfs-utils.x86_64
[root@server20 Desktop]# firewall-cmd --permanent --add-service=nfs
success
[root@server20 Desktop]# firewall-cmd --reload
success
[root@server20 Desktop]# systemctl start nfs
[root@server20 Desktop]# showmount -e 172.25.20.11 ##显示指定NFS服务器共享目录列表
Export list for 172.25.20.11:

[root@server20 Desktop]# firewall-cmd --permanent --add-service=rpc-bind
success
[root@server20 Desktop]# firewall-cmd --permanent --add-service=mountd
success
[root@server20 Desktop]# firewall-cmd --reload
success
测试:用desktop查看server的共享目录列表

####Demo####
systemctl start nfs-server ##启动NFS服务
systemctl enable nfs-server
mkdir /westos ##创建共享目录
chmod 755 /westos ##设置权限
vim /etc/exports
###########################################
/westos *(rw,no_root_squash)
将目录/westosyiroot的情况导出至网络上的所有主机
rw:对目录具有只读权限
ro:对目录具有读写权限
###########################################
默认情况下,NFS服务器将NFS客户端上的root视为用户nfsnobody。即,如果root尝试访问挂载的
导出中的文件,服务器会将其视作用户nfsnobody访问。在NFS导出被无磁盘客户端用作/和root需
要被视作root的情况中,这种安全措施存在隐患。若要禁用此保护,服务器需要将no_root_squash
添加到在/etc/exports中导出设置的选项列表。
exportfs -rv ##保存修改并显示所有导出
4. 从客户端查看并挂载NFS pseudo-root共享:
[root@desktop20 ~]# showmount -e server0
[root@desktop20 ~]# mkdir /mnt/westos
[root@desktop20 ~]# mount -t nfs server20.example.com:/ /mnt/westos
客户端NFS挂载选项
rw:挂载可读写的文件系统
ro:挂载只读文件系统
vers=4:尝试只使用指定的NFS版本进行挂载。如果服务器不支持该版本,则挂载
请求失败
soft:如果NFS请求超时,三次尝试后返回错误。权衡数据完整性与提高客户端响应
性。(默认行为hard,将无限期地重试)。
保护NFS输出
Demo:
在serverx和desktopx上运行脚本,加入kerberos认证域:
# lab nfskrb5 setup
安装kerberos服务所需的keytab:(以下操作都在server0上进行)
# wget -O /etc/krb5.keytab http://classroom.example.com/pub/keytabs/server0.keytab
激活NFS v4.2版本,可以输出selinux标签,编辑/etc/sysconfig/nfs修改如下选项:
RPCNFSDARGS="-V 4.2"
启动nfs-secure-server服务:
# systemctl start nfs-secure-server; systemctl enable nfs-secure-server
配置NFS输出:
# mkdir /securenfs
# echo '/securenfs desktop0(sec=krb5p,rw)' >> /etc/exports
# exportfs -r
安装kerberos服务所需keytab:(以下操作都在dekstop20进行)
# wget -O /etc/krb5.keytab http://classroom.example.com/pub/keytabs/desktop0.keytab
启动nfs-secure服务:
# systemctl start nfs-secure; systemctl enable nfs-secure
配置客户端挂载:
# mkdir /mnt/secureshare
# echo 'server0:/securenfs /mnt/secureshare
/etc/fstab
nfs defaults,v4.2,sec=krb5p 0 0' >>
# mount -a