CentOs7.5系统IP配置、关闭防火墙和selinux、光盘开机自动挂载、配置本地YUM源、实验快照
一,IP配置
[root@JhouShuai ~]# ifconfig
ens33: flags=4163 mtu 1500
inet 192.168.31.60 netmask 255.255.255.0 broadcast 192.168.31.255
inet6 fe80::65f:d191:42e:38aa prefixlen 64 scopeid 0x20
ether 00:0c:29:26:6c:fc txqueuelen 1000 (Ethernet)
RX packets 2351 bytes 145794 (142.3 KiB)
RX errors 0 dropped 0 overruns 0 frame 0
TX packets 104 bytes 10418 (10.1 KiB)
TX errors 0 dropped 0 overruns 0 carrier 0 collisions 0
第一行:up-->网卡开启状态
RUNNING-->网线处理连接状态
MULTICAST-->支持组播
mtu 1500-->(Maximum Transmission Unit)最大传输单元大小为1500字节
第二行:该网卡的IP地址,子网掩码,广播地址
第三行:IPV6的配置信息
第四行:网卡的MAC地址
ether表示连接类型为以太网
txqueuelen 1000 --》传输队列的长度
第五六行:网卡接收数据包的统计信息和接收错误的统计信息
第七八行:网卡发送数据包的统计信息和发送错误的统计信息
临时修改IP地址
方法1:临时修改网卡IP地址
ifconfig 网卡名称 IP地址 ---直接修改网卡的IP地址,重启失效
方法2: 添加多个临时IP地址
ifconfig 网卡名称:0 第一个IP地址 (netmask 子网掩码) ---增加一个IP
ifconfig 网卡名称:1 第二个IP地址 (netmask 子网掩码) ---增加一个IP
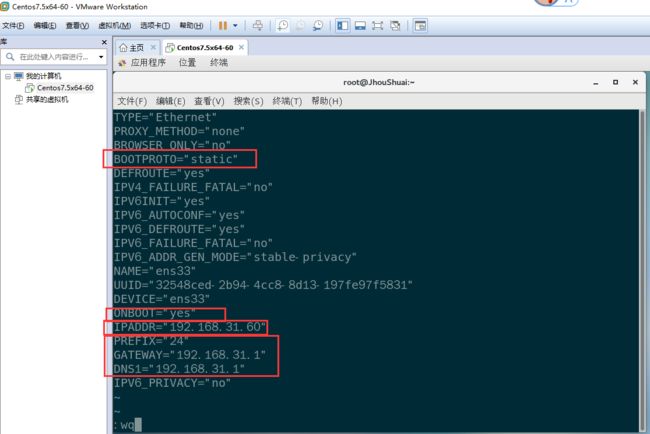
通过修改网卡配置文件改IP地址
[root@JhouShuai ~]# vim /etc/sysconfig/network-scripts/ifcfg-ens33
——————————————————————————————————————————————————————————————————————————————————————————————————
TYPE="Ethernet" #接口类型;常见有的Ethernet, Bridge
PROXY_METHOD="none"
BROWSER_ONLY="no"
BOOTPROTO="none" #static:静态IP、DHCP:动态IP、none:表示不指定,就是静态。
DEFROUTE="yes"
IPV4_FAILURE_FATAL="no"
IPV6INIT="yes"
IPV6_AUTOCONF="yes"
IPV6_DEFROUTE="yes"
IPV6_FAILURE_FATAL="no"
IPV6_ADDR_GEN_MODE="stable-privacy"
NAME="ens33"
UUID="32548ced-2b94-4cc8-8d13-197fe97f5831" #设备的惟一标识
DEVICE="ens33" #此配置文件应用到的设备
ONBOOT="yes" #在系统引导时是否激活此设备 :yes
IPADDR="192.168.31.60" #IP地址
PREFIX="24" #掩码长度 24位:255.255.255.0
GATEWAY="192.168.31.1" #默认网关
DNS1="192.168.31.1" #DNS
IPV6_PRIVACY="no"
——————————————————————————————————————————————————————————————————————————————————————————————————
[root@JhouShuai ~]# systemctl restart network.service
[root@JhouShuai ~]# systemctl status network.service
● network.service - LSB: Bring up/down networking
Loaded: loaded (/etc/rc.d/init.d/network; bad; vendor preset: disabled)
Active: active (exited) since 六 2019-02-23 13:14:46 CST; 16s ago
Docs: man:systemd-sysv-generator(8)
Process: 3433 ExecStop=/etc/rc.d/init.d/network stop (code=exited, status=0/SUCCESS)
Process: 3604 ExecStart=/etc/rc.d/init.d/network start (code=exited, status=0/SUCCESS)
[root@JhouShuai ~]# ping www.baidu.com
PING www.a.shifen.com (180.97.33.107) 56(84) bytes of data.
64 bytes from 180.97.33.107 (180.97.33.107): icmp_seq=1 ttl=54 time=34.8 ms
64 bytes from 180.97.33.107 (180.97.33.107): icmp_seq=2 ttl=54 time=33.5 ms
64 bytes from 180.97.33.107 (180.97.33.107): icmp_seq=3 ttl=54 time=36.1 ms
64 bytes from 180.97.33.107 (180.97.33.107): icmp_seq=4 ttl=54 time=33.3 ms
^C
--- www.a.shifen.com ping statistics ---
4 packets transmitted, 4 received, 0% packet loss, time 3004ms
rtt min/avg/max/mdev = 33.311/34.478/36.151/1.145 ms
[root@JhouShuai ~]#
[root@JhouShuai ~]# ifconfig
网络配置

查看IP
二,关闭防火墙并设置开机自动关闭
[root@JhouShuai ~]# systemctl status firewalld.service       #查看服务运行状态
● firewalld.service - firewalld - dynamic firewall daemon
   Loaded: loaded (/usr/lib/systemd/system/firewalld.service; enabled; vendor preset: enabled)
   Active: active (running) since 六 2019-02-23 12:42:38 CST; 41min ago
     Docs: man:firewalld(1)
 Main PID: 795 (firewalld)
    Tasks: 2
   CGroup: /system.slice/firewalld.service
           └─795 /usr/bin/python -Es /usr/sbin/firewalld --nofork --nopi...

2月 23 12:42:36 JhouShuai systemd[1]: Starting firewalld - dynamic fir....
2月 23 12:42:38 JhouShuai systemd[1]: Started firewalld - dynamic fire....
Hint: Some lines were ellipsized, use -l to show in full.


[root@JhouShuai ~]# systemctl stop firewalld.service               #关闭当前
[root@JhouShuai ~]# systemctl status firewalld.service           #查看服务运行状态
● firewalld.service - firewalld - dynamic firewall daemon
   Loaded: loaded (/usr/lib/systemd/system/firewalld.service; enabled; vendor preset: enabled)
   Active: inactive (dead) since 六 2019-02-23 13:25:58 CST; 8s ago
     Docs: man:firewalld(1)
  Process: 795 ExecStart=/usr/sbin/firewalld --nofork --nopid $FIREWALLD_ARGS (code=exited, status=0/SUCCESS)
 Main PID: 795 (code=exited, status=0/SUCCESS)

2月 23 12:42:36 JhouShuai systemd[1]: Starting firewalld - dynamic fir....
2月 23 12:42:38 JhouShuai systemd[1]: Started firewalld - dynamic fire....
2月 23 13:25:57 JhouShuai systemd[1]: Stopping firewalld - dynamic fir....
2月 23 13:25:58 JhouShuai systemd[1]: Stopped firewalld - dynamic fire....
Hint: Some lines were ellipsized, use -l to show in full.


[root@JhouShuai ~]# systemctl disable firewalld.service         #开机自动关闭
Removed symlink /etc/systemd/system/multi-user.target.wants/firewalld.service.
Removed symlink /etc/systemd/system/dbus-org.fedoraproject.FirewallD1.service.
[root@JhouShuai ~]#

[root@JhouShuai ~]# reboot   #重启系统生效
三、关闭selinux并设置开机自动关闭
[root@JhouShuai ~]# getenforce
Enforcing
[root@JhouShuai ~]# setenforce 0        #临时关闭
[root@JhouShuai ~]# getenforce
Permissive
[root@JhouShuai ~]#

#开机自动关闭:
[root@JhouShuai ~]# vim /etc/sysconfig/selinux
——————————————————————————————————————————————————————————————————————————————————————————————————


# This file controls the state of SELinux on the system.
# SELINUX= can take one of these three values:
#     enforcing - SELinux security policy is enforced.
#     permissive - SELinux prints warnings instead of enforcing.
#     disabled - No SELinux policy is loaded.
SELINUX=enforcing      #删除enforcing,改为disabled
# SELINUXTYPE= can take one of three two values:
#     targeted - Targeted processes are protected,
#     minimum - Modification of targeted policy. Only selected processes are protected.
#     mls - Multi Level Security protection.
SELINUXTYPE=targeted

——————————————————————————————————————————————————————————————————————————————————————————————————
[root@JhouShuai ~]# reboot   #重启系统生效

root@JhouShuai ~]# getenforce
Disabled
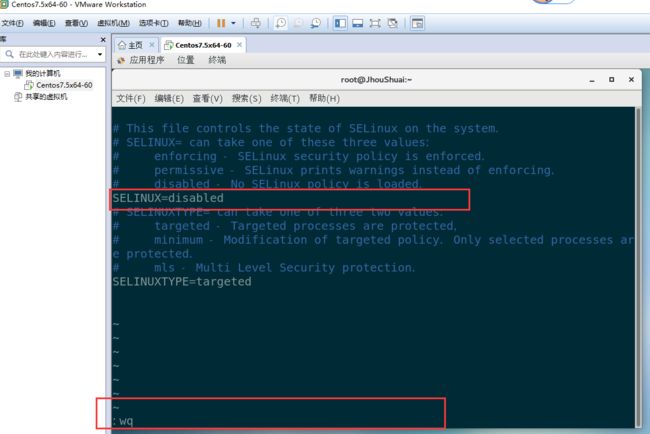
删除enforcing,改为disabled
四、设置系统光盘开机自动挂载
linux中一切皆文件
/dev/cdrom,/dev/sr0 光驱的设备名
[root@JhouShuai ~]# echo "/dev/sr0 /mnt iso9660 defaults 0 0"  >> /etc/fstab
[root@JhouShuai ~]# vim /etc/fstab


#
# /etc/fstab
# Created by anaconda on Thu Feb 21 00:28:07 2019
#
# Accessible filesystems, by reference, are maintained under '/dev/disk'
# See man pages fstab(5), findfs(8), mount(8) and/or blkid(8) for more info
#
UUID=91733de7-9339-4f8c-bb3a-92a2aac9463d /                       xfs     defaults        0 0
UUID=b7c20cc2-17ab-4d5a-9b4d-7c8b037e3ac4 /boot                   xfs     defaults        0 0
UUID=46a5b91f-a2e0-4296-8bcd-c6db48943ab8 swap                    swap    defaults        0 0
/dev/sr0 /mnt iso9660 defaults 0 0
~
~


[root@JhouShuai ~]# mount -a
mount: /dev/sr0 写保护,将以只读方式挂载


[root@JhouShuai ~]# df -h          #查看挂载情况
文件系统        容量  已用  可用 已用% 挂载点
/dev/sda3        10G  4.6G  5.5G   46% /
devtmpfs        976M     0  976M    0% /dev
tmpfs           992M     0  992M    0% /dev/shm
tmpfs           992M   11M  981M    2% /run
tmpfs           992M     0  992M    0% /sys/fs/cgroup
/dev/sda1       497M  148M  350M   30% /boot
tmpfs           199M   24K  199M    1% /run/user/0
/dev/sr0        4.2G  4.2G     0  100% /mnt


[root@JhouShuai ~]# ls /mnt/        #可以查看到此目录下有内容,说明挂载成功
CentOS_BuildTag  GPL       LiveOS    RPM-GPG-KEY-CentOS-7
EFI              images    Packages  RPM-GPG-KEY-CentOS-Testing-7
EULA             isolinux  repodata  TRANS.TBL
五、配置本地YUM源
什么是yum
Yum****(全称为 Yellow dog Updater, Modified)是一个在Fedora和RedHat以及CentOS中的Shell前端软件包管理器。基于RPM包管理,能够从指定的服务器自动下载RPM包并且安装,可以自动处理依赖性关系,并且一次安装所有依赖的软件包,无须繁琐地一次次下载、安装。
YUM的配置文件
yum****的一切配置信息都储存在一个叫yum.repos.d目录的配置文件中,通常位于/etc目 录下,这是整个yum系统的重中之重
创建文件 文件的格式 必须是.repo结尾
[root@JhouShuai ~]# ls /etc/yum.repos.d/
CentOS-Base.repo  CentOS-Debuginfo.repo  CentOS-Media.repo    CentOS-Vault.repo
CentOS-CR.repo    CentOS-fasttrack.repo  CentOS-Sources.repo
[root@JhouShuai ~]#
Centos7已经自动配好了网络yum源
[root@JhouShuai ~]# vim /etc/yum.repos.d/CentOS-Base.repo
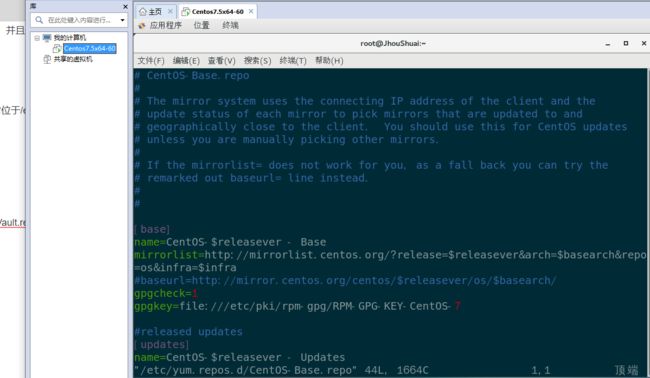
网络yum源
配置本地YUM源
[root@JhouShuai ~]# cd /etc/yum.repos.d/
[root@JhouShuai yum.repos.d]# mv CentOS-Base.repo CentOS-Base.repo.bak
[root@JhouShuai yum.repos.d]# vim CentOS7.repo

[CentOS7-source]                      #yum的ID,必须唯一
name=CentOS7-server            #描述信息
baseurl=file:///mnt                    # /mnt表示的是光盘的挂载点  . file:后面有3个///
enabled=1                              #启用
gpgcheck=0                          #取消验证


[root@JhouShuai yum.repos.d]# yum repolist
已加载插件:fastestmirror, langpacks
Loading mirror speeds from cached hostfile
CentOS7-source                                           | 3.6 kB     00:00
(1/2): CentOS7-source/group_gz                             | 166 kB   00:00
(2/2): CentOS7-source/primary_db                           | 3.1 MB   00:00
源标识                               源名称                                状态
CentOS7-source                       CentOS7-server                        3,971
repolist: 3,971
[root@JhouShuai yum.repos.d]#

[root@JhouShuai yum.repos.d]# yum repolist
已加载插件:fastestmirror, langpacks
Loading mirror speeds from cached hostfile
源标识                                   源名称                                   状态
CentOS7-source                           CentOS7-server                           3,971
repolist: 3,971


[root@JhouShuai yum.repos.d]# yum clean all          #清空yum缓存
已加载插件:fastestmirror, langpacks
正在清理软件源: CentOS7-source
Cleaning up everything
Maybe you want: rm -rf /var/cache/yum, to also free up space taken by orphaned data from disabled or removed repos
Cleaning up list of fastest mirrors

[root@JhouShuai yum.repos.d]# yum list        #生成缓存列表
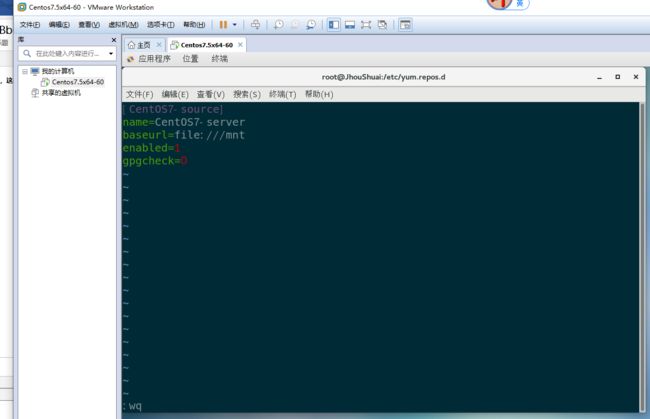
本地源
六、创建可用实验快照
虚拟机----》快照----》拍摄快照----》自定义快照名如“可用实验快照”
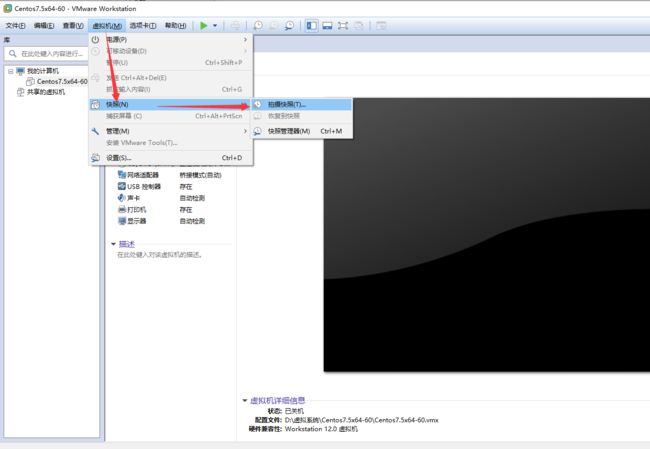
拍摄快照
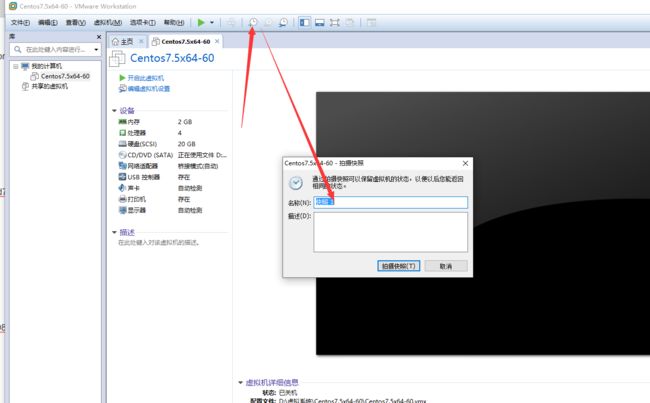
拍摄快照
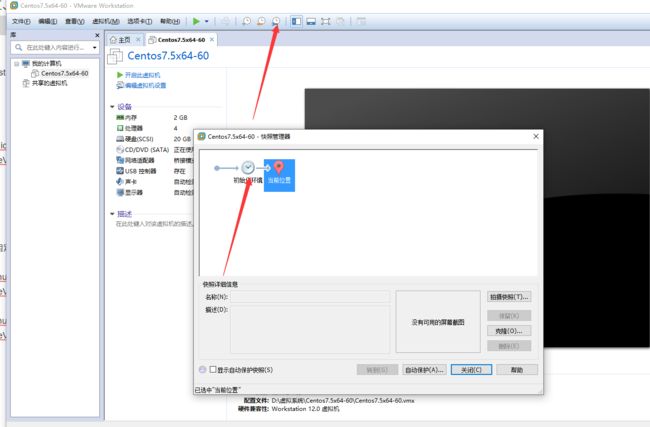
快照
七、硬件:
中央处理器、内存、芯片组、I/O总线、I/O设备、电源、机箱和相关软件等。