需求分析
在商品录入界面实现多图片上传
后端代码(maven项目)
工具类
		    org.csource.fastdfs
		    fastdfs


			commons-fileupload
			commons-fileupload
(2)将fastDFS工具类FastDFSClient.java 拷贝到common工程(代码在最下面)
配置文件
(1)将fastDFS配置文件 fdfs_client.conf 拷贝到shop-web工程config文件夹(最下面)
FILE_SERVER_URL=http://192.168.25.153/
(3)在shop-web工程springmvc.xml添加配置
控制层
在shop-web新建UploadController.java
package com.pinyougou.shop.controller;
import org.springframework.beans.factory.annotation.Value;
import org.springframework.web.bind.annotation.RequestMapping;
import org.springframework.web.bind.annotation.RestController;
import org.springframework.web.multipart.MultipartFile;
import entity.Result;
import util.FastDFSClient;
/**
 * 文件上传Controller
 * @author Administrator
 *
 */
@RestController
public class UploadController {

	@Value("${FILE_SERVER_URL}")
	private String FILE_SERVER_URL;//文件服务器地址

	@RequestMapping("/upload")
	public Result upload( MultipartFile file){
		//1、取文件的扩展名
		String originalFilename = file.getOriginalFilename();
		String extName = originalFilename.substring(originalFilename.lastIndexOf(".") + 1);
		try {
			//2、创建一个 FastDFS 的客户端
			FastDFSClient fastDFSClient  = new FastDFSClient("classpath:config/fdfs_client.conf");
			//3、执行上传处理
			String path = fastDFSClient.uploadFile(file.getBytes(), extName);
			//4、拼接返回的 url 和 ip 地址,拼装成完整的 url
			String url = FILE_SERVER_URL + path;
			return new Result(true,url);
		} catch (Exception e) {
			e.printStackTrace();
			return new Result(false, "上传失败");
		}
	}
}
前端代码
1 服务层
//文件上传服务层
app.service("uploadService",function($http){
	this.uploadFile=function(){
		var formData=new FormData();//是HTML5中新增的一个类,专门用于文件上传
	    formData.append("file",file.files[0]);   //file代表文件上传框的name,.files[0]代表取页面的第一个文件上传框
		return $http({		//angularjs的另一种写法
            method:'POST',
            url:"../upload.do",
            data: formData,	//formData作为载体上传文件
            headers: {'Content-Type':undefined},	//头信息设置为不指定类型,默认是json
            transformRequest: angular.identity		//表示对整个表单进行二进制序列化
        });
	}
});
anjularjs对于post和get请求默认的Content-Type header 是application/json。通过设置‘Content-Type’: undefined,这样浏览器会帮我们把Content-Type 设置为 multipart/form-data.
通过设置 transformRequest: angular.identity ,anjularjs transformRequest function 将序列化我们的formdata object.
(2)将uploadService服务注入到goodsController 中
//商品控制层(商家后台)
app.controller('goodsController' ,function($scope,$controller   ,goodsService,itemCatService,uploadService){
(3)在goods_edit.html引入js
上传图片
(1)goodsController编写代码
	/**
	 * 上传图片
	 */
	$scope.uploadFile=function(){
		uploadService.uploadFile().success(
			function(response) {
	        	if(response.success){//如果上传成功,取出url
	        		$scope.image_entity.url=response.message;//设置文件地址
	        	}else{
	        		alert(response.message);
	        	}
        }).error(function() {
        	     alert("上传发生错误");
        });
    };
(2)在HTML中修改图片上传窗口,调用上传方法,回显上传图片
(3)修改新建按钮(初始化清空数据)
告一段落并测试
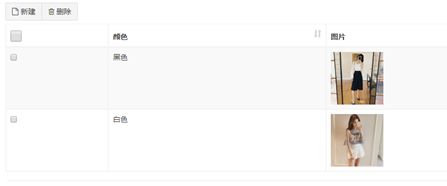
追加显示图片列表
(1)在goodsController.js增加方法
    $scope.entity={goods:{},goodsDesc:{itemImages:[]}};//定义页面实体结构
    //添加图片列表
    $scope.add_image_entity=function(){
        $scope.entity.goodsDesc.itemImages.push($scope.image_entity);
    }
(2)修改上传窗口的保存按钮
    $scope.entity={goods:{},goodsDesc:{itemImages:[]}};//定义页面实体结构
    //添加图片列表
    $scope.add_image_entity=function(){
        $scope.entity.goodsDesc.itemImages.push($scope.image_entity);
    }
保存
(3)遍历图片列表
{{pojo.color}}
移除图片
在goodsController.js增加代码
    //列表中移除图片
    $scope.remove_image_entity=function(index){
    	    $scope.entity.goodsDesc.itemImages.splice(index,1);
    }
修改列表中的删除按钮
上代码
shop-web项目结构如下,common是单独一项目,引入common子项目的依赖即可
HTML代码
商品编辑
商品分类
商品名称
品牌
副标题
价格
商品介绍
包装列表
售后服务
颜色
图片
操作
{{pojo.color}}
返回列表
FastDFSClient
package util;

import org.csource.common.NameValuePair;
import org.csource.fastdfs.ClientGlobal;
import org.csource.fastdfs.StorageClient1;
import org.csource.fastdfs.StorageServer;
import org.csource.fastdfs.TrackerClient;
import org.csource.fastdfs.TrackerServer;

public class FastDFSClient {

	private TrackerClient trackerClient = null;
	private TrackerServer trackerServer = null;
	private StorageServer storageServer = null;
	private StorageClient1 storageClient = null;

	public FastDFSClient(String conf) throws Exception {
		if (conf.contains("classpath:")) {
			conf = conf.replace("classpath:", this.getClass().getResource("/").getPath());
		}
		ClientGlobal.init(conf);
		trackerClient = new TrackerClient();
		trackerServer = trackerClient.getConnection();
		storageServer = null;
		storageClient = new StorageClient1(trackerServer, storageServer);
	}

	/**
	 * 上传文件方法
	 * Title: uploadFile
	 * Description:
	 * @param fileName 文件全路径
	 * @param extName 文件扩展名,不包含(.)
	 * @param metas 文件扩展信息
	 * @return
	 * @throws Exception
	 */
	public String uploadFile(String fileName, String extName, NameValuePair[] metas) throws Exception {
		String result = storageClient.upload_file1(fileName, extName, metas);
		return result;
	}

	public String uploadFile(String fileName) throws Exception {
		return uploadFile(fileName, null, null);
	}

	public String uploadFile(String fileName, String extName) throws Exception {
		return uploadFile(fileName, extName, null);
	}

	/**
	 * 上传文件方法
	 * Title: uploadFile
	 * Description:
	 * @param fileContent 文件的内容,字节数组
	 * @param extName 文件扩展名
	 * @param metas 文件扩展信息
	 * @return
	 * @throws Exception
	 */
	public String uploadFile(byte[] fileContent, String extName, NameValuePair[] metas) throws Exception {

		String result = storageClient.upload_file1(fileContent, extName, metas);
		return result;
	}

	public String uploadFile(byte[] fileContent) throws Exception {
		return uploadFile(fileContent, null, null);
	}

	public String uploadFile(byte[] fileContent, String extName) throws Exception {
		return uploadFile(fileContent, extName, null);
	}
}
fdfs_client.conf配置文件
注意修改tracker_server地址:tracker_server=192.168.25.153:22122(fastDFS服务器的地址)
# connect timeout in seconds
# default value is 30s
connect_timeout=30

# network timeout in seconds
# default value is 30s
network_timeout=60

# the base path to store log files
base_path=/home/fastdfs

# tracker_server can ocur more than once, and tracker_server format is
#  "host:port", host can be hostname or ip address
tracker_server=192.168.25.153:22122

#standard log level as syslog, case insensitive, value list:
### emerg for emergency
### alert
### crit for critical
### error
### warn for warning
### notice
### info
### debug
log_level=info

# if use connection pool
# default value is false
# since V4.05
use_connection_pool = false

# connections whose the idle time exceeds this time will be closed
# unit: second
# default value is 3600
# since V4.05
connection_pool_max_idle_time = 3600

# if load FastDFS parameters from tracker server
# since V4.05
# default value is false
load_fdfs_parameters_from_tracker=false

# if use storage ID instead of IP address
# same as tracker.conf
# valid only when load_fdfs_parameters_from_tracker is false
# default value is false
# since V4.05
use_storage_id = false

# specify storage ids filename, can use relative or absolute path
# same as tracker.conf
# valid only when load_fdfs_parameters_from_tracker is false
# since V4.05
storage_ids_filename = storage_ids.conf


#HTTP settings
http.tracker_server_port=80

#use "#include" directive to include HTTP other settiongs
##include http.conf