Kotlin协程Coroutines入门到实战:(三)Coroutines+Retrofit+ViewModel+LiveData实现MVVM客户端架构
Kotlin协程入门到实战全部三篇文章:
- Kotlin协程Coroutines入门到实战:(一)理解异步回调的本质
- Kotlin协程Coroutines入门到实战:(二)Coroutines初体验
- Kotlin协程Coroutines入门到实战:(三)Coroutines+Retrofit+ViewModel+LiveData实现MVVM客户端架构
我们在前两篇文章中讲解了Kotlin协程的基本用法和所解决的关键性问题,接下来让我们来看看在实际项目中该怎么使用Kotlin协程这一利器呢。接下来一起来将Kotlin协程与Jetpack中的架构组件结合起来搭建个简单的项目吧。以下是此Demo的效果:
可以看到功能其实很简单,界面由一个按钮和三个图片组成。每次按下刷新按钮,就都会从网络上获取三张图片显示到界面上。从网络上获取图片的时候刷新按钮变为不可用状态,刷新完成后按钮恢复可用状态。
1.添加依赖
//添加Retrofit网络库和gsonConverter的依赖,注意一定要2.6.0版本以上
implementation 'com.squareup.retrofit2:retrofit:2.7.0'
implementation 'com.squareup.retrofit2:converter-gson:2.7.0'
//添加Jetpack中架构组件的依赖,注意viewmodel要添加viewmodel-ktx的依赖
implementation "androidx.lifecycle:lifecycle-livedata:2.1.0"
implementation 'androidx.lifecycle:lifecycle-viewmodel-ktx:2.1.0'
implementation "androidx.lifecycle:lifecycle-extensions:2.1.0"
//添加Glide的依赖用于图片加载
implementation 'com.github.bumptech.glide:glide:4.10.0'
这里需要注意的是retrofit版本要求2.6.0以上,因为2.6.0以上的retrofit对于Kotlin协程提供了不错的支持,用起来也更方便。另外添加ViewModel的依赖一定要添加Kotlin版本的,因为这个版本为我们提供了viewModelScope这个协程范围的支持,这让我们可以方便地将生命周期管理和网络请求自动取消的任务交给它。
2.编写UI界面
<LinearLayout xmlns:android="http://schemas.android.com/apk/res/android"
    xmlns:app="http://schemas.android.com/apk/res-auto"
    xmlns:tools="http://schemas.android.com/tools"
    android:layout_width="match_parent"
    android:layout_height="match_parent"
    android:orientation="vertical"
    android:layout_marginTop="10dp"
    tools:context=".MainActivity">

    <Button
        android:id="@+id/button"
        android:text="refresh"
        android:layout_width="match_parent"
        android:layout_height="wrap_content"/>

    <ImageView
        android:id="@+id/imageView1"
        android:layout_width="match_parent"
        android:layout_height="0dp"
        android:layout_weight="1"
        android:scaleType="centerCrop"
        android:layout_marginTop="10dp"/>

    <ImageView
        android:id="@+id/imageView2"
        android:layout_width="match_parent"
        android:layout_height="0dp"
        android:layout_weight="1"
        android:scaleType="centerCrop"
        android:layout_marginTop="10dp"/>

    <ImageView
        android:id="@+id/imageView3"
        android:layout_width="match_parent"
        android:layout_height="0dp"
        android:layout_weight="1"
        android:scaleType="centerCrop"
        android:layout_marginTop="10dp"/>

LinearLayout>
界面没什么可说的,从上到下垂直排列的一个按钮和三个图片,一个LinearLayout全部搞定。
2.编写网络层接口
首先来看一下我们要使用到的搜狗美图的api接口:https://api.ooopn.com/image/sogou/api.php?type=json
此接口每次随机返回一张图片的url地址,返回数据格式为:
{
    "code": "200",
    "imgurl": "https://img02.sogoucdn.com/app/a/100520113/20140811192414"
}
数据格式很简单,我们可以很容易地创建出对应的实体类:
data class ImageDataResponseBody(
    val code: String,
    val imgurl: String
)
接着我们可以先创建个network包来存放网络层相关的代码:
ApiService为我们网络接口的访问单例类,NetworkService为定义的网络接口:
import com.njp.coroutinesdemo.bean.ImageDataResponseBody
import retrofit2.http.GET
import retrofit2.http.Query

//网络接口
interface ApiService {

    //声明为suspend方法
    @GET("image/sogou/api.php")
    suspend fun getImage(@Query("type") type: String = "json"): ImageDataResponseBody
}
import okhttp3.OkHttpClient
import retrofit2.Retrofit
import retrofit2.converter.gson.GsonConverterFactory
import retrofit2.create
import java.util.concurrent.TimeUnit

//网络层访问统一入口
object NetworkService {

    //retorfit实例,在这里做一些统一网络配置,如添加转换器、设置超时时间等
    private val retrofit = Retrofit.Builder()
        .client(OkHttpClient.Builder().callTimeout(5, TimeUnit.SECONDS).build())
        .baseUrl("https://api.ooopn.com/")
        .addConverterFactory(GsonConverterFactory.create())
        .build()

    //网络层访问服务
    val apiService = retrofit.create<ApiService>()

}
值得注意的是我们在定义我们的接口的时候一定要声明为suspend方法,这样就完成了对Kotlin协程的完美支持了,怎么样,是不是很简单呢?
3.编写ViewModel和View层代码
首先由于我们的项目中要对网络加载的状态进行监听,以此来进行对刷新按钮是否可点击状态的设置和错误信息的显示。所以我们可以编写一个LoadState类来作为网络加载状态信息的承载:
sealed class LoadState(val msg: String) {
    class Loading(msg: String = "") : LoadState(msg)
    class Success(msg: String = "") : LoadState(msg)
    class Fail(msg: String) : LoadState(msg)
}
这里使用了sealed类,sealed类是一种特殊的父类,它只允许内部继承,所以在与when表达式合用来判断状态时很适合。其中Fail状态必须指定错误信息,其他的状态信息可为空。我们可以将其与ImageDataResponseBody一起放在新建的bean包下:
接着我们来创建我们的ViewModel:
import androidx.lifecycle.MutableLiveData
import androidx.lifecycle.ViewModel
import com.xxx.coroutinesdemo.bean.LoadState
import com.xxx.coroutinesdemo.network.NetworkService

class MainViewModel : ViewModel() {

    //存放三张图片的url数据
    val imageData = MutableLiveData<List<String>>()
    //存放网路加载状态信息
    val loadState = MutableLiveData<LoadState>()

    //从网络加载数据
    fun getData() {...}

}
在其中放了两个LiveData作为数据,第一个存放三张图片的url数据,第二个就是我们的网络加载的状态信息啦。
在具体实现我们的getData具体的方法体之前,我们先实现一下我们Activity中的View层代码:
import androidx.appcompat.app.AppCompatActivity
import android.os.Bundle
import android.widget.Toast
import androidx.lifecycle.Observer
import androidx.lifecycle.ViewModelProviders
import com.bumptech.glide.Glide
import com.xxx.coroutinesdemo.R
import com.xxx.coroutinesdemo.bean.LoadState
import kotlinx.android.synthetic.main.activity_main.*

class MainActivity : AppCompatActivity() {

    private lateinit var viewModel: MainViewModel

    override fun onCreate(savedInstanceState: Bundle?) {
        super.onCreate(savedInstanceState)
        setContentView(R.layout.activity_main)
        //获取ViewModel
        viewModel = ViewModelProviders.of(this).get(MainViewModel::class.java)

        //对加载状态进行动态观察
        viewModel.loadState.observe(this, Observer {
            when (it) {
                is LoadState.Success -> button.isEnabled = true
                is LoadState.Fail -> {
                    button.isEnabled = true
                    Toast.makeText(this, it.msg, Toast.LENGTH_SHORT).show()
                }
                is LoadState.Loading -> {
                    button.isEnabled = false
                }
            }

        })

        //对图片Url数据进行观察
        viewModel.imageData.observe(this, Observer {
            //用Glide加载三张图片
            Glide.with(this)
                .load(it[0])
                .into(imageView1)
            Glide.with(this)
                .load(it[1])
                .into(imageView2)
            Glide.with(this)
                .load(it[2])
                .into(imageView3)
        })

        //点击刷新按钮来网络加载
        button.setOnClickListener {
            viewModel.getData()
        }


    }
}
这里使用了Kotlin为我们提供的直接引用xml中控件id的方式,这样可以避免编写findViewById代码。首先我们用ViewModelProviders将我们的MainViewModel注入MainActivity中,接着分别对MainViewModel中的两组数据进行观察并更新我们的UI。
加载状态为LoadState.Loading的时候我们要设置刷新按钮为不可用状态,LoadState.Success和LoadState.Fail两种状态要将其设置为可用状态。此外失败状态还有将错误信息通过Toast显示出来。图片url数据更新时我们就使用Glide将三张图片加载到三个ImageView上即可。接着为刷新按钮设置点击事件,直接调用MainViewModel的getData方法即可。
我们可以将这两个类放在同一个包中(如果有其他新的页面的话需要二级分包):
4.实现getData方法
接下来我们就具体地来实现一下最核心的getData方法:
fun getData() {
    viewModelScope.launch(CoroutineExceptionHandler { _, e ->
            //加载失败的状态
            loadState.value = LoadState.Fail(e.message ?: "加载失败")
        }) {
        	//更新加载状态
            loadState.value = LoadState.Loading()

        	//并发请求三张图片的数据
            val data1 = async { NetworkService.apiService.getImage() }
            val data2 = async { NetworkService.apiService.getImage() }
            val data3 = async { NetworkService.apiService.getImage() }
        	//通过为LiveData设置新的值来触发更新UI
            imageData.value = listOf(data1.await(), data2.await(), data3.await()).map {
                it.imgurl
            }

        	//更新加载状态
            loadState.value = LoadState.Success()
        }
}
首先我们用Jetpack组件提供给我们的viewModelScope开启一个协程,我们可以稍微看下这个viewModelScope:
/**
 * ...
 * This scope is bound to [Dispatchers.Main]
 */
val ViewModel.viewModelScope: CoroutineScope
        get() {...}
可以看到viewModelScope是通过Kotlin的拓展属性的方式添加到ViewModel上的,并且其所处的线程是主线程,所以我们可以放心地在其中更新UI的操作。并且其与ViewModel的声明周期绑定,我们在这个协程范围内的耗时操作会在其生命周期结束时自动取消,不用担心内存泄漏之类的性能问题。
而且我们在开启协程的时候为其指定了CoroutineExceptionHandler,所有在协程中出现的错误都将回调这个方法。在加载数据时我们调用了apiService的suspend方法,并通过async方式来实现并发数据请求,最后通过为LiveData设置新值的方式触发UI的更新。
但是目前只有一个页面,只要一个ViewModel,所以这样的写法不会有什么问题。但是当页面数量和ViewModel的数量多起来的时候,每一次网络请求都要写一些模板代码总是有些不舒服,所以接下来我们来对网络请求的代码进行进一步的优化。
可能遇到重复代码的时候大家一般的想法是创建一个BaseViewModel类,重复的模板代码写在这个基类中,接着所有我们的ViewModel继承这个BaseViewModel。这样的做法的确是可行的,但是我们只有一个很小的功能需要抽象出来,可能基类中也就只有这么一个方法,而且如果你的项目已经成型的时候,这种做法会严重破坏项目结构,你需要手动更改所有ViewModel的父类,接着更改所有的对应方法。Kotlin为ViewModel添加viewModelScope的做法值得我们借鉴,我们可以为ViewModel添加一个拓展方法,而不需要更改其自身的继承结构:
import androidx.lifecycle.ViewModel
import androidx.lifecycle.viewModelScope
import kotlinx.coroutines.CoroutineExceptionHandler
import kotlinx.coroutines.CoroutineScope
import kotlinx.coroutines.launch

fun ViewModel.launch(
    block: suspend CoroutineScope.() -> Unit,
    onError: (e: Throwable) -> Unit = {},
    onComplete: () -> Unit = {}
) {
    viewModelScope.launch(CoroutineExceptionHandler { _, e -> onError(e) }) {
        try {
            block.invoke(this)
        } finally {
            onComplete()
        }
    }
}
我们可以新建一个ViewModelExt.kt文件,在其中为ViewModel编写一个launch方法。我们为方法设置了三个参数:
block:协程主体;onError:错误回调;onComplete:完成回调。
接着我们在方法体中调用了viewModelScope.launch方法,并把我们的协程主体传入,并在其CoroutineExceptionHandler中调用了我们的onError,在viewModelScope.launch中我们通过一个try{...}finally{...}块包裹了方法体,但是我们没有catch任何错误,所以这在保证了onComplete一定得到执行的同时也保证了onError可以接受到所有的错误。
接着我们使用新的方法来重写我们的MainViewModel:
import androidx.lifecycle.MutableLiveData
import androidx.lifecycle.ViewModel
import com.xxx.coroutinesdemo.bean.LoadState
import com.xxx.coroutinesdemo.launch
import com.xxx.coroutinesdemo.network.NetworkService
import kotlinx.coroutines.async

class MainViewModel : ViewModel() {

    val imageData = MutableLiveData<List<String>>()
    val loadState = MutableLiveData<LoadState>()

    fun getData() {
        launch(
            {
                loadState.value = LoadState.Loading()
                val data1 = async { NetworkService.apiService.getImage() }
                val data2 = async { NetworkService.apiService.getImage() }
                val data3 = async { NetworkService.apiService.getImage() }
                imageData.value = listOf(data1.await(), data2.await(), data3.await()).map {
                    it.imgurl
                }
                loadState.value = LoadState.Success()
            },
            {
                loadState.value = LoadState.Fail(it.message ?: "加载失败")
            }
        )
    }

}
是不是感觉简洁了许多呢?
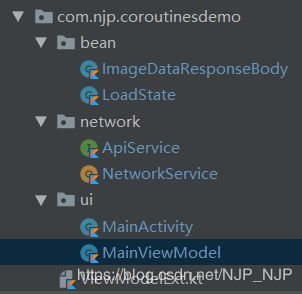
整体项目结构:
项目地址:https://github.com/NaJiPeng/Coroutines-Demo
好了,整个Kotlin协程入门实战的三篇文章就完成了,希望自己的一些经验总结可以对大家有所帮助吧。
PS:
其实这个演示项目中还留下了一些坑,因为我们的重点是讲Kotlin协程的实际应用,有些坑就没有处理,在这里我提一下。网络加载错误不一定只有网络连接和超时等这些明显的错误,对于业务上的错误我们没有做进一步的处理,相信实际项目中网络接口的结构都类似这种三段式的结构:
{
    "code": 200,
    "data": {...},
    "msg": "OK"
}
那么我们可以定义一个包装类ResonseBody:
data class ResponseBody<T>(
    val code: Int,
    val msg: String,
    val data: T
)
接着建立一个独立的网络访问层Repository:
object Repository {

    //数据脱壳与错误预处理
    fun <T> preprocessData(responseBody: ResponseBody<T>): T {
        return if (responseBody.code == 200) responseBody.data else throw Throwable(responseBody.msg)
    }

    suspend fun getImageData(paramter: Paramter1): ImageData {
        //调用ApiService定义的接口方法
        val responseBody = ApiService.getImage(paramter)
        //返回处理后的数据
        return preprocessData<ImageData>(responseBody)
    }

    suspend fun getOtherData(paramter: Paramter2): OtherData {...}

    ...

}
这样在网络层就将所有可能遇到的错误处理完毕了,ViewModel层直接拿到的就是脱壳后的正确数据,也不需要额外处理这些业务错误了,因为这里throw的错误最终都会由我们的onError回调接收到,我们编写的launch方法可以完美的对其进行处理。