springboot工程 seata-1.2.0 + nacos-1.3.0 + dubbo-2.7.x + shardingspehere-4.1.1 分布式高可用之AT事务最新版演示
一、准备事项
- seata-server-1.2.0
·下载地址:https://github.com/seata/seata/releases - nacos-server-1.3.0
下载地址:https://github.com/alibaba/nacos/releases/tag/1.3.0 - 项目版本:springboot cloud alibaba 2.2.1(默认使用的是seata1.0.0版本)
maven使用当前最新的seata版本
        <dependency>
            <groupId>com.alibaba.cloudgroupId>
            <artifactId>spring-cloud-starter-alibaba-seataartifactId>
            <version>2.2.1.RELEASEversion>
            <exclusions>
                <exclusion>
                    <groupId>io.seatagroupId>
                    <artifactId>seata-allartifactId>
                exclusion>
                <exclusion>
                    <groupId>io.seatagroupId>
                    <artifactId>seata-spring-boot-starterartifactId>
                exclusion>
            exclusions>
        dependency>
        <dependency>
            <groupId>io.seatagroupId>
            <artifactId>seata-spring-boot-starterartifactId>
            <version>1.2.0version>
        dependency>
二、运行nacos,解压即可运行,默认端口8848
运行成功访问:http://localhost:8848/nacos
默认登录账号密码:
账号:nacos
密码:nacos
三、安装seata1-.2.0
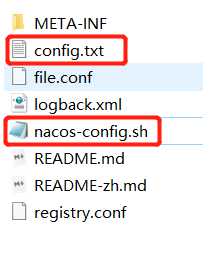
下载后目录结构:
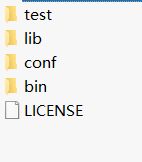
打开conf目录:

- 删除file.conf文件
- 修改file.conf.example文件名称为file.conf
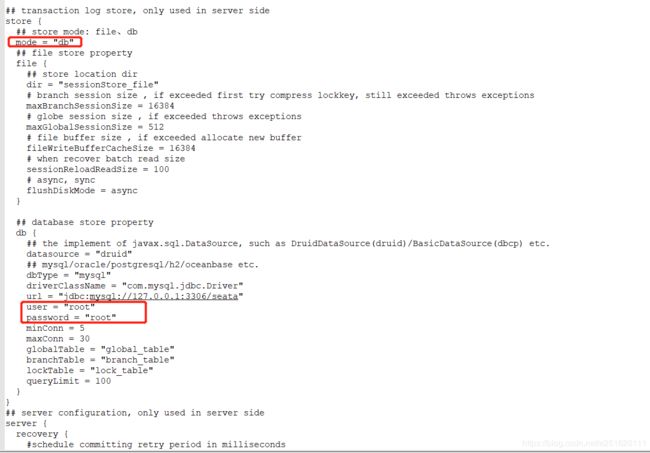
修改此文件内容:
模式改为db,修改数据库连接信息
- 修改registry.conf配置文件:
注册类型改成nacos,并修改nacos连接信息
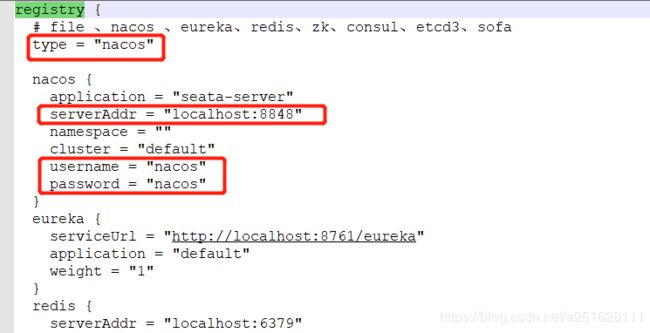
配置信息类型也修改为nacos,并修改nacos连接信息

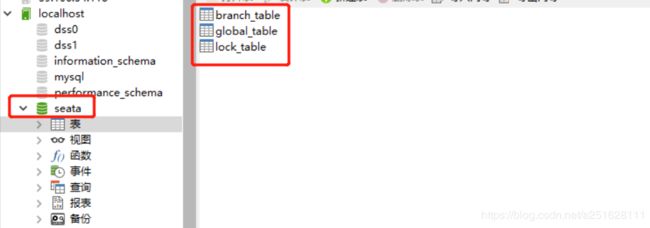
配置名称为seata数据库`,seata用来存储事务锁表等信息,v1.2.0版本未提供sql脚本。附上sql脚本:
create table `global_table` (
  `xid` varchar(128)  not null,
  `transaction_id` bigint,
  `status` tinyint not null,
  `application_id` varchar(32),
  `transaction_service_group` varchar(32),
  `transaction_name` varchar(128),
  `timeout` int,
  `begin_time` bigint,
  `application_data` varchar(2000),
  `gmt_create` datetime,
  `gmt_modified` datetime,
  primary key (`xid`),
  key `idx_gmt_modified_status` (`gmt_modified`, `status`),
  key `idx_transaction_id` (`transaction_id`)
);

create table `branch_table` (
  `branch_id` bigint not null,
  `xid` varchar(128) not null,
  `transaction_id` bigint ,
  `resource_group_id` varchar(32),
  `resource_id` varchar(256) ,
  `lock_key` varchar(128) ,
  `branch_type` varchar(8) ,
  `status` tinyint,
  `client_id` varchar(64),
  `application_data` varchar(2000),
  `gmt_create` datetime,
  `gmt_modified` datetime,
  primary key (`branch_id`),
  key `idx_xid` (`xid`)
);

create table `lock_table` (
  `row_key` varchar(128) not null,
  `xid` varchar(96),
  `transaction_id` long ,
  `branch_id` long,
  `resource_id` varchar(256) ,
  `table_name` varchar(32) ,
  `pk` varchar(36) ,
  `gmt_create` datetime ,
  `gmt_modified` datetime,
  primary key(`row_key`)
);
如下图所示:
配置为高可用db模式参数并提交至配置中心
配置高可用需要2个文件,可以在github上复制
a. content.txt
精简之后的配置:注意修改mysql用户名密码
service.vgroupMapping.my_test_tx_group=default
store.mode=db
store.db.datasource=druid
store.db.dbType=mysql
store.db.driverClassName=com.mysql.jdbc.Driver
store.db.url=jdbc:mysql://127.0.0.1:3306/seata?useUnicode=true
store.db.user=root
store.db.password=root
store.db.minConn=5
store.db.maxConn=30
store.db.globalTable=global_table
store.db.branchTable=branch_table
store.db.queryLimit=100
store.db.lockTable=lock_table
store.db.maxWait=5000
b. nacos-config.sh
将这两个文件放在seata目录的conf目录下
nacos-config.sh文件执行配置信息上传时,会寻找content.txt文件,所以需要改一下nacos-config.sh内容:
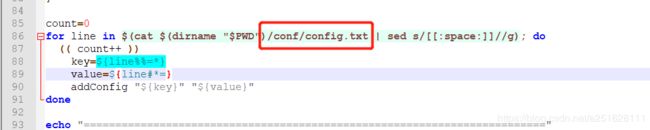 修改后保存,然后执行命令, 后面填写nacos的IP地址,我的是本机所以是127.0.0.1:
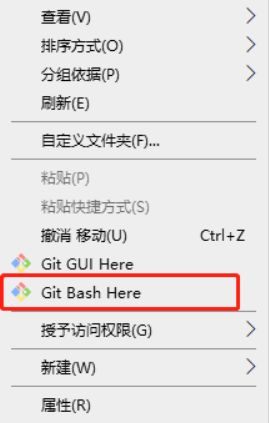
sh nacos-config.sh 127.0.0.1
windows系统使用Git Bash执行
成功后会提示
init nacos config finished, please start seata-server
nacos配置列表也能查询到相关配置
启动seata:
当前bin目录直接启动seata-server.bat(默认8091端口),或者执行seata-server.bat -p 端口号(来指定端口启动)
集群下可以启动多个:
seata-server.bat -p 8091
seata-server.bat -p 8092
四、项目application.yml配置
seata:
  enabled: true
  application-id: ${spring.application.name}-seata
  tx-service-group: my_test_tx_group
  enable-auto-data-source-proxy: true
  service:
    vgroup-mapping:
      my_test_tx_group: my_test_tx_group
    grouplist:
      - localhost:8091
      - localhost:8092
      #- xxxxxxx.8093
  config:
    type: nacos
    #file:
    #  name: file.conf 【namespace: seata-config-1】
    nacos:
      namespace:
      serverAddr: localhost:8848
      group: SEATA_GROUP
      userName: "nacos"
      password: "nacos"
  registry:
    type: nacos
    nacos:
      #与seata server的registry.conf的nacos名字相同
      application: seata-server
      server-addr: localhost:8848
      namespace:
      userName: "nacos"
      password: "nacos"

五、启动项目
调用接口方法:
成功

失败

有问题的同学可以私信我,一起探讨。