springboot2.0x全系列一 快速搭建springboot2.0x项目
搭建springboot项目有两种快捷方式
第一是从idea中可以之间创建,因为网络原因,所以我习惯于从官网搭建,下面介绍从官网搭建的方式:
网址:https://start.spring.io/
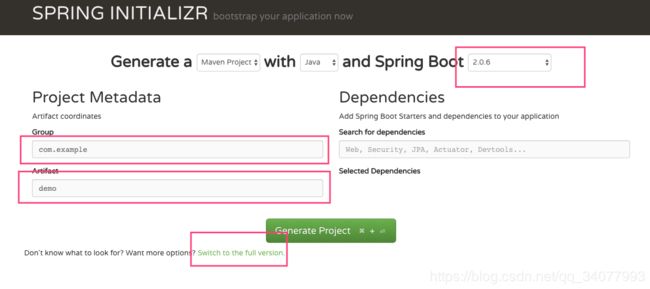
打开网址后可以看到:
在此页面中从上往下的红框中第一个代表springboot的版本号,写此文时最高版本为2.0.6版本
第二个第三个可以自定义命名
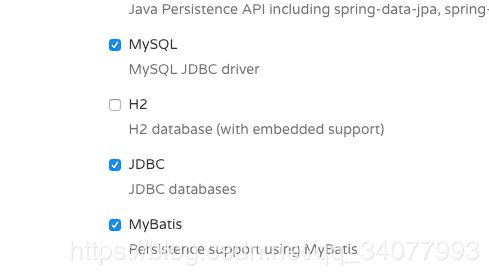
第四个可以点开来看一下,里面是对项目进行自定义的组装,说白了就是对如mysql,tomcat等等各种工具的依赖jar包
最后点绿色按钮会下载zip文件,解压后放入你的ide中
我这里是用的是idea所以下面是基于idea的说明:
我这里使用的springboot的版本并不是最新的版本使用的是
2.1.0.M1稳定版本
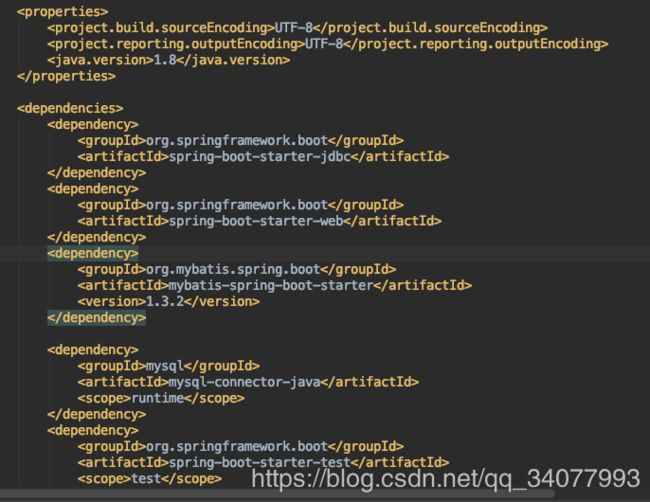
打开pom文件我们可以看到刚才我选择的依赖都在里面
再看你自定义名字的Application类里面的内容
(springboot的注解暂时不解释)
可以看到在main方法的左侧有绿色向右箭头,直接启动main方法
发现报错了:报错信息如下
 因为我官网创建框架的时候选择了对mybatis的依赖,但是我却没有对数据库进行匹配设置
现在再来看下springboot中重要的文件application.properties文件(在resources下面)
一开始进去是空空如也,现在添加一些你需要的配置
如图:
再次启动发现刚才的问题没有了,接着我们写个helloword吧
在java下创建文件夹controller,并在文件夹中添加java文件helloword
再次启动访问localhost:8080/hello
补充:
使用第三方容器启动:
本人在这使用tomcat9
1、
@SpringBootApplication
public class Springboot2Application extends SpringBootServletInitializer {

    public static void main(String[] args) {
        SpringApplication.run(Springboot2Application.class, args);
    }
//继承SpringBootServletInitializer重写configure方法
    @Override
    protected SpringApplicationBuilder configure(SpringApplicationBuilder application) {
        return application.sources(Springboot2Application.class);
    }

}
2、在pom中添加依赖
   org.springframework.boot
   spring-boot-starter-tomcat
   provided
3、将原来的jar改成war
war
至此简单的基于springboot2.0的框架完成了


