windows10 编译nginx
系统环境:windows10 + vs2010 +vs2010sp1
一:下载以下工具,并依次安装。
1、 MSYS-1.0.11.exe
2、 ActivePerl-5.26.1.2601-MSWin32-x64-404865.exe
4、 Mercurial-5.1.1-x64.exe
5、 nasm-2.12.02rc9-installer-x64.exe(安装完成后,需将nasm.exe拷贝到C:\Program Files (x86)\Microsoft Visual Studio 10.0\VC\bin目录下,vs2010的安装路径)
6、 sed-4.2.1-setup.exe(安装完成后将sed.exe拷贝到C:\Windows\System32目录下)
7、 下载配套的所需库代码PCRE, zlib and OpenSSL libraries sources.
并且需要确保以上工具加入到了环境变量。
二、获取Nginx源代码
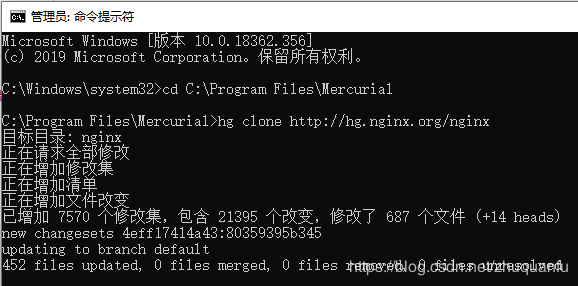
打开CMD命令,切换到Mercurial安装根目录,执行命令:hg clone http://hg.nginx.org/nginx
下载成功后会在Mercurial安装目录下,自动创建nginx源代码文件夹。
三、添加依赖资源包
在nginx源代码分别创建objs\lib 文件夹,并且将下载好的nginx-rtmp-module、openssl、pcre、zlib分别解压在lib文件夹下面。
结果如下图:
四、生成makefile文件,用于C++编译器
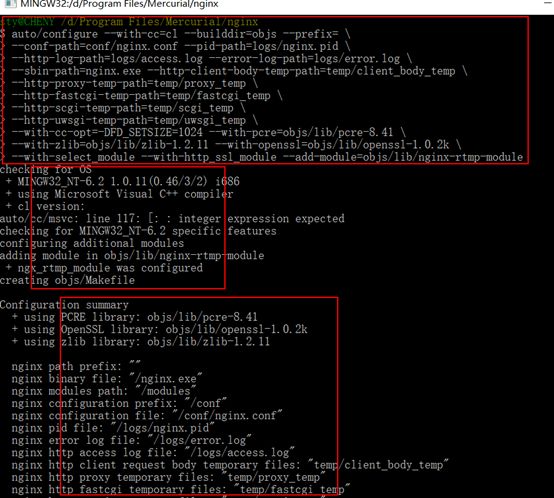
继续使用MSYS工具,返回到nginx源代码根目录,执行以下脚本:
auto/configure --with-cc=cl --builddir=objs --prefix= \
--conf-path=conf/nginx.conf --pid-path=logs/nginx.pid \
--http-log-path=logs/access.log --error-log-path=logs/error.log \
--sbin-path=nginx.exe --http-client-body-temp-path=temp/client_body_temp \
--http-proxy-temp-path=temp/proxy_temp \
--http-fastcgi-temp-path=temp/fastcgi_temp \
--http-scgi-temp-path=temp/scgi_temp \
--http-uwsgi-temp-path=temp/uwsgi_temp \
--with-cc-opt=-DFD_SETSIZE=1024 --with-pcre=objs/lib/pcre-8.43 \
--with-zlib=objs/lib/zlib-1.2.11 --with-openssl=objs/lib/openssl-1.0.2t \
--with-select_module --with-http_ssl_module --add-module=objs/lib/nginx-rtmp-module
有如上三部分输出
最终结果,会在objs目录下生成Makefile文件,以及其他所依赖的代码。
五、OpenSSL的坑,
需要修改 nginx\auto\lib\openssl\makefile.msvc 文件。
将ms\do_ms 改为ms\do_nasm。
六、编译Nginx源码
使用VS2010命令工具,切换到Nginx根目录,执行nmake -f objs/Makefile 命令。
等待一段时间后,编译成功。
七、创建运行件夹
在nginx.exe所在文件夹下创建创建conf,logs,temp目录,可将nginx-rtmp-module\test下的nginx.conf文件复制到conf目录下,启动nginx,基础的RTMP流媒体服务搭建完成。
八、测试
双击nginx.exe运行,可在任务管理器下面查看是否成功,以及检查端口是否正常,默认是1935。
可以用ffmpeg工具模拟推流,命令如下:
ffmpeg -re -i sample.flv -vcodec copy -acodec copy -f flv rtmp://localhost:1935/myapp/stream
推流成功后可以用vlc等播放器拉流观看,地址如下:
rtmp://localhost:1935/live/stream。
九、编译所用资源
文件比较大,可到网盘下载
链接:https://pan.baidu.com/s/1h9o6MP-wS06wA0iWSq6n_w 提取码:txk5


