在Qml中显示FFmpeg解码视频
本文主要讲述ffmpeg解码的视频如何现实到qml窗口上的过程,文末有代码地址。文章开始处先贴一张效果图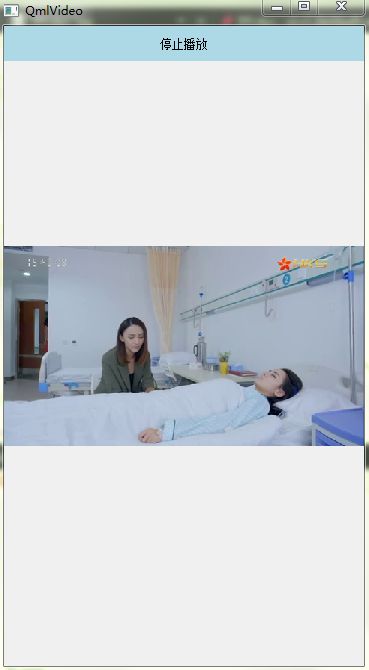
1、绘制类
通过继承QQuickPaintedItem可以使用QPainter接口将一帧解码QImage绘制到Qml上面。(XVideo是QQuickPaintedItem的子类)当接收到一帧(QImage)的时候直接调用update()更新。
void XVideo::paint(QPainter *pPainter)
{

    if (!m_Frame.isNull())
    {
        qDebug()<<"painter";
        pPainter->drawImage(QRect(0, 0, nWidth, nHeight), m_Frame);
    }
}
2、解码类
使用ffmpeg接收视频流,将视频流解码成QImage然后传递给QQuickPaintedItem的子类(XVideoThread是QThread的子类,因为解码过程比较消耗资源如果放在主线程中会造成UI卡死)ffmpeg的转码过程可以参考雷神的博客。这边贴一段参考后的代码。
void XVideoThread::run()
{
    m_pInFmtCtx = avformat_alloc_context();
    if(avformat_open_input(&m_pInFmtCtx, m_strPath.c_str(), NULL, NULL))
    {
        qDebug()<<"get rtsp failed";
        return;
    }
    else
    {
        qDebug()<<"get rtsp success";
    }
    if(avformat_find_stream_info(m_pInFmtCtx, NULL) < 0)
    {
        qDebug()<<"could not find stream information";
        return;
    }
    int nVideoIndex = -1;
    for(int i = 0; i < m_pInFmtCtx->nb_streams; i++)
    {
        if(m_pInFmtCtx->streams[i]->codec->codec_type == AVMEDIA_TYPE_VIDEO)
        {
            nVideoIndex = i;
            break;
        }
    }
    if(nVideoIndex == -1)
    {
        qDebug()<<"could not find video stream";
        return;
    }
    //Output Info---输出一些信息
    qDebug("---------------- File Information ---------------");
    //av_dump_format(m_pInFmtCtx, 0, m_strPath.c_str(), 0);
    m_pCodecCtx = m_pInFmtCtx->streams[nVideoIndex]->codec;
    m_pCodec = avcodec_find_decoder(m_pCodecCtx->codec_id);
    if(!m_pCodec)
    {
        qDebug()<<"could not find codec";
        return;
    }
    if (avcodec_open2(m_pCodecCtx, m_pCodec, NULL) < 0) {
        qDebug("Could not open codec.\n");
        return;
    }
    m_pFrame     = av_frame_alloc();
    m_pFrameRGB  = av_frame_alloc();
    m_pOutBuf = (uint8_t*)av_malloc(avpicture_get_size(AV_PIX_FMT_RGB32, m_pCodecCtx->width, m_pCodecCtx->height));
    avpicture_fill((AVPicture*)m_pFrameRGB, m_pOutBuf, AV_PIX_FMT_RGB32, m_pCodecCtx->width, m_pCodecCtx->height);


    struct SwsContext *pImgCtx = sws_getContext(m_pCodecCtx->width, m_pCodecCtx->height, m_pCodecCtx->pix_fmt,
                                                m_pCodecCtx->width, m_pCodecCtx->height, AV_PIX_FMT_RGB32, SWS_BICUBIC, NULL, NULL, NULL);
    int nSize = m_pCodecCtx->width * m_pCodecCtx->height;
    m_pPacket = (AVPacket *)av_malloc(sizeof(AVPacket));
    if(av_new_packet(m_pPacket, nSize) != 0)
    {
        qDebug()<<"new packet failed";
    }

    while (!isInterruptionRequested())
    {
        if(av_read_frame(m_pInFmtCtx, m_pPacket) >= 0)
        {
            if(m_pPacket->stream_index == nVideoIndex)
            {
                int nGotPic = 0;
                if(avcodec_decode_video2(m_pCodecCtx, m_pFrame, &nGotPic, m_pPacket) < 0)
                {
                    qDebug()<<"decode failed";
                    return;
                }
                if(nGotPic)
                {
                    sws_scale(pImgCtx, (const uint8_t* const*)m_pFrame->data,
                              m_pFrame->linesize, 0, m_pCodecCtx->height, m_pFrameRGB->data,
                              m_pFrameRGB->linesize);
                    QImage *pImage = new QImage((uchar*)m_pOutBuf, m_pCodecCtx->width, m_pCodecCtx->height, QImage::Format_RGB32);
                   // pImage->save("c://test.png", "PNG", 50);
                    emit sig_SendOneFrame(pImage);
                }
            }
        }
        av_free_packet(m_pPacket);
        msleep(5);
    }
    exec();
}
3、注册到qml
将XVideo(绘制类)注册到qml中,这里可以使用qmlRegisterType模板方法将Qt的c++类注册到qml中,值得注意的是被注册的类必须继承与QObject并且需要添加Q_OBJECT宏。
qmlRegisterType("XVideo", 1, 0,"XVideo"); 4、控件使用
在qml中使用XVideo类,通过上面的注册我们可以直接import导入后直接使用,这边单独使用了一个qml文件作为播放的控件(QmlVideo.qml)这样可以测试打开和关闭播放控件。
import QtQuick 2.5
import XVideo 1.0
Rectangle {
   width: dpW(360)
   height: dpH(640)
   XVideo{
       anchors.centerIn: parent;
       nWidth :dpW(360);//cpp中的宽和高
       nHeight: dpH(200);
       width: dpW(360);
       height: dpH(200);
       strVideoPath: "rtmp://live.hkstv.hk.lxdns.com/live/hks";//香港电视台直播流
    }

}
5、视频播放
通过StackView来打开和关闭QmlVideo控件。
importQtQuick 2.5
importQtQuick.Controls 1.4

ApplicationWindow{
    visible: true
    id: main;
    //用来适配手机屏幕的一些转换函数
    property real multiplierH:(main.height/640)*1000;
    property real multiplierW:(main.width/360)*1000;
     function dpH(numbers) {
        return numbers*multiplierH/1000;
     }
     function dpW(numbers) {
        return numbers*multiplierW/1000;
     }
     function dpX(numbers){
         return (dpW(numbers)+dpH(numbers))/2;
     }
    width: 360;
    height: 640;
    //标记是否在播放
    property bool isPlaying: false;
    Rectangle{
        width: parent.width;
        height: dpW(35);
        color: "lightblue";
        Text{
            id:btn_text;
            anchors.centerIn: parent;
            text: isPlaying ? qsTr("停止播放") :qsTr("开始播放");
        }

        MouseArea{
            anchors.fill: parent;
            onClicked: {
                if (isPlaying)
                {
                    stack_view.pop();
                }
                else
                {
                   stack_view.push("qrc:/QmlVideo.qml");
                }
                isPlaying = !isPlaying;
            }
        }
    }

    StackView
    {
        anchors.centerIn: parent;
        id:stack_view;
        initialItem: Rectangle{
        }
    }
}
6、注意事项
在windows环境中运行的时候需要把ffmpeg的dll放入到运行目录,在android运行中需要把so打包到apk,本人源码中使用了2个版本的ffmpeg代码(不是本人编译)。
7、总结
好了这样我们就可以在qml中使用ffmpeg播放本地视频或者网络视频流啦。当然上面的代码是有残缺的,如果有接触过ffmpeg和qml上面的流程应该可以理解,没有接触过的话全部代码比较长就不在博客中贴了,下面附送代码地址。
代码地址https://download.csdn.net/download/cxc233/10425922