ESP32项目:邮件警报
这是一个旧项目的拓展项目。在此基础上,每次使用PIR(被动红外)传感器和ESP32发送邮件时均会被检测到。
硬件组件:
FireBeetle ESP32物联网微控制器 *1
人体热释电红外传感器 1
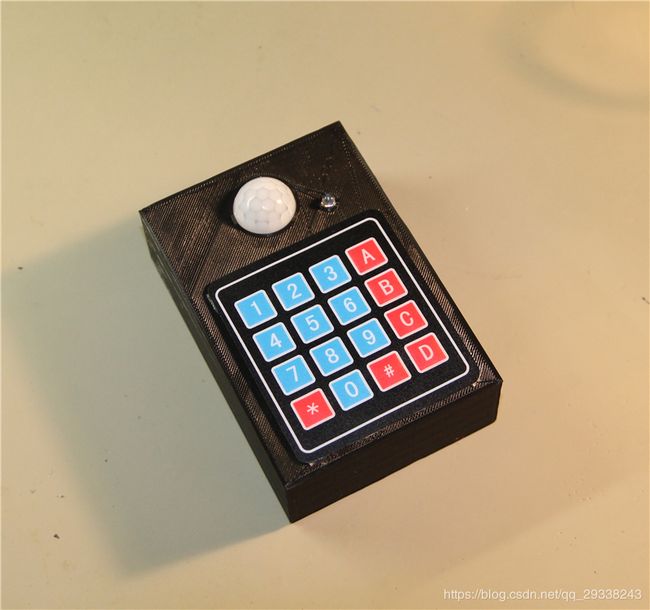
4*4 薄膜数字键盘(背面带贴纸) 1
5毫米LED包(50只) *1
220R电阻 *1
万能电路板 *1
软件程序和在线服务:
Arduino IDE软件 (下载教程)
手动工具和制作机器:
烙铁(通用)
3D打印机(通用)
故事
完成全球移动通信系统家用警报 (GSM Home Alarm) V1.0并使用一段时间后,我决定做一些修改。
硬件方面的主要变化是更换超声波传感器并添加键盘。
软件方面则把短信 (SMS) 通知改为电邮通知。
此外,我决定缩小电路并设计、3D打印电路盒。
视频:https://v.qq.com/x/page/j0833hlnh7x.html
组件
FireBeetle ESP32物联网微控制器将作为本项目的“大脑”。其最大的优势是能够以极小的空间配备WIFI和电池管理功能。该控制器直接由USB端口 (+5V) 供电,但我还加了一块电池作为备用电源(备用电池非必选项)。

键盘从引脚 D2连接到引脚 D8
LED连接到引脚 MOSI/IO19
PIR传感器信号引脚连接到引脚A1/IO39
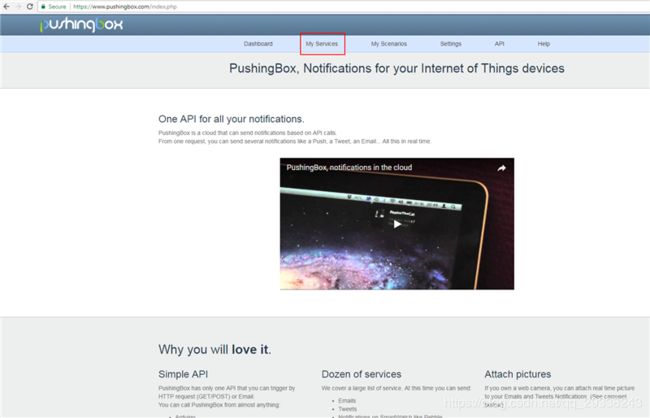
在本项目制作期间,我找到了这个可设置多个通知的物联网 (IOT) 服务。
1-前往https://www.pushingbox.com创建一个账户。
2-前往“我的服务 (My Services)”
3-“添加服务 (Add a service)”
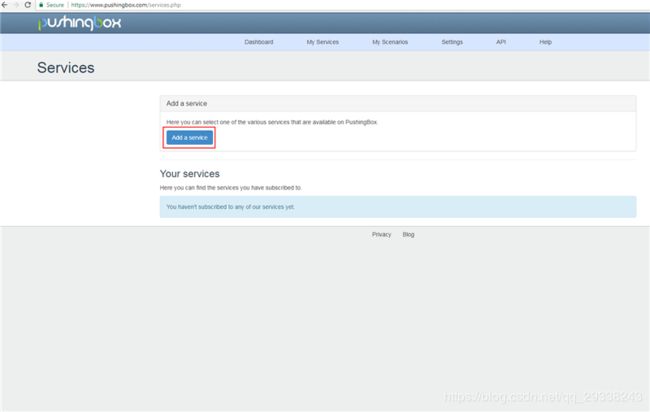
4-在“电子邮件 (Email)”行中点击“选择此服务 (Select this service)”

5-设置将用于接收通知的邮箱

6-前往“我的场景 (My Scenarios)”

7-点击“测试 (Test)”
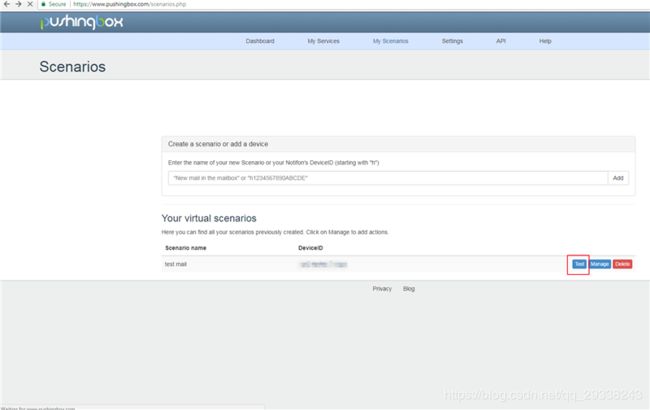
8-如一切正常,你的收件箱将收到一封电子邮件。

代码
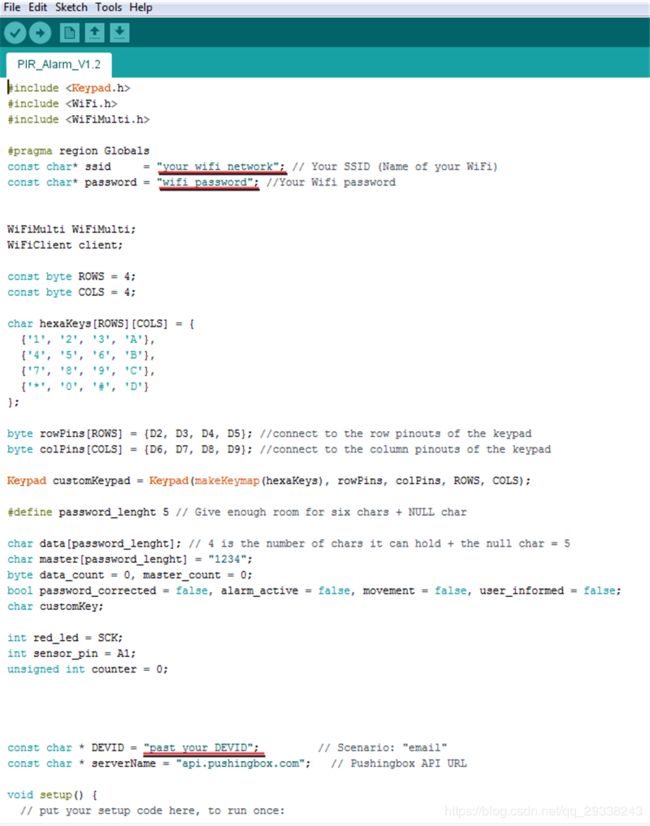
在使用我的代码之前,需要做一些改动。
规定你的WIFI网络名称和密码。
从Pushingbox上的“我的场景”中复制DEVID并将其粘贴到代码中。
上传并打开“串口监视器 (Serial Monitor)”窗口,检查一切是否正常。
要激活系统,只需输入我的默认密码“1234”,警报将在8秒内启动(也可以在代码中对此进行更改)。
#include
#include
#include

#pragma region Globals
const char* ssid     = "your_wifi_network"; // Your SSID (Name of your WiFi)
const char* password = "wifi_password"; //Your Wifi password


WiFiMulti WiFiMulti;
WiFiClient client;

const byte ROWS = 4;
const byte COLS = 4;

char hexaKeys[ROWS][COLS] = {
  {'1', '2', '3', 'A'},
  {'4', '5', '6', 'B'},
  {'7', '8', '9', 'C'},
  {'*', '0', '#', 'D'}
};

byte rowPins[ROWS] = {D2, D3, D4, D5}; //connect to the row pinouts of the keypad
byte colPins[COLS] = {D6, D7, D8, D9}; //connect to the column pinouts of the keypad

Keypad customKeypad = Keypad(makeKeymap(hexaKeys), rowPins, colPins, ROWS, COLS);

#define password_lenght 5 // Give enough room for six chars + NULL char

char data[password_lenght]; // 4 is the number of chars it can hold + the null char = 5
char master[password_lenght] = "1234";
byte data_count = 0, master_count = 0;
bool password_corrected = false, alarm_active = false, movement = false, user_informed = false;
char customKey;

int red_led = SCK;
int sensor_pin = A1;
unsigned int counter = 0;


const char * DEVID = "past_your_DEVID";         // Scenario: "email"
const char * serverName = "api.pushingbox.com";   // Pushingbox API URL

void setup() {
  // put your setup code here, to run once:

  Serial.begin(115200);
  delay(10);

  pinMode(sensor_pin, INPUT);
  pinMode(red_led, OUTPUT);


  Connect_to_Wifi();


}

void loop() {

  Check_Keypad();

  if (alarm_active == true) {
    Check_Movement();
  }

  if (alarm_active == true && movement == true && user_informed == false)
  {
    Serial.println("Send Mail");

    // Send_mail();
    sendToPushingBox(DEVID);


  }

}


bool Check_Movement()
{

  if (digitalRead(sensor_pin) == LOW)
  {
    counter++;
    delay(5);
    if (counter >= 200)
    {
      movement = true;
      Serial.println("Movement");
      counter = 0;
    }
  } else movement = false;
}


void Connect_to_Wifi()
{

  // We start by connecting to a WiFi network
  WiFiMulti.addAP(ssid, password);

  Serial.println();
  Serial.println();
  Serial.print("Wait for WiFi... ");

  while (WiFiMulti.run() != WL_CONNECTED) {
    Serial.print(".");
    delay(500);
  }

  Serial.println("");
  Serial.println("WiFi connected");
  Serial.println("IP address: ");
  Serial.println(WiFi.localIP());

}

void sendToPushingBox(const char * devid)
{


  client.stop();
  if (client.connect(serverName, 80)) {
    client.print("GET /pushingbox?devid=");
    client.print(devid);
    client.println(" HTTP/1.1");
    client.print("Host: ");
    client.println(serverName);
    client.println("User-Agent: test mail");
    client.println();
    client.flush();

        user_informed = true;

  }
  else {
    Serial.println("connection failed");
  }
}


void Check_Keypad()
{
  char customKey = customKeypad.getKey();

  if (customKey) // makes sure a key is actually pressed, equal to (customKey != NO_KEY)
  {

    delay(50);
    digitalWrite(red_led, HIGH);
    delay(50);
    digitalWrite(red_led, LOW);

    data[data_count] = customKey; // store char into data array
    data_count++; // increment data array by 1 to store new char, also keep track of the number of chars entered
  }

  if (data_count == password_lenght - 1) // if the array index is equal to the number of expected chars, compare data to master
  {

    if (!strcmp(data, master)) // equal to (strcmp(Data, Master) == 0)
    {
      //Right password
      Serial.println("Password Correct");

      for (int i = 0; i < 10; i++) {
        delay(50);
        digitalWrite(red_led, HIGH);
        delay(50);
        digitalWrite(red_led, LOW);
      }

      if (alarm_active == true ) {
        // reset alarm
        alarm_active = false;
        Serial.println("Alarm DESACTIVE");

      }
      else
      {
        alarm_active = true;
        user_informed = false;

        int counter = 0;
        while (counter < 5)
        {
          digitalWrite(red_led, HIGH);
          delay(1000);
          digitalWrite(red_led, LOW);
          delay(1000);
          counter++;
        }

        digitalWrite(red_led, LOW);
        Serial.println("Alarm ACTIVE");

      }


    } else {
      Serial.println("Password Wrong");
      digitalWrite(red_led, HIGH);
      delay(1000);
      digitalWrite(red_led, LOW);
    }

    //Clear data
    while (data_count != 0)
    { // This can be used for any array size,
      data[data_count--] = 0; //clear array for new data
    }

  }
}
小结
与我之前的项目相比,升级到PIR传感器是一项重大改进。我几乎没有收到任何误报警报。
几乎到项目尾声时我才想起,“为什么我没有使用射频识别 (RFID)???!!!”,或者更好的是用ESP32可用的蓝牙模块代替键盘。
此外,代码也很基础,有很大的改进空间,因此我想我还会制作新的警报系统。
如果你发现任何错误或有任何建议、改进及疑问,请随时给我留言。
电路图

esp32/esp8266其他精华教程:
ESP32 MicroPython教程:uPyCraft IDE入门
ESP32 MicroPython教程:解析JSON
ESP32 MicroPython教程:MicroPython支持
ESP32 MicroPython教程:连接Wi-Fi网络
ESP32 / ESP8266 MicroPython教程:自动连接WiFi
ESP32 / ESP8266 MicroPython教程:从文件系统运行脚本
ESP32 / ESP8266 MicroPython教程:HTTP GET请求
ESP32 Arduino教程:用于构建ESP32编译环境的Arduino IDE软件
ESP32 Arduino教程:FreeRTOS队列性能测试
ESP32 RFID教程:打印MFRC522固件版本
ESP32 Picoweb教程:获取请求的HTTP方法
……
还有更多教程: ESP32教程 合集
英文版 :ESP32 tutorial合集