python的Matplotlib库(常用)
Matplotlib库的教程链接:点击查看
#matplotlib库常用的
import matplotlib.pyplot as plt
import csv
import numpy as np
import matplotlib.animation as animation
from matplotlib import style
import random

slices = [7,2,2,13]
activities = ['sleeping','eating','working','playing']
cols = ['c','m','r','b']
x=[]
y=[]

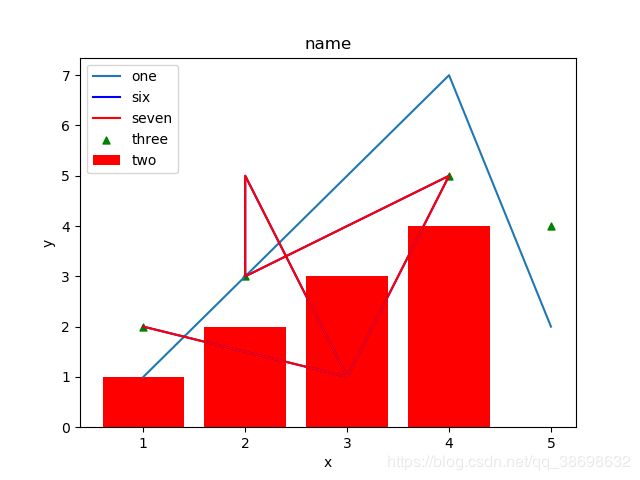
plt.plot([1,2,3,4,5],[1,3,5,7,2],label="one")#折线图
plt.bar([1,2,3,4],[1,2,3,4],label="two",color="red")#柱状图(g为绿色,b为蓝色,r为红色,等等。 你还可以使用十六进制颜色代码,如#191970)
plt.scatter([5,3,2,1,4],[4,1,3,2,5],label="three",color="g",s=25,marker="^")#散点图marker参数为散点图类型【https://matplotlib.org/api/markers_api.html】

#饼状图
# plt.pie(slices,
#         labels=activities,#名称
#         colors=cols,#颜色
#         startangle=90,#角度
#         shadow= True,#阴影
#         explode=(0,0.1,0,0),#拉出的切片
#         autopct='%1.1f%%')#百分比放到图表上

#读取CSV电子表格的数据[这个地方可以用在搭建一个模板文档,自动填入数据进行可视化分析]
with open('11.txt','r') as csvfile:
    plots = csv.reader(csvfile, delimiter=',')
    for row in plots:
        x.append(int(row[0]))
        y.append(int(row[1]))
plt.plot(x,y, label='six',color="b")

#使用另一个模块[numpy]
x, y = np.loadtxt('11.txt', delimiter=',', unpack=True)
plt.plot(x,y, label='seven',color="r")

#从网络加载数据【上一篇文章https://blog.csdn.net/qq_38698632/article/details/104520834】

#调用实时图表
# style.use('fivethirtyeight')

# fig = plt.figure()
# ax1 = fig.add_subplot(1,1,1)
# def animate(i):
#     graph_data = open('11.txt','r').read()
#     lines = graph_data.split('\n')
#     xs = []
#     ys = []
#     for line in lines:
#         if len(line) > 1:
#             x, y = line.split(',')
#             xs.append(x)
#             ys.append(y)
#     ax1.clear()
#     ax1.plot(xs, ys)
# ani = animation.FuncAnimation(fig, animate, interval=5000)

#子图
# style.use('fivethirtyeight')

# fig = plt.figure()

# def create_plots():
#     xs = []
#     ys = []

#     for i in range(10):
#         x = i
#         y = random.randrange(10)

#         xs.append(x)
#         ys.append(y)
#     return xs, ys

# ax1 = fig.add_subplot(221)
# ax2 = fig.add_subplot(222)
# ax3 = fig.add_subplot(212)


plt.xlabel("x")#x轴名称
plt.ylabel("y")#y轴名称

plt.title("name")#图的标题
plt.legend()#默认图例

plt.show()
