c#调用c++程序(DLL方法,以及opencv,运行开源的人脸识别seetaface)
谨以此篇文章记录我2017.9.19日改bug的旅程
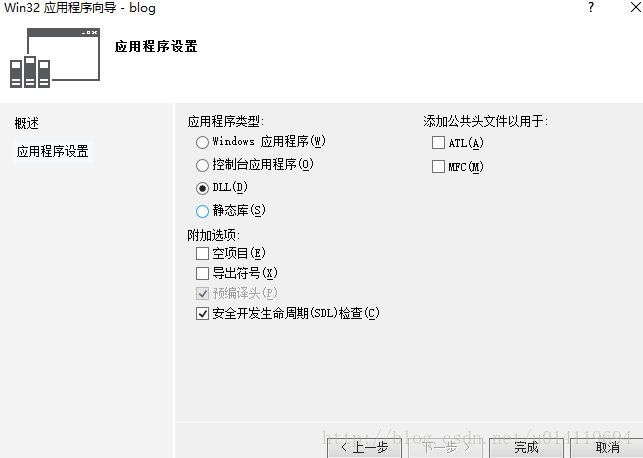
前段时间把开源的人脸识别代码编译运行了起来,奈何又有新的需求出现,能够在asp.net写的网站上调用人脸识别,这就涉及到了怎么用c#来调用c++函数的问题,经过一段时间的百度,终于找到了把c++打包成dll的方法,本以为很简单的demo,结果出现了一大堆的问题,经过一天的调试,完美运行,吐槽结束,干货开始。
1. 准备
人脸识别的源码在:https://github.com/seetaface/SeetaFaceEngine。编译方式参见里面的word文档。
2. c#简单调用
在blog.cpp中加入以下代码:
#include "stdafx.h"

extern "C" __declspec(dllexport) int Add(int x, int y)
{
    return x + y;
}
extern "C" __declspec(dllexport) int Sub(int x, int y)
{
    return x - y;
}
extern "C" __declspec(dllexport) int Multiply(int x, int y)
{
    return x * y;
}
extern "C" __declspec(dllexport) int Divide(int x, int y)
{
    return x / y;
}
然后生成,即可得到该项目的dll文件,特别声明一下,一个c++项目只能生成一个dll,如果想用多个dll,那就多建几个项目。到这里c++项目就完成了,接下来新建一个c#项目(同一个解决方案下),
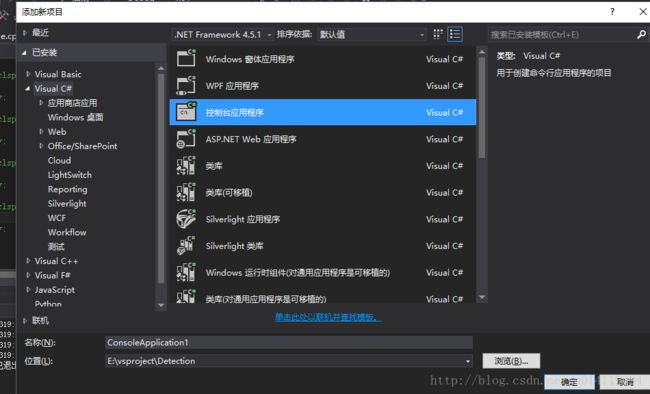
然后在c#下的.cs文件中添加如下代码:
using System;
using System.Collections.Generic;
using System.Linq;
using System.Text;
using System.Threading.Tasks;
using System.Runtime.InteropServices;

namespace test
{
    class Program
    {
        [DllImport("blog.dll", CallingConvention = CallingConvention.Cdecl)]
        public static extern int Add(int x,int y);

        static void Main(string[] args)
        {

            //int result = Add(10, 20);
            int x = Add(1,2);
            Console.WriteLine(x);
            Console.ReadLine();
        }
    }
}
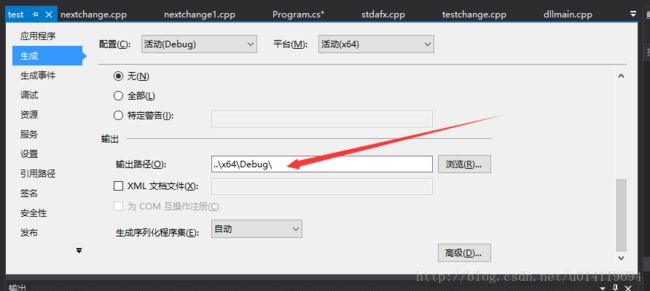
当然,还需要把c++生成的dll文件拷贝到debug文件夹下,或者是release文件夹下,这看你的运行方式。然后生成,运行就ok了。当然还有一种设置输出路径的方式,将c++输出目录和c#生成目录放在一起即可,这样就不必手动复制dll文件了,具体操作如下。

3.opencv跑起来
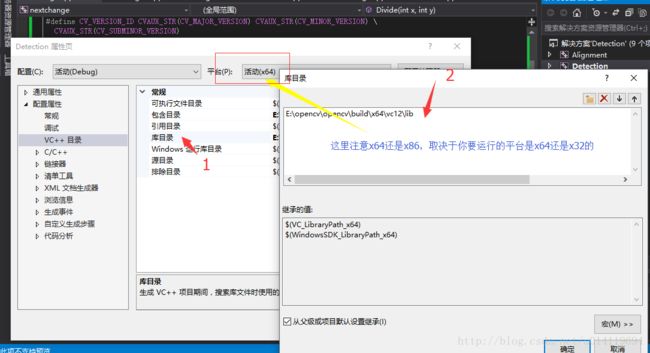
具体实现摄像头创建,当然opencv 的配置方式如下:
(1)包含路径
(2)库目录
(3)附加依赖项
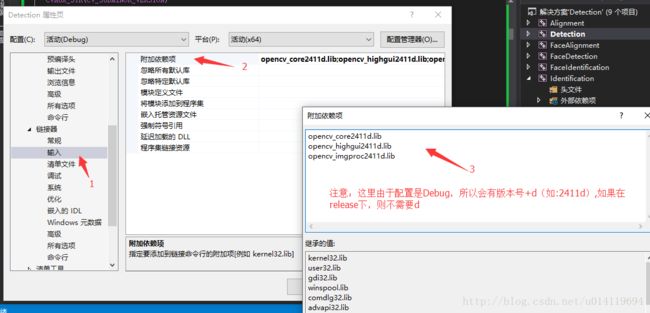
当然这里我运行后各种错误,包括摄像头的框乱码的问题,最后我把以下的lib全部加上才解决这个问题:
opencv_calib3d2411d.lib
opencv_contrib2411d.lib
opencv_core2411d.lib
opencv_features2d2411d.lib
opencv_flann2411d.lib
opencv_gpu2411d.lib
opencv_highgui2411d.lib
opencv_imgproc2411d.lib
opencv_legacy2411d.lib
opencv_ml2411d.lib
opencv_nonfree2411d.lib
opencv_objdetect2411d.lib
opencv_photo2411d.lib
opencv_stitching2411d.lib
opencv_ts2411d.lib
opencv_video2411d.lib
opencv_videostab2411d.lib
opencv打开摄像头代码:
#include "stdafx.h"
#include 这里的.c_str()是返回头指针(char *c=string),至于这为什么要用这个函数,是因为c# 的string和c++的string不一样,当你在c#调用c++的dll时会出现乱码。
这里涉及到一个问题:c#传参string,c++应该怎么接收呢,网上大部分方法是用char *s来接受:
//c#
 [DllImport("blog.dll", CallingConvention = CallingConvention.Cdecl)]
        public static extern int Add(string s);
//c++
extern "C" __declspec(dllexport) int Add(char *s)
{

    return 0;
}
4.错误改正
你如果用c++运行的话,你的各种目录是从你的cpp所在的文件夹开始的(也可能是Debug目录,网上说有好几种方式,你可以生成一个文本文档测试一下)。但是如果是dll方式的话应该是从输出目录开始的。测试代码如下:
#include  // c++ 文件IO头
using namespace std;
int main()
{
char* path = "1.txt"; // 你要创建文件的路径
ofstream fout( path );
if ( fout ) { // 如果创建成功
fout << "写入内容" << endl; // 使用与cout同样的方式进行写入
fout.close();  // 执行完操作后关闭文件句柄
}
}
当然还有其他错误,暂时想不起来了,就先记到这里吧!关于其他问题可以私信我

