最近将两年前买的STM32F103最小系统板拿出来准备学习,安装完MDK5后写了一个点亮LED程序,发现无法下载。查了下购买评论,原来这种板子发货时已经锁定了flash。鼓捣了2、3天,最后采取的办法是通过sram启动方式,来运行一个flash解锁程序,程序运行后就可以将板子恢复。在此将该过程记录下来。
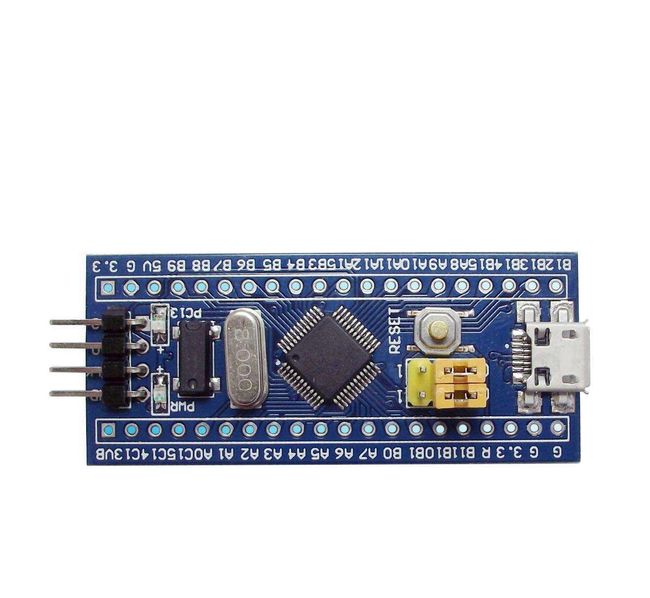
一、系统板外形是这种。
二、硬件跳线
将两个黄色跳线帽全部插在1端,即BOOT0、BOO1全部接1。
三、MDK5设置
3-1、新建一个工程,取名Flash_Unlock。设置Run-time,选择CMSIS->CORE、Device->Startup、Device->StdPeriph Device->Framework、Device->StdPeriph Device->Flash,新建并添加main.c文件;
3-2、添加代码:
 1 #include "stm32f10x.h"
 2 #include "stm32f10x_flash.h"
 3
 4 int main(void)
 5 {
 6     NVIC_SetVectorTable(NVIC_VectTab_RAM, 0x0);
 7     FLASH_Unlock();//解锁flash
 8     FLASH_ReadOutProtection(DISABLE);//解除读保护
 9     return 0;
10 }
3-3、设置Option参数
3-3-1、在Device选项卡中选择STM32F103C8型号;
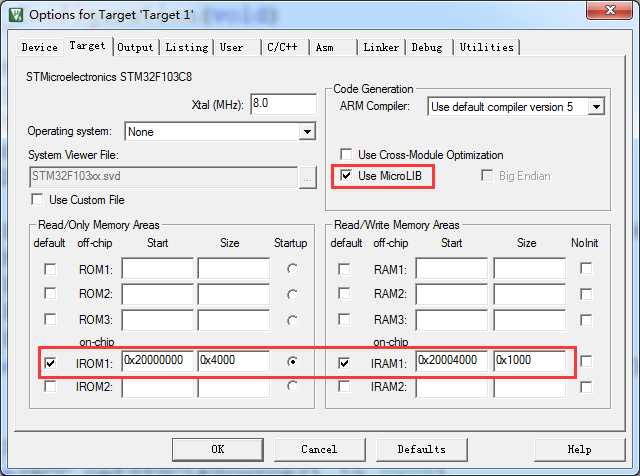
3-3-2、在Target选项卡中设置8MHz,选择Use MicroLIBsram的起始地址为0x2000 0000,此型号芯片ram大小为20KB,即0x5000。因此将ROM划分16KB,填入0x4000,RAM划分为4KB,起始地址为0x2000 4000,大小为0x1000;
3-3-3、在Output选项卡中选中“Create HEX File”;
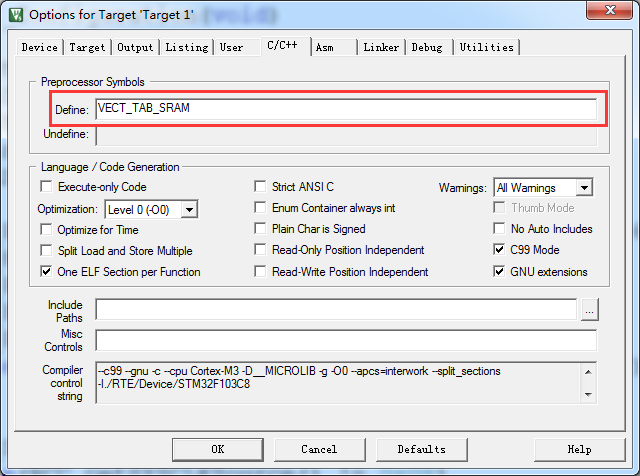
3-3-4、在C/C++选项卡中Define栏中填入:VECT_TAB_SRAM;
3-3-5、在Linker选项卡总先取消选择Use Memory Layout from Target Independent,更改R/O Base为0x20000000,更改R/I BASE为0x20004000,在选择Use Memory Layout from Target Independent;
3-3-6、在Debug选项卡中根据实际情况选择调试器,这里选择ST-LINK,取消选择Load Application at Startup,在工程文件夹中新建一个txt文件,改名为RAM2.ini,打开并复制如下代码,并在Initialization File一栏中加载此文件;
 1 /******************************************************************************/
 2 /* RAM.INI: RAM Initialization File                                           */
 3 /******************************************************************************/
 4 // <<< Use Configuration Wizard in Context Menu >>>                           //
 5 /******************************************************************************/
 6 /* This file is part of the uVision/ARM development tools.                    */
 7 /* Copyright (c) 2005-2007 Keil Software. All rights reserved.                */
 8 /* This software may only be used under the terms of a valid, current,        */
 9 /* end user licence from KEIL for a compatible version of KEIL software       */
10 /* development tools. Nothing else gives you the right to use this software.  */
11 /******************************************************************************/
12
13 FUNC void Setup (void) {
14   SP = _RDWORD(0x20000000);          // Setup Stack Pointer
15   PC = _RDWORD(0x20000004);          // Setup Program Counter
16  _WDWORD(0xE000ED08, 0x20000000);   // Setup Vector Table
17 }
18
19 LOAD ARM\Blinky.axf INCREMENTAL      // Download
20
21 Setup();                             // Setup for Running
22 g, main
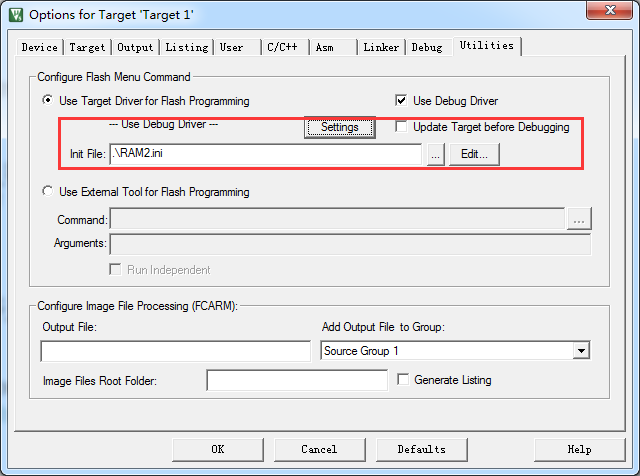
3-3-7、在Utilities选项卡中Init File一栏加载RAM.ini文件,取消选择Update Target before Debugging;
3-3-8、在Utilities选项卡中点击Setting,在弹出的窗口中选择Do not Erase,并设置RAM和ROM地址;
3-3-9、点击调试按钮,进入调试窗口后按F5,flash即可解锁,将芯片断电,跳线帽恢复至0、0,可以正常下载程序。


