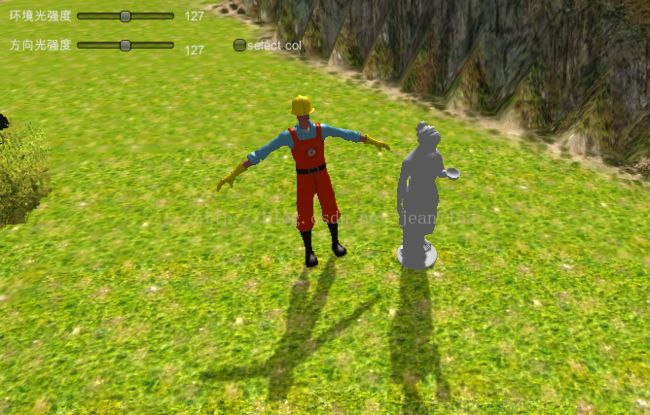
Unity3D GUI C#脚本实例1——slider 控制环境光
环境:Unity3D 4.5.1f3版本
1、创建项目,在场景中放入地层和模型文件。
2、创建脚本 myGui.cs文件,public class myGui : MonoBehaviour
3、在myGui类中,void OnGUI()函数中添加代码
        {
            GUI.Label(new Rect(10, 10, 70, 30), "环境光强度");
            mAmbientLightValue = GUI.HorizontalSlider(new Rect(80, 15, 100, 30),
                mAmbientLightValue, 0.0f, 1.0f);
            int index = (int)(mAmbientLightValue * 255);
            GUI.Label(new Rect(190, 10, 40, 30), index.ToString());
        }
就会显示上面的那组滑块组,拖动slider滑块的数值显示在后面的Label中,范围是0,255。
4、 在上面代码后面更随添加改变环境光的代码:
        RenderSettings.ambientLight = new Color(mAmbientLightValue,
            mAmbientLightValue, mAmbientLightValue, 0);
编译后运行,在Unity3D中,可以看到随着slider滑动,环境光强弱改变了。
5、下面的那个滑块,和上面的类似。我在场景中添加了一个方向光,名称为directlight。
给方向光directlight添加一个脚本 directlightMove文件,让方向光在模型上面转动,可以看到地面是阴影的移动。
代码如下:
using UnityEngine;
using System.Collections;

public class directlightMove : MonoBehaviour {
	private GameObject mPointLight;
	private GameObject mPlayer;
	// Use this for initialization
	void Start () {
		mPointLight = GameObject.Find("directlight");
		mPlayer = GameObject.Find ("construction_worker");
	}

	// Update is called once per frame
	void Update () {
		mPointLight.transform.RotateAround(mPlayer.transform.position,
		                                   mPlayer.transform.forward, Time.deltaTime*30);
	}
}
运行一下,可以看到地面上的阴影随着方向光在移动。
6、让第二个slider控制方向光强度。
在myGui类中,void OnGUI()函数中添加代码:
        {
            GUI.Label(new Rect(10, 40, 70, 30), "方向光强度");
            mLightValue = GUI.HorizontalSlider(new Rect(80, 45, 100, 30),
                mLightValue, 0.0f, 1.0f);
            int index = (int)(mLightValue * 255);
            GUI.Label(new Rect(190, 45, 40, 30), index.ToString());
            mPointLight.light.intensity = mLightValue;
        }
运行一下,方向光在运动,两个slider可以控制两种光。完成!
最近新接触的C#和Unity3D,有错误请一定要指教啊!

