android studio 将 cpp 文件编译的so 库 给其它工程使用
这篇文章本来是作为另一篇 http://blog.csdn.net/handsonn/article/details/78253536 的一部分,但是感觉会有很多图片,就单独拿了出来
以下是我的运行环境:
操作系统:Ubuntu 16.0.4
IDE:Android Studio 3.0. beta4
网上大多数是另一种打包的流程,个人感觉比较麻烦,所以记录下自己尝试的这几种
记录的主要是静态编译里面的两种
动态编译是为了区别于静态编译(记录下另外的调用native方法的方式)
1、静态编译
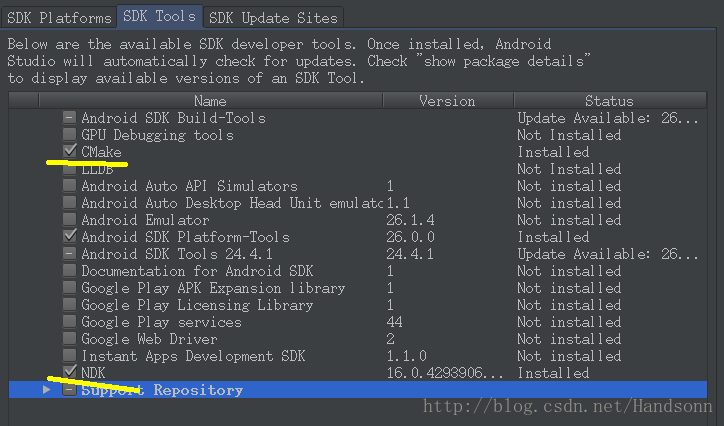
这两种的前提都要有 ndk 和 cmake,主要区别是第一种有 “include c++ support”,比较方便,第二种没有 “include c++ support”:
第一种:
一共需要创建两个 android project
首先,要确认 SDK里面有安装了 CMake 和 NDK,如下
(1)创建第一个 project,记得勾选 c++ support
然后一路到finish,第一个 project 就建好了
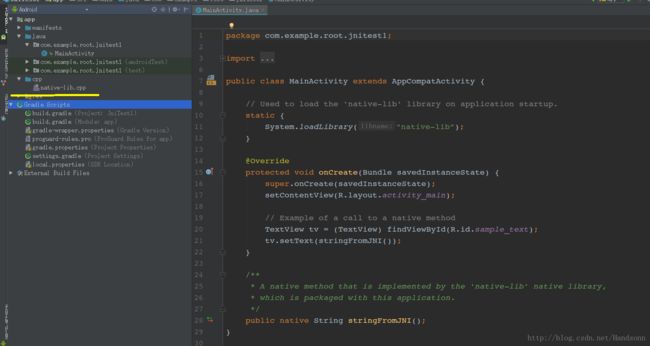
(2)打开 MainActivity,长这样的,并且可以看到旁边有个 cpp 文件
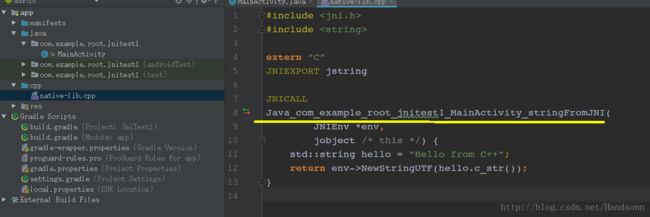
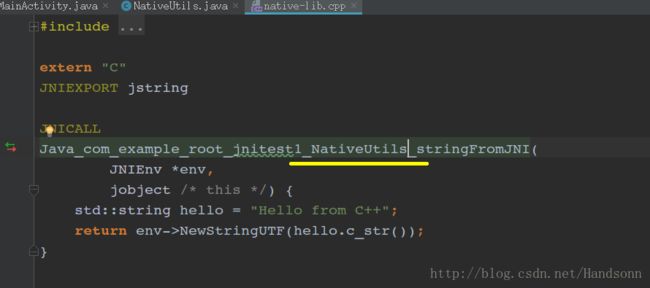
打开 cpp 文件 ,看一下 具体内容
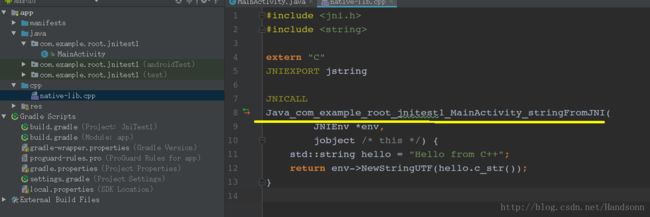
可以看到这里的类名是 包名+类名+方法名,
(3)为了方便,我们建一个类,名为 NativeUtils,将 MainActivity 中的 native 方法移动到到这个类里面,结果如下:
然后,点击 Build --> Make Project 或者 ctrl + F9 , 然后切换到 project 目录,可以看到已经生成 so 库,
如下:
这就是要给其他工程用的,可以看到这样就生成了,默认是全部类型的 so 都有,如果要部分的话可以在
app 的 build.gradle 中添加过滤,即 abiFilters 指定生成什么格式的 so 文件,moduleName 指定 so 文件 名字,这里没有进行指定,
(4)将这些 so 文件拷贝出来,建立第二个工程,第二个工程随意,然后将这些 so 文件拷贝到 libs 目录下,并在 app 的 build.gradle 中添加依赖
(5)建立一个新的包,和第一个工程 NativeUtils 所在的包名一样,并且将第一个工程的 NativeUtils 类拷贝过来到这个新建的包下:
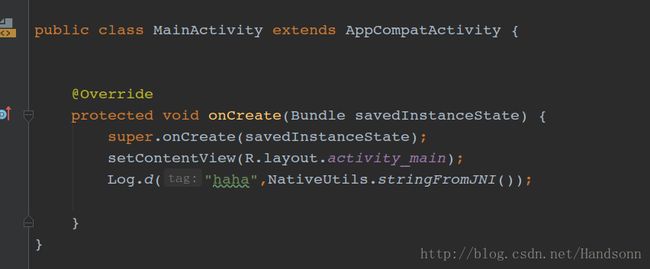
(6)这个时候我们在 MainActivity 调用 NativeUtils 中的 方法,毫无疑问,报了错误,如下
原因是:开始第一步的时候,我们将 第一个工程 MainActivity 中生成 的 native 方法移动 到 NativeUtils中,cpp 文件的类名称并没有修改,打开第一个工程,开始是这样的
我们需要改成这样,因为 这里的类名是 “ 包名+类名+方法名” ,我们改成了 NativieUtils,所以要改成如下:
重新 MakeProject,将 so 文件 复制到第二个工程,再次编译运行,即可成功运行,打个 Log即可验证
两个小点:
1、关于 so 的 加载,也就是 System.loadLibrary(“native-lib”); 可以看到 目录里面 这个 so 文件的名称是
“libnative-lib.so”,这里加载 没有 “lib” 和 ". so"
2、这 7 种 so 文件常用的 abi 只有三种
第二种:
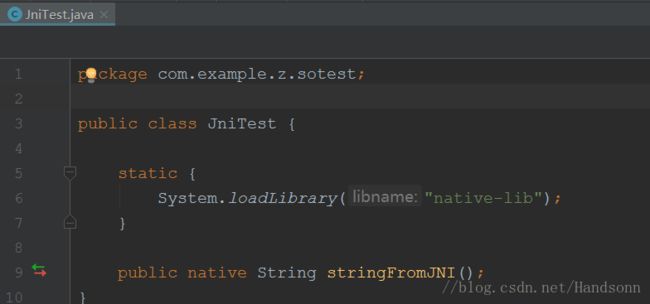
上面是建立项目的时候勾选了 “include c++ support”,如果没有勾选呢,也可以自己来,首先创建一个 普通类 JniTest.java
然后 ALT + F12 呼出控制台 , cd到 main 文件夹,我的包名是 com.example.z.sotest,最后命令如下:
![]()
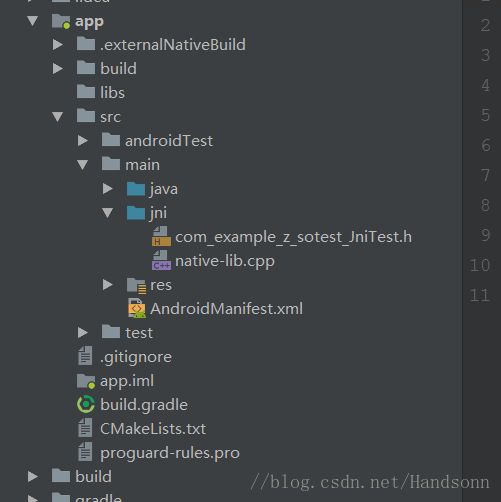
接着可以看到生成了 jni 的文件夹和对应的 h 文件,
接着,右键新建一个 c++ source file,名字叫 native-lib.cpp,然后内容如下:
这样导入一个 h 文件有可能后面编译会出现一个错误,如下:
根据提示,很简单的,将导入的尖括号改成双引号,即第一句改成
#include "com_example_z_sotest_JniTest.h" 后续的编译即可成功,
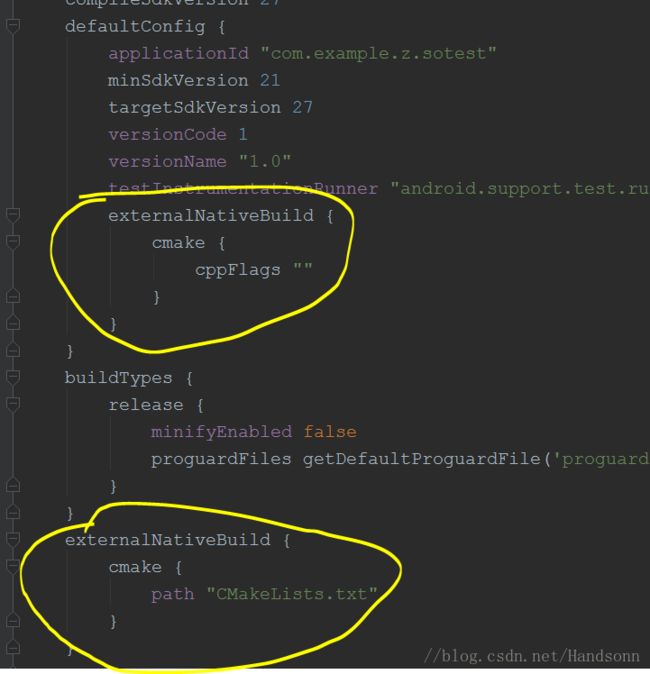
在进行编译之前,还需要配置一下 gradle,具体如下:
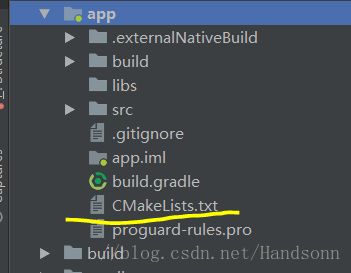
可以看到,还需要一个 CMakeLists.txt,我们需要在 app 下新建立一个 CMakeLists.txt,如下:
顺便将 txt 内容贴出来:
# For more information about using CMake with Android Studio, read the
# documentation: https://d.android.com/studio/projects/add-native-code.html

# Sets the minimum version of CMake required to build the native library.

cmake_minimum_required(VERSION 3.4.1)

# Creates and names a library, sets it as either STATIC
# or SHARED, and provides the relative paths to its source code.
# You can define multiple libraries, and CMake builds them for you.
# Gradle automatically packages shared libraries with your APK.

add_library( # Sets the name of the library.
             native-lib

             # Sets the library as a shared library.
             SHARED

             # Provides a relative path to your source file(s).
             src/main/jni/native-lib.cpp )

# Searches for a specified prebuilt library and stores the path as a
# variable. Because CMake includes system libraries in the search path by
# default, you only need to specify the name of the public NDK library
# you want to add. CMake verifies that the library exists before
# completing its build.

find_library( # Sets the name of the path variable.
              log-lib

              # Specifies the name of the NDK library that
              # you want CMake to locate.
              log )

# Specifies libraries CMake should link to your target library. You
# can link multiple libraries, such as libraries you define in this
# build script, prebuilt third-party libraries, or system libraries.

target_link_libraries( # Specifies the target library.
                       native-lib

                       # Links the target library to the log library
                       # included in the NDK.
                       ${log-lib} )
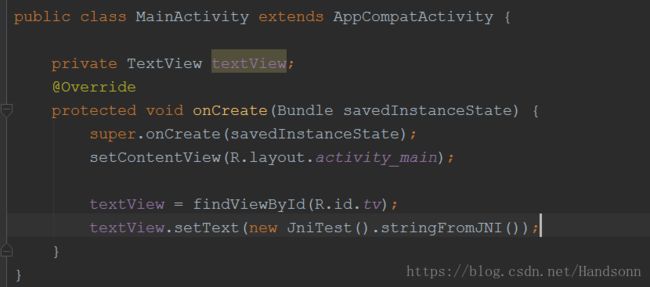
然后 make project,或者 ctrl + F9,即可看到生成了 so 库,最后通过 textview 简单输出一段文字验证下:
更多可以参考:
https://developer.android.google.cn/ndk/guides/cmake
https://developer.android.com/studio/projects/add-native-code
2、动态编译
上面讲的属于静态编译,这里再记录下动态编译,一般步骤如下:
a、建立一个 java 类:
package com.example.z.jnitest;

public class JniTest {

    static {
        System.loadLibrary("my-jni");
    }

    public native String stringFromJNI();

    public native int maxNum(int a, int b);

}
b、修改 CMakeLists.txt 对应的地方为 “my-jni” (对应 System.loadLibrary()方法传递的字符串即可)
c、新建 JniTest.cpp,内容如下:
下面的几个方法的写法在 androidxref.com 里面也可以看到,
例如 libcore/ojluni/src/main/native/Runtime.c
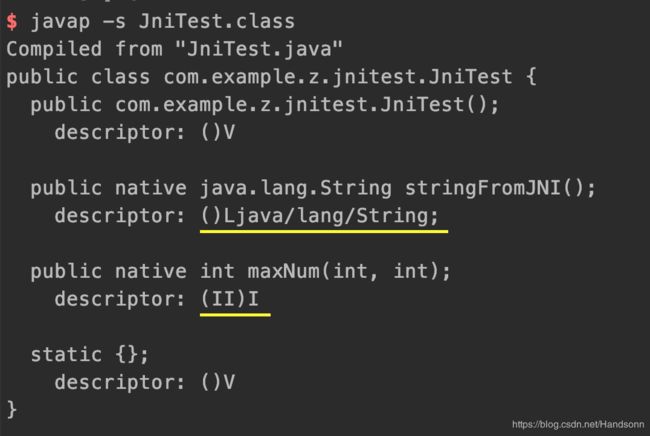
#include 上面有个地方,java方法名的方法签名,需要class文件,然后运行下面命令获得:
javap -s ***.class
首先 cd 到对应的 class 文件的目录下,如下:

接着在 Terminal 命令面板 cd 到这个目录下,然后运行命令如下图:(注意第一个方法的方法签名有个分号)
c、接着记得 make project,编译下
d、看下调用:
import android.os.Bundle
import android.support.v7.app.AppCompatActivity
import android.widget.TextView

class MainActivity : AppCompatActivity() {

    override fun onCreate(savedInstanceState: Bundle?) {
        super.onCreate(savedInstanceState)
        setContentView(R.layout.activity_main)
        val a = JniTest()
        val s = "${a.stringFromJNI()} ---- ${a.maxNum(1, 3)}"
        findViewById<TextView>(R.id.sample_text).text = s
    }

}
贴下CMakeLists.txt :
# For more information about using CMake with Android Studio, read the
# documentation: https://d.android.com/studio/projects/add-native-code.html

# Sets the minimum version of CMake required to build the native library.

cmake_minimum_required(VERSION 3.4.1)

# Creates and names a library, sets it as either STATIC
# or SHARED, and provides the relative paths to its source code.
# You can define multiple libraries, and CMake builds them for you.
# Gradle automatically packages shared libraries with your APK.

add_library( # Sets the name of the library.
        my-jni

        # Sets the library as a shared library.
        SHARED

        # Provides a relative path to your source file(s).
        src/main/cpp/JniTest.cpp)

# Searches for a specified prebuilt library and stores the path as a
# variable. Because CMake includes system libraries in the search path by
# default, you only need to specify the name of the public NDK library
# you want to add. CMake verifies that the library exists before
# completing its build.

find_library( # Sets the name of the path variable.
        log-lib

        # Specifies the name of the NDK library that
        # you want CMake to locate.
        log)

# Specifies libraries CMake should link to your target library. You
# can link multiple libraries, such as libraries you define in this
# build script, prebuilt third-party libraries, or system libraries.

target_link_libraries( # Specifies the target library.
        my-jni

        # Links the target library to the log library
        # included in the NDK.
        ${log-lib})
接着看下运行效果:

最后简单捋下 System.loadLibrary 的过程,知道怎么用之后,也要大概知道里面为啥这样,知其然,也知其所以然:
更多文章推荐:
关于 extern C :http://www.cppblog.com/Macaulish/archive/2008/06/17/53689.html
