最新Google Analytics在Android Studio工具中的集成使用
前言
自动google发布Android Studio以来,很多项目都转到这了这个开发工具,Android Studio采用gradle进行构建,虽然某种意义上十分的自动化,但是对于用惯了Eclipse+ADT开发的人来讲,最开始还是有很多的不适应,在第一次构建项目的时候,最好能让你的网络连接google,否则会有很多问题,因为自动构建会从google服务上获取相应的服务包,这是需要能够访问google网络,最近项目更新,要集成Google Analytics, 遇到了一些小问题,这是始料未及的,这里和大家分享一下!
Google Services导入
这里我们为什么要导入Google Services呢?前面说过Gradle是自动话构建,所以很多时候都会用到google提供的插件进行,例如:
apply plugin: 'com.google.gms.google-services'为此,我们需要在你的项目build.gradle中引入这个插件:
buildscript {
    repositories {
        mavenCentral()
    }
    dependencies {
        classpath 'com.android.tools.build:gradle:2.0.0'
        classpath 'com.google.gms:google-services:3.0.0'
    }
}
然后再项目模块文件中应用这个插件:
apply plugin: 'com.android.application'

repositories {
    mavenCentral()
}

dependencies {
    compile fileTree(include: '*.jar', dir: 'libs')
}

apply plugin: 'com.google.gms.google-services'
上面代码中,记住一定要在最后apply 这个plugin,否则项目会报错误。
创建Google Analytics分析账户
https://www.google.com/analytics/
通过上面的url,我们可以按照导航创建我们自己对应的平台账户,这里要创建android平台,Google 分析注册的账户名字一定要记好(这里举个例子叫MyDemo),之后我们在获取配置文件时候会用到。
获取配置文件
通过如下URL获取google-services.json文件,之后我们需要应用这个文件在项目中
https://developers.google.com/analytics/devguides/collection/android/v4/start?configured=true
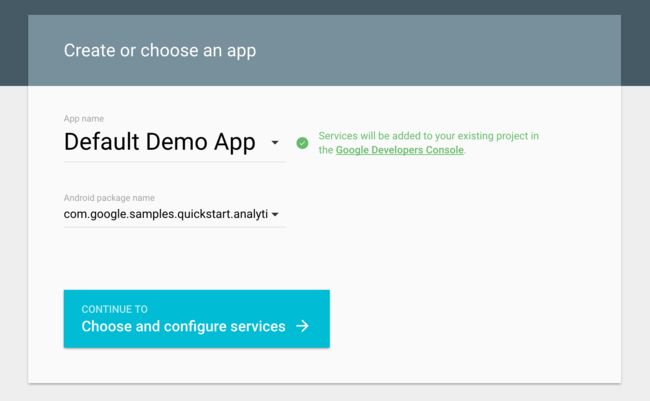
下图中的app name我们要用到创建时候的名字(MyDemo)。
配置Manifest
"http://schemas.android.com/apk/res/android"
          package="com.example.analytics">

  "android.permission.INTERNET"/>
  "android.permission.ACCESS_NETWORK_STATE"/>

  "AnalyticsApplication">
    ...
导入Google-Services.json
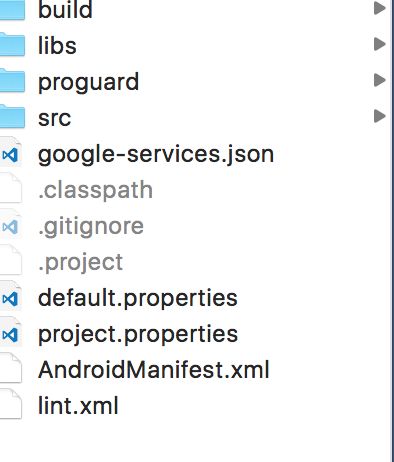
在src同级目录导入这个文件。
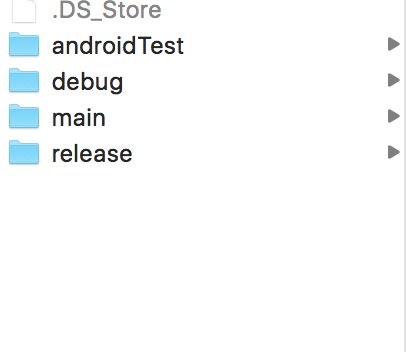
在main的同级目录创建两个文件夹,debug和release,同样导入这个文件,之所以这样,是因为google-service plugin 会用到这个路径,否则会报错。
实例化GoogleAnalytics
/*
 * Copyright Google Inc. All Rights Reserved.
 *
 * Licensed under the Apache License, Version 2.0 (the "License");
 * you may not use this file except in compliance with the License.
 * You may obtain a copy of the License at
 *
 *     http://www.apache.org/licenses/LICENSE-2.0
 *
 * Unless required by applicable law or agreed to in writing, software
 * distributed under the License is distributed on an "AS IS" BASIS,
 * WITHOUT WARRANTIES OR CONDITIONS OF ANY KIND, either express or implied.
 * See the License for the specific language governing permissions and
 * limitations under the License.
 */

package com.google.samples.quickstart.analytics;

import android.app.Application;

import com.google.android.gms.analytics.GoogleAnalytics;
import com.google.android.gms.analytics.Tracker;

/**
 * This is a subclass of {@link Application} used to provide shared objects for this app, such as
 * the {@link Tracker}.
 */
public class AnalyticsApplication extends Application {
  private Tracker mTracker;

  /**
   * Gets the default {@link Tracker} for this {@link Application}.
   * @return tracker
   */
  synchronized public Tracker getDefaultTracker() {
    if (mTracker == null) {
      GoogleAnalytics analytics = GoogleAnalytics.getInstance(this);
      // To enable debug logging use: adb shell setprop log.tag.GAv4 DEBUG
      mTracker = analytics.newTracker(R.xml.global_tracker);
    }
    return mTracker;
  }
}
触发Event事件
正常来讲,我们需要统计某些页面用户访问信息,所以需要集成这个事件,代码示例:
mTracker.send(new HitBuilders.EventBuilder()
    .setCategory("Action")
    .setAction("Share")
    .build());
好了,可以build一下试试吧!


