《ABP框架入门——第二章》简单的查询Demo
创建一个简单的CURD demo,实现对一个person的查询,后续还有增删改。
Step 1:创建实体类(dto)
把实体类写在Core项目中,因为实体是领域层的一部分(Core即为领域层)。

Step 2:执行数据迁移(code first)
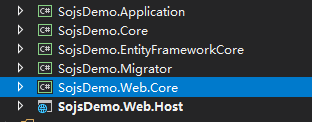
在如下目录下,

找到这个文件
![]()
在BuildModel方法中添加以下代码:
modelBuilder.Entity("SojsDemo.Demo.Person", b =>
                {
                    //自增的主键id,是entity生成的
                    b.Property("Id")
                        .ValueGeneratedOnAdd()
                        .HasAnnotation("SqlServer:ValueGenerationStrategy", SqlServerValueGenerationStrategy.IdentityColumn);

                    //姓名
                    b.Property("Name");

                    //设置id为主键
                    b.HasKey("Id");

                    //表名
                    b.ToTable("People");
                });
然后在PM中执行 ![]() ,‘PeopleInitialCreate’是文件的名字。此时会生成下面的两个文件:
,‘PeopleInitialCreate’是文件的名字。此时会生成下面的两个文件:
 ,修改第一个文件,如下:
protected override void Up(MigrationBuilder migrationBuilder)
        {
            //建表逻辑
            migrationBuilder.CreateTable(
                //表名
               name: "AbpPeople",
               //Column,字段名
               columns: table => new
               {
                   Id = table.Column(nullable: false),
                   Name = table.Column(nullable: false),
               },
               //约束,这里只有一个主键约束
               constraints: table =>
               {
                   table.PrimaryKey("PK_AppEvents", x => x.Id);
               });

        }

        protected override void Down(MigrationBuilder migrationBuilder)
        {
            //删除表的逻辑,暂时用不到
            migrationBuilder.DropTable(
                name: "AbpPeople");
        }
然后执行update-database,打开sqlserver资源管理器,找到你的数据库,可以看到已经生成了对应的表:
![]()
Step 3: Respository层(仓储层)
在如下位置创建Person的仓储接口IPersonRepository:

接下来实现接口,将写在EntityFrameworkCore项目中,这是我们的数据持久化层,代码如下:
public class PersonRepository : SojsDemoRepositoryBase, IPersonRepository
    {
        public readonly IRepository _personRepository;
        protected PersonRepository(IDbContextProvider dbContextProvider) : base(dbContextProvider)
        {
        }
        public List GetAllPerson()
        {
            return _personRepository.GetAllList();
        }
    }
这里继承了一个框架的基类,其中以及帮我们实现了一些常用的CURD方法,今后如果有通用方法,也可以写在这个类中。
关于访问级别的提醒,请把类定义为public
Step 4:Application Service层
在application项目中创建Demo文件夹,结构和内容如下:
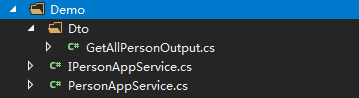
其中Dto为应用层的数据传输对象,对应为业务层的model,内容如下:
public class GetAllPersonOutput
    {
        public GetAllPersonOutput(int id, string name)
        {
            this.Id = id;
            this.Name = name;
        }
        public int Id { get; set; }
        public string Name { get; set; }
    }
然后分别是应用服务接口和实现类:
///
    /// 继承IApplicationService接口
    ///
    public interface IPersonAppService : IApplicationService
    {
        //定义一个方法
        List GetAllPerson();
    }
///
/// 实现IPersonAppService接口
///
public class PersonAppService : IPersonAppService
{
//通过构造函数注入IPersonRepository,也可通过属性注入,详情查看学习资料或官方文档
public readonly IPersonRepository _personRepository;
//实现接口中的方法
public List GetAllPerson()
{
List resultSet = new List();
List people = _personRepository.GetAllPerson();
foreac(Person item in people){
resultSet.Add(new GetAllPersonOutput(item.Id, item.Name));
}
return resultSet;
}
} 到此,Demo的后端已经完成,我们提供了一个Web API接口供前端调用获取数据,swaggerUI显示如下:

过两天我看一下vue.js基础,写一个前端调用这个api的demo。
OK总结一下:
首先创建领域层的model,并且在此定义IRepository接口。之后我们在EntityFrameworkCore中实现我们刚刚定义的IRepository接口。到此我们领域模型这里完成。然后去写应用服务层,首先定义需要的业务传输对象,与领域层的model对应(当然有特殊业务需求时是不同的),然后是应用服务接口与实现类。到此一个简单的demo完成了。
ps:关于web api,是框架自动帮我们生成的,官方文档的代码如下:
Configuration.Modules.AbpAspNetCore().CreateControllersForAppServices(typeof(MyApplicationModule).Assembly, moduleName: 'app', useConventionalHttpVerbs: true);这句代码对于在我们的demo中是:
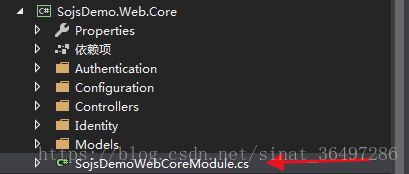 ,在这个类的预初始化方法中,如下:
public override void PreInitialize()
        {
            Configuration.DefaultNameOrConnectionString = _appConfiguration.GetConnectionString(
                SojsDemoConsts.ConnectionStringName
            );

            // Use database for language management
            Configuration.Modules.Zero().LanguageManagement.EnableDbLocalization();

            Configuration.Modules.AbpAspNetCore()
                 .CreateControllersForAppServices(
                     typeof(SojsDemoApplicationModule).GetAssembly()
                 );

            ConfigureTokenAuth();
        }
这里的注册也是由框架去完成的,感兴趣可以查看官方文档
https://aspnetboilerplate.com/Pages/Documents/Dynamic-Web-API