Android官方Toolbar自定义高度最靠谱的解决办法
相信大家在开发Android App的时候都需要用到Toolbar这个空间来实现页面导航。Android官方的Toolbar很强大,而且相信在性能和代码方面都是最好的,能够更好的与Activity相协调,包括title的显示、Menu的布局...
但是这个强大的Toolbar也有让人心痛的地方,相信各位看官也都跟我一样碰到过这样的问题,自定义Toolbar的高度,也就是改成一个比官方规定的actionBarSize小的高度之后,Toolbar最让人蛋疼的问题问题出现了,包括NavButton、Title以及Menu在内的所有子控件都不能垂直居中了,而且Title也不能调成居中布局。这就有点微妙了,貌似是Google为了让开发者统一使用自己的UI规范而特意做的限制,不对开发者开放这些接口。
这怎么办呢?默认的高度对一些看官来说有点高,而且Title布局中让很多强迫症患者不能容忍。网上有相关的解决办法,但我个人搜到的无一例外是给Toolbar添加子TextView解决Title不能居中的问题,显然这样做就没办法使用Toolbar.setTitle的方法了,而且还要额外持有一个TextView,不仅很不优雅,更重要的是像我这样的强迫症患者完全不能忍啊!在这里不得不吐槽一下Baidu等国内一些网站和一些人,Baidu搜到的一些资源链接基本上都是抄同一个作者的,而且一抹一样,错误的地方改都不改直接抄,还有一些人转载不写出处,说了那么多还是希望大家尊重一下作者分享资源的辛苦吧。
言归正传,对于这样的问题,我在stackoverflow也搜索了一番,都是跟前面说的那样,不优雅,而且没办法解决居中问题(如果大家找到了更好的办法欢迎在评论区告诉我,一起交流交流,谢谢)。那么久只能自己动手了。下面进入正题。
1、解决Title居中问题
首先查看Toolbar源码发现Title是其实是由一个mTitleTextView负责显示的,那么我们可以顺着这个点找,看能不能找到一个解决办法。mTitleTextView有一个比较特殊的地方,也是解决问题的关键。
/**
* Set the title of this toolbar.
*@paramtitleTitle to set
*/
public voidsetTitle(CharSequence title) {
  if(!TextUtils.isEmpty(title)) {
    if(mTitleTextView==null) {
      finalContext context = getContext();
      mTitleTextView=newTextView(context);
      ...
    }
    if(!isChildOrHidden(mTitleTextView)) {
      addSystemView(mTitleTextView, true);
    }
  }
  ...
  mTitleText= title;
}
查看上面的源码发现,mTitleTextView是在setTitle中初始化的,而且setTitle这个方法正是我们用来设置Title的方法,它是开放的,这就是前面说的特殊之处。那么我们可以从这里下手。
首先我们新建一个MyToolbar,并继承android.support.v7.widget.Toolbar,如下:
public class MyToolbar extends android.support.v7.widget.Toolbar {
}
然后定义一个TextView mTitleTextView字段,这里特意让其与父类的Title控件同名。由于要使用自己定义的mTitleTextView,所以跟mTitleTextView有关的代码都要复写,因为代码跟官方一样,支持稍加修改,所以不会很突兀。下面直接上代码
public class MyToolbar extends android.support.v7.widget.Toolbar {
  privateTextView mTitleTextView;
  privateCharSequence mTitleText;
  private int mTitleTextColor;
  private int mTitleTextAppearance;
  publicToolbar(Context context) {
    super(context);
    resolveAttribute(context, null,R.attr.toolbarStyle);
  }
publicToolbar(Context context,@NullableAttributeSet attrs) {
super(context,attrs);
resolveAttribute(context,attrs,R.attr.toolbarStyle);
}
publicToolbar(Context context,@NullableAttributeSet attrs, intdefStyleAttr) {
super(context,attrs,defStyleAttr);
resolveAttribute(context,attrs,defStyleAttr);
}
private voidresolveAttribute(Context context,@NullableAttributeSet attrs, intdefStyleAttr) {
// Need to use getContext() here so that we use the themed context
context = getContext();
finalTintTypedArray a = TintTypedArray.obtainStyledAttributes(context,attrs,
R.styleable.Toolbar,defStyleAttr,0);
final inttitleTextAppearance = a.getResourceId(R.styleable.Toolbar_titleTextAppearance,0);
if(titleTextAppearance !=0) {
setTitleTextAppearance(context,titleTextAppearance);
}
if(mTitleTextColor!=0) {
setTitleTextColor(mTitleTextColor);
}
a.recycle();
post(newRunnable() {
@Override
public voidrun() {
if(getLayoutParams()instanceofLayoutParams) {
Log.v(Toolbar.class,"is Toolbar.LayoutParams");
((LayoutParams) getLayoutParams()).gravity= Gravity.CENTER;
}
}
});
}
@Override
publicCharSequencegetTitle() {
returnmTitleText;
}
@Override
public voidsetTitle(CharSequence title) {
if(!TextUtils.isEmpty(title)) {
if(mTitleTextView==null) {
finalContext context = getContext();
mTitleTextView=newTextView(context);
mTitleTextView.setSingleLine();
mTitleTextView.setEllipsize(TextUtils.TruncateAt.END);
if(mTitleTextAppearance!=0) {
mTitleTextView.setTextAppearance(context,mTitleTextAppearance);
}
if(mTitleTextColor!=0) {
mTitleTextView.setTextColor(mTitleTextColor);
}
}
if(mTitleTextView.getParent() !=this) {
addCenterView(mTitleTextView);
}
}else if(mTitleTextView!=null&&mTitleTextView.getParent() ==this) {// 当title为空时,remove
removeView(mTitleTextView);
}
if(mTitleTextView!=null) {
mTitleTextView.setText(title);
}
mTitleText= title;
}
private voidaddCenterView(View v) {
finalViewGroup.LayoutParams vlp = v.getLayoutParams();
finalLayoutParams lp;
if(vlp ==null) {
lp = generateDefaultLayoutParams();
}else if(!checkLayoutParams(vlp)) {
lp = generateLayoutParams(vlp);
}else{
lp = (LayoutParams) vlp;
}
addView(v,lp);
}
@Override
publicLayoutParamsgenerateLayoutParams(AttributeSet attrs) {
LayoutParams lp =newLayoutParams(getContext(),attrs);
lp.gravity= Gravity.CENTER;
returnlp;
}
@Override
protectedLayoutParamsgenerateLayoutParams(ViewGroup.LayoutParams p) {
LayoutParams lp;
if(pinstanceofLayoutParams) {
lp =newLayoutParams((LayoutParams) p);
}else if(pinstanceofActionBar.LayoutParams) {
lp =newLayoutParams((ActionBar.LayoutParams) p);
}else if(pinstanceofMarginLayoutParams) {
lp =newLayoutParams((MarginLayoutParams) p);
}else{
lp =newLayoutParams(p);
}
lp.gravity= Gravity.CENTER;
returnlp;
}
@Override
protectedLayoutParamsgenerateDefaultLayoutParams() {
LayoutParams lp =newLayoutParams(LayoutParams.WRAP_CONTENT,LayoutParams.WRAP_CONTENT);
lp.gravity= Gravity.CENTER;
returnlp;
}
@Override
public voidsetTitleTextAppearance(Context context,@StyleResintresId) {
mTitleTextAppearance= resId;
if(mTitleTextView!=null) {
mTitleTextView.setTextAppearance(context,resId);
}
}
@Override
public voidsetTitleTextColor(@ColorIntintcolor) {
mTitleTextColor= color;
if(mTitleTextView!=null) {
mTitleTextView.setTextColor(color);
}
}
}
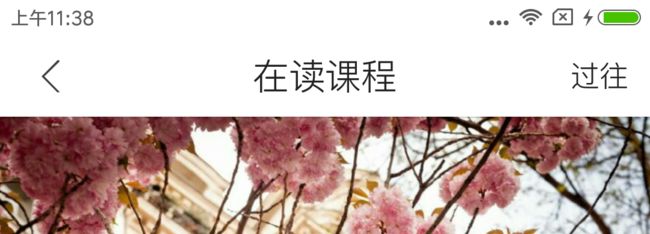
至此解决了Title居中的问题,看效果
2、解决修改高度后所有子控件垂直居中问题
这个问题就没有上面的那么简单了,因为像mNavButtonView和mMenuView这些都不像上面那样暴露在一些开放方法里面。而且与之相关的方法多是私有或者受保护不能复写的,这就蛋疼了。
到了这里就不得不祭出java的法宝了,反射!通过反射拿到对应的View,然后修改LayoutParams.gravity= Gravity.CENTER即可。当然上面的mTitleTextView也要这么处理,只是不需要用到反射而已。下面直接上代码,相信有了解过反射机制的都能看懂,不懂的可以在评论区提问,我会尽量回复大家的。
@Override
public void setNavigationIcon(@NullableDrawable icon) {
super.setNavigationIcon(icon);
setGravityCenter();
}

public void setGravityCenter() {
post(newRunnable() {
@Override
public voidrun() {
setCenter("mNavButtonView");
setCenter("mMenuView");
}

});
}
private voidsetCenter(String fieldName) {
try{
Field field = getClass().getSuperclass().getDeclaredField(fieldName);//反射得到父类Field
field.setAccessible(true);
Object obj = field.get(this);//拿到对应的Object
if(obj ==null)return;
if(objinstanceofView) {
View view = (View) obj;
ViewGroup.LayoutParams lp = view.getLayoutParams();//拿到LayoutParams
if(lpinstanceofActionBar.LayoutParams) {
ActionBar.LayoutParams params = (ActionBar.LayoutParams) lp;
params.gravity= Gravity.CENTER;//设置居中
view.setLayoutParams(lp);
}
}
}catch(NoSuchFieldException e) {
e.printStackTrace();
}catch(IllegalAccessException e) {
e.printStackTrace();
}
}
到这里就决解了上面所有问题,之所以在setNavigationIcon调用setGravityCenter方法是因为大多数用到Toolbar的都会设置NavigationIcon,当然也可以在设置Toolbar的时候主动调用setGravityCenter()方法。看效果:
好了,所有问题都解决了,希望能对大家有所帮助。欢迎大家评论在评论区交流,当然打赏一下我也是不介意的。最后再提一下,转载要写明出处,请尊重作者的劳动成果,谢谢大家支持。
原文链接:http://www.jianshu.com/p/621225a55561
著作权归作者所有,转载请联系作者获得授权,并标注“简书作者”。


