本文示例基于Laravel框架 代码参考laravel-tutorial
目录
-
tools
VirtualBox
Vagrant
Laravel-Homestead
-
development
Homestead.yaml
Laravel-Project
-
debugging
xdebug
Visual-Studio-Code
PHPStorm
tools
VirtualBox
Virtualbox is a powerful x86 and AMD64/Intel64 virtualization product for enterprise as well as home use
下载
安装
关于VirtualBox更多介绍参考VirtualBox官网
Vagrant
Vagrant: Development Environments Made Easy
下载
安装
镜像
方法1: 在线安装
vagrant box add laravel/homestead
在线安装访问Vagrant官方镜像下载地址 例如: laravel/homestead
方法2: 离线安装
离线安装压缩文件下载地址 -> 解压
# 在解压后的目录中
vagrant box add metadata.json
vagrant box list # 打印"laravel/homestead (virtualbox, 3.0.0)"
laravel/homestead镜像包含的软件有
Ubuntu 16.04
Git
PHP 7.1
Nginx
MySQL
MariaDB
Sqlite3
Postgres
Composer
Node (With Yarn, Bower, Grunt, and Gulp)
Redis
Memcached
Beanstalkd
Mailhog
ngrok
互动: Vagrant和Docker的使用场景和区别?
Laravel Homestead
Laravel Homestead is an official, pre-packaged Vagrant box that provides you a wonderful development environment without requiring you to install PHP, a web server, and any other server software on your local machine
- 下载
git clone https://git.coding.net/summerblue/homestead.git ~/Homestead
熟练掌握Laravel后推荐使用Laravel Homestead官方仓库
- 初始化
cd ~/Homestead

git checkout v5.4.0

bash init.sh
关于Laravel Homestead更多介绍参考Laravel官网
development
Homestead.yaml
mkdir -p ~/Workspace/laravel-tutorial

vim ~/Homestead/Homestead.yaml
# 省略了未修改代码
folders:
    - map: ~/Workspace/laravel-tutorial
      to: /home/vagrant/Code

sites:
    - map: laravel.test
      to: /home/vagrant/Code/Laravel/public

databases:
    - homestead
# 省略了未修改代码
注意这里设置的域名以"test"结尾 这是因为Chrome浏览器会将'".dev"".app"域名从HTTP自动转到"HTTPS" 更多参考Chrome 于 V63 版本起会将 .dev 域名强制转换为 HTTPS
vagrant up
如果虚拟机已经运行 则使用该命令更新配置
vagrant reload --provision
Laravel Project
vagrant ssh
cd ~/Code

composer create-project laravel/laravel Laravel
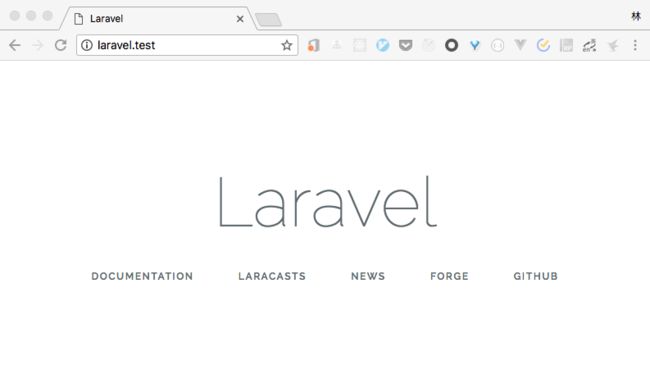
- 浏览器打开http://laravel.test
记住修改hosts: "192.168.10.10 laravel.test"
debugging
xdebug
vagrant ssh
xon # 打开xdebug
netstat -rn | grep "^0.0.0.0 " | cut -d " " -f10
10.0.2.2
php --ini | grep 'xdebug'
/etc/php/7.1/cli/conf.d/20-xdebug.ini,
sudo vim /etc/php/7.1/cli/conf.d/20-xdebug.ini
zend_extension=xdebug.so
xdebug.remote_enable = 1
#xdebug.remote_connect_back = 1
#xdebug.remote_port = 9000
#xdebug.max_nesting_level = 512
xdebug.remote_autostart=1
xdebug.remote_host=10.0.2.2
sudo service php7.1-fpm restart
Visual Studio Code
插件PHP Debug
修改launch.json
{
    // 使用 IntelliSense 了解相关属性。
    // 悬停以查看现有属性的描述。
    // 欲了解更多信息,请访问: https://go.microsoft.com/fwlink/?linkid=830387
    "version": "0.2.0",
    "configurations": [
        {
            "name": "Listen for XDebug",
            "type": "php",
            "request": "launch",
            "port": 9000
        },
        {
            "name": "Launch currently open script",
            "type": "php",
            "request": "launch",
            "program": "${file}",
            "cwd": "${fileDirname}",
            "port": 9000
        },
        {
            "name": "Listen for XDebug on Homestead",
            "type": "php",
            "request": "launch",
            "pathMappings": {
                "/home/vagrant/Code/Laravel": "/Users/yuanlin/Workspace/laravel-tutorial/Laravel"
            },
            "port": 9000
        }
    ]
}
- 启动调试
Listen for XDebug on Homestead
- 断点调试
打开文件: ~/Workspace/laravel-tutorial/Laravel/routes/web.php
添加断点: 在这一行"return view('welcome');"
浏览器打开http://laravel.test -> 即进入断点
PHPStorm
- 首先配置Preferences -> Languages & Frameworks -> PHP
点击红色按钮 添加Remote PHP到CLI Interpreter
点击添加按钮 选择From Docker, Vagrant, VM, Remote...
然后 在Vagrant Instance Folder中选择本地Homestead文件夹路径
最后 一路点击OK或保存按钮即可 效果如下
- 接着配置Preferences -> Languages & Frameworks -> PHP -> Servers
点击添加按钮 依次填写Name, Host, 同时勾选Use path mappings并配置Project files
其中 File/Directory是本地Laravel项目的路径 Absolute path on the server是该Laravel项目在虚拟机中的路径
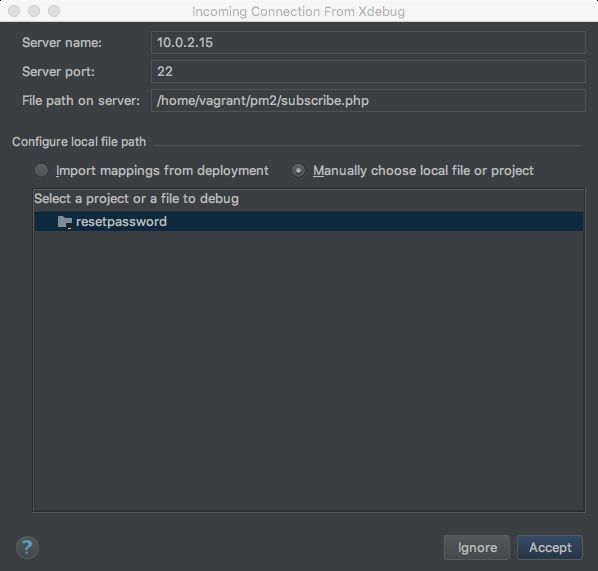
- 最后配置Run -> Start Listening for PHP Debug Connections
选择要调试的项目 点击Accept即可开启调试
参考
开发环境搭建 - MacOS
Chrome 于 V63 版本起会将 .dev 域名强制转换为 HTTPS
Debugging: Configure Xdebug + Laravel Homestead + VS Code + PHPUnit
Debugging Laravel Homestead Applications with PHPStorm


