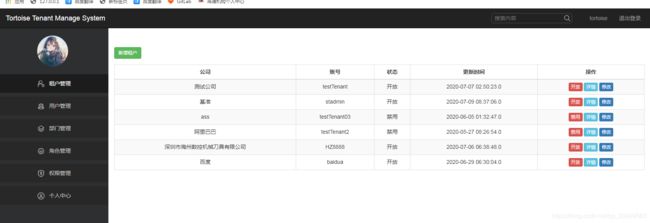
多租户认证tortoise-tenant-service服务的使用
(一)多租户系统设计四要素关系图
(二)多租户系统串接流程
(三)docker部署tortoise-tenant-service服务与tortoise-tenant-web客户端环境
docker下载: docker pull lqliuqiang/tortoise-tenant-service:1.3.1
1.数据库文件: 在 https://github.com/LQliuqiang/docker-tortoise-tenant-service 对应版本目录下下载 tortoise-tenant.sql文件
2.容器加载卷:在 https://github.com/LQliuqiang/docker-tortoise-tenant-service 对应版本目录下下载
3.启动命令: docker run --name tortoiseTenantService -p 8088:8088 -v /opt/tortoise-tenant-service/config:/opt/tortoise-tenant-service/config -v /opt/tortoise-tenant-service/tortoiseFile:/opt/tortoiseFile -d tortoise-tenant-service:1.3.1
4.部署tortoise-tenant-web多租户服务的客户端
1) 在 https://github.com/LQliuqiang/docker-tortoise-tenant-service 对应版本目录下下载tortoise-tenant-web目录并放入到/opt目录下
2) 修改/opt/tortoise-tenant-web/html/dist/static/js目录下的app.a38f168f3463abedb30a.js文件中的 “http://10.124.132.49:8088/tortoise” 地址为自己部署的tortoise-tenant-service服务的地址
3) 下载nginx镜像
4) 启动 tortoise-tenant-web 客户端
docker run --name tortoiseTenantWeb -p 8083:80 -v /opt/tortoise-tenant-web/html:/usr/share/nginx/html -v /opt/tortoise-tenant-web/nginx.conf:/etc/nginx/nginx.conf:ro -v /opt/tortoise-tenant-web/conf.d:/etc/nginx/conf.d -d nginx
5.访问地址:http://tortoise-tenant-web服务地址:8083(默认管理员用户名与密码:tortoise)
(四)application.yml配置文件加密参数解释
三种加密模式注意项(xxx-des-mode):IvParameterSpec模式与SecureRandom模式不限制secret-token-key与secret-password-key值的长度,python模式限制secret-token-key与secret-password-key值的长度只能为8位
auth-args:
  secret-token-key: auth2090 #DES token验证令牌加密公钥
  secret-password-key: authTenant2090 #DES 密码验证令牌加密公钥
  token-invalid-time: 4200 #token验证过期时间(单位:秒)
  split-symbol: Symbol #(注:固定值,不可变)
  token-des-mode: python #token加密模式
  pwd-des-mode: SecureRandom #密码加密模式
  file-path: /opt/tortoiseFile #文件存储地址 (注:固定值,不可变)
(五)客户端用户登录API接口调用
请求地址:/tortoise/user/auth
请求方式:POST
请求参数类型:json对象
请求参数:
| 参数 |
参数描叙 |
限制 |
| username |
用户名 |
6~16位 |
| password |
密码 |
8~20位 |
返回结果:
***数据不变值字段:permissionTag与permissionType
| permissionTags |
该用户所拥有所有权限标记的字符串集合 |
||||||||||||||||||||||||||||||
| permissionTypes |
该用户所拥有所有权限类型的字符串集合 |
||||||||||||||||||||||||||||||
| tokenValue |
Token值 |
||||||||||||||||||||||||||||||
| object |
该用户详细信息
|
(六)后端服务集成使用(依赖springboot-dagger-x)
    com.github.LQliuqiang
    springboot-dagger-x
    1.4.RELEASE
在springboot的application启动文件的目录下同级包下编写一个Main.java文件,内容如下
public class Main {

    public static void main(String[] args) throws Exception {
        //指定自己项目mysql的链接地址
        JdbcConfigEntity jdbcConfigEntity = new JdbcConfigEntity.Builder("root", "123456", "spring_dagger")
                .url("10.124.132.49",3306)
                .build();
        //实例化SpringBootCli
        SpringBootCli springBootCli = new SpringBootCli.Builder(Main.class, jdbcConfigEntity).build();
        //项目集成tortoise-tenant-service服务
        springBootCli.useTortoise(true);
    }

}
后端服务集成后需要在后端服务的application.yml配置文件中添加如下配置
auth-args:
  secret-token-key: auth2090 #要与tortoise-tenant-service服务下配置文件中secret-token-key值一致
  split-symbol: Symbol #要与tortoise-tenant-service服务下配置文件中split-symbol值一致
  decrypt-mode: python #token的加密模式,要与tortoise-tenant-service服务下配置文件中token-des-mode值一致
  exclude-url-paths: /test2,/test3 #配置过滤不拦截的接口地址
后端服务接口权限拦截的使用(权限添加与配置在tortoise-tenant-web租户管理前端中添加与赋值)
import com.lq.tortoise.present.RequiredPermission;
import org.springframework.web.bind.annotation.GetMapping;
import org.springframework.web.bind.annotation.RestController;

@RestController
public class TestController {

    @GetMapping("/test")
    //配置拦截的接口所需要的权限,此权限值在多租户认证系统中已添加注册
    @RequiredPermission("BIG_DATA_DESIGN")
    public String test()
    {
        return "call test";
    }

    @GetMapping("/test2")
    public String test2()
    {
        return "call test2";
    }

}注:项目发布打包发布时,可以将springboot-dagger-x依赖给注释掉


