Android自定义密码输入框
Android自定义密码输入框
项目地址
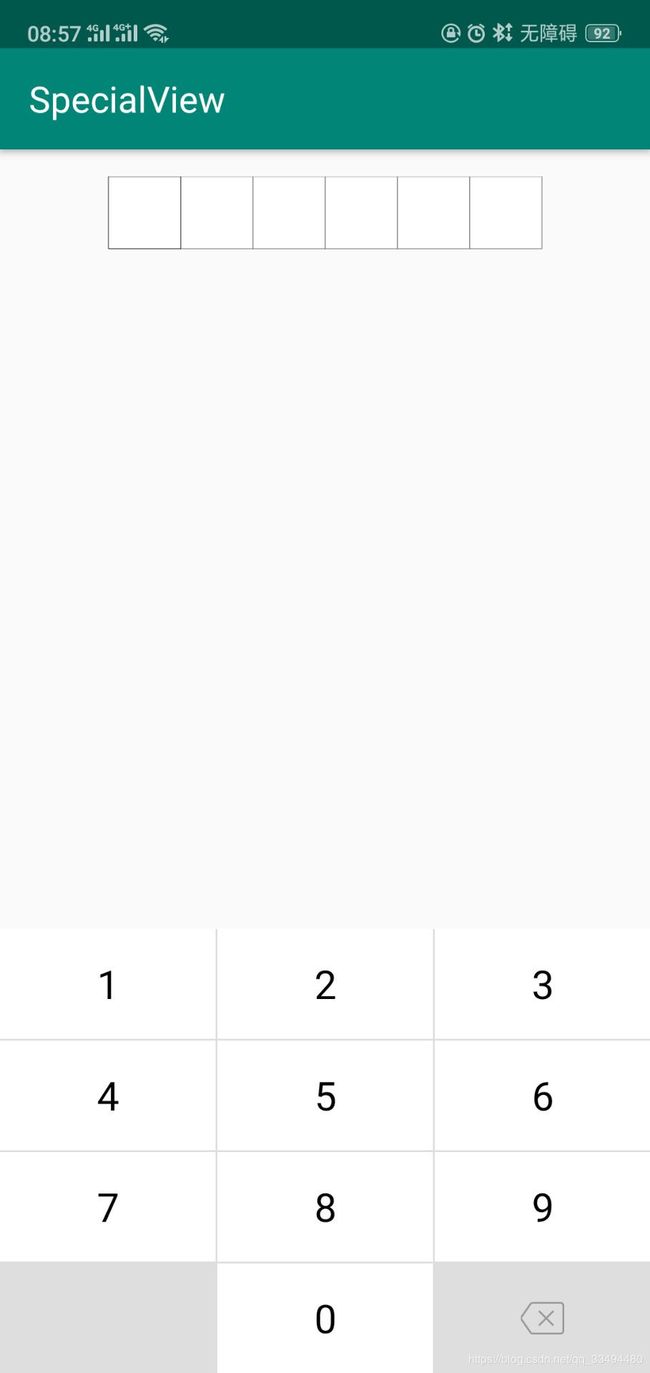
项目需要用到密码框输入,并且使用自定义的键盘,但是密码框需要区分输入完成、待输入、未输入颜色百度一番没有结果就自己自定义一个了
自定义键盘 (我做的比较简单就不累赘了)
我这里使用的是简单的键盘 需要看源码点击这里
自定义输入框View
1.控件属性定义,自己根据需求罗列一下感觉需要的属性如下
| 属性名称 | 作用 |
|---|---|
| textColor | 文字颜色默认黑色 |
| textSize | 文文字尺寸默认 22 |
| count | 输入框个数默认6 |
| width | 输入框宽度默认40dp |
| height | 输入框高度默认40dp |
| lineColor | 默认状态的边框颜色 默认黑色 |
| fillColor | 默认状态的填充颜色 默认白色 |
| lineWidth | 默认状态的边框宽度 默认1dp |
| focusLColor | 默认状态的边框颜色 默认黑色 |
| focusFillColor | 默认状态的填充颜色 默认白色 |
| focusLineWidth | 默认状态的边框宽度 默认1dp |
| employLColor | 默认状态的边框颜色 默认黑色 |
| employFillColor | 默认状态的填充颜色 默认白色 |
| employLineWidth | 默认状态的边框宽度 默认1dp |
| isContinuous | 输入框是否连续(方便以后其他需要就添加了)默认true 连续 |
| borderRadius | 文输入框边角半径 默认0dp |
| conceal | 是否隐藏文字 默认false 不隐藏 |
| replaceString | 文字隐藏替换字符 默认没有 |
| replaceDrawable | 文字隐藏替换图片(优先级高于replaceString) 默认没有 |
| circleRadius | 默认替换图案半径(圆形) 默认为width的三分之一 |
| circleColor | 默认替换图案颜色 默认与textColor 一致 |
| isContinuousRepeatChar | 是否过滤连续重复的字符 默认false 不过滤 |
| isContinuousChar | 是否过滤连续的字符 默认false 不过滤 |
| isInvokingKeyboard | 是否使用系统键盘 默认为true 如果为false的换需要自己手动调起键盘 |
根据自己的需求并考虑到我们后期的扩展性定义了如上属性,属性定义这个也比较简单就不过多的描述:
2.初始化
首先我们要获取属性
通过:TypedArray typedArray =
context.obtainStyledAttributes(attrs, R.styleable.BorderPWEditText);获取到typedArray 对象,使用typedArray对象我们将会获取到用户设置的属性并可以指定属性默认值
初始化画笔
private void initPaint() {
//文字画笔
paintText = new Paint(Paint.ANTI_ALIAS_FLAG);
paintText.setTextAlign(Paint.Align.CENTER);
paintText.setAntiAlias(true);
paintText.setTextSize(mTextSize);
paintText.setColor(mTextColor);
    //边框画笔
    borderPaint = new Paint(Paint.ANTI_ALIAS_FLAG);
    borderPaint.setStrokeWidth(mLineWidth);
    borderPaint.setColor(mLineColor);
    borderPaint.setAntiAlias(true);
    borderPaint.setStyle(Paint.Style.STROKE);

    //填充画笔
    fillPaint = new Paint(Paint.ANTI_ALIAS_FLAG);
    fillPaint.setColor(mFillColor);
    fillPaint.setAntiAlias(true);
    fillPaint.setStyle(Paint.Style.FILL);

}
目前定义了三只画笔,可能有人说你不是有默认边框填充,待输入边框填充,未输入边框填充类型吗?但是我们梳理一下你你会发现 默认、待输入、未输入情况下画笔的颜色和宽度不同,起始就只有填充和边框画笔类型所以我们就少定义一些变量,我们方法修改画笔属性并返回如下:我们只用传当前的状态
    private Paint getBorderPaint(InputStatus status) {
        if (InputStatus.No_Input == status) {
            borderPaint.setStrokeWidth(mLineWidth);
            borderPaint.setColor(mLineColor);
        } else if (InputStatus.To_Input == status) {
            borderPaint.setStrokeWidth(mFocusLineWidth);
            borderPaint.setColor(mFocusLineColor);
        } else if (InputStatus.Have_Input == status) {
            borderPaint.setStrokeWidth(mEmployLineWidth);
            borderPaint.setColor(mEmployLineColor);
        }
        return borderPaint;
    }

    private Paint getFillPaint(InputStatus status) {
        if (InputStatus.No_Input == status) {
            fillPaint.setColor(mFillColor);
        } else if (InputStatus.To_Input == status) {
            fillPaint.setColor(mFocusFillColor);
        } else if (InputStatus.Have_Input == status) {
            fillPaint.setColor(mEmployFillColor);
        }

        return fillPaint;
    }
我们话默认替换图案的画笔呢,我们这个画笔不一定适用,因为用户可能定义替换文字我们就直接适用文字画笔了,如果用户使用替换图案我们话图适不使用画笔的,只有绘制默认替换图适需要,所以我们这个画笔在需要时再去延迟创建
根据属性值初始化部分配置
还有什么属性需要设置呢?我当时也是不请求根据自己控件需要动态添加的,但是如果我们继承EditText的话就需要注意了在初始完需要调用setBackgroundColor(Color.TRANSPARENT);进行处理,如果不处理你就能看到你绘制的控件上覆盖着一条线,通过Xml布局设置 background会引发其问题具体原因还没有深究。可能我们还需要使用setFilters属性设置部分拦截比如长度,重复处理等。我们在做其他自定义控件是就可以在这里处理一个默认配置
开始测量,我们没有指定测量的方式,这个根据自己定义控件的特性自行修改onMeasure完成测量
我们需要指定控件的绘制起始位置我们需要重新onSizeChanged方法这个方法在控件尺寸改变是会调用我们设置如下:
 @Override
    protected void onSizeChanged(int w, int h, int oldw, int oldh) {
        super.onSizeChanged(w, h, oldw, oldh);
        if (isContinuous) {
            startX = (w - count * mWidth) / 2;
        } else {
            startX = (w - count * mWidth - (count - 1) * intervalWidth) / 2;
        }
    }
绘制:接下来就是绘制的我们需要重新onDraw方法,看一下我们这里很清晰因为我把操作方法都封装了
 @Override
    protected void onDraw(Canvas canvas) {
        //绘制边框
        drawPeripheryBorder(canvas, position);
        if (isConceal) {
            //绘制替换符
            drawConceal(canvas);
        } else {
            //绘制文字
            drawText(canvas);
        }
    }
看看我们的具体实现:
先看drawPeripheryBorder()
 /**
     * 背景框绘制
     *
     * @param canvas
     * @param position
     */
    private void drawPeripheryBorder(Canvas canvas, int position) {

		循环所有的边框
        for (int i = 0; i < count; i++) {
        计算当前位置边框的左上角与右下角的坐标点
            float left = startX + i * mWidth;
            float top = 0;
            float right = left + mWidth;
            float bottom = mHeight;
            if (!isContinuous) {
                left = left + i * intervalWidth;
                right = left + mWidth;
            }

            if (i < position) {
			//输入过的位置
                if (i == 0) {
                    PeripheryBorder(canvas, left, top, right, bottom, 1, InputStatus.Have_Input);
                } else if (i == count - 1) {
                    PeripheryBorder(canvas, left, top, right, bottom, 2, InputStatus.Have_Input);
                } else {
                    PeripheryBorder(canvas, left, top, right, bottom, 3, InputStatus.Have_Input);
                }

            } else if (i > position) {
			//未输入的边框
                if (i == 0) {
                    PeripheryBorder(canvas, left, top, right, bottom, 1, InputStatus.No_Input);
                } else if (i == count - 1) {
                    PeripheryBorder(canvas, left, top, right, bottom, 2, InputStatus.No_Input);
                } else {
                    PeripheryBorder(canvas, left, top, right, bottom, 3, InputStatus.No_Input);
                }


            }
        }

        //结束时绘制选中框避免别覆盖
        if (position < count) {

            float left = startX + position * mWidth;
            float top = 0;
            float right = left + mWidth;
            float bottom = mHeight;
            if (!isContinuous) {
                left = left + position * intervalWidth;
                right = left + mWidth;
            }

            if (position == 0) {
                PeripheryBorder(canvas, left, top, right, bottom, 1, InputStatus.To_Input);
            } else if (position == count - 1) {
                PeripheryBorder(canvas, left, top, right, bottom, 2, InputStatus.To_Input);
            } else {
                PeripheryBorder(canvas, left - mFocusLineWidth / 2, top, right + mFocusLineWidth / 2, bottom, 3, InputStatus.To_Input);
            }
        }
    }

看到吗这里吗处理不同绘制的流程具体绘制还有方法
 /**
     * 绘制背景
     *
     * @param canvas       画布
     * @param left         左边坐标
     * @param top          头坐标
     * @param right        右坐标
     * @param bottom       下坐标
     * @param locationType 1.左边,2.右边 3.中间
     * @param status       表示当前位置
     */
    public void PeripheryBorder(Canvas canvas, float left, float top, float right, float bottom, int locationType, InputStatus status) {

        int lineWidth = status == InputStatus.No_Input ? mLineWidth : (status == InputStatus.Have_Input ? mEmployLineWidth : mFocusLineWidth);
        if (locationType == 1) {
//绘制最左边(因为我们有圆角,因为连续的时候只有最左边与最右边有圆角)
            Path FillPathRoundRect = new Path();
            FillPathRoundRect.addRoundRect(
                    new RectF(left, top + lineWidth, right, bottom - lineWidth),
                    (isContinuous ? getLeftRadius() : getAllRadius()), //看到这句了吗,他是判断当前边框是绘制的圆角位置
                    Path.Direction.CCW
            );
            canvas.drawPath(FillPathRoundRect, getFillPaint(status));

            Path borderPathRoundRect = new Path();
            borderPathRoundRect.addRoundRect(
                    new RectF(left, top + lineWidth / 2, right, bottom - lineWidth / 2),
                    isContinuous ? getLeftRadius() : getAllRadius(),
                    Path.Direction.CCW
            );
            canvas.drawPath(borderPathRoundRect, getBorderPaint(status));


        } else if (locationType == 2) {
//绘制最右边边框
            Path FillPathRoundRect = new Path();
            FillPathRoundRect.addRoundRect(
                    new RectF(left, top + lineWidth, right, bottom - lineWidth),
                    isContinuous ? getRightRadius() : getAllRadius(),//看到这句了吗,他是判断当前边框是绘制的圆角位置
                    Path.Direction.CCW
            );
            canvas.drawPath(FillPathRoundRect, getFillPaint(status));

            Path borderPathRoundRect = new Path();
            borderPathRoundRect.addRoundRect(
                    new RectF(left, top + lineWidth / 2, right, bottom - lineWidth / 2),
                    isContinuous ? getRightRadius() : getAllRadius(),
                    Path.Direction.CCW
            );
            canvas.drawPath(borderPathRoundRect, getBorderPaint(status));


        } else if (locationType == 3) {

//绘制中间边框
            if (isContinuous) {
                canvas.drawRect(
                        new RectF(left, top + lineWidth, right, bottom - lineWidth), getFillPaint(status)
                );
                canvas.drawRect(new RectF(left, top + lineWidth / 2, right, bottom - lineWidth / 2), getBorderPaint(status));

            } else {

                Path FillPathRoundRect = new Path();
                FillPathRoundRect.addRoundRect(
                        new RectF(left, top + lineWidth, right, bottom - lineWidth),
                        getAllRadius(),
                        Path.Direction.CCW
                );
                canvas.drawPath(FillPathRoundRect, getFillPaint(status));

                Path borderPathRoundRect = new Path();
                borderPathRoundRect.addRoundRect(
                        new RectF(left, top + lineWidth / 2, right, bottom - lineWidth / 2),
                        getAllRadius(),
                        Path.Direction.CCW
                );
                canvas.drawPath(borderPathRoundRect, getBorderPaint(status));
            }
        }
    }
接着我们看drawText()文字绘制方法:简单的文本绘制
 /**
     * 绘制文字
     */
    private void drawText(Canvas canvas) {
        char[] chars = getText().toString().toCharArray();

        for (int i = 0, n = chars.length; i < n; i++) {
            //绘制输入状态
            Paint.FontMetrics fontMetrics = paintText.getFontMetrics();
            int baseLineY = (int) (mWidth / 2 - fontMetrics.top / 2 - fontMetrics.bottom / 2);
            canvas.drawText(
                    String.valueOf(chars[i]),
                    (startX + i * mWidth + mWidth / 2 + (isContinuous ? 0 : i * intervalWidth)),
                    baseLineY,
                    paintText
            );

        }

    }
drawConceal(canvas)方法:这个方法也很简单就是判断逻辑具体的操作有是方法,具体代码我就不贴了需要看源码点击这里
/**
     * 绘制隐藏图标
     *
     * @param canvas
     */
    public void drawConceal(Canvas canvas) {

        if (mReplaceDrawable != null) {
            drawDrawableConceal(canvas); //绘制用户指定的遮盖图标
        } else if (!TextUtils.isEmpty(mReplaceString)) {
            drawReplaceText(canvas); //绘制用户设置的遮盖字符
        } else {
            drawCircle(canvas); //设置默认的遮盖图案
        }

    }
到此我们的自定控件的代码基本完成,起始自定义控件难点就在测量绘制这里,当我们解决了测量绘制的问题基本上自定义view就大功告成了,后续可能需要添加部分设置啊,回调啊进行更友好的交互比如我们这个控件就添加了setmInputOverListener属性用于监听用户输入完成回调
自定义密码输入框的使用
添加依赖
1.在项目根build.gradle中添加如下代码
allprojects {
repositories {
…
maven { url “https://jitpack.io” }
}
}
2. 在使用的Module中添加如下引用
dependencies {
…
implementation ‘com.github.rupertoL:SpecialView:1.2’
…
}
3.布局Xml中使用:
根据前面的属性说明自行添加相应属性实现效果
4.监听输入
 BorderPWEditText.setmInputOverListener(object : BorderPWEditText.InputOverListener {
            override fun InputOver(string: String?) {
                Toast.makeText(baseContext, "当前接收的数据为:${string}", Toast.LENGTH_LONG).show()
            }

            override fun InputHint(string: String?) {
                Toast.makeText(baseContext, string, Toast.LENGTH_LONG).show()
            }

        })
当然我们还可以使用最简单的方式,就是什么也不配置