安卓自定义原户型加载进度条的实现
最近开发公司新产品,设计师设计了一个加载进度的圆弧型界面,觉得挺不错的,先发出效果图来让大家看看
先上完成效果:
从这两张图上,我们可以大致总结出几个ui要点:
1:两层进度条,围成一个大的圆弧,并且这两层进度条的格子长度不一致,上边的每个格子都有渐变的效果,并且边角是圆形的。
2:外层进度条单个角度的颜色,只要显示了,是一直不变的,这跟以往的一些外层进度条不停地旋转,是不一样的。
3:计算好内部文字的大小,方位,防止溢出到两层进度条上。
首先我们明确一点,这个界面可以通过自定义view来实现,具体需要在onDraw()方法里进行界面的绘制。
确定了大体的思路,现在我们开始考虑如何编写这个效果。
先考虑外层的两个进度条,我们知道绘制圆弧的话,主要是有两种方法,分别是:
Path对象的addArc()和Canvas的drawArc();
这里讲解一下这两个方法
Path.addArc()作用是从指定的角度,以顺时针的方式绘制一段扇形 第一个参数是圆形的外接矩形的RectF对象,第二个参数是起始角度,第三个参数是圆弧顺时针转动的角度
部分测试代码如下:
RectF rectF = new RectF(0, 0, mWidth, mHeight);
Paint paint = new Paint();
paint.setColor(getContext().getResources().getColor(R.color.ready_to_connect_color_01));
Path path = new Path();
path.addArc(rectF, 30, 60);
canvas.drawPath(path, paint);
我们再看下Canvas的drawArc()这个方法 前三个参数与addArc一致,但第四个参数表示是否把圆心绘制进去,我们选择true的话,就是一个连接圆心的扇形,否则跟上图是一致的,第五个参数是颜色paint对象
部分测试代码如下:
        RectF rectF = new RectF(0, 0, mWidth, mHeight);
        Paint paint = new Paint();
        paint.setColor(getContext().getResources().getColor(R.color.ready_to_connect_color_01));
        canvas.drawArc(rectF, 30, 60, true, paint);
这里,两种方法都可以,大家可以任选一种
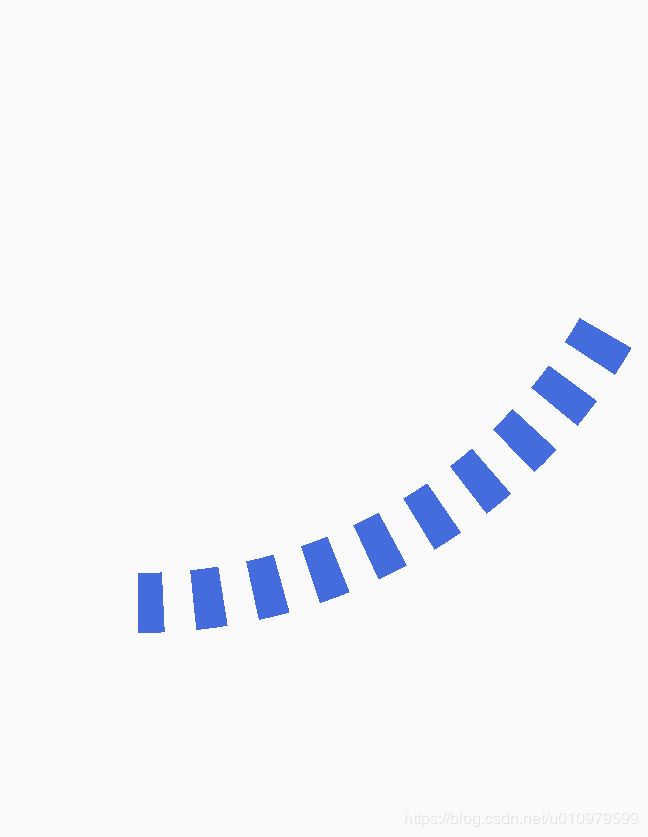
考虑了这个,接下来我们来处理外部进度条的样式,这里我们使用的是DashPathEffect 这个类,它的作用是绘制一段实,虚相隔的线段,具体不赘述,有兴趣的童鞋可以自行百度.我们可以为Paint对象设置这个类对象,这样,绘制出来的图形,就是绕园的一圈间隔的图形了
部分测试代码如下:
        RectF rectF = new RectF(0, 0, mWidth, mHeight);
        Paint paint = new Paint();
        paint.setColor(getContext().getResources().getColor(R.color.ready_to_connect_color_01));

        DashPathEffect dashPathEffect = new DashPathEffect(new float[]{30, 30}, 0);
        paint.setPathEffect(dashPathEffect);
        paint.setStrokeWidth(60);
        paint.setStyle(Paint.Style.STROKE);
        Path path = new Path();
        path.addArc(rectF, 30, 60);
        canvas.drawPath(path, paint);
那这样的话,基本效果就出来了,但是大家如果仔细看的话,最左边的那个蓝色块宽度要比其他的短一截,因为DashPathEffect这个方法的两个参数定死了蓝条框和白条框的宽度,所以在角度定死的情况下,就会出现单个蓝色框短小的问题,那怎么办呢?
很简单,只要计算出当前弧度的长度,在分割出自己想要的数目就可以了。
部分代码如下:
PathMeasure pathMeasure = new PathMeasure(total, false);
float length = pathMeasure.getLength();
float step = length / totalIndex;
DashPathEffect dashPathEffect = new DashPathEffect(new float[]{step / 2, step / 2}, 0);
这样就解决了那个问题,接下来考虑怎么进行颜色渐变
我这里用到了 Shader意为着色器,使用梯度渲染器 SweepGradient就可以解决这个问题,它第一,第二个参数是中心点坐标,第三个数组是颜色的值,第四个是相对位置的颜色数组。你可以使用 ArgbEvaluator这个类,来对颜色进行细分,达到更为精致的效果
接下来就是角度选择,这个简单 我们知道安卓里面有个矩阵类Matrix,矩阵类有例如平移 缩放等变换功能,这里我们使用旋转变换就可以了,绘制完毕扇形后,直接旋转一个初始角度就可以了
外部圆形绘制完毕,接下来内圈圆和文字就都很简单了,我就直接上代码了。
View的代码
public class CheckDeviceView extends View {
    private static final String TAG = CheckDeviceView.class.getSimpleName();
    // 主画笔
    private Paint mPaint;
    // 起始角度 终点角度
    private float startAngle = 0, endAngle = 0;
    // 起始,终点,间隔角度
    private float sweepAngle = 0;
    // 矩阵
    private Matrix mMatrix;
    // 着色器
    private Shader mShader;
    // 开始,结束的渐变色
    private int startColro,endColor;
    // 渐变色数组
    private int[] colorListDatas;
    // 当前view的宽高
    private int mWidth = 0, mHeight = 0;
    // 内部竖条指示器的宽度
    private int innerIndictorWeight;
    // 外部竖条指示器的宽度
    private int outerIndictorWeight;
    // 是否启用延时加载器阀值
    private boolean enableUserTap;
    // 是否处于延时加载器模式
    private boolean hasEnterIndictorMode;
    // 延时加载器进退值
    private boolean hasFordWard;
    // 总的指示器数目
    private int totalIndex = 0;
    // 第多少竖条指示器开始展示阀值
    private int tapIndex = 0;
    // 判断数据是否已经加载完毕
    private boolean valueHasLoadFinish;
    // 内部竖条指示器到外部竖条指示器的距离
    private float innerArcToOuter;
    // 圆角矩形的x偏移值, y偏移值
    private float roundRectXRadius,roundRectYRadius;
    // 圆角矩形的x,y的偏移半径
    private float botoomXYRadius;
    // 当前的比率
    private int currentRate = 1;
    // 单个旋转角度的值
    private float singleRotateDegree;
    // 中心文字的字符串
    private String titleText;
    // 进度条变化时间,
    private long normalVariation,peculiarVariation;

    public CheckDeviceView(Context context, AttributeSet attrs, int defStyleAttr) {
        super(context, attrs, defStyleAttr);
        // 计算偏斜角度
        TypedArray typedArray = context.obtainStyledAttributes(attrs, R.styleable.CheckDeviceView);
        // 起始,终止角度默认为180 270,用户可以自己设置
        startAngle = typedArray.getFloat(R.styleable.CheckDeviceView_startAngle, 180);
        endAngle = typedArray.getFloat(R.styleable.CheckDeviceView_endAngle, 270);
        titleText = typedArray.getString(R.styleable.CheckDeviceView_titleText);
        enableUserTap = typedArray.getBoolean(R.styleable.CheckDeviceView_enableUserTap, false);
        totalIndex = typedArray.getInt(R.styleable.CheckDeviceView_totalIndex, 0);
        tapIndex = typedArray.getInt(R.styleable.CheckDeviceView_tapIndex, 0);
        startColro = typedArray.getInt(R.styleable.CheckDeviceView_startColor, 0);
        endColor = typedArray.getInt(R.styleable.CheckDeviceView_endColor, 0);
        typedArray.recycle();

        if(totalIndex < tapIndex){
            totalIndex = tapIndex;
        }
        if(endAngle < startAngle){
            endAngle = startAngle + 90;
        }
        // 进度条自增长时间,你可以自己设置想要的时间
        peculiarVariation = 100;
        normalVariation = 2000;
        sweepAngle = endAngle - startAngle;
        singleRotateDegree = (endAngle - startAngle) / totalIndex / 2;
    }

    public CheckDeviceView(Context context, AttributeSet attrs) {
        this(context, attrs, 0);
    }

    public CheckDeviceView(Context context) {
        this(context, null);

    }
    public void drawCanvas(Canvas canvas, float centerX, float cneterY, float r){
        RectF rect = new RectF(centerX - r, cneterY - r, centerX + r, cneterY + r);
        Path total = new Path();
        total.addArc(rect, startAngle, endAngle - startAngle);

        PathMeasure pathMeasure = new PathMeasure(total, false);
        float length = pathMeasure.getLength();
        float step = length / totalIndex;
        DashPathEffect dashPathEffect = new DashPathEffect(new float[]{step / 2, step / 2}, 0);
        mPaint.setPathEffect(dashPathEffect);
        mPaint.setStrokeWidth(outerIndictorWeight);

        colorEvaluteList(startColro, endColor, 6);
        mShader = new SweepGradient(mWidth/2-1, mHeight/2-1, colorListDatas, null);
        mPaint.setShader(mShader);
        mPaint.setStyle(Paint.Style.STROKE);
        canvas.drawColor(Color.WHITE);
        mMatrix.setRotate(startAngle,mWidth/2-1, mHeight/2-1);
        mShader.setLocalMatrix(mMatrix);

        //画圆
        Paint normalPaint = new Paint();
        normalPaint.setColor(getResources().getColor(R.color.roundColor_svprogresshuddefault));
        normalPaint.setPathEffect(dashPathEffect);
        normalPaint.setStrokeWidth(outerIndictorWeight);
        normalPaint.setStyle(Paint.Style.STROKE);
        float currentDegree = 0;
        if(!hasEnterIndictorMode){
            if(singleRotateDegree * currentRate < sweepAngle){
                currentRate += 2;
            }else {
                currentRate = 1;
            }
        }else {
            currentRate = hasFordWard == true ? currentRate + 2 : currentRate - 2;
            hasFordWard = !hasFordWard;
        }

        currentDegree =  singleRotateDegree * currentRate;
        int currentValue = (tapIndex - 1) * 2 + 1;
        if(currentValue == currentRate){
            hasEnterIndictorMode = true;
        }
        if(enableUserTap && !valueHasLoadFinish && hasEnterIndictorMode){
            // 延时加载效果
            new android.os.Handler().postDelayed(new Runnable() {
                @Override
                public void run() {
                    invalidate();
                }
            },peculiarVariation);
        }else {
            // 正常效果
            new android.os.Handler().postDelayed(new Runnable() {
                @Override
                public void run() {
                    invalidate();
                }
            },normalVariation);
        }
        canvas.drawArc(rect, startAngle, sweepAngle, false,normalPaint);
        canvas.drawArc(rect, startAngle, currentDegree, false, mPaint);

        // 绘制内圈圆
        Paint innerPaint = new Paint();
        innerPaint.setColor(getResources().getColor(R.color.roundColor_svprogresshuddefault));
        DashPathEffect innerDash = new DashPathEffect(new float[]{step / 2 / 3, step / 2 / 3 * 5}, 0);
        innerPaint.setPathEffect(innerDash);
        innerPaint.setStrokeWidth(innerIndictorWeight);
        innerPaint.setStyle(Paint.Style.STROKE);
        //计算内切圆的外部正方形1
        float outerInnerCircleRadius = r - outerIndictorWeight / 2;
        float innerRectFHalfWidth = (float) outerInnerCircleRadius - innerArcToOuter;
        RectF innerRectF = new RectF(centerX - innerRectFHalfWidth , cneterY - innerRectFHalfWidth, centerX + innerRectFHalfWidth, cneterY + innerRectFHalfWidth);
        canvas.drawArc(innerRectF, startAngle, sweepAngle, false,innerPaint);

        // 绘制文字
        // 上部文字
        Paint textTopPaint = new Paint();
        textTopPaint.setTextAlign(Paint.Align.CENTER);
        textTopPaint.setTypeface(Typeface.MONOSPACE );
        // 单位为px
        textTopPaint.setTextSize(DpPxUtil.sp2px(getContext(), 30));
        textTopPaint.setStrokeWidth(30);
        canvas.drawText(titleText,centerX,cneterY, textTopPaint);
        textTopPaint.setStrokeWidth(1);
        // 下部文字
        textTopPaint.setTextSize(DpPxUtil.sp2px(getContext(), 16));
        textTopPaint.setTypeface(Typeface.DEFAULT  );
        canvas.drawText("体检车况",centerX,cneterY + innerRectFHalfWidth / 3, textTopPaint);
        // 最后绘制圆角矩形
        roundRectXRadius = r / 7;
        roundRectYRadius = r / 36;
        botoomXYRadius = DpPxUtil.dip2px(getContext(), 5f);
        RectF bottomRectF = new RectF(centerX - roundRectXRadius, cneterY + r - roundRectYRadius - outerIndictorWeight, centerX + roundRectXRadius, cneterY + r + roundRectYRadius - outerIndictorWeight);
        Paint paintBottomRect = new Paint();
        paintBottomRect.setStrokeWidth(5);
        paintBottomRect.setColor(getContext().getResources().getColor(R.color.pre_text_color_03));
        canvas.drawRoundRect(bottomRectF, botoomXYRadius, botoomXYRadius, paintBottomRect);
    }
    @Override
    protected void onDraw(Canvas canvas) {
        setFocusable(true);
        mPaint = new Paint(Paint.ANTI_ALIAS_FLAG);
        mMatrix = new Matrix();
        //设置获取焦点是否在触摸模式下
        setFocusableInTouchMode(true);


        Paint paint = mPaint;
        outerIndictorWeight = (mHeight / 4) / 2;
        innerIndictorWeight = outerIndictorWeight / 8;
        innerArcToOuter = outerIndictorWeight / 4;
        drawCanvas(canvas,mWidth/2-1, mHeight/2-1,mHeight/2 - 1 - outerIndictorWeight / 2);
    }

    @Override
    protected void onMeasure(int widthMeasureSpec, int heightMeasureSpec) {
        super.onMeasure(widthMeasureSpec, heightMeasureSpec);
        int widthSpecMode = MeasureSpec.getMode(widthMeasureSpec);
        int heightSpecMode = MeasureSpec.getMode(heightMeasureSpec);
        int widthSpecSize = MeasureSpec.getSize(widthMeasureSpec);
        int heightSpecSize = MeasureSpec.getSize(heightMeasureSpec);
        if (widthSpecMode==MeasureSpec.EXACTLY||heightSpecMode == MeasureSpec.EXACTLY){
            mWidth = widthSpecSize;//这里的值为实际的值的3倍
            mHeight =heightSpecSize;

        }else{
            float defaultSize = TypedValue.applyDimension(TypedValue.COMPLEX_UNIT_DIP,200,getContext().getResources().getDisplayMetrics());
            mHeight = (int) defaultSize;
            mWidth = (int) defaultSize;
        }
        if(mWidth 0){
            return ;
        }
        List integers = new ArrayList<>();
        if(colorDistance < 0 || colorDistance > 10){
            colorDistance = 6;
        }
        integers.add(startColor);
        for(int i=1;i
style文件:
使用方式:
如果大家有什么疑问的话,欢迎在下面提出来,很可惜的是,外圈的进度条渐变,圆角效果没有能够实现,如果有朋友知道的话,也请不吝赐教。
//ps
外层圆圆角的问题已经找到解决办法,设置ComposePathEffect 它可以把两个PathEffect组合起来这时我们设置CornerPathEffect 与 DashPathEffect ,再paint.setPathEffect(composePathEffect )就可以了


