RecyclerView双列表联动效果开发细节
目录
1.简介
2.静态联动效果实现
3.动态联动效果实现
4.无侵入式粘性Header

1.简介
双列表联动,一般由左右两个列表组成,在这个例子中,左侧列表显示分类,右侧列表显示每个分类的具体项,在每一组具体项的顶部由一个header进行区分。
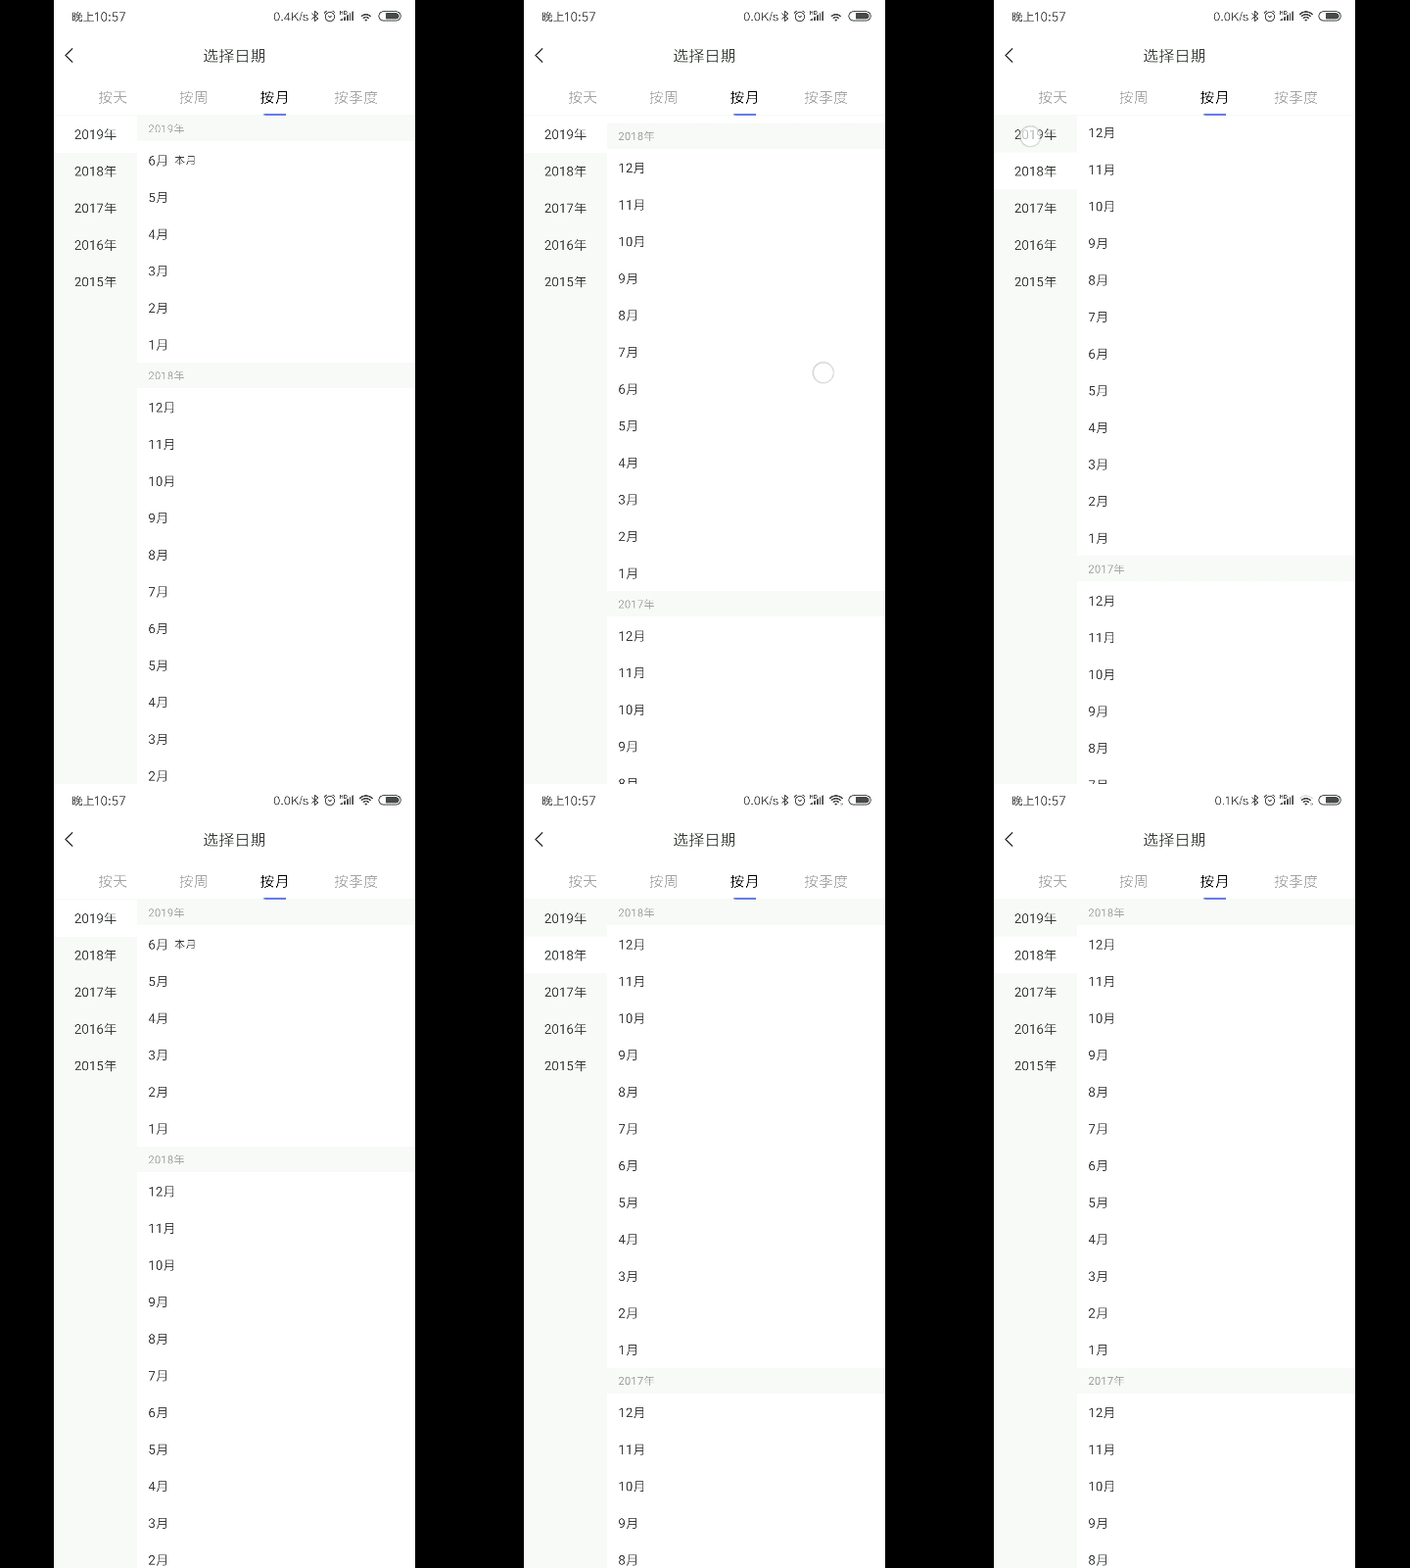
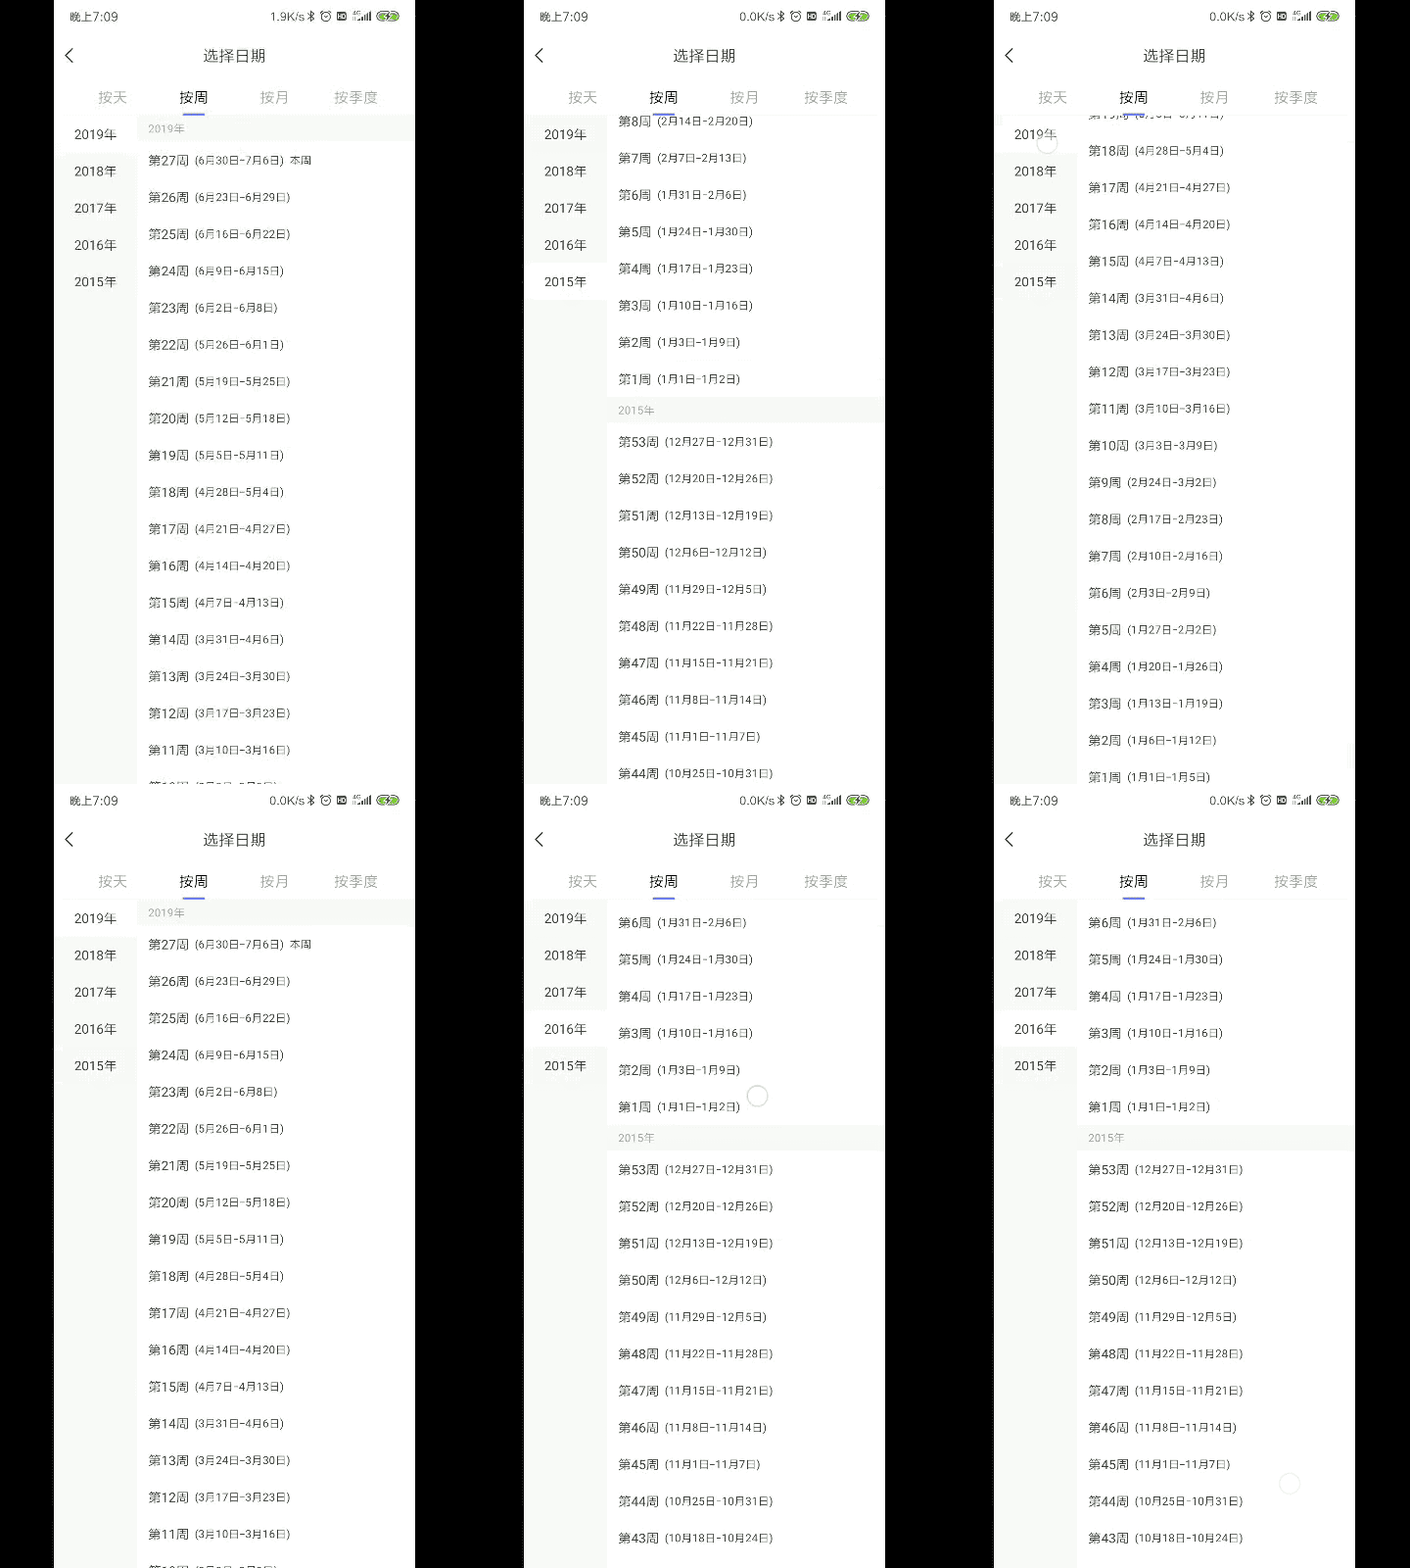
点击左侧列表某一个分类时,右侧列表滚动到对应分类的首个header位置。滑动右侧列表显示下一个或上一个分类的数据时,左侧对应的分类选中状态自动变化。
最后会介绍RecyclerView通过ItemDecoration实现无侵入式的header吸顶效果。
2.静态联动效果实现
这里会把联动效果分为两部分来实现,第一部分先实现静态的联动,这里指的静态联动意思是当点击左侧的分类时右侧直接跳到对应分类的第一个item位置,跳转过程无滑动效果。静态联动效果的实现相对来说需要考虑的状态更少,专注于通用滑动逻辑的抽离,在完成第一步后再改造成动态联动效果即可。
联动列表的关键点:
两个列表中的每一个item都需要绑定对方列表中的关键item位置
假设现在有ABCD四个分类,对于左侧的分类列表来说,A item需要绑定右侧列表中对应A分类的首个item,它的作用是当用户点击左侧A分类的时候,可以拿到右侧列表中需要跳转的对应位置,右侧列表直接跳转到这个绑定的位置即可。
同样假设ABCD四个分类,对于右侧的列表来说,当用户向下滑动列表使B分类的数据到达屏幕可显示的第一个位置时,可以获取到第一个item绑定的左侧分类位置,左侧列表使该位置的item直接出现选中效果即可。
定义联动列表的通用bean,里面只有一个属性bindPosition,代表绑定另一个列表跳转的位置。
public class BaseBindPositionBean {

    public int bindPosition; //绑定另一个列表自动跳转位置
}
定义大分类列表BaseTitleAdapter和数据列表BaseValueAdapter,这里定义的Adapter使用了BaseRecyclerViewAdapterHelper库,专注于业务逻辑的编写,不了解的可以到github看看该库。
BaseTitleAdapter定义了一个abstract方法updateSelectedPos(),实现类只要在此位置做item的高亮实现即可。
再看BaseValueAdapter,里面好像什么内容都没有,是的它就是什么内容都没有,定义这个类是为了后面联动工具类中可以使用这个类型做强制转换处理一些通用逻辑。
public abstract class BaseTitleAdapter<T extends BaseBindPositionBean, K extends BaseViewHolder> extends BaseQuickAdapter<T, K> {

    public BaseTitleAdapter(int layoutResId, @Nullable List<T> data) {
        super(layoutResId, data);
    }

    /**
     * 子类实现该方法做高亮逻辑处理
     * 点击title列表某一个item时会进入该回调
     * 当value列表滑动时会进入该回调方法
     * 需要注意recyclerView onScroll方法滑动时会一直触发,所以在方法内部需要判断pos是否与当前高亮pos相同,相同则不做处理,优化性能
     * @param pos 被选中高亮的item位置
     */
    public abstract void updateSelectedPos(int pos);
}
public abstract class BaseValueAdapter<T extends BaseBindPositionBean, K extends BaseViewHolder> extends BaseQuickAdapter<T, K> {

    public BaseValueAdapter(@Nullable List<T> data) {
        super(data);
    }
}
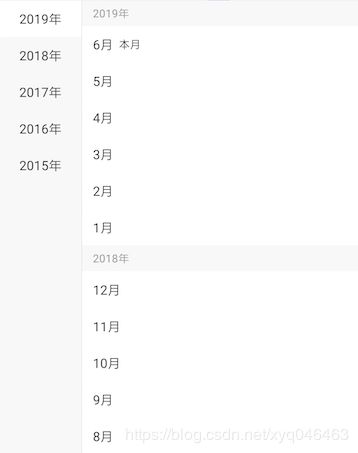
下面是两个列表的bean实现类以及adapter实现类,这里拿年份月份两个列表来做示例,实现效果如下图。

title列表的bean实现以及adapter实现,代码非常简单给选中的item加个背景色即可,数据也只有一个年份。Adapter继承了BaseTitleAdapter并实现了updateSelectedPos方法,在方法内做了item高亮选中的处理。
//bean
public class YearTitleBean extends BaseBindPositionBean {
    public String year;
}
//adapter
public class YearTitleAdapter extends BaseTitleAdapter<YearTitleBean, BaseViewHolder> {

    private String selectedYear;

    public YearTitleAdapter(List<YearTitleBean> data) {
        super(R.layout.year_item, data);
        if (data != null && data.size() > 0) {
            selectedYear = data.get(0).year;
        }
    }

    @Override
    protected void convert(BaseViewHolder helper, YearTitleBean item) {
        String text = item.year + "年";
        helper.setText(R.id.year_text, text);
        if (item.year.equals(selectedYear)) {
            //设置选中
            helper.setBackgroundColor(R.id.year_text, mContext.getResources().getColor(android.R.color.white));
        } else {
            helper.setBackgroundColor(R.id.year_text, mContext.getResources().getColor(android.R.color.transparent));
        }
    }

    public void updateSelectedPos(int pos) {
        YearTitleBean item = getItem(pos);
        if (item != null && !item.year.equals(selectedYear)) {
            selectedYear = item.year;
            notifyDataSetChanged();
        }
    }
}
接下来实现value列表的bean以及adapter。可以看到value列表的子view类型分两种,一种是显示年份的header,一种是显示月份的view,所以定义bean的时候拆了一个HeaderValueBean出来存储bean的类型和年份。对应的拆出了一个HeaderValueAdapter用于处理头部数据显示。
//带有头部的通用HeaderValueBean
public class HeaderValueBean extends BaseBindPositionBean {
    public static final int HEADER_TYPE = 0;
    public static final int ITEM_TYPE = 1;

    public int type; //item类型
    public String year; //头部显示年份
}
//value列表的月份bean
public class MonthDataBeanV3 extends HeaderValueBean {
    public String month;

    //子view类型的构造方法
    public MonthDataBeanV3() {
        this.type = ITEM_TYPE;
    }

    //header类型的构造方法
    public MonthDataBeanV3(String year) {
        this.type = HEADER_TYPE;
        this.year = year;
    }
}
//ValueAdapter基类,处理header的数据
public abstract class HeaderValueAdapter<T extends HeaderValueBean, K extends BaseViewHolder>
        extends BaseValueAdapter<T, K> {

    public HeaderValueAdapter(@Nullable List<T> data) {
        super(data);
        setMultiTypeDelegate(new MultiTypeDelegate<T>() {
            @Override
            protected int getItemType(T entity) {
                //根据你的实体类来判断布局类型
                return entity.type;
            }
        });
        getMultiTypeDelegate()
                .registerItemType(T.HEADER_TYPE, R.layout.value_header_view)
                .registerItemType(T.ITEM_TYPE, R.layout.value_item_view);
    }

    @Override
    protected void convert(K helper, T item) {
        if (item.type == T.HEADER_TYPE) {
            helper.setText(R.id.header_text, item.year + "年");
        }
    }
}
//ValueAdapter,处理子view的数据显示
public class ValueAdapter extends HeaderValueAdapter<MonthDataBeanV3, BaseViewHolder> {

        ValueAdapter(@Nullable List<MonthDataBeanV3> data) {
            super(data);
        }

        @Override
        protected void convert(BaseViewHolder helper, MonthDataBeanV3 item) {
            super.convert(helper, item);
            if (item.type == HeaderValueBean.ITEM_TYPE) {
                helper.setText(R.id.primary_text, item.month + "月");
                if (helper.getAdapterPosition() == 1) {
                    helper.setText(R.id.current_tips, "本月");
                    helper.setVisible(R.id.current_tips, true);
                } else {
                    helper.setGone(R.id.current_tips, false);
                }
            }
        }
    }
bean和adapter都准备好了,接下来要注意的是数据的生成,不要忘了两个列表的bean基类都是BaseBindPositionBean,里面有一个字段是需要绑定对方列表item位置的。
下面是我们准备的一份简单json数据,从2019年6月到2018年1月的倒序数据,里面只有年份和月份。
生成数据时分别传入title列表和value列表的list,把原始数据转换成两个列表的数据,并且为各个bean分别绑定对方列表对应item的位置。
[{"year":2019,"month":6},{"year":2019,"month":5},{"year":2019,"month":4},{"year":2019,"month":3},{"year":2019,"month":2},{"year":2019,"month":12},{"year":2018,"month":11},{"year":2018,"month":10},{"year":2018,"month":9},{"year":2018,"month":8},{"year":2018,"month":7},{"year":2018,"month":6},{"year":2018,"month":5},{"year":2018,"month":4},{"year":2018,"month":3},{"year":2018,"month":2},{"year":2018,"month":1}]
private void generateData(List<YearTitleBean> titleBeans, List<MonthDataBeanV3> valueBeans) {
    //生成month原始数据
    List<MonthDataBeanV3> sourceData = getJsonData();
    //生成month title 和 value 数据
    String currentGenerateYear = "";
    for (int i = 0; i < sourceData.size(); i++) {
        MonthDataBeanV3 valueDate = sourceData.get(i);
        if (!valueDate.year.equals(currentGenerateYear)) {
            currentGenerateYear = valueDate.year;

            //生成titleBean
            YearTitleBean baseTitleBean = new YearTitleBean();
            baseTitleBean.year = currentGenerateYear;
            //titleBean绑定value列表对应item的position
            baseTitleBean.bindPosition = valueBeans.size();
            titleBeans.add(baseTitleBean);

            //生成valueBean头部
            MonthDataBeanV3 seasonHeader = new MonthDataBeanV3(currentGenerateYear);
            //valueBean绑定title列表对应item的position
            seasonHeader.bindPosition = titleBeans.size() - 1;
            valueBeans.add(seasonHeader);
        }
        //valueBean绑定title列表对应item的position
        valueDate.bindPosition = titleBeans.size() - 1;
        valueBeans.add(valueDate);
    }
}
数据准备妥当,两个列表经过上面的逻辑已经可以分别显示出数据来了。
接下绑定两个列表的联合滚动:
-
给Title列表的item绑定点击事件,当点击Title列表的item时item高亮选中,右侧列表跟随跳转到到指定分类的第一个item位置。在RecyclerView中直接跳转的方法有scrollTo、scrollBy和scrollToPosition,scrollToPosition这个方法最适合处理直接跳转到指定item,但这个方法跳转的时候非常懒,它对RecyclerView的位移距离一定会尽可能的少,只要item出现在屏幕中就不会再做任何移动。这是什么意思呢?
我们可以把这个跳转分成三种情况来看:
1. item在屏幕可视范围的上方 : 调用scrollToPosition方法后使RecyclerView进行尽可能少的移动,使item显示在屏幕中。所以item会显示在屏幕可视范围的 第一个位置
2. item在屏幕可视范围的下方 : 同理调用scrollToPosition方法进行尽可能少的移动。最后item显示在屏幕可视范围的 最后一个位置
3. item已经在屏幕的可视范围内 : scrollToPosition懒到不想做任何事情,调用完以后item还是在 原来的位置为了使跳转的位置始终保持在屏幕顶部显示的第一个位置上,翻看了scrollToPosition的源码,发现它内部调用的其实是LayoutManager.scrollToPosition方法,而在LinearLayoutManager实现类里面发现有一个scrollToPositionWithOffset方法,该方法接受一个offset参数,它可以控制你想要跳转的item跳转后与顶部的距离。方法源码如下,只要拿到RecyclerView的LayoutManager强转为LinearLayoutManager直接调用scrollToPositionWithOffset方法并传入0作为offset即可跳转item并置于列表顶部。
/** * If you are just trying to make a position visible, use {@link #scrollToPosition(int)}. * * @param position Index (starting at 0) of the reference item. * @param offset The distance (in pixels) between the start edge of the item view and * start edge of the RecyclerView. */ public void scrollToPositionWithOffset(int position, int offset) { mPendingScrollPosition = position; mPendingScrollPositionOffset = offset; if (mPendingSavedState != null) { mPendingSavedState.invalidateAnchor(); } requestLayout(); } -
Value列表设置ScrollListener滚动监听,当Value列表进行滚动时,获取列表中第一个可见的item,从item中拿到绑定Title列表的对应position,直接调用TitleAdapter实现的abstract方法updateSelectedPos传入position设置高亮。
ps:这里遇到一个坑,从RecyclerView获取第一个可见item最初使用的是RecyclerView.getChildLayoutPosition(mRecyclerView.getChildAt(0)),但发现这种使用方式经常出现不准确的情况,在某些滑动情况下RecyclerView预加载了一页内容,导致拿到的第一个item并不是屏幕中显示的第一个item,后续验证了RecyclerView.getChildCount()也会出现类似的不准确现象,在使用的时候尽量避开这两个api。获取第一个可见item从RecyclerView拿到LayoutManager强转为LinearLayoutManager调用findFirstVisibleItemPosition()方法可以拿到准确的首个可见位置。
列表联动的绑定方法代码如下:
/**
 * Created by kejie.yuan
 * Date: 2019/3/20
 * Description: 联动列表工具类
 */
public class LinkageScrollUtil {

    public static void bindStaticLinkageScroll(RecyclerView titleRv, final RecyclerView valueRv) {
        //初始化联合滚动效果
        final BaseTitleAdapter titleAdapter = (BaseTitleAdapter) titleRv.getAdapter();
        titleAdapter.setOnItemClickListener(new BaseQuickAdapter.OnItemClickListener() {
            @Override
            public void onItemClick(BaseQuickAdapter adapter, View view, int position) {
                BaseBindPositionBean item = (BaseBindPositionBean) titleAdapter.getItem(position);
                if (item != null) {
                    ((LinearLayoutManager) valueRv.getLayoutManager()).scrollToPositionWithOffset(item.bindPosition, 0);
                    titleAdapter.updateSelectedPos(position);
                }
            }
        });
        final BaseValueAdapter valueAdapter = (BaseValueAdapter) valueRv.getAdapter();
        valueRv.addOnScrollListener(new RecyclerView.OnScrollListener() {
            @Override
            public void onScrolled(RecyclerView recyclerView, int dx, int dy) {
                //获取右侧列表的第一个可见Item的position
                int topPosition = ((LinearLayoutManager) valueRv.getLayoutManager()).findFirstVisibleItemPosition();
                // 如果此项对应的是左边的大类的index
                BaseBindPositionBean item = (BaseBindPositionBean) valueAdapter.getItem(topPosition);
                if (item != null) {
                    int bindPos = item.bindPosition;
                    titleAdapter.updateSelectedPos(bindPos);
                }
            }
        });
    }
}
//通过工具类绑定联合滚动
LinkageScrollUtil.bindLinkageScroll(titleList, valueList);
3.动态联动效果实现
经过上面的步骤,静态联动效果已经实现了,但是实际上手使用效果着实一般,因为点击时界面是忽然跳动的,如果value列表中的item内容很相似的话,会给人一种界面没有任何变化的错觉,所以接下来是优化联动效果使它的跳转变成滚动到达目标位置。
在改写成动态联动效果前,当然是参考一下网上现有的实现方案,发现网上大部分公开的实现方法效果都并不完善。很多方法都是使用smoothScrollToPosition()配合scrollBy()进行最多两次滑动达到目标item渐渐滑动到顶部的效果,为什么要两个API配合使用呢?在静态联动效果的介绍中说过scrollToPosition()方法,这个很多方法都是使用smoothScrollToPosition()跟scrollToPosition()是一样懒的,所以需要区分三种情况进行配合使用才能达到item贴顶的效果。
这种方案的缺点:
- Item贴顶的代码逻辑比较复杂,需要两个api配合使用才能达到效果。
- 直接调用smoothScrollToPosition(),列表的滑动速度太快,并没有流畅平滑的滑动。
- 如果目标Item的位置距离非常远,使用smoothScrollToPosition()方法需要滑动好几秒的时间才能出现在屏幕上。
改进第一第二个缺点,我们可以从RecyclerView的smoothScrollToPosition()方法入手,通过源码可以看到内部是调用了LinearLayoutManager的smoothScrollToPosition()方法,而在方法内部初始化了一个LinearSmoothScroller处理滑动动画。LinearSmoothScroller的内部属性定义了它的滑动速度以及目标Item滑动后Snap的位置。所以重写LayoutManager内部的Scroller,不但可以控制滑动速度达到缓慢平滑的滑动,还可以控制滑动后Item的黏贴位置。
这里简单介绍一下Item滑动后黏贴位置的常量,分别有三种:
SNAP_TO_START滑动后Item直接黏贴到顶部 (完美解决第一个问题)SNAP_TO_END滑动后Item黏贴到底部SNAP_TO_ANY默认值,即静态联动中介绍过的尽量懒的滑动处理方式
重写的LinearLayoutManager代码如下:
public class LinearLayoutManagerWithScrollTop extends LinearLayoutManager {

    public LinearLayoutManagerWithScrollTop(Context context) {
        super(context);
    }

    public LinearLayoutManagerWithScrollTop(Context context, int orientation, boolean reverseLayout) {
        super(context, orientation, reverseLayout);
    }

    public LinearLayoutManagerWithScrollTop(Context context, AttributeSet attrs, int defStyleAttr, int defStyleRes) {
        super(context, attrs, defStyleAttr, defStyleRes);
    }

    @Override
    public void smoothScrollToPosition(RecyclerView recyclerView, RecyclerView.State state, int position) {
        TopSnappedSmoothScroller topSnappedSmoothScroller = new TopSnappedSmoothScroller(recyclerView.getContext());
        topSnappedSmoothScroller.setTargetPosition(position);
        startSmoothScroll(topSnappedSmoothScroller);
    }

    class TopSnappedSmoothScroller extends LinearSmoothScroller {

        public TopSnappedSmoothScroller(Context context) {
            super(context);
        }

        @Nullable
        @Override
        public PointF computeScrollVectorForPosition(int targetPosition) {
            return LinearLayoutManagerWithScrollTop.this.computeScrollVectorForPosition(targetPosition);
        }

        /**
         * MILLISECONDS_PER_INCH 默认为25,即移动每英寸需要花费25ms,如果你要速度变慢一点,把数值调大,注意这里的单位是f
         */
        protected float calculateSpeedPerPixel(DisplayMetrics displayMetrics) {
            return 50f / displayMetrics.densityDpi;
        }


        @Override
        protected int getVerticalSnapPreference() {
            return SNAP_TO_START;
        }
    }
}
重写了自定义的LinearLayoutManager后,设置给ValueList使用。
RecyclerView.LayoutManager layoutManager = new LinearLayoutManagerWithScrollTop(context, LinearLayoutManager.VERTICAL, false);
valueList.setLayoutManager(layoutManager);
至此,第一第二个问题完美解决,修改LinkageScrollUtil绑定两个列表的联合滚动逻辑,即可从跳转到达变成滑动到达。
最后为了解决第三个问题,定义了一套较为统一的交互情景,固定目标Item滑动到屏幕顶部的 最长时间。
在介绍交互前先定义一个概念: 一屏的距离
假设现在有40个item,在屏幕上显示的item为16-25,刚好10个。以屏幕显示的首个item(16)为目标位置,向上相隔一屏距离的item为6,向下相隔一屏距离的item为26。市面上不同的机型可能一屏能放下的item不同,假如小屏手机能放下8个item,当前显示item为16-23,同理向上相隔一屏的item为8,向下相隔一屏为24。
为了统一最长滑动时间,如果滑动目标距离屏幕第一个显示位置超过一屏的距离,那么滑动效果就是从一屏距离开始,到屏幕第一个显示位置结束。
根据以上定义,把滑动情景分成3种:
- 目标item在屏幕可视区域上方并且相隔超过一屏距离。
- 目标item在屏幕可视区域下方并且相隔超过一屏距离。
- 目标item已经在屏幕可视区域内,或距离屏幕第一个位置不超过一屏距离。
对于情景3,直接调用smoothScrollToPosition(item)方法,item就会平滑滑动到屏幕第一个位置。
对于情景1、2,使用scrollToPosition()把目标item放置到屏幕首位相隔一屏的距离,然后转为情景3进入平滑滑动。
交互情景定义完,基本的处理逻辑就出来了。剩余一些细枝末节的处理,下面列一下。
- 使用ValueList的ViewTreeObserver来衔接情景3->1和情景3->2的逻辑,需要两个中间变量记录是否需要跳转后进行滑动,滑动的目标item position。
- 滑动过程中会不停回调recycler的onScrolled方法,在前面静态效果的实现中说过,这里回调会更新TitleList的选中item,为了优化滑动时TitleList一个一个跳动选中状态的问题,这里会记录一个中间变量表示是否在平滑滑动的过程中。
- 在平滑滑动的时候用户突然按住屏幕或者拖拽屏幕,平滑滑动需要立刻停止下来,更新左侧TitleList的选中,重置各种中间变量。
- 列表平滑滑动效果结束后,重置各种中间变量。
动态联动效果LinkageScrollUtil代码如下:
/**
 * Created by kejie.yuan
 * Date: 2019/3/20
 * Description: 联动列表工具类
 */
public class LinkageScrollUtil {

    public static void bindLinkageScroll(RecyclerView titleRv, final RecyclerView valueRv) {
        // 初始化联合滚动效果
        final SmoothPos smoothPos = new SmoothPos();

        final BaseTitleAdapter titleAdapter = (BaseTitleAdapter) titleRv.getAdapter();
        final BaseValueAdapter valueAdapter = (BaseValueAdapter) valueRv.getAdapter();

        // 向上滚动时先显示targetItem相隔一屏的位置,再缓动上去,向下同理
        titleAdapter.setOnItemClickListener(new BaseQuickAdapter.OnItemClickListener() {
            @Override
            public void onItemClick(BaseQuickAdapter adapter, View view, int position) {
                BaseBindPositionBean item = (BaseBindPositionBean) titleAdapter.getItem(position);
                if (item != null) {
                    // 点击时立刻取消上一次滑动并重置状态
                    stopScrollIfNeed(valueRv, smoothPos);
                    smoothPos.mScrolling = true;
                    smoothMoveToPosition(valueRv, item.bindPosition, smoothPos);
                    // 直接指定title列表选中item
                    titleAdapter.updateSelectedPos(position);
                }
            }
        });
        // valueRv滚动状态时需要实时获取第一个显示的item相应更新titleRv的选中
        valueRv.addOnScrollListener(new RecyclerView.OnScrollListener() {
            @Override
            public void onScrollStateChanged(RecyclerView recyclerView, int newState) {
                super.onScrollStateChanged(recyclerView, newState);
                if (RecyclerView.SCROLL_STATE_DRAGGING == newState
                        && smoothPos.mScrolling) {
                    // 缓动状态中突然触摸拖拽需要更新titleRv选中item
                    updateSelectPos(valueRv, valueAdapter, titleAdapter, false);
                }
                if (RecyclerView.SCROLL_STATE_IDLE == newState ||
                        RecyclerView.SCROLL_STATE_DRAGGING == newState) {
                    // 缓动过程中手指突然触摸拖拽或rv进入idle状态,需要立刻取消滑动并重置状态
                    stopScrollIfNeed(valueRv, smoothPos);
                }
            }

            @Override
            public void onScrolled(RecyclerView recyclerView, int dx, int dy) {
                updateSelectPos(valueRv, valueAdapter, titleAdapter, smoothPos.mScrolling);
            }
        });
        // scrollToPositionWithOffset时会进入globalLayout回调,判断状态进入二次缓动
        valueRv.getViewTreeObserver().addOnGlobalLayoutListener(new ViewTreeObserver.OnGlobalLayoutListener() {
            @Override
            public void onGlobalLayout() {
                if (smoothPos.mShouldScroll) {
                    smoothPos.mShouldScroll = false;
                    smoothMoveToPosition(valueRv, smoothPos.mToPosition, smoothPos);
                }
            }
        });
    }

    /**
     * 滑动到指定位置
     */
    private static void smoothMoveToPosition(RecyclerView mRecyclerView, final int position, final SmoothPos smoothPos) {
        // 第一个可见位置
        int firstItem = ((LinearLayoutManager) mRecyclerView.getLayoutManager()).findFirstVisibleItemPosition();
        // 最后一个可见位置
        int lastItem = ((LinearLayoutManager) mRecyclerView.getLayoutManager()).findLastVisibleItemPosition();
        int offsetCount = lastItem - firstItem;
        if (position < firstItem && position + offsetCount < firstItem) {
            // 第一种可能:跳转位置在第一个可见位置之前且相隔超过一屏,使用scrollToPositionWithOffset
            int targetPos = position + offsetCount > firstItem ? firstItem : position + offsetCount;
            // 直接跳
            ((LinearLayoutManager) mRecyclerView.getLayoutManager()).scrollToPositionWithOffset(targetPos, 0);
            smoothPos.mToPosition = position;
            smoothPos.mShouldScroll = true;
        } else if (position > lastItem && position - offsetCount > lastItem) {
            // 第二种可能:跳转位置在最后可见项之后且相隔超过一屏,则先调用scrollToPositionWithOffset指定到目标位置相隔一屏的位置
            // 再通过OnGlobalLayoutListener控制再次调用smoothMoveToPosition,执行smoothScrollToPosition方法
            int targetPos = position - offsetCount < lastItem ? lastItem : position - offsetCount;
            // 直接跳
            ((LinearLayoutManager) mRecyclerView.getLayoutManager()).scrollToPositionWithOffset(targetPos, 0);
            smoothPos.mToPosition = position;
            smoothPos.mShouldScroll = true;
        } else {
            // 第三种可能:往上的跳转位置在第一个可见位置相隔不超过一屏,或往下的跳转位置和最后一个可见位置相隔不超过一屏
            // 使用smoothScrollToPosition进行缓动,缓动速率详见 LinearLayoutManagerWithScrollTop 类
            mRecyclerView.smoothScrollToPosition(position);
        }
    }

    /**
     * 取消valRv的滚动,并重置SmoothPos的状态
     *
     * @param valRv     valRv
     * @param smoothPos 状态
     */
    private static void stopScrollIfNeed(RecyclerView valRv, SmoothPos smoothPos) {
        if (smoothPos.mScrolling) {
            valRv.stopScroll();
            smoothPos.resetState();
        }
    }

    /**
     * 更新titleRv的选中状态
     *
     * @param valRv        valRecyclerView
     * @param valAdapter   valueAdapter
     * @param titleAdapter titleAdapter
     * @param scrolling    是否在缓动状态中,缓动中忽略更新选中
     */
    private static void updateSelectPos(RecyclerView valRv, BaseValueAdapter valAdapter,
                                        BaseTitleAdapter titleAdapter, boolean scrolling) {
        // 获取右侧列表的第一个可见Item的position
        int topPosition = ((LinearLayoutManager) valRv.getLayoutManager()).findFirstVisibleItemPosition();
        // 如果列表不是滚动状态,更新此项对应的是左边的大类的index
        BaseBindPositionBean item = (BaseBindPositionBean) valAdapter.getItem(topPosition);
        if (item != null && !scrolling) {
            int bindPos = item.bindPosition;
            titleAdapter.updateSelectedPos(bindPos);
        }
    }

    public static class SmoothPos {
        //目标项是否需要二次滑动
        public boolean mShouldScroll;
        //记录目标项位置
        public int mToPosition;
        //点击title列表使右侧value列表滚动过程中,title列表不跟随变化
        public boolean mScrolling;

        public void resetState() {
            mShouldScroll = false;
            mScrolling = false;
            mToPosition = 0;
        }
    }

}
//通过工具类绑定联合滚动
LinkageScrollUtil.bindLinkageScroll(titleList, valueList);
4.无侵入式粘性Header
最后介绍联动列表的粘性Header实现。加上粘性Header,整个双列表联动效果才算是完整。
RecyclerView粘性头部的实现方式一般就两种
- 在RecyclerView所在的布局xml同级位置上方放置一个Header View
- 使用RecyclerView的ItemDecoration功能把Header直接绘制在RecyclerView中
第一种方式,实现起来是比较简单,直接在RecyclerView的onScrolled回调中获取当前显示的item,调整Header的隐藏显示和内容,但这种方式耦合太高,这里不做更多介绍。
我们直接使用第二种方式利用ItemDecoration实现粘性Header,ItemDecoration在RecyclerView滑动的过程中会不停的重绘,关键点在于获取列表显示的第一和第二个item,通过上面定义的实体BaseBindPositionBean判断如果第一第二个bean所绑定的位置不一样,说明已经到了分组的边界,在滑动时绘制Header的位置紧贴下一个group的顶部即可实现美观的粘性Header效果。
关于ItemDecoration的更多介绍可以参考: 使用ItemDecoration为RecyclerView添加header
下面是本例子中ItemDecoration的实现代码,使用kotlin实现:
class SuctionTopDecoration(val context: Context) : RecyclerView.ItemDecoration() {

    private val res: Resources = context.resources

    private val headerHeight = res.getDimension(R.dimen.calendar_value_header_height)
    private val textSize = res.getDimension(R.dimen.calendar_value_header_text_size)
    private val textPaddingLeft = res.getDimension(R.dimen.calendar_value_header_padding_left)

    private val paint: Paint = Paint() //背景颜色paint
    private val textPaint: TextPaint = TextPaint() //文字paint

    // 文字绘制基准点x,y
    var x: Float = 0f
    var y: Float = 0f

    init {
        paint.color = res.getColor(R.color.calendar_value_header_bg_color)
        textPaint.isAntiAlias = true
        textPaint.textSize = textSize
        textPaint.color = res.getColor(R.color.calendar_color_99_white)
        textPaint.textAlign = Paint.Align.LEFT

        x = textPaddingLeft

        // 使文字垂直区域居中绘制
        val fontMetrics = textPaint.fontMetrics
        val fontHeight = fontMetrics.bottom - fontMetrics.top // 计算文字高度
        y = headerHeight - (headerHeight - fontHeight) / 2 - fontMetrics.bottom // 计算文字baseline
    }

    override fun onDrawOver(c: Canvas, parent: RecyclerView, state: RecyclerView.State?) {
        super.onDrawOver(c, parent, state)

        // 文字绘制基准点y
        var actualY = y

        if(parent.childCount > 2) {
            // 获取列表可见位置的第一第二个item index
            val firstIndex = (parent.layoutManager as LinearLayoutManager).findFirstVisibleItemPosition()
            val secondIndex = firstIndex + 1

            val firstView = (parent.layoutManager as LinearLayoutManager).findViewByPosition(firstIndex)
            val secondView = (parent.layoutManager as LinearLayoutManager).findViewByPosition(secondIndex)

            val valueAdapter = parent.adapter as HeaderValueAdapter<*, *>
            val firstValueBean = valueAdapter.getItem(firstIndex)
            val secondValueBean = valueAdapter.getItem(secondIndex)

            val text = "${firstValueBean?.year}年"
            // 如果第一个item和第二个item的绑定位置不相等,decoration需要跟随上移,否则固定
            if (firstValueBean?.bindPosition != secondValueBean?.bindPosition) {
                var topOffset = 0f
                if (secondView != null && secondView.top <= headerHeight) {
                    topOffset = headerHeight - secondView.top
                    actualY -= topOffset
                }
                c.drawRect(0f, -topOffset, c.width.toFloat(), headerHeight - topOffset, paint)
                c.drawText(text, x, actualY, textPaint)
            } else {
                c.drawRect(0f, 0f, c.width.toFloat(), headerHeight, paint)
                c.drawText(text, x, actualY, textPaint)
            }
        }

    }
}
//无侵入式粘性头部
SuctionTopDecoration suctionTopDecoration = new SuctionTopDecoration(valueRv.getContext());
valueRv.addItemDecoration(suctionTopDecoration);
源码仓库: https://github.com/YuanKJ-/HoVerticalCalendarView/tree/master


