linux---ssh服务添加认证方式 sshd的安全配置
以下操作需要一个客户端和服务端两个虚拟机来完成
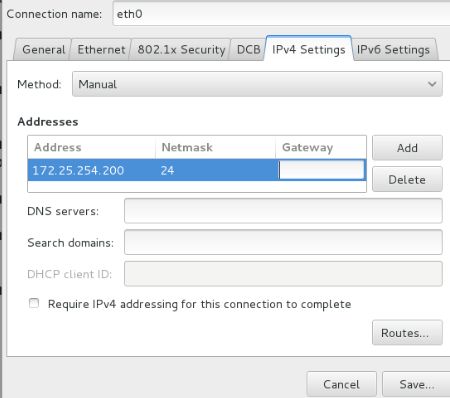
打开两个虚拟机。输入“nm-connectiong-editor”来修改ip
如果设客户端ip为172.25.254.100,那么服务端ip要为172.25.254.200,不影响工作进程
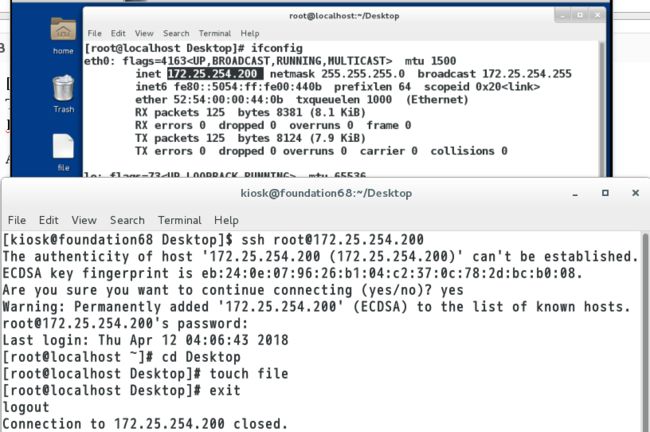
随后用“ifconfig”查看本台虚拟机的ip。
做以下实验需要搞明白哪个是服务端哪个是客户端,可以用改变颜色区分开。
1.openssh
当主机中开启openssh服务,那么就对外开放了远程连接的接口
sshd #openssh服务的服务端
ssh #openssh服务的客户端
2.在客户端连接sshd的方式
ssh 服务端用户@服务端ip地址
例如
ssh [email protected] ##在客户端用ssh命令连接172.25.254.200主机的root用户
[root@localhost ~]# ssh [email protected]
The authenticity of host '172.25.254.200 (172.25.254.200)' can't be established.
ECDSA key fingerprint is eb:24:0e:07:96:26:b1:04:c2:37:0c:78:2d:bc:b0:08.
Are you sure you want to continue connecting (yes/no)?
##当当前主机第一次连接陌生主机时
##会自动建立.ssh/know_hosts
##这个文中记录的是连接过的主机信息
[email protected]'s password: #输入密码连接成功
Last login: Fri Mar 30 02:05:52 2018 from 172.25.254.100
[root@localhost ~]# exit #表示退出当前连接
logout
Connection to 172.25.254.200 closed.
这个是可以外连虚拟机的操作
注意:以上连接方式是不能打开远程主机的图形功能的如果需要打开远程主机图形功能需要输入 "-X"
ssh -X [email protected] 输入cheese是系统检测摄像头
3.给ssh服务添加新的认证方式 KEY认证
1)生成锁和钥匙
[root@localhost Desktop]# rm -fr /root/.ssh ##删除/root/.ssh
[root@localhost Desktop]# ssh-keygen ##生成密钥的命令
Generating public/private rsa key pair. ##提示生成公钥私钥的存放路径和文件名
Enter file in which to save the key (/root/.ssh/id_rsa): ##通常不用改,回车
Created directory '/root/.ssh'.
Enter passphrase (empty for no passphrase): ##通常直接回车
Enter same passphrase again: ##回车
Your identification has been saved in /root/.ssh/id_rsa. ##私钥
Your public key has been saved in /root/.ssh/id_rsa.pub. ##公钥
The key fingerprint is:
aa:1c:25:78:7d:40:57:64:7e:5f:17:da:45:03:34:e6 root@localhost
The key's randomart image is:
+--[ RSA 2048]----+
| . .o+ .=.+o|| . . o o + + |
| . . .E .o |
| . . . . . .. |
| . o o S . |
| . o o |
| . . | ##RSA加密协议的方框图形
| . o |
| o |
+---------------------+
注释:公钥用于加密,它是向所有人公开的;私钥用于解密,只有密文的接受着持有。
在服务端
ssh-copy-id -i /root/.ssh/id_rsa.pub [email protected]
ssh-copy-id ##加密命令
-i ##指定密钥
/root/.ssh/id_rsa.pub ##密钥
root ##加密用户
172.25.254.200 ##主机ip
[root@localhost Desktop]# ssh-copy-id -i /root/.ssh/id_rsa.pub [email protected]
The authenticity of host '172.25.254.200 (172.25.254.200)' can't be established.
ECDSA key fingerprint is eb:24:0e:07:96:26:b1:04:c2:37:0c:78:2d:bc:b0:08.
Are you sure you want to continue connecting (yes/no)? yes
/usr/bin/ssh-copy-id: INFO: attempting to log in with the new key(s), to filter out any that are already installed
/usr/bin/ssh-copy-id: INFO: 1 key(s) remain to be installed -- if you are prompted now it is to install the new keys
[email protected]'s password:
Number of key(s) added: 1
Now try logging into the machine, with: "ssh '[email protected]'"
and check to make sure that only the key(s) you wanted were added.
[root@localhost Desktop]# ls -l /root/.ssh ##查看/root/.ssh中有没有生成密钥
-rw-------. 1 root root 396 4月 12 05:21 authorized_keys
-rw-------. 1 root root 1679 4月 12 05:20 id_rsa
-rw-r--r--. 1 root root 396 4月 12 05:20 id_rsa.pub
-rw-r--r--. 1 root root 176 4月 12 05:20 known_hosts
3)验证
#解密文件传输到客户端
scp /root/.ssh/id_rsa [email protected]:/root/.ssh/ #将密钥传给客户端
[root@localhost Desktop]# scp /root/.ssh/id_rsa [email protected]:/root/.ssh
[email protected]'s password:
id_rsa 100% 1679 1.6KB/s 00:00
ssh [email protected] #连接不需要密码 在客户端验证
#在服务端
rm -fr /root/.ssh/authorized_keys ##当此文件被删除,客户端解密文件失效
[root@localhost Desktop]# rm -fr /root/.ssh/authorized_keys
[root@localhost Desktop]# systemctl restart sshd.service ##一定要刷新服务器
[root@localhost Desktop]# ll /root/.ssh
total 12
-rw-------. 1 root root 1679 4月 12 05:20 id_rsa
-rw-r--r--. 1 root root 396 4月 12 05:20 id_rsa.pub
-rw-r--r--. 1 root root 352 4月 12 05:24 known_hosts
#在客户端
在服务端把解密文件删除后,客户端再次连接时就需要输入密码登录。
#在服务端
cp /root/.ssh/id_rsa.pub /root/.ssh/authorized_keys ##从新生成锁文件,解密文件功能恢复
4.sshd的安全配置
vim /etc/ssh/sshd_config ##更改
systemctl restart sshd.service ##刷新
1)禁止原始认证方式
78 PasswordAuthentication no|yes ##开启或关闭ssh的默认认证方式
![]() ##更改文件后要刷新文件
##更改文件后要刷新文件
![]()
##上图是在客户端,在服务端关闭ssh的默认认证方式后,任何用户都不能登录服务端。
48 PermitRootLogin no|yes ##开启或关闭root用户的登陆权限
![]() 将48行改为no的同时,要将78行更改为yes,才能看到实验效果
将48行改为no的同时,要将78行更改为yes,才能看到实验效果
做以下实验必须PermitRootLogin yes
注意:用客户端登录服务端的时候,服务端必须有这个用户,并且一定要有密码才可以
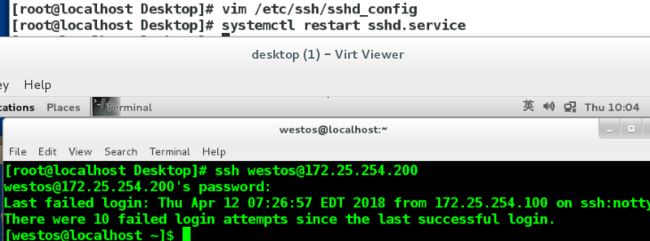
79 AllowUsers westos ##用户白名单,当前设定是只允许westos登陆
![]()
80 DenyUsers student ##用户黑名单,当前设定是只不允许student登陆
![]()
注意:1.在做这个黑白名单的实验时,黑白名单不能同时出现
2.改完文件一定一定!要用“systemctl restart ssh.service”刷新文件
3.登录完一个用户要先退出才能进行下一个用户的登录


