基于OpenCv的SVM实现车牌检测与识别(一)
都说深度学习的出现极力地打压着传统机器学习算法的地位,作为一个二刷机器学习经典算法的小伙伴告诉你:还真多半是这样,咳,毕竟还是差距较大,深度学习处理真实世界多维度的问题更权威!不过,有的事情还是机器学习能做的,经典永不过时,下面我们来做一个实践。
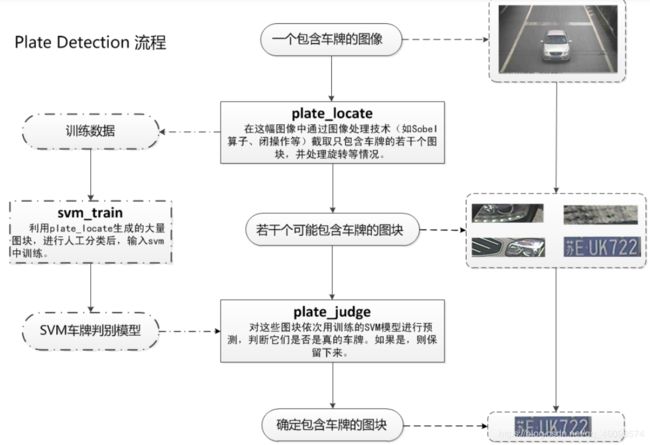
上期,有埋下伏笔,我们来回顾一下:
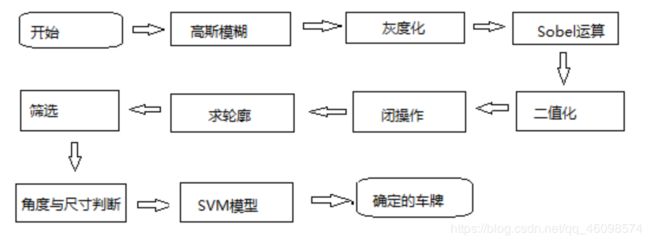
我们来看看基本的识别流程:
我们使用的是OpenCv自带的SVM模型,我们上篇也说了,由于SVM的突出表现,得到了更多官方的青睐,就诞生出了很多方便使用的封装,正如Opencv的SVM封装。
核心代码介绍:
调用Opencv的SVM
class SVM(StatModel):
	def __init__(self, C = 1, gamma = 0.5):
		self.model = cv2.ml.SVM_create()
		self.model.setGamma(gamma)
		self.model.setC(C)
		self.model.setKernel(cv2.ml.SVM_RBF)
		self.model.setType(cv2.ml.SVM_C_SVC)
这边的cv2.ml.SVM_create(生成一个SVM模型
setGamma(gamma),设置Gamma参数,demo中是0.5
setC(C), 设置惩罚项, 为:1
setKernel(cv2.ml.SVM_RBF):设置核函数:RBF
setType(cv2.ml.SVM_C_SVC):设置SVM的模型类型:SVC是分类模型,SVR是回归模型
以上,看过我以前文章的朋友应该秒懂,
接下来继续走:
训练svm
1:定义
class SVM(StatModel):
	def __init__(self, C = 1, gamma = 0.5):
		self.model = cv2.ml.SVM_create()
		self.model.setGamma(gamma)
		self.model.setC(C)
		self.model.setKernel(cv2.ml.SVM_RBF)
		self.model.setType(cv2.ml.SVM_C_SVC)
#训练svm
	def train(self, samples, responses):
		self.model.train(samples, cv2.ml.ROW_SAMPLE, responses)
2:
调用方法,并且喂数据:
	def train_svm(self):
		#识别英文字母和数字
		self.model = SVM(C=1, gamma=0.5)
		#识别中文
		self.modelchinese = SVM(C=1, gamma=0.5)
		if os.path.exists("svm.dat"):
			self.model.load("svm.dat")
这边已经训练好模型就执行IF语句中的load操作(常用的调取持久化模型的方法),否则要是没有模型就开始训练(喂数据):
		else:
			chars_train = []
			chars_label = []

			for root, dirs, files in os.walk("train\\chars2"):
				if len(os.path.basename(root)) > 1:
					continue
				root_int = ord(os.path.basename(root))
				for filename in files:
					filepath = os.path.join(root,filename)
					digit_img = cv2.imread(filepath)
					digit_img = cv2.cvtColor(digit_img, cv2.COLOR_BGR2GRAY)
					chars_train.append(digit_img)
					#chars_label.append(1)
					chars_label.append(root_int)

			chars_train = list(map(deskew, chars_train))
			chars_train = preprocess_hog(chars_train)
			#chars_train = chars_train.reshape(-1, 20, 20).astype(np.float32)
			chars_label = np.array(chars_label)
			print(chars_train.shape)
			self.model.train(chars_train, chars_label)
调用的相对路径是:"train\chars2是数据集:
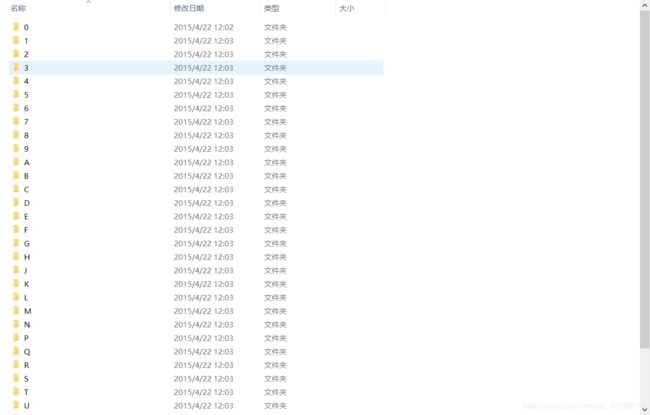
这是从1-9,A到Z的数据集~
有点像MNIST手写数字体有木有!
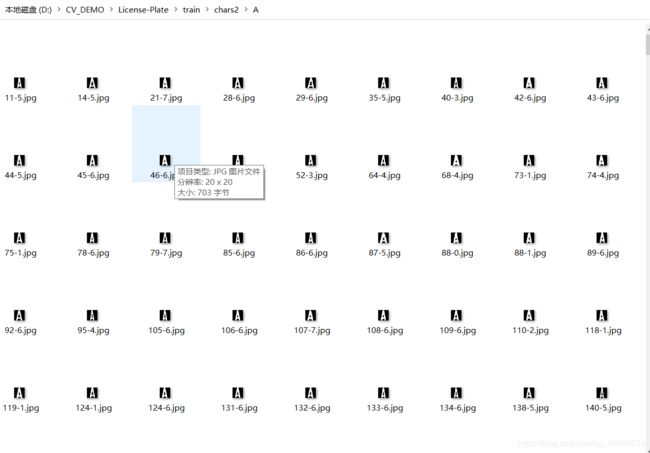
比如A:
这些是字母的训练数据,同样的还有我们车牌的省份简写:
**来看一个:广西的简称:桂
**
在此分成了SVC分别训练省份简称和右边的英文字符和数字
	def train_svm(self):
		#识别英文字母和数字
		self.model = SVM(C=1, gamma=0.5)
		#识别中文
		self.modelchinese = SVM(C=1, gamma=0.5)
		if os.path.exists("svm.dat"):
			self.model.load("svm.dat")
		else:
			chars_train = []
			chars_label = []

			for root, dirs, files in os.walk("train\\chars2"):
				if len(os.path.basename(root)) > 1:
					continue
				root_int = ord(os.path.basename(root))
				for filename in files:
					filepath = os.path.join(root,filename)
					digit_img = cv2.imread(filepath)
					digit_img = cv2.cvtColor(digit_img, cv2.COLOR_BGR2GRAY)
					chars_train.append(digit_img)
					#chars_label.append(1)
					chars_label.append(root_int)

			chars_train = list(map(deskew, chars_train))
			chars_train = preprocess_hog(chars_train)
			#chars_train = chars_train.reshape(-1, 20, 20).astype(np.float32)
			chars_label = np.array(chars_label)
			print(chars_train.shape)
			self.model.train(chars_train, chars_label)
		if os.path.exists("svmchinese.dat"):
			self.modelchinese.load("svmchinese.dat")
		else:
			chars_train = []
			chars_label = []
			for root, dirs, files in os.walk("train\\charsChinese"):
				if not os.path.basename(root).startswith("zh_"):
					continue
				pinyin = os.path.basename(root)
				index = provinces.index(pinyin) + PROVINCE_START + 1 #1是拼音对应的汉字
				for filename in files:
					filepath = os.path.join(root,filename)
					digit_img = cv2.imread(filepath)
					digit_img = cv2.cvtColor(digit_img, cv2.COLOR_BGR2GRAY)
					chars_train.append(digit_img)
					#chars_label.append(1)
					chars_label.append(index)
			chars_train = list(map(deskew, chars_train))
			chars_train = preprocess_hog(chars_train)
			#chars_train = chars_train.reshape(-1, 20, 20).astype(np.float32)
			chars_label = np.array(chars_label)
			print(chars_train.shape)
			self.modelchinese.train(chars_train, chars_label)
同上的,先判断我们本地是否训练好了,免得多此一举(需要改善的是,训练和测试应该分离),
解读一下:
os.walk方法,主要用来遍历一个目录内各个子目录和子文件。
os.walk(top, topdown=True, onerror=None, followlinks=False)
可以得到一个三元tupple(dirpath, dirnames, filenames), 我们这里换名了: root, dirs, files
第一个为起始路径,第二个为起始路径下的文件夹,第三个是起始路径下的文件。
dirpath 是一个string,代表目录的路径,
dirnames 是一个list,包含了dirpath下所有子目录的名字。
filenames 是一个list,包含了非目录文件的名字。
这些名字不包含路径信息,如果需要得到全路径,需要使用os.path.join(dirpath, name).
os.path.basename(),返回path最后的文件名。若path以/或\结尾,那么就会返回空值。
标好了训练集和标签,就可以“喂”给分类器了:
self.modelchinese.train(chars_train, chars_label)
特征提取:获取车牌的可能位置(以下为根据车牌颜色再定位,缩小边缘非车牌边界)
	def accurate_place(self, card_img_hsv, limit1, limit2, color):
		row_num, col_num = card_img_hsv.shape[:2]
		xl = col_num
		xr = 0
		yh = 0
		yl = row_num
		#col_num_limit = self.cfg["col_num_limit"]
		row_num_limit = self.cfg["row_num_limit"]
		col_num_limit = col_num * 0.8 if color != "green" else col_num * 0.5#绿色有渐变
		for i in range(row_num):
			count = 0
			for j in range(col_num):
				H = card_img_hsv.item(i, j, 0)
				S = card_img_hsv.item(i, j, 1)
				V = card_img_hsv.item(i, j, 2)
				if limit1 < H <= limit2 and 34 < S and 46 < V:
					count += 1
			if count > col_num_limit:
				if yl > i:
					yl = i
				if yh < i:
					yh = i
		for j in range(col_num):
			count = 0
			for i in range(row_num):
				H = card_img_hsv.item(i, j, 0)
				S = card_img_hsv.item(i, j, 1)
				V = card_img_hsv.item(i, j, 2)
				if limit1 < H <= limit2 and 34 < S and 46 < V:
					count += 1
			if count > row_num - row_num_limit:
				if xl > j:
					xl = j
				if xr < j:
					xr = j
		print('size111', xl, xr, yh, yl)

		return xl, xr, yh, yl
接下来:测试
	def predict(self, car_pic):
		if type(car_pic) == type(""):
			img = imreadex(car_pic)
		else:
			img = car_pic
		pic_hight, pic_width = img.shape[:2]

		if pic_width > MAX_WIDTH:
			resize_rate = MAX_WIDTH / pic_width
			img = cv2.resize(img, (MAX_WIDTH, int(pic_hight*resize_rate)), interpolation=cv2.INTER_AREA)
			print('tuxing', img.shape[0],img.shape[1])
传入车子图片 ——>判定图片完整性——>处理或重读图片——>使用img.shape方式获取图片的高和宽——>超出自定义最大高宽,就resize操作,接下来 边缘计算:
blur = self.cfg["blur"]
		#高斯去噪
		if blur > 0:
			img = cv2.GaussianBlur(img, (blur, blur), 0)#图片分辨率调整
		oldimg = img
		img = cv2.cvtColor(img, cv2.COLOR_BGR2GRAY)
		#equ = cv2.equalizeHist(img)
		#img = np.hstack((img, equ))
		#去掉图像中不会是车牌的区域
		kernel = np.ones((20, 20), np.uint8)
		img_opening = cv2.morphologyEx(img, cv2.MORPH_OPEN, kernel)
		img_opening = cv2.addWeighted(img, 1, img_opening, -1, 0);

		#找到图像边缘
		ret, img_thresh = cv2.threshold(img_opening, 0, 255, cv2.THRESH_BINARY + cv2.THRESH_OTSU)
		img_edge = cv2.Canny(img_thresh, 100, 200)
		#使用开运算和闭运算让图像边缘成为一个整体
		kernel = np.ones((self.cfg["morphologyr"], self.cfg["morphologyc"]), np.uint8)
		img_edge1 = cv2.morphologyEx(img_edge, cv2.MORPH_CLOSE, kernel)
		img_edge2 = cv2.morphologyEx(img_edge1, cv2.MORPH_OPEN, kernel)
高斯去噪——>图片分辨率调整——>图像裁剪(去掉图像中不会是车牌的区域)——>找到图像边缘——>使用开运算和闭运算让图像边缘成为一个整体
先上图:
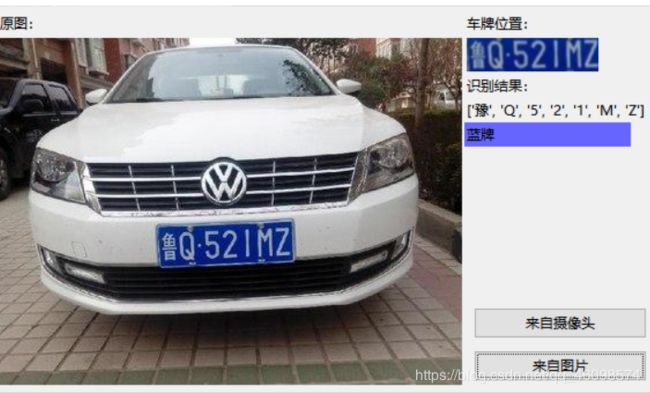
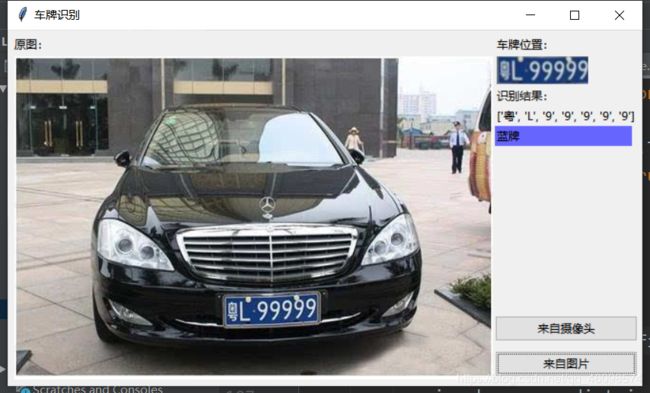
这个是我使用了中文包的显示,Opencv不支持的是中文,不论是中文路径还是中文显示,都不行,天无绝人之路,我使用了PIL的方法来解决:看图:
上面这两步是视觉的底层常用的基本操作,经常用于数据(图像)预处理,大家可以做笔记,在实践的情况下,会事半功倍哟!
篇幅有限,暂时介绍这么多,还有很多代码,下期介绍吧~,另外值得说明的是,代码不是我写的,我只帮朋友调试修改了一下,时间繁忙,剩余精华,静待下期分解!
至此,可知,机器学习传统算法比较迅速!
最后欢迎大家与我联系,多多交流,欢迎大家进群交流,机器学习,深度学习交流群,附上我的微信~~

上海第二工业大学 智能科学与技术大二 周小夏(CV调包侠)
