【码上实战】【立体匹配系列】经典PatchMatch: (6)后处理
下载完整源码,点击进入: https://github.com/ethan-li-coding/PatchMatchStereo.git
欢迎同学们在Github项目里讨论,如果觉得博主代码质量不错,给颗小星星,Follow 我!感激不尽!
算法效果图镇楼:
|
|
|
|
|
上一篇博客迭代传播中,我们对PatchMatchStereo(PMS)的核心步骤做了代码讲解,经过迭代传播,PMS可以得到非常不错的视差图结果,我们再回顾下上篇的结果:
|
|
|

|
|
经常做立体匹配,和视差图打交道的同学,相信都会觉得这个效果很不错,边缘很清晰,细节表现很棒。但很多同学也知道这并不是最终结果,图中还存在不少的错误视差,而本篇所介绍的后处理步骤就是用于剔除错误视差、填充视差空洞,最后得到本文开头的结果。
我们一起来看代码吧!
【码上实战】【立体匹配系列】经典PatchMatch: (6)后处理
- 一致性检查
- 视差填充
按照原文的理论,后处理分为两步:(1)一致性检查(2)视差填充。代码也是这样实现的,将两个步骤放到两个私有成员函数中:
/** \brief 一致性检查	 */
void LRCheck();

/** \brief 视差图填充 */
void FillHolesInDispMap();
我们分别来看它们的实现。
一致性检查
一致性检查的原理是非常简单的,对于视图1的像素 p p p,根据视差值 p d p_d pd找到视图2的同名像素 q ( q = p − d ) q(q=p-d) q(q=p−d),检查 q q q的视差值 q d q_d qd和 p d p_d pd差值的绝对值是否小于一定阈值,如果是,则满足一致性约束,视差值 p d p_d pd有效,如果否,则不满足一致性约束,把 p d p_d pd设置为无效值。看看代码:
void PatchMatchStereo::LRCheck()
{
	const sint32 width = width_;
	const sint32 height = height_;

	const float32& threshold = option_.lrcheck_thres;

	// k==0 : 左视图一致性检查
	// k==1 : 右视图一致性检查
	for (int k = 0; k < 2; k++) {
		auto* disp_left = (k == 0) ? disp_left_ : disp_right_;
		auto* disp_right = (k == 0) ? disp_right_ : disp_left_;
		auto& mismatches = (k == 0) ? mismatches_left_ : mismatches_right_;
		mismatches.clear();

		// ---左右一致性检查
		for (sint32 y = 0; y < height; y++) {
			for (sint32 x = 0; x < width; x++) {

				// 左影像视差值
				auto& disp = disp_left[y * width + x];

				if (disp == Invalid_Float) {
					mismatches.emplace_back(x, y);
					continue;
				}

				// 根据视差值找到右影像上对应的同名像素
				const auto col_right = lround(x - disp);

				if (col_right >= 0 && col_right < width) {
					// 右影像上同名像素的视差值
					auto& disp_r = disp_right[y * width + col_right];

					// 判断两个视差值是否一致(差值在阈值内为一致)
					// 在本代码里,左右视图的视差值符号相反
					if (abs(disp + disp_r) > threshold) {
						// 让视差值无效
						disp = Invalid_Float;
						mismatches.emplace_back(x, y);
					}
				}
				else {
					// 通过视差值在右影像上找不到同名像素(超出影像范围)
					disp = Invalid_Float;
					mismatches.emplace_back(x, y);
				}
			}
		}
	}
}
代码逻辑是很简单的,遍历左视图的每个像素,根据它的视差值找到右视图的对应像素,比较两个像素的视差值差值绝对值是否小于阈值(阈值是提前设置好的,一般为1个像素),如果大于阈值,则把视差设置为无效值。
代码里需要注意的3个点:
- 代码里左右视图的视差值负号相反,所以计算差值的时候,是用的加法而不是减法。
- 设置为无效的像素,都会把位置保存到数组mismatches里,这是为了后面做视差填充的时候只遍历这些无效视差像素数组,节省填充时间。
- 函数里执行了左右视图两个视差图的一致性检查,k=0时左视差图,k=1时右视差图。
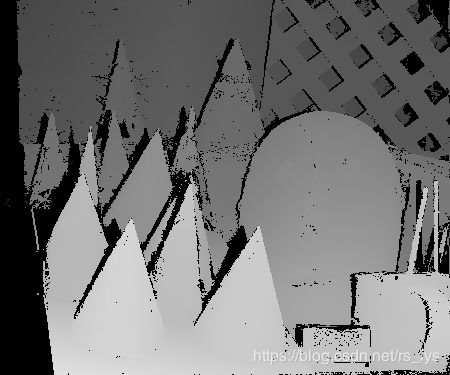
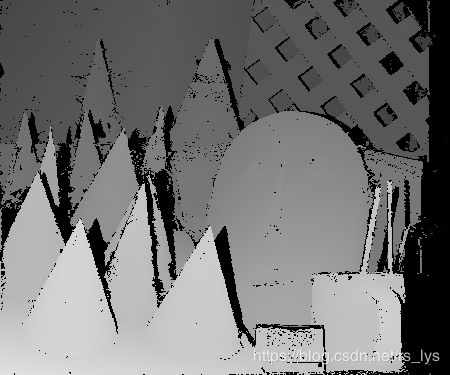
一致性检查的结果如图:
|
|
|

|

|
视差填充
如上图,一致性检查后,会给视差图留下很多空洞,咋办呢?得给它填上,不然paper图显得不够好看(如果有某产品上用了视差填充算法的请联系我,真诚的!)
PMS的填充是把所有无效像素都当做遮挡像素来看待的,倒也没什么大问题,那些非遮挡区的无效区域大多都比较小,当做遮挡区处理问题也不大,而碰到大片的无效区,反正也没啥好办法。
而遮挡区怎么填充呢?基于一个假设:遮挡区往往是背景区域被前景遮挡而造成的视差错误,而背景是离相机更远的区域,所以视差是较小值。
基于此假设,PMS的做法是:对于无效像素 p p p,往其左边和右边分别搜索到第一个有效视差像素,将俩像素的平面 f l f_l fl、 f r f_r fr分配给像素 p p p,并计算视差值,选择较小的那个视差值。
理论挺简单,我们看完整代码:
void PatchMatchStereo::FillHolesInDispMap()
{
	const sint32 width = width_;
	const sint32 height = height_;
	if (width <= 0 || height <= 0 ||
		disp_left_ == nullptr || disp_right_ == nullptr ||
		plane_left_ == nullptr || plane_right_ == nullptr) {
		return;
	}

	const auto& option = option_;

	// k==0 : 左视图视差填充
	// k==1 : 右视图视差填充
	for (int k = 0; k < 2; k++) {
		auto& mismatches = (k == 0) ? mismatches_left_ : mismatches_right_;
		if(mismatches.empty()) {
			continue;
		}
		const auto* img_ptr = (k == 0) ? img_left_ : img_right_;
		const auto* plane_ptr = (k == 0) ? plane_left_ : plane_right_;
		auto* disp_ptr = (k == 0) ? disp_left_ : disp_right_;
		vector<float32> fill_disps(mismatches.size());		// 存储每个待填充像素的视差
		for (auto n = 0u; n < mismatches.size();n++) {
			auto& pix = mismatches[n];
			const sint32 x = pix.first;
			const sint32 y = pix.second;
			vector<DisparityPlane> planes;

			// 向左向右各搜寻第一个有效像素,记录平面
			sint32 xs = x + 1;
			while (xs < width) {
				if (disp_ptr[y * width + xs] != Invalid_Float) {
					planes.push_back(plane_ptr[y * width + xs]);
					break;
				}
				xs++;
			}
			xs = x - 1;
			while (xs >= 0) {
				if (disp_ptr[y * width + xs] != Invalid_Float) {
					planes.push_back(plane_ptr[y * width + xs]);
					break;
				}
				xs--;
			}

			if(planes.empty()) {
				continue;
			}
			else if (planes.size() == 1u) {
				fill_disps[n] = planes[0].to_disparity(x, y);
			}
			else {
				// 选择较小的视差
				const auto d1 = planes[0].to_disparity(x, y);
				const auto d2 = planes[1].to_disparity(x, y);
				fill_disps[n] = abs(d1) < abs(d2) ? d1 : d2;
			}
		}
		for (auto n = 0u; n < mismatches.size(); n++) {
			auto& pix = mismatches[n];
			const sint32 x = pix.first;
			const sint32 y = pix.second;
			disp_ptr[y * width + x] = fill_disps[n];
		}

		// 加权中值滤波
		pms_util::WeightedMedianFilter(img_ptr, width, height, option.patch_size, option.gamma, mismatches, disp_ptr);
	}
}
请忽略掉最后一句加权中值滤波,这个留在后面讲。而前面的代码,便是遍历每个无效像素(前面已经保存在mismatches数组里了),向左向右各搜寻到第一个有效像素,记录两个平面,再计算俩平面下的视差值,选较小值。依旧有两个点要说明:
- 左视图的视差值是正值,右视图的视差值是负值,所以代码里比较视差大小时用的绝对值。
- 函数里执行了左右视图两个视差图的视差填充,k=0时左视差图,k=1时右视差图。
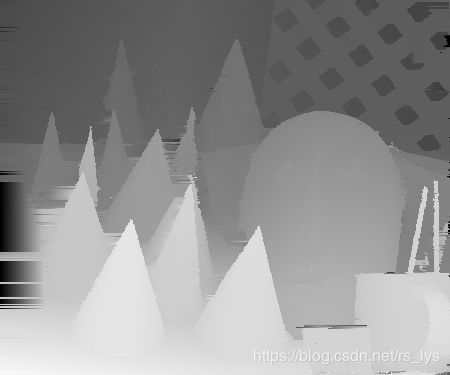
视差填充的结果图:
|
|
|

|

|
看到两点:
- 视差图没空洞了,填充的很完整
- 有一条条行方向的条纹,这是因为我们填充时只考虑行方向的像素,没考虑其他方向,所以会由于行之间的视差值有差别而导致条纹效应。这时候我们忽略掉的那步加权中值滤波就要起作用了。
// 加权中值滤波
pms_util::WeightedMedianFilter(img_ptr, width, height, option.patch_size, option.gamma, mismatches, disp_ptr);
加权中值滤波是中值滤波的升级版,中值滤波只考虑了空间域,并未考虑颜色域,所以它对边缘的保持其实不太友好,而加权中值滤波则会考虑窗口内像素和中心像素的色差,色差越小的像素,给其更大的权值,色差越大的像素,给其更小的权值,这样就尽可能避免不同属性的像素彼此影响。
加权中值滤波的具体做法是这样的:
- 窗口内的每个像素,基于它和中心像素的颜色差别计算权值,将权值和视差值捆绑成一个数据对,PMS给的权值公式为:
- 对所有数据对,按权值从小到大排序。然后对权值进行累加,当累加值首次超过总权值的一半时,对应的视差值就是输出视差值。
代码实现在pms_util.cpp文件中,如下:
void pms_util::WeightedMedianFilter(const uint8* img_data, const sint32& width, const sint32& height, const sint32& wnd_size, const float32& gamma, const vector<pair<int, int>>& filter_pixels, float32* disparity_map)
{
	const sint32 wnd_size2 = wnd_size / 2;

	// 带权视差集
	vector<pair<float32,float32>> disps;
	disps.reserve(wnd_size * wnd_size);

	for (auto& pix : filter_pixels) {
		const sint32 x = pix.first;
		const sint32 y = pix.second;
		// weighted median filter
		disps.clear();
		const auto& col_p = GetColor(img_data, width, height, x, y);
		float32 total_w = 0.0f;
		for (sint32 r = -wnd_size2; r <= wnd_size2; r++) {
			for (sint32 c = -wnd_size2; c <= wnd_size2; c++) {
				const sint32 yr = y + r;
				const sint32 xc = x + c;
				if (yr < 0 || yr >= height || xc < 0 || xc >= width) {
					continue;
				}
				const auto& disp = disparity_map[yr * width + xc];
				if(disp == Invalid_Float) {
					continue;
				}
				// 计算权值
				const auto& col_q = GetColor(img_data, width, height, xc, yr);
				const auto dc = abs(col_p.r - col_q.r) + abs(col_p.g - col_q.g) + abs(col_p.b - col_q.b);
				const auto w = exp(-dc / gamma);
				total_w += w;

				// 存储带权视差
				disps.emplace_back(disp, w);
			}
		}

		// --- 取加权中值
		// 按value排序
		std::sort(disps.begin(), disps.end());
		const float32 median_w = total_w / 2;
		float32 w = 0.0f;
		for (auto& wd : disps) {
			w += wd.second;
			if (w >= median_w) {
				disparity_map[y * width + x] = wd.first;
				break;
			}
		}
	}
}
做完加权中值滤波后的结果就是算法最终的视差图:
|
|
|
|
|
嗯,关于PatchMatchStereo的码上实战教学篇,到这里就结束了,大家遇到代码里不懂的地方就可以到博文里找到答案了。
PatchMatchStereo虽然说效率确实是比较低,但是它的思想却不得不说很先进,一些实验结果也证明了它在倾斜表面的表现确实要明显优于基于Frontal-Parallel Windows的算法,至于效率,自然是会有不少学者对其进行优化使其得以产品化,可能是以牺牲一定算法效果为代价,但依旧有强劲的竞争力。