SpingBoot整合SpringCloud实现注册运行坑点整理
大家好,今天给大家总结一下我在使用SpringBoot整合SpringCloud时候遇见的一些问题,以及一些注意事项,其中很多事我亲测网上博文无效之后自己的解决方法,希望给遇到这个问题各位一个借鉴。
废话就不多说了,什么介绍什么是springcloud,什么是springboot的这里就先不谈,至于怎么创建springcloud项目我也不想多说,直接百度,第一个博客里面说的很清楚,我这篇主要是以那篇博客为基础,介绍一些那篇博客里没有讲到或者是比较重要的点以及坑。
今天花了一天来爬坑,就是因为中央仓库没办法下博客上教程里面的那个版本的springcloud...导致出现奇奇怪怪的问题,比如无法创建某个bean,报空指针异常什么的,其实你打开自己的maven依赖管理,会发现很多依赖没有下载下来,或者后面的版本是unknown,如下图所示

刚开始我以为是教程的问题,然后就各种换教程,之后百度错误,百度上面包括谷歌上面各种奇怪的答案,包括说是因为父pom没有版本统一导致子pom没办法识别版本,或者是说删除一下maven仓库,重新下载就好了
于是我就各种删maven,重新下载,来来回回折腾了很多次,发现还是不行。。。
万般无奈之下,死马当做活马医,按照某个教程的版本号改了版本。。。就好了。。。
所以这次直接上新版本的代码 ,顺带总结一波实现注册和运行的流程。
1.首先是注册中心,这个注册中心是所有服务类共用的,首先是Pom.xml
	4.0.0

	top.wangqichao
	eurekaserver
	0.0.1-SNAPSHOT
	jar

	eurekaserver
	Demo project for Spring Boot


		org.springframework.boot
		spring-boot-starter-parent
		1.5.9.RELEASE


		UTF-8
		UTF-8
		1.8
		Dalston.SR5


			org.springframework.cloud
			spring-cloud-starter-eureka-server


			org.springframework.boot
			spring-boot-starter-test
			test


				org.springframework.cloud
				spring-cloud-dependencies
				${spring-cloud.version}
				pom
				import


				org.springframework.boot
				spring-boot-maven-plugin
这里按照其他教程的方法创建就会给你的pom.xml,只需要注意一点
主要就是版本的问题,springcloud的版本是以大写字母开头的代表大版本,然后后面的SRn代表小版本,一般springboot是1.5.x都是用的D开头的,到后面1.5.1x就是用的E开头的版本,具体用什么没有仔细研究过,因为后面来说版本之间差距不大,排错的时候注意一下就可以了。
所以我这里springboot使用的是1.5.9,而springcloud选择的D.SR5版本
然后还有一个小知识点就是如果你的pom里面project标签有报错,说阿里云中央仓库找不到的话,需要在下面添加这段代码,这是去其他仓库里面找,如果上面的就可以下载依赖,就不需要添加此段代码
			spring-milestones
			Spring Milestones
			https://repo.spring.io/milestone

				false
2. 然后是aplication.properties文件,之前教程都是用的yml格式,所以我找了半天才确定这个defaultZone到底应该怎么写
#eueka 主机名
eureka.instance.hostname=localhost
#不注册自己
eureka.client.register-with-eureka=false
#获取服务
eureka.client.fetch-registry=false
#提供者和消费者的注册地址
eureka.client.service-url.defaultZone=http://localhost:8761/eureka/

server.port=8761
这里的8761就是注册中心的端口,而后面每个客户端都要使用不同的端口。
注意里面的几个设置选项。
3.然后就是启动类,默认创建的是不带注解的,然后我昨天使用的时候必须打三个注解才能运行,但是今天只需要两个注解就可以了,不得不说很神奇,注意需要先将其加到spring的默认配置文件中,也就是在启动类的类名上点一下会出来一个黄色灯泡,按照提示操作就可以。下面的启动类同理。
import org.springframework.boot.SpringApplication;
import org.springframework.boot.autoconfigure.SpringBootApplication;
import org.springframework.cloud.netflix.eureka.server.EnableEurekaServer;

//作为注册中心必带注解,否则启动无法看到注册中心
@EnableEurekaServer
@SpringBootApplication
public class EurekaserverApplication {

	public static void main(String[] args) {
		SpringApplication.run(EurekaserverApplication.class, args);
	}
}5.然后是客户端,也可以叫做服务端,因为他们都是 要在注册中心来注册的,可以提供服务,也可以调用别的服务
按照上面的步骤创建,但是和上面略有不同就是创建时候要选择eureka discover而不是eureka server,创建的时候注意springboot版本不要选择2.0.x,直接选1.5.x,否则依赖会有问题,直接改版本号会出错
创建之后,修改pom.xml的版本
	4.0.0

	top.wangqichao
	eurekaclient
	0.0.1-SNAPSHOT
	jar

	eurekaclient
	Demo project for Spring Boot


		org.springframework.boot
		spring-boot-starter-parent
		1.5.9.RELEASE


		UTF-8
		UTF-8
		1.8
		Dalston.SR5


			org.springframework.cloud
			spring-cloud-starter-eureka


			org.springframework.boot
			spring-boot-starter-test
			test


				org.springframework.cloud
				spring-cloud-dependencies
				${spring-cloud.version}
				pom
				import


				org.springframework.boot
				spring-boot-maven-plugin
6.在其自带的配置文件中添加相关信息
#此客户端的端口号,要与注册中心的不同
server.port=8762
#服务名,在注册中心可以看到
spring.application.name=client-a
#要和注册中心的一样才行
eureka.client.serviceUrl.defaultZone=http://localhost:8761/eureka/
7.修改启动类文件,也是注解问题,然后编写一个简单的方法
import org.springframework.beans.factory.annotation.Value;
import org.springframework.boot.SpringApplication;
import org.springframework.boot.autoconfigure.SpringBootApplication;
import org.springframework.cloud.netflix.eureka.EnableEurekaClient;
import org.springframework.web.bind.annotation.RequestMapping;
import org.springframework.web.bind.annotation.RequestParam;
import org.springframework.web.bind.annotation.RestController;

@EnableEurekaClient
@SpringBootApplication
@RestController
public class EurekaclientApplication {

	public static void main(String[] args) {
		SpringApplication.run(EurekaclientApplication.class, args);
	}

	@Value("${server.port}")
	String port;
	@RequestMapping("/hi")
	public String home(@RequestParam String name) {
		return "hi "+name+",i am from port:" +port;
	}

}
注意和服务类一样,需要添加注解@EnableEurekaClient来标记这是一个客户端。
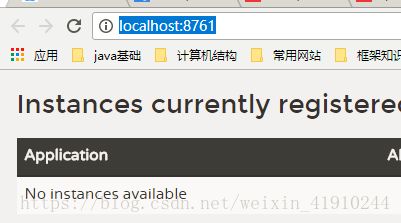
启动之后,可以看到注册成功
然后进入8762端口,输入相关参数,可以看到成功了
至此,一个简单的注册和运行就完成了。
8.总结一下:
第一个就是版本问题一定要注意,如果遇到依赖包无法下载,或者下载之后版本显示unknown的,删除一次maven仓库不奏效就赶紧换版本,不要在一棵树上吊死。
第二个就是如果pom里面project标签无法在中央仓库找到这个依赖的话,需要在下面添加其他仓库的镜像地址
第三个就是配置文件的写法,特别是defaultZone的写法,以及要理解几个配置的含义
第四个就是需要将启动类加入到sping的配置文件路径里面去,否则启动会报错
第五个就是启动类里面的注解不要忘记,也不要将注册中心和客户端的注解弄混。
9.最后,附带上参考的那篇热门博客的传送门
https://blog.csdn.net/forezp/article/details/69696915
以及本次demo的github地址
https://github.com/superkingdan/springclouddemo
希望大家能一次成功,今天的分享就到这里了


