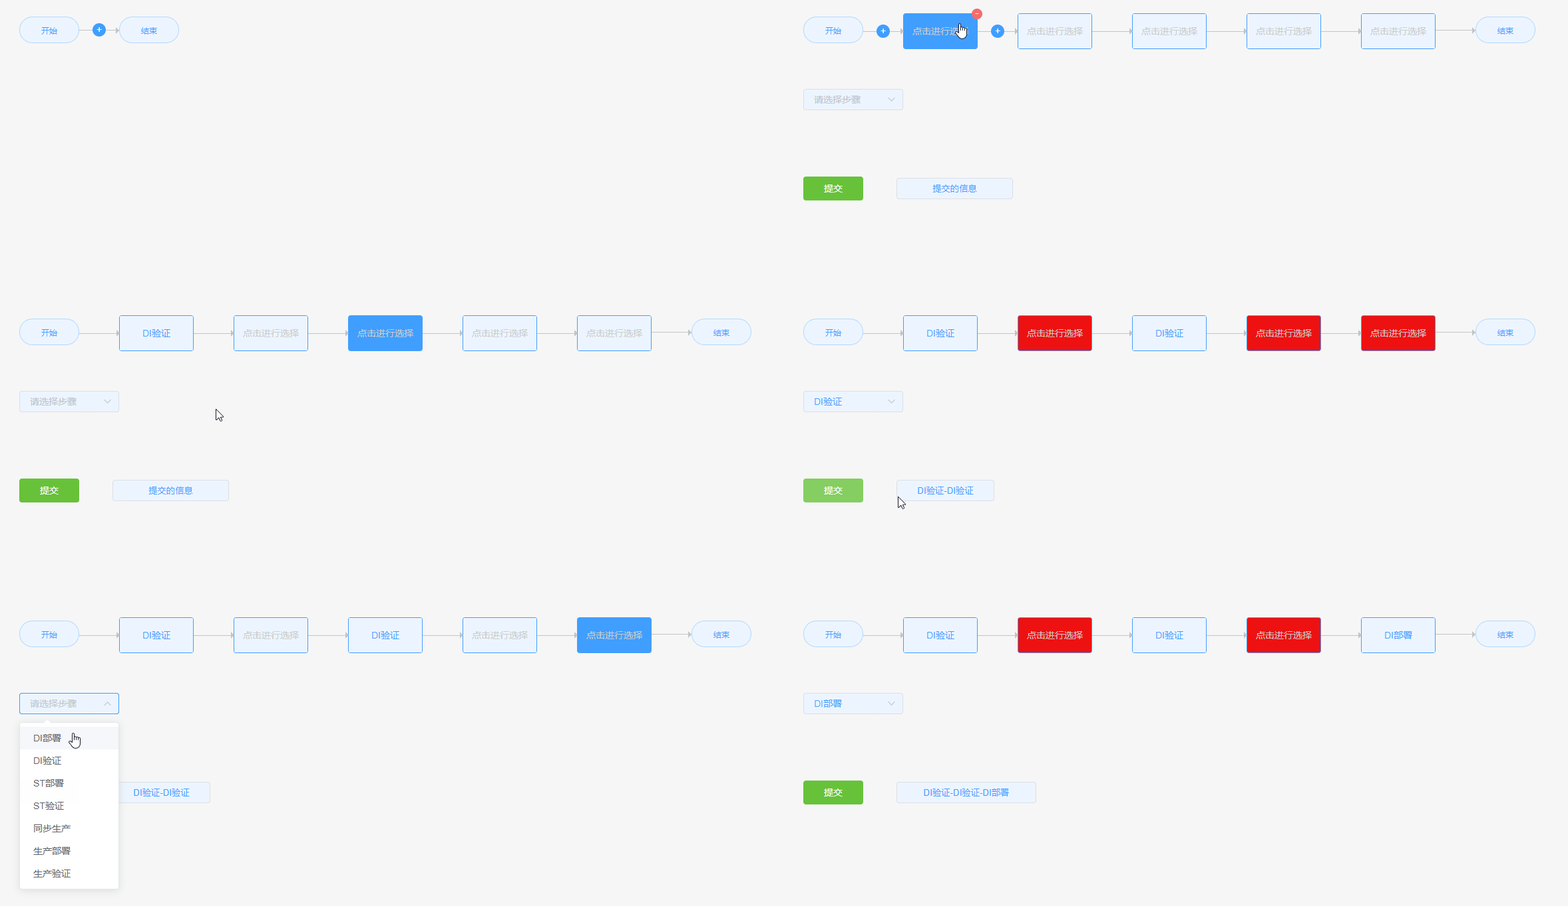
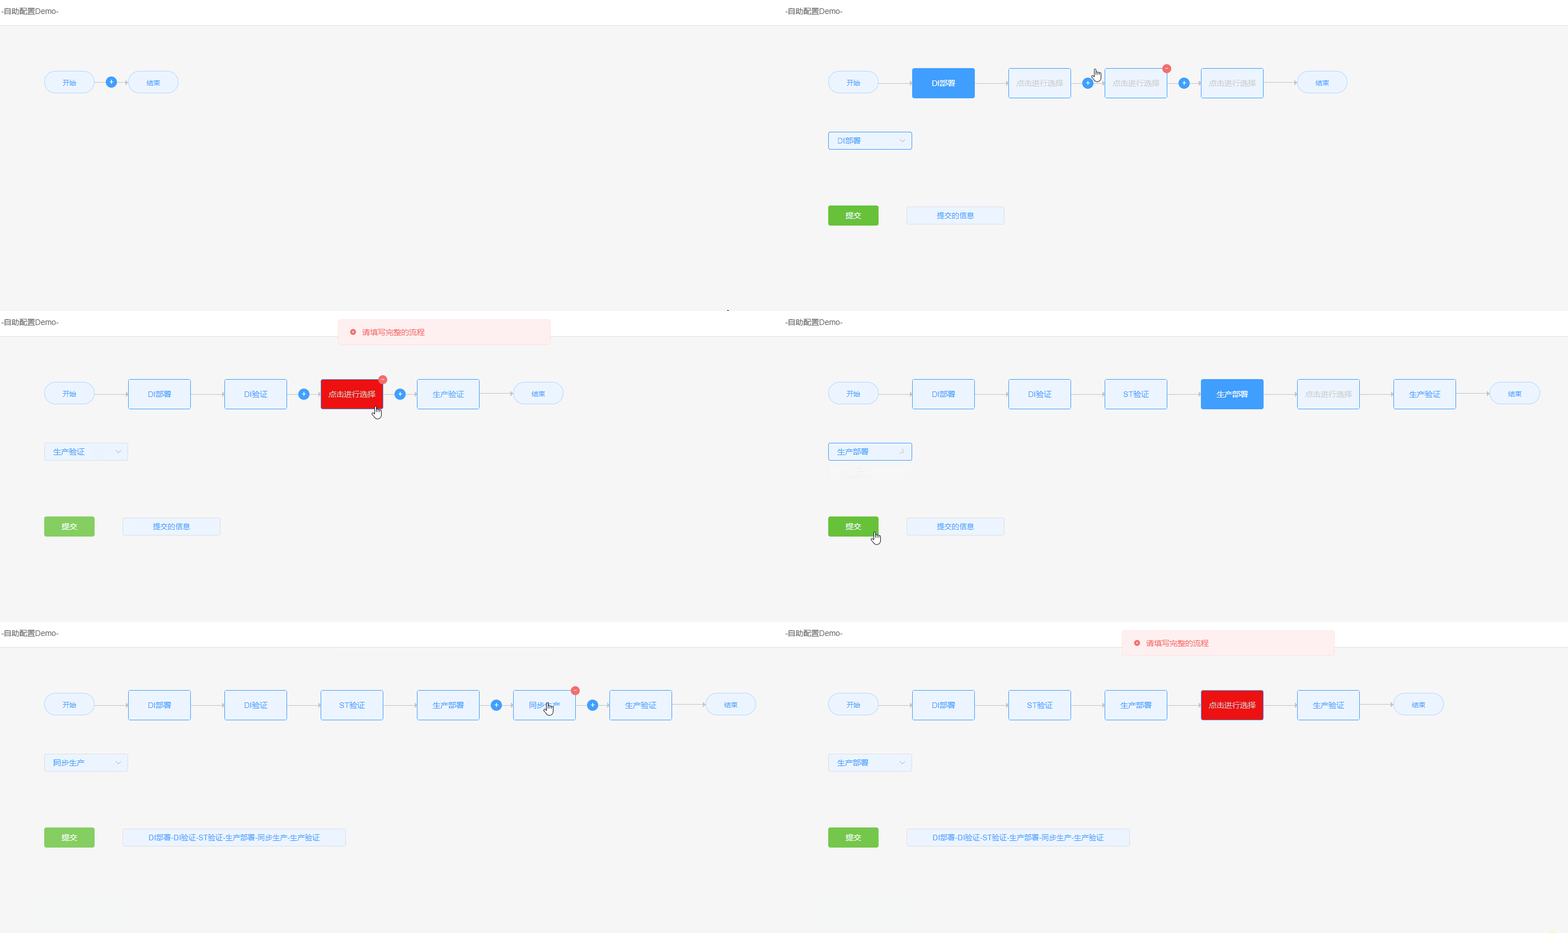
Vue实现自定义流程图的创建(v0.2.8版——优化提交逻辑,阻止了用户在有空白块的提交行为)
v0.1.1 - 基础版本
1、安装
这里用到的vue组件库是vue-dragging
$ npm install awe-dnd --save
2、代码
// main.js

import VueDND from 'awe-dnd'

Vue.use(VueDND)
// your.vue
<template>
  <div class="color-show">
    <div v-for="v in colors" v-dragging="{ list: colors, item: v, group: 'color' }" class="color-box" :style="{'background-color': v.text}" :key="v.id" >
      <input type="text"  :placeholder="v.text" :disabled="v.disabled" />
    </div>
    <button @click="addBox">新增</button>
  </div>
</template>

<script>
export default {
  data() {
    return {
      colors: [
        {
          text: "开始",
          id: 0,
          disabled: true
        },
        {
          text: "请输入内容",
          id: 1
        },
        {
          text: "结束",
          disabled: true,
          id: 999
        }
      ],
      colorShow: true,
      IsDisabled: true,
      id : 2,
    };
  },
  methods: {
    addBox(){
      this.colors.splice( length-1, 0, {text:"请输入内容", id: this.id} );
      this.id++;
    }
  }
};
</script>

<style>
.color-show {
  cursor: pointer;
  box-sizing: border-box;
  margin: 200px 0 0 200px;
  display: flex;
  flex-wrap: wrap;
  width: 100rem;
}
.color-box {
  border-radius: 20px;
  cursor: pointer;
  box-sizing: border-box;
  margin-left: 20px;
  margin-top: 20px;
  padding: 0;
  height: 6rem;
  background: skyblue;
  line-height: 6rem;
  text-align: center;
  transition: transform 0.3s;
}

input {
  cursor: pointer;
  box-sizing: border-box;
  outline-style: none;
  border: none;
  width: 100%;
  height: 100%;
  background-color: transparent;
  text-align: center;
  font-size: 18px;
  color: black;
}

button {
  width: 10%;
  font-size: 18px;
  color: black;
  height: 6rem;
  text-align: center;
  border-radius: 20px;
  cursor: pointer;
  margin-left: 20px;
  margin-top: 20px;
  border: none;
}

button:focus {
  outline: 0;
}
</style>
3、Git地址
https://github.com/hilongjw/vue-dragging.git
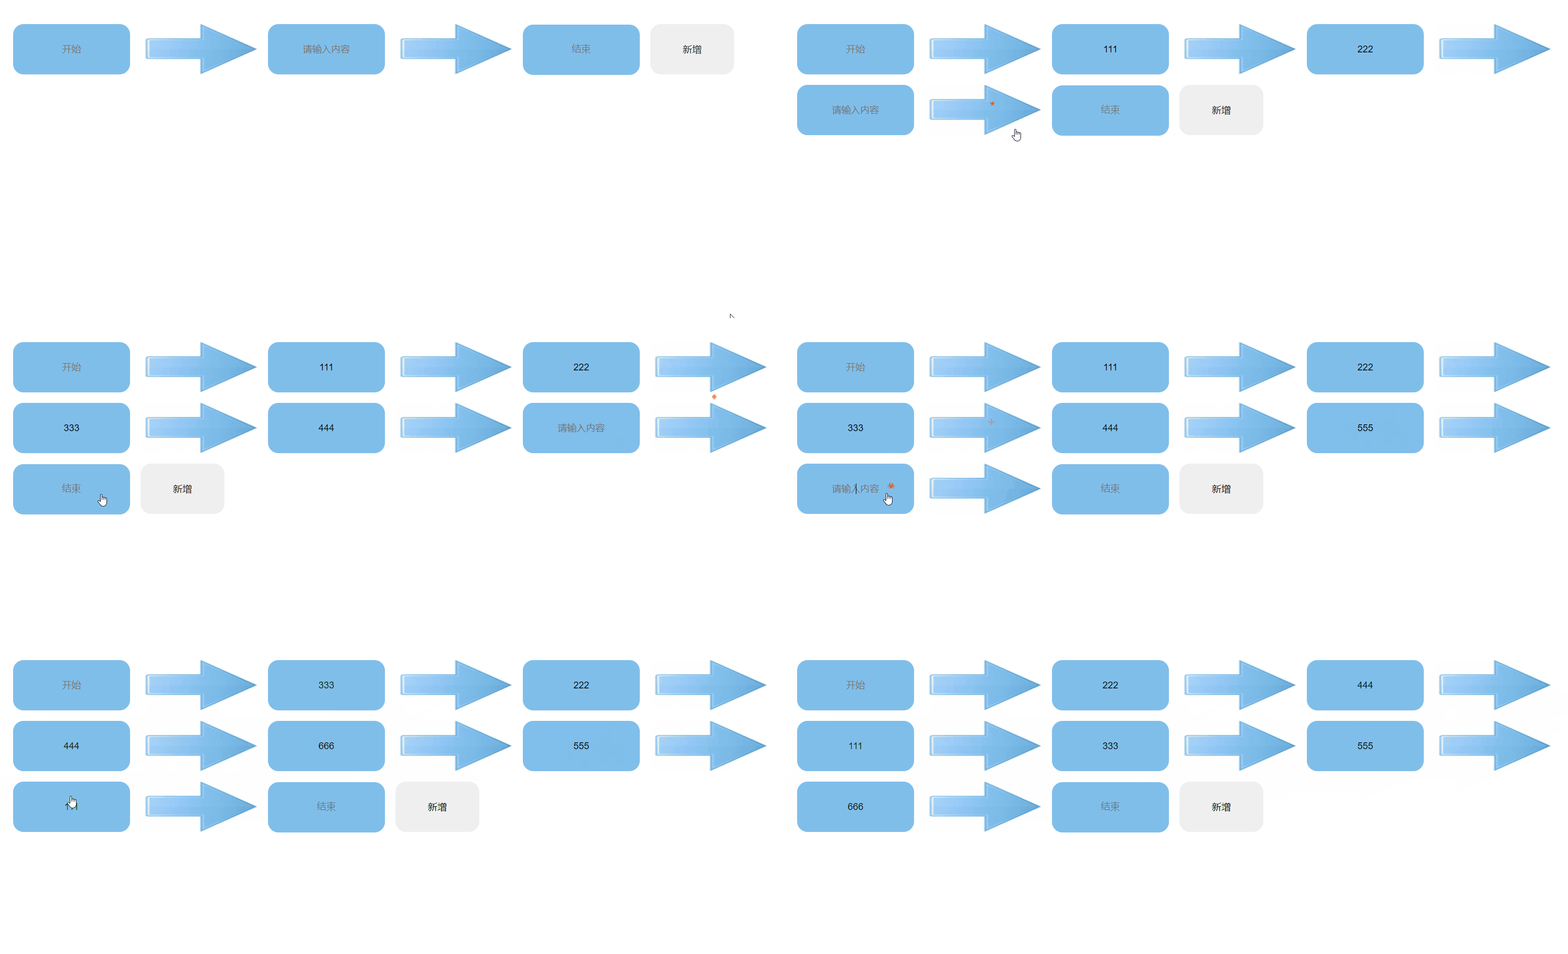
4、效果演示
v0.1.2 - 箭头版本
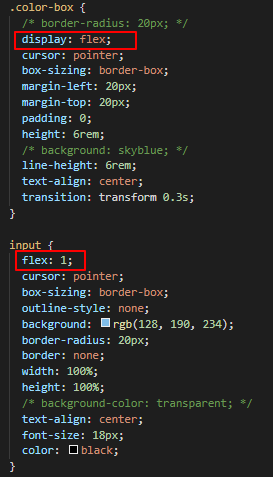
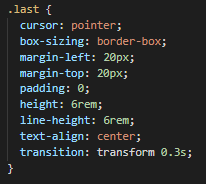
上面一个版本实现了基本的添加功能,但是可视化效果并不是太好,因此做了改进,增加了箭头,修改代码如下:
1、代码
<template>
  <div class="color-show">
    <div v-for="v in colors" v-dragging="{ list: colors, item: v, group: 'color' }" class="color-box" :style="{'background-color': v.text}" :key="v.id" >
      <input type="text"  :placeholder="v.text" :disabled="v.disabled" />
      <img class="jt" src="../assets/jt.jpg" />
    </div>
    <div class="last"><input type="text"  placeholder="结束" disabled /></div>
    <button @click="addBox">新增</button>
  </div>
</template>

<script>
export default {
  data() {
    return {
      colors: [
        {
          text: "开始",
          id: 0,
          disabled: true
        },
        {
          text: "请输入内容",
          id: 1
        }
      ],
      colorShow: true,
      IsDisabled: true,
      index : 2,
    };
  },
  methods: {
    addBox(){
      this.colors.splice( this.index, 0, {text:"请输入内容", id: this.index} );
      this.index++;
    }
  }
};
</script>

<style>
.color-show {
  cursor: pointer;
  box-sizing: border-box;
  margin: 200px 0 0 200px;
  display: flex;
  flex-wrap: wrap;
  width: 100rem;
}
.color-box {
  display: flex;
  cursor: pointer;
  box-sizing: border-box;
  margin-left: 20px;
  margin-top: 20px;
  padding: 0;
  height: 6rem;
  line-height: 6rem;
  text-align: center;
  transition: transform 0.3s;
}

input {
  flex: 1;
  cursor: pointer;
  box-sizing: border-box;
  outline-style: none;
  background: rgb(128, 190, 234);
  border-radius: 20px;
  border: none;
  width: 100%;
  height: 100%;
  text-align: center;
  font-size: 18px;
  color: black;
}

.last {
  cursor: pointer;
  box-sizing: border-box;
  margin-left: 20px;
  margin-top: 20px;
  padding: 0;
  height: 6rem;
  line-height: 6rem;
  text-align: center;
  transition: transform 0.3s;
}

button {
  width: 10%;
  font-size: 18px;
  color: black;
  height: 6rem;
  text-align: center;
  border-radius: 20px;
  cursor: pointer;
  margin-left: 20px;
  margin-top: 20px;
  border: none;
}

button:focus {
  outline: 0;
}

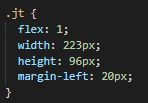
.jt {
  flex: 1;
  width: 223px;
  height: 96px;
  margin-left: 20px;
}

</style>
2、新增加的图片
3、修改部分
4.效果演示
v0.1.3 - 一行显示更多版本
1、代码
<style>
.color-show {
  cursor: pointer;
  box-sizing: border-box;
  margin: 200px 0 0 120px;
  display: flex;
  flex-wrap: wrap;
  width: 100rem;
}
.color-box {
  display: flex;
  cursor: pointer;
  box-sizing: border-box;
  margin-left: 10px;
  margin-top: 20px;
  padding: 0;
  width: 19%;
  height: 6rem;
  line-height: 6rem;
  text-align: center;
  transition: transform 0.3s;
}

input {
  flex: 1;
  cursor: pointer;
  box-sizing: border-box;
  outline-style: none;
  background: rgb(128, 190, 234);
  border-radius: 20px;
  border: none;
  width: 100%;
  height: 100%;
  text-align: center;
  font-size: 18px;
  color: black;
}

.last {
  cursor: pointer;
  box-sizing: border-box;
  margin-left: 10px;
  margin-top: 20px;
  padding: 0;
  width: 144px;
  height: 6rem;
  line-height: 6rem;
  text-align: center;
  transition: transform 0.3s;
}

button {
  width: 10%;
  font-size: 18px;
  color: black;
  height: 6rem;
  text-align: center;
  border-radius: 20px;
  cursor: pointer;
  margin-left: 10px;
  margin-top: 20px;
  border: none;
}

button:focus {
  outline: 0;
}

.jt {
  flex: 1;
  width: 140px;
  height: 96px;
  margin-left: 10px;
}

</style>
2、效果演示
v0.1.4 - 带删除功能版本
1、代码
<template>
  <div class="color-show">
    <div class="btn">
      <button @click="addBox">新增</button>
      <button @click="delBox">删除</button>
    </div>
    <div class="start">
      <input type="text"  placeholder="开始" disabled />
      <img class="jt" src="../assets/jt.jpg" />
    </div>
    <div v-for="v in colors" v-dragging="{ list: colors, item: v, group: 'color' }" class="color-box" :style="{'background-color': v.text}" :key="v.id">
      <input type="text" :placeholder="v.text" :disabled="v.disabled" />
      <img class="jt" src="../assets/jt.jpg" />
    </div>
    <div class="last"><input type="text"  placeholder="结束" disabled /></div>
  </div>
</template>

<script>
export default {
  data() {
    return {
      colors: [
        {
          text: "请输入内容",
          id: 0
        }
      ],
      index : 1,
      closeShow: false
    };
  },
  methods: {
    addBox(){
      this.colors.splice( this.index, 0, {text:"请输入内容", id: this.index} );
      this.index++;
    },
    delBox(){
      this.colors.splice( this.index-1, 1);
      this.index--;
    }
  }
};
</script>

<style>
.color-show {
  cursor: pointer;
  box-sizing: border-box;
  margin: 200px 0 0 120px;
  display: flex;
  flex-wrap: wrap;
  width: 100rem;
}

.btn {
  display: flex;
  width: 18%;
  position: absolute;
  top: 130px;
  left: 50%;
  transform: translate(-50%, -50%);
}

.color-box {
  position: relative;
  display: flex;
  cursor: pointer;
  box-sizing: border-box;
  margin-left: 10px;
  margin-top: 20px;
  padding: 0;
  width: 19%;
  height: 6rem;
  line-height: 6rem;
  text-align: center;
  transition: transform 0.3s;
}

input {
  flex: 1;
  cursor: pointer;
  box-sizing: border-box;
  outline-style: none;
  background: rgb(128, 190, 234);
  border-radius: 20px;
  border: none;
  width: 100%;
  height: 100%;
  text-align: center;
  font-size: 18px;
  color: black;
}

.start, .last {
  display: flex;
  cursor: pointer;
  box-sizing: border-box;
  margin-left: 10px;
  margin-right: 150px;
  margin-top: 20px;
  padding: 0;
  width: 144px;
  height: 6rem;
  line-height: 6rem;
  text-align: center;
  transition: transform 0.3s;
}

.start input {
  width: 144px;
}

.last {
  margin-right: 10px;
}

button {
  flex: 1;
  width: 10%;
  font-size: 18px;
  color: black;
  height: 6rem;
  text-align: center;
  border-radius: 20px;
  cursor: pointer;
  margin-left: 20px;
  border: none;
}

button:focus {
  outline: 0;
}

.jt {
  flex: 1;
  width: 140px;
  height: 96px;
  margin-left: 10px;
}

</style>
2、效果演示
v0.2.1版 - 修改使用的插件库,优化操作和界面
1、安装
npm i vuedraggable -s
2、代码
<template>
  <div class="stepsBox">
    <div class="start-steps">
      <button class="start-btn">开始</button>
    </div>
    <div class="other-steps">
      <div class="drap-box">
        <vuedraggable class="draggable">
          <div class="steps-box" v-for="(i, v) in stepsBox" :key="i">
            <div class="steps-btn">
              <input type="text" maxlength="30" placeholder="请输入阶段名称">
            </div>
            <div class="stepsAdd stepsAdd-before" @click="addStepBox1(i, v)">+</div>
            <div class="stepsAdd stepsAdd-after" @click="addStepBox2(i, v)">+</div>
            <div class="sb-close" @click="subStepBox(i, v)">-</div>
          </div>
          <div class="end-steps">
            <button class="end-btn">结束</button>
            <div class="stepsAdd stepsAdd-end" @click="addStepBox1()">+</div>
          </div>
        </vuedraggable>
      </div>
    </div>
  </div>
</template>

<script lang="ts">
import { Vue, Component } from 'vue-property-decorator';
import vuedraggable from 'vuedraggable';

@Component({
  components: { vuedraggable }
})
export default class StepDemo extends Vue {
  private stepsBox: any = [];
  private id: any = 1;
  private addStepBox1(v: any, i: number): void {
    this.id++;
    this.stepsBox.splice(i, 0, this.id);
  }
  private addStepBox2(v: any, i: number): void {
    this.id++;
    this.stepsBox.splice(i+1,0,this.id);
  }
  private subStepBox(v: any, i: number): void {
    this.stepsBox.splice( i, 1 );
  }

}
</script>

<style lang="less" scoped>
i {
  font-style: normal;
}

div {
  box-sizing: border-box;
}

.stepsBox {
  position: relative;
  display: flex;
  flex-wrap: nowrap;

  .draggable {
    display: flex;
    flex-wrap: wrap;
  }

  .stepsAdd {
      text-align: center;
      position: absolute;
      top: 50%;
      border-radius: 100%;
      width: 20px;
      height: 20px;
      line-height: 18px;
      margin-top: -9px;
      background-color: #409eff;
      color: #fff;
      z-index: 1;
      cursor: pointer;
    }

  .start-steps,
  .end-steps {
    height: 70px;
    width: 120px;
    position: relative;
    padding: 15px 30px 15px 0;
  }

  .end-steps {
    box-sizing: border-box;
    position: relative;
    padding: 15px 0 15px 30px;

    .stepsAdd {
      left: -10px;
    }
  }

  .end-steps::before {
    content: "";
    position: absolute;
    top: 50%;
    left: -30px;
    width: 60px;
    height: 1px;
    background: #c0c4cc;
  }

  .end-steps::after {
    position: absolute;
    content: "";
    width: 0;
    height: 0;
    border-width: 5px;
    border-style: dashed solid;
    top: 50%;
    left: 25px;
    margin-top: -4px;
    border-color: transparent transparent transparent #c0c4cc;
  }

  .other-steps {
    position: relative;
    display: flex;
    flex-wrap: wrap;

    .steps-box {
      text-align: center;
      color: #333;
      font-size: 12px;
      cursor: pointer;
      padding: 10px 30px;
      line-height: 50px;
      position: relative;
    }

    .steps-box::before {
      content: "";
      position: absolute;
      top: 50%;
      left: -30px;
      width: 60px;
      height: 1px;
      background: #c0c4cc;
    }


    .steps-btn {
      box-sizing: border-box;
      position: relative;
      border-radius: 4px;
      border: 1px solid #409eff;
      background: #409eff;

      input {
        text-align: center;
        width: 100px;
        border: none;
        outline: 0;
        padding: 0 5px;
        font-size: 14px;
        font-weight: 500px;
        line-height: 48px;
        background: #409eff;
        color: #fff;
      }
    }

    .steps-btn::before {
      position: absolute;
        content: "";
        width: 0;
        height: 0;
        border-width: 5px;
        border-style: dashed solid;
        top: 50%;
        left: -5px;
        margin-top: -5px;
        border-color: transparent transparent transparent #c0c4cc;
    }
  }

  .drap-box {
    display: flex;
    flex-wrap: wrap;
  }

  .stepsAdd-before {
    // display: none;
    left: -10px;
    z-index: 2;
  }

  .stepsAdd-end {
    display: block;
  }

  .stepsAdd-after {
    // display: none;
    right: -10px;
    z-index: 2;
  }

  .sb-close {
    display: none;
    width: 16px;
    height: 16px;
    border-radius: 16px;
    color: #fff;
    text-align: center;
    position: absolute;
    color: #fff;
    background: #f56c6c;
    font-size: 16px;
    border-radius: 50%;
    top: 3px;
    right: 23px;
    line-height: 12px;
  }

  .end-steps:hover {
    .stepsAdd-after {
      display: block;
    }
  }

  .steps-box:hover {
    .stepsAdd-before {
      display: block;
    }

    .stepsAdd-after {
      display: block;
    }

    .sb-close {
      display: block;
    }
  }

  .start-btn,
  .end-btn {
    width: 90px;
    height: 40px;
    border: 1px solid #b3d8ff;
    border-radius: 20px;
    text-align: center;
    color: #409eff;
    line-height: 40px;
    font-size: 12px;
    cursor: pointer;
    background: #ecf5ff;
  }
}
</style>
3、效果演示
可以在任意地方添加流程模块
可以删除指定的流程模块
选择了新的组件库vuedraggable
v0.2.2版 - 新增提交功能,可把添加的数据生成提交到后端
1、代码
<div class="selectSteps" v-if="showSelect">
	<el-button type="success" size="medium" style="margin-left:50px; padding:10px 30px; font-size:14px;" @click="click">提交</el-button>
	<input style="margin-left:50px; height:28px; text-align:center;" v-model="confirmMessage" disabled />
</div>
private showSelect: boolean = false;
private showEndSteps: boolean = true;
private confirmMessage: string = '提交的信息';
private addStepBox1(v: any, i: number): void {
    this.id++;
    this.stepsBox.splice(i, 0, this.id);
    if(this.stepsBox.length !== 0) {
      this.showSelect = true;
      this.showEndSteps = false;
    };
  }
  private addStepBox2(v: any, i: number): void {
    this.id++;
    this.stepsBox.splice(i + 1, 0, this.id);
  }
  private subStepBox(v: any, i: number): void {
    this.stepsBox.splice(i, 1);
    if(this.stepsBox.length === 0) {
      this.showSelect = false;
      this.showEndSteps = true;
    };
  }

  private click(): void {
    let stepsMessage = [];
    let stepsArrey = document.querySelectorAll('input');
    for(let i=0; i<stepsArrey.length-2; i++) {
      stepsMessage.push(stepsArrey[i].value);
    };
    this.confirmMessage = stepsMessage.join('-');
  }
2、效果演示
v0.2.3版 - 新增选择功能,限定用户输入条件
第一版:侧面打开进行选择
该版本写了两版,功能大致相同,样式上一个版本有,也没做过多的改动,就不放了
1、代码
<template>
  <div class="main">
    <div class="stepsBox">
      <div class="start-steps">
        <button class="start-btn">开始</button>
      </div>
      <div class="other-steps">
        <div class="drap-box">
          <vuedraggable v-model="stepsBox" class="draggable">
            <div class="steps-box" v-for="(i, v) in stepsBox" :key="i">
              <div class="steps-btn">
                <input type="text" maxlength="30" placeholder="点击进行选择" @click="showDrawer(i, v)" value="" />
              </div>
              <div class="stepsAdd stepsAdd-before" @click="addStepBox1(i, v)">+</div>
              <div class="stepsAdd stepsAdd-after" @click="addStepBox2(i, v)">+</div>
              <div class="sb-close" @click="subStepBox(i, v)">-</div>
            </div>
            <div class="end-steps">
              <button class="end-btn">结束</button>
              <div class="stepsAdd stepsAdd-end" v-if="showEndSteps" @click="addStepBox1()">+</div>
            </div>
          </vuedraggable>
        </div>
      </div>
      <el-drawer title="选择栏" :visible.sync="drawer" :with-header="false" size="15%" style="text-align: center;" @open="openDrawer" @close="closeDrawer">
        <template>
          <el-select class="selectBox" v-model="selectValue" placeholder="请选择" @change="selectChange">
            <el-option v-for="i in options" :key="i.label" :label="i.label" :value="i.value" />
          </el-select>
        </template>
      </el-drawer>
    </div>
    <div class="confirm-box" v-if="showConfirm">
      <el-button type="success" size="medium" style="padding:10px 30px; font-size:14px;" @click="confirm">提交</el-button>
      <input style="margin-left:50px; height:28px; text-align:center;" :size="iptWidth" v-model="confirmMessage" disabled />
    </div>
  </div>
</template>

<script lang="ts">
import { Vue, Component } from "vue-property-decorator";
import vuedraggable from "vuedraggable";

@Component({
  components: { vuedraggable }
})
export default class StepDemo extends Vue {
  private stepsBox: any = [];
  private id: any = 0;
  private selectId: any = 0;
  private drawer: boolean = false;
  private selectValue: any = '请选择';
  private showEndSteps: boolean = true;
  private showConfirm: boolean = false;
  private index: any = '';
  private confirmMessage: string = "提交的信息";
  private options: any[] = [
    { value: 'DI部署', label: 'DI部署' },
    { value: 'DI验证', label: 'DI验证' },
    { value: 'ST部署', label: 'ST部署' },
    { value: 'ST验证', label: 'ST验证' },
    { value: '同步生产', label: '同步生产' },
    { value: '生产部署', label: '生产部署' },
    { value: '生产验证', label: '生产验证' },
  ];
  private selVal: any = '';
  private iptWidth: any = '';

  private showDrawer(v: any, i: number): void {
    this.drawer = true;
    this.index = i;
  }

  private selectChange(selVal: any): void {
    let stepsArrey = document.querySelectorAll("input");
    stepsArrey[this.index].value = selVal;
    this.selVal = selVal;
  }

  private openDrawer(): void {
    let stepsArrey = document.querySelectorAll("input");
    this.selectValue = stepsArrey[this.index].value;
  }

  private closeDrawer():void {
    this.selectValue = '请选择';
  }

  private addStepBox1(v: any, i: number): void {
    this.id++;
    this.selectId++;
    this.stepsBox.splice(i, 0, this.id);
    if (this.stepsBox.length !== 0) {
      this.showConfirm = true;
      this.showEndSteps = false;
    }
  }
  private addStepBox2(v: any, i: number): void {
    this.id++;
    this.selectId++;
    this.stepsBox.splice(i + 1, 0, this.id);
  }
  private subStepBox(v: any, i: number): void {
    this.stepsBox.splice(i, 1);
    if (this.stepsBox.length === 0) {
      this.showConfirm = false;
      this.showEndSteps = true;
    }
  }

  private confirm(): void {
    let stepsMessage = [];
    let stepsArrey = document.querySelectorAll("input");
    for (let i = 0; i < stepsArrey.length - 2; i++) {
      stepsMessage.push(stepsArrey[i].value);
    }
    this.confirmMessage = stepsMessage.join("-");
    this.iptWidth = 1.8 * this.confirmMessage.length;
  }

}
</script>
2、效果演示
第二版:下方展示进行选择
1、代码
<template>
  <div class="main">
    <div class="stepsBox">
      <div class="start-steps">
        <button class="start-btn">开始</button>
      </div>
      <div class="other-steps">
        <div class="drap-box">
          <vuedraggable v-model="stepsBox" class="draggable">
            <div class="steps-box" v-for="(i, v) in stepsBox" :key="i">
              <div class="steps-btn">
                <input type="text" maxlength="30" placeholder="点击进行选择" value="" @focus="iptFocus(v, i)" @blur="iptBlur(v, i)" />
              </div>
              <div class="stepsAdd stepsAdd-before" @click="addStepBox1(i, v)">+</div>
              <div class="stepsAdd stepsAdd-after" @click="addStepBox2(i, v)">+</div>
              <div class="sb-close" @click="subStepBox(i, v)">-</div>
            </div>
            <div class="end-steps">
              <button class="end-btn">结束</button>
              <div class="stepsAdd stepsAdd-end" v-if="showEndSteps" @click="addStepBox1()">+</div>
            </div>
          </vuedraggable>
        </div>
      </div>
    </div>
    <div class="select-box" v-if="showSelect">
      <template>
          <el-select class="selectBox" v-model="selectValue" placeholder="请选择" @change="selectChange">
            <el-option v-for="i in options" :key="i.label" :label="i.label" :value="i.value" />
          </el-select>
        </template>
    </div>
    <div class="confirm-box" v-if="showConfirm">
      <el-button type="success" size="medium" style="padding:10px 30px; font-size:14px;" @click="confirm">提交</el-button>
      <input style="margin-left:50px; height:28px; text-align:center;" :size="iptWidth" v-model="confirmMessage" disabled />
    </div>
  </div>
</template>

<script lang="ts">
import { Vue, Component } from "vue-property-decorator";
import vuedraggable from "vuedraggable";

@Component({
  components: { vuedraggable }
})
export default class StepDemo extends Vue {
  private stepsBox: any = [];
  private id: any = 0;
  private selectId: any = 0;
  private drawer: boolean = false;
  private selectValue: any = '';
  private showEndSteps: boolean = true;
  private showSelect: boolean = false;
  private showConfirm: boolean = false;
  private index: any = '';
  private confirmMessage: string = "提交的信息";
  private options: any[] = [
    { value: 'DI部署', label: 'DI部署' },
    { value: 'DI验证', label: 'DI验证' },
    { value: 'ST部署', label: 'ST部署' },
    { value: 'ST验证', label: 'ST验证' },
    { value: '同步生产', label: '同步生产' },
    { value: '生产部署', label: '生产部署' },
    { value: '生产验证', label: '生产验证' },
  ];
  private selVal: any = '';
  private iptWidth: any = '';

  private iptFocus(i: any): void {
    let stepsArrey = document.querySelectorAll("input");
    this.index = i;
    this.selectValue = stepsArrey[this.index].value;
  }

  private selectChange(selVal: any): void {
    let stepsArrey = document.querySelectorAll("input");
    stepsArrey[this.index].value = selVal;
    this.selVal = selVal;
  }

  private iptBlur(i: any): void {
    let stepsArrey = document.querySelectorAll("input");
    this.index = i;
  }

  private addStepBox1(v: any, i: number): void {
    this.id++;
    this.selectId++;
    this.stepsBox.splice(i, 0, this.id);
    this.selectValue = '';
    if (this.stepsBox.length !== 0) {
      this.showSelect = true;
      this.showConfirm = true;
      this.showEndSteps = false;
    }
  }
  private addStepBox2(v: any, i: number): void {
    this.id++;
    this.selectId++;
    this.stepsBox.splice(i + 1, 0, this.id);
    this.selectValue = '';
  }
  private subStepBox(v: any, i: number): void {
    this.stepsBox.splice(i, 1);
    if (this.stepsBox.length === 0) {
      this.showConfirm = false;
      this.showEndSteps = true;
      this.showSelect = false;
    }
  }

  private confirm(): void {
    let stepsMessage = [];
    let stepsArrey = document.querySelectorAll("input");
    for (let i = 0; i < stepsArrey.length - 2; i++) {
      stepsMessage.push(stepsArrey[i].value);
    }
    this.confirmMessage = stepsMessage.join("-");
    this.iptWidth = 1.8 * this.confirmMessage.length;
  }

}
</script>
2、效果演示
v0.2.4版 - 优化可视化效果
1、代码
private iptFocus(i: any): void {
    let stepsArrey = document.querySelectorAll("input");
    this.index = i;
    this.selectValue = stepsArrey[this.index].value;
    for(let i=0; i<stepsArrey.length; i++) {
      stepsArrey[i].style.backgroundColor = '#ecf5ff';
      stepsArrey[i].style.color = '#409eff';
    };
    stepsArrey[this.index].style.backgroundColor = '#409eff';
    stepsArrey[this.index].style.color = '#fff';
  }

private addStepBox1(v: any, i: number): void {
    let stepsArrey = document.getElementsByTagName("input");
    if(i) {
      window.setTimeout(()=>{stepsArrey[i].focus()},0);
    } else {
      window.setTimeout(()=>{stepsArrey[0].focus()},0);
    };
    this.id++;
    this.selectId++;
    this.stepsBox.splice(i, 0, this.id);
    this.selectValue = '';
    if (this.stepsBox.length !== 0) {
      this.showSelect = true;
      this.showConfirm = true;
      this.showEndSteps = false;
    }
  }

  private addStepBox2(v: any, i: number): void {
    if(i >= 0) {
      let stepsArrey = document.getElementsByTagName("input");
      i = i + 1;
      window.setTimeout(()=>{stepsArrey[i].focus()},0);
    }
    this.id++;
    this.selectId++;
    this.stepsBox.splice(i + 1, 0, this.id);
    this.selectValue = '';
  }
2、原理及注意点
这里用的DOM获取页面节点,因为用ref会导致$refs报错,可以获取到DOM元素,但是就是取不到值,在之前提交的时候也是一样
3、效果演示
v0.2.5版 - 优化提交后背景色显示问题
1、代码
private confirm(): void {
    let stepsMessage = [];
    let stepsArrey = document.querySelectorAll("input");
    for (let i = 0; i < stepsArrey.length - 2; i++) {
      stepsMessage.push(stepsArrey[i].value);
    }
    this.confirmMessage = stepsMessage.join("-");
    this.iptWidth = 1.8 * this.confirmMessage.length;
    for(let i = 0; i < stepsArrey.length; i++) {
      stepsArrey[i].style.backgroundColor = '#ecf5ff';
      stepsArrey[i].style.color = '#409eff';
    };
  }
2、效果演示
v0.2.6版 - 优化删除模块后选择框显示问题以及模块背景色问题,限制用户只能从选择框中进行步骤选择
1、存在问题
2、代码
<input type="text" maxlength="30" placeholder="点击进行选择" value="" @focus="iptFocus(v, i)" @blur="iptBlur(v, i)" autofocus readonly />
// autofocus:新增是自动获取焦点
// readonly:input为只读
private subStepBox(v: any, i: number): void {
    this.stepsBox.splice(i, 1);
    if (this.stepsBox.length === 0) {
      this.showConfirm = false;
      this.showEndSteps = true;
      this.showSelect = false;
    };
    this.selectValue = '请选择修改模块';
    let stepsArrey = document.querySelectorAll("input");
    for(let i = 0; i < stepsArrey.length; i++) {
      stepsArrey[i].style.backgroundColor = '#ecf5ff';
      stepsArrey[i].style.color = '#409eff';
    };
  }
3、效果演示
v0.2.7版 - 优化提交时有空白项的提醒和清除空白项提交
1、存在问题
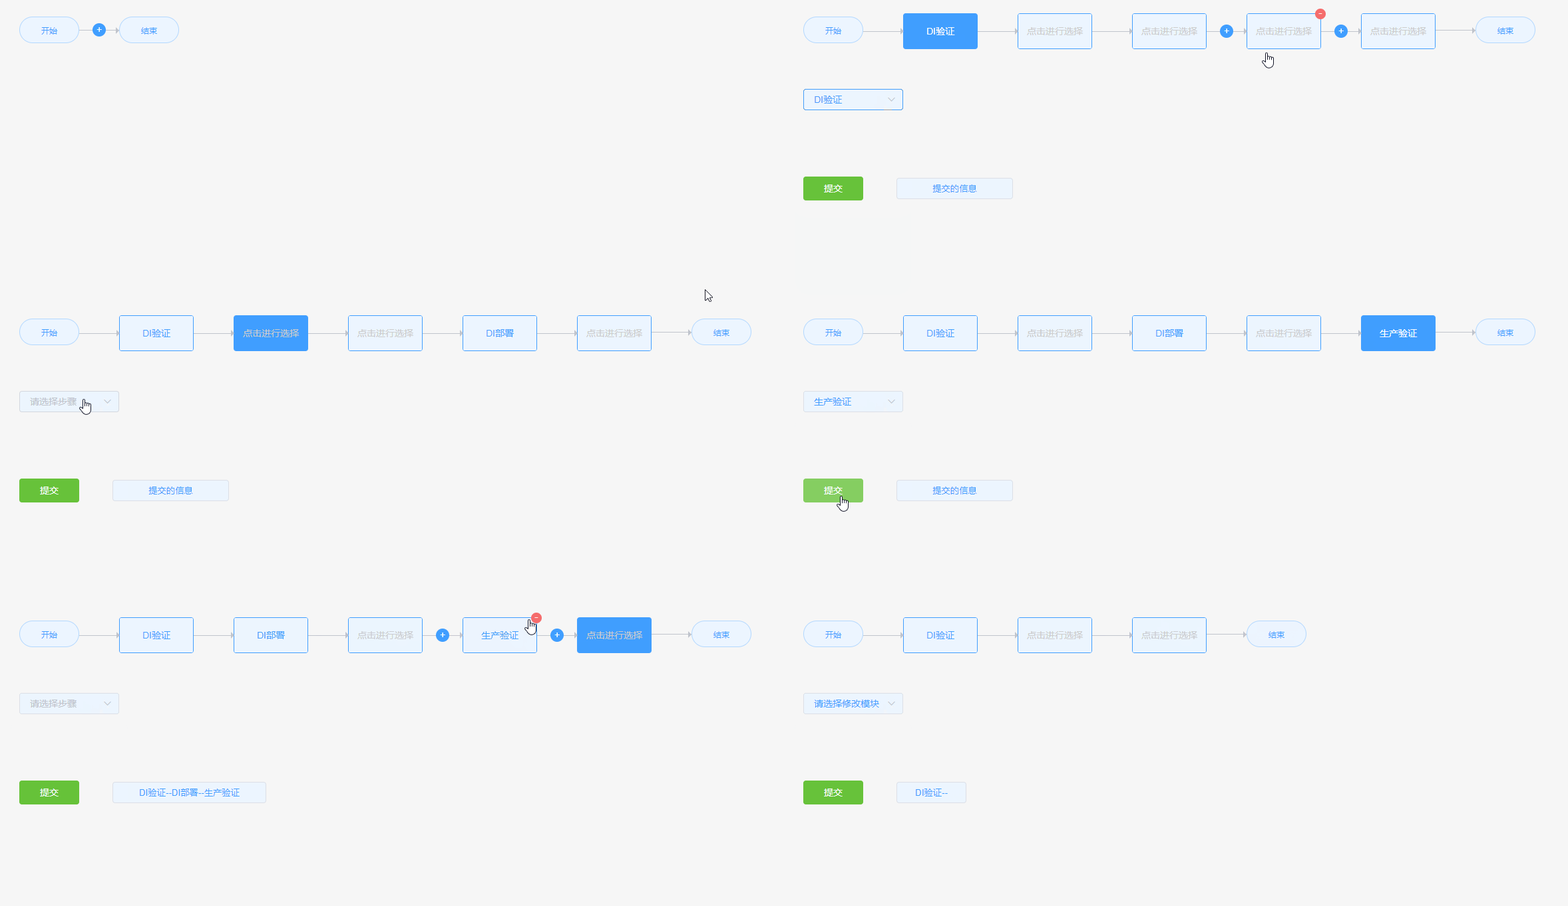
在有空白选项时,提交就会出现错误,导致提交的信息有误。
这里做的优化时允许用户提交,但是会清除空白选项。
2、代码
  private confirm(): void {
    let stepsMessage = [];
    let stepsArrey = document.querySelectorAll('input');
    for(let i = 0; i < stepsArrey.length; i++) {
      stepsArrey[i].style.backgroundColor = '#ecf5ff';
      stepsArrey[i].style.color = '#409eff';
    };
    + for (let i = 0; i < stepsArrey.length - 2; i++) {
      + if(stepsArrey[i].value == '') {
        + stepsArrey[i].style.backgroundColor = '#EE1111';
        + stepsArrey[i].style.color = '#fff';
      + };
      stepsMessage.push(stepsArrey[i].value);
    };
    + stepsMessage = stepsMessage.filter( s => { return s && s.trim() }); // 去除空白的无效项
    this.confirmMessage = stepsMessage.join('-');
    this.iptWidth = 1.8 * this.confirmMessage.length;
  }
3、效果演示
v0.2.8版 - 阻止了用户有空白块的提交行为
1、存在问题
在上一个版本中,可以看到用户及时在有空白快的时候也可以提交,对于提交的校验效果不好,因此这里的功能改成了在点击提交之后,提示用户没有填写的空白项,并阻止用户的提交行为。
2、代码
  private confirm(): void {
    let stepsMessage = [];
    let stepsArrey = document.querySelectorAll('input');
    for(let i = 0; i < stepsArrey.length; i++) {
      stepsArrey[i].style.backgroundColor = '#ecf5ff';
      stepsArrey[i].style.color = '#409eff';
    };
    for (let i = 0; i < stepsArrey.length - 2; i++) {
      if(stepsArrey[i].value != '') {
        stepsMessage.push(stepsArrey[i].value);
      } else {
        for (let i = 0; i < stepsArrey.length - 2; i++) {
          if(stepsArrey[i].value === '') {
            stepsArrey[i].style.backgroundColor = '#EE1111';
            stepsArrey[i].style.color = '#fff';
          };
        }
        this.$message({type: 'error', message: '请填写完整的流程'});
        return;
      }
    };
    this.confirmMessage = stepsMessage.join('-');
    this.iptWidth = 1.8 * this.confirmMessage.length;
  }

