手把手教你springboot企业微信开发(一)
手把手教你springboot企业微信开发(一)
- 1、 配置企业号
- 2、Springboot配置企业号
1、 配置企业号
企业号登录、设置,网址是:
https://work.weixin.qq.com/wework_admin/loginpage_wx
微信扫码登录:
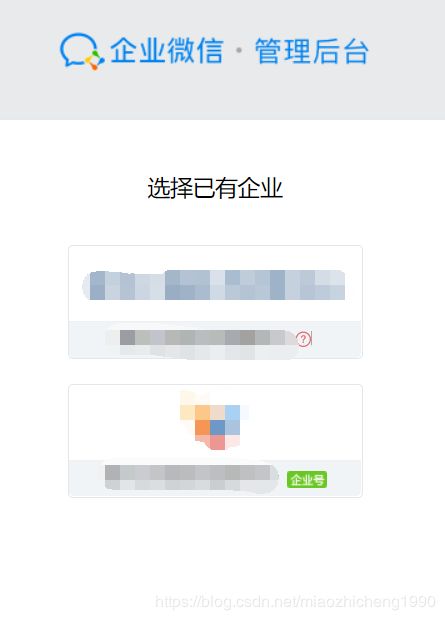
选一个,进入企业号,点【我的企业】进入:
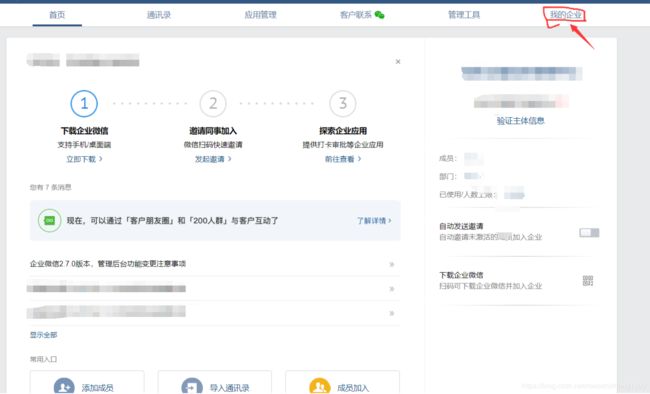
点左上角我的企业:
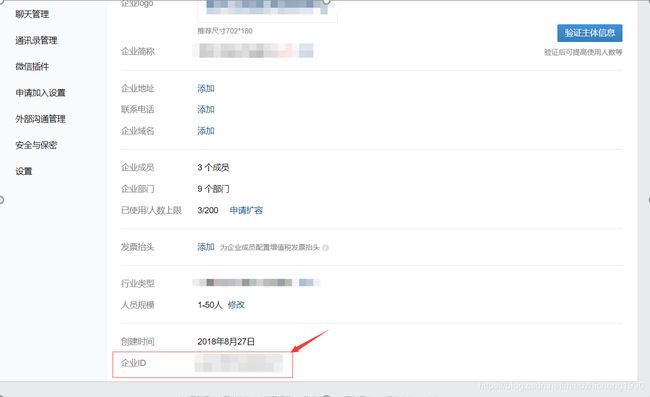
设置里,有企业ID复制,到一边备用,这是cropId,在后面会有用的。
下一步点【应用管理】

拉到下面,看【自建】
点【创建应用】,填写:


可见范围选好了哈,没选自己的话在企业号里看不到应用。
配置好了之后,点【创建应用】,看到下面的页面:
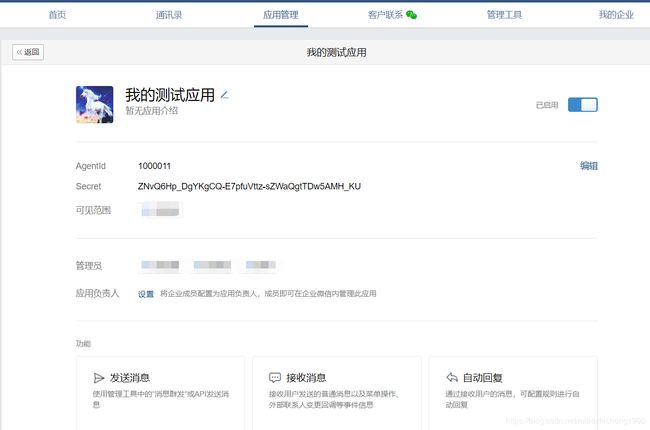
复制AgentId,和secret至一边,后面备用。现在我们的备用有哪些啦?crop_id,agentId,secret对吧?
到此,企业号配置,暂时告一段落,我们先转到springboot。
2、Springboot配置企业号
Springboot概述…………略
这里就不细说springboot了,以后看看有没有时间写吧。
先看一个开源的demo吧:https://github.com/binarywang/weixin-java-cp-demo
微信企业号中,有很多细节问题,这里不一一赘述,如果有疑问,可以在评论区,我看到之后一起讨论。
把这个项目拉下来。这里先说一下,要使用lombok插件,下载地址:
https://projectlombok.org/download打开安装到eclipse。要安装一下哦,要不然会报错的。
言归正传,从github上拉下来weixin-java-cp-demo之后,打开eclipse,import:
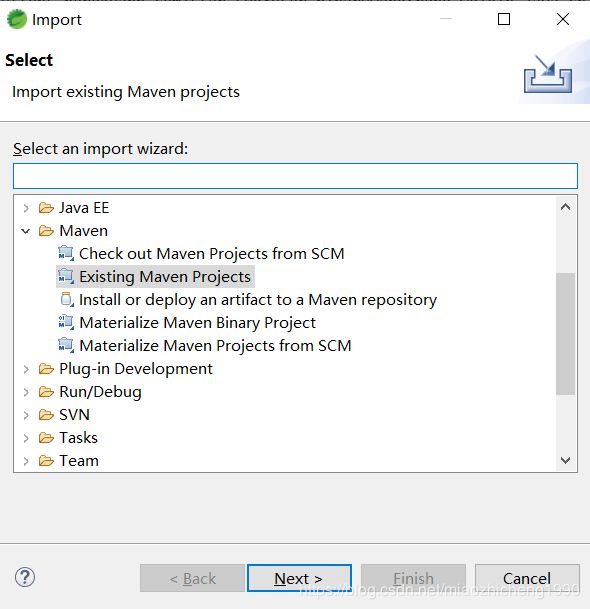
要用maven导入。对maven有疑问?
导入~
导入成功之后目录结构应该类似这个(红框中的两个yml文件除外):
将application.yml.template的.template去掉,打开yml文件:
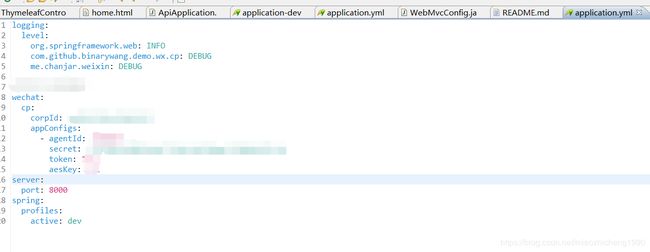
这里,还记得我前面让复制下来备用的吗?
Token、aeskey暂且分别填个111;corpId、agentId、secret粘贴到这里。
我这边多添加了个yml文件是application-dev.yml,这里不赘述配置文件的细节。
打开pom.xml文件,引入jar包:
>
>com.github.binarywang >
>weixin-java-cp >
>3.7.0 >
>
新建一个java文件试试配置有没有效果,名称是:WxPushMessageController,内容是:
package com.github.binarywang.demo.wx.cp.controller;

import java.util.HashMap;
import java.util.Map;

import org.slf4j.Logger;
import org.slf4j.LoggerFactory;
import org.springframework.beans.factory.annotation.Autowired;
import org.springframework.web.bind.annotation.GetMapping;
import org.springframework.web.bind.annotation.RequestMapping;
import org.springframework.web.bind.annotation.RequestParam;
import org.springframework.web.bind.annotation.RestController;

import com.github.binarywang.demo.wx.cp.config.WxCpConfiguration;
import com.github.binarywang.demo.wx.cp.config.WxCpProperties;

import me.chanjar.weixin.common.error.WxErrorException;
import me.chanjar.weixin.cp.api.WxCpService;
import me.chanjar.weixin.cp.bean.WxCpMessage;
import me.chanjar.weixin.cp.bean.WxCpMessageSendResult;
@RestController
@RequestMapping("/wx/cp/push")
public class WxPushMessageController {

	private final Logger logger = LoggerFactory.getLogger(this.getClass());

	@Autowired
	WxCpProperties wxCpProperties;

	@GetMapping("/touser")
	public Map pushToUsers(@RequestParam(value="user") String user , @RequestParam(value="content") String content , @RequestParam(value="index") int index) {

		Map returnMap = new HashMap();
		returnMap.put("code", "100");

		int agentId = wxCpProperties.getAppConfigs().get(index).getAgentId();
		final WxCpService wxCpService = WxCpConfiguration.getCpService(agentId);

		WxCpMessage message = WxCpMessage
		  .TEXT()
		  .agentId(agentId) // 企业号应用ID
		  .toUser(user)
//		  .toParty("非必填,PartyID列表,多个接受者用‘|’分隔。当touser为@all时忽略本参数")
//		  .toTag("非必填,TagID列表,多个接受者用‘|’分隔。当touser为@all时忽略本参数")
		  .content(content)
		  .build();

		this.logger.info("\n接收到来自微信服务器的认证消息:echostr = [{}]" , message.getContent());

		WxCpMessageSendResult wxCpMessageSendResult = new WxCpMessageSendResult();
		try {
			wxCpMessageSendResult = wxCpService.messageSend(message);
		} catch (WxErrorException e) {

			e.printStackTrace();
			this.logger.info("\n---------------------------------> 报错cause: [{}]" , e.getCause());
			this.logger.info("\n---------------------------------> 报错message: [{}]" , e.getMessage());
			returnMap.put("code", "400");
			returnMap.put("msg", "推送失败,请联系管理员。");
			return returnMap;
		}

		if(wxCpMessageSendResult.getErrCode()==0) {
			returnMap.put("code", "0");
			returnMap.put("msg", "推送成功。");
			return returnMap;
		}else {
			returnMap.put("code", "500");
			returnMap.put("msg", "推送失败,请联系管理员。");
			return returnMap;
		}

	}

}
这个是实现能发个推送消息。
简单解释一下:
@Autowired
WxCpProperties wxCpProperties;
注入的是配置信息,wxCpService.messageSend(message);是调用发送消息。完成之后,可以自己调试一下,先体会体会。
调试启动:WxCpDemoApplication.java,
看到下面的日志,说明已经成功了:

在浏览器里输入:
http://localhost:8000/wx/cp/push/touser?user=XXXXX&content=%E6%B5%8B%E8%AF%95%E6%B6%88%E6%81%AF%E8%BF%99%E6%98%AF&index=0
这里的user留意一下,是企业号的userId。在浏览器中出现:

恭喜你,已经成功的迈出了第一步了。转载的小伙伴,注一下出处,谢谢你们。有任何问题,在评论区留言,我们一起讨论。下一篇博文我与大家一道再接再厉!
