SpringBoot整合SpringMVC、Druid连接池、mybatis、通用mapper实战
什么是SpringBoot
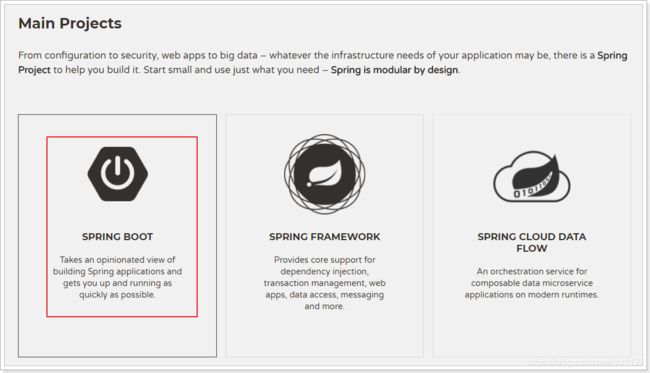
SpringBoot makes it easy to create stand-alone, production-grade Spring based Applications that you can “just run”.We take an opinionated view of the Spring platform and third-party libraries so you can get started with minimum fuss. Most Spring Boot applications need very little Spring configuration.
SpringBoot的特点
Spring Boot为 Spring 开发者提供一个开箱即用的、非常快速的入门体验,根据Spring Boot 官网介绍,Springboot具有以下特点:
- 创建独立的spring应用程序;
- 直接内嵌tomcat、jetty和undertow(不需要打包成war包部署);
- 提供了固定化的“starter”配置,以简化构建配置;
- 尽可能的自动配置spring和第三方库;
- 提供产品级的功能,如:安全指标、运行状况监测和外部化配置等;
- 绝对不会生成代码,并且不需要XML配置;
SpringBoot注解
1、@EnableAutoConfiguration开启spring应用程序的自动配置
2、@ComponentScan注解方式的注解扫描
3、@SpringBootApplication组合注解:
@SpringBootConfiguration:声明当前类是SpringBoot应用的配置类
@EnableAutoConfiguration:开启自动配置
@ComponentScan:开启注解扫描
SpringBoot实战
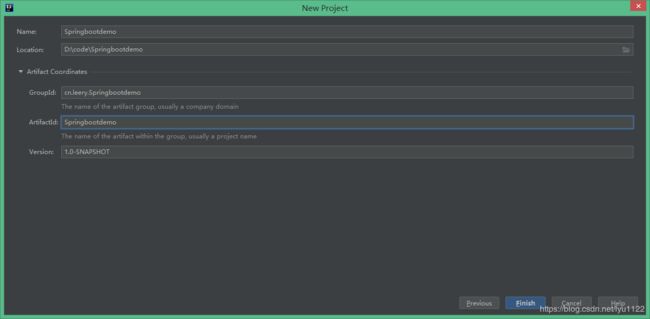
创建工程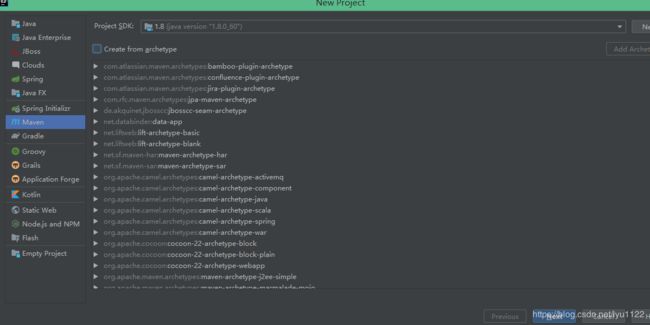
<?xml version="1.0" encoding="UTF-8"?>
<project xmlns="http://maven.apache.org/POM/4.0.0"
         xmlns:xsi="http://www.w3.org/2001/XMLSchema-instance"
         xsi:schemaLocation="http://maven.apache.org/POM/4.0.0 http://maven.apache.org/xsd/maven-4.0.0.xsd">
    <modelVersion>4.0.0</modelVersion>

    <groupId>cn.leery.Springbootdemo</groupId>
    <artifactId>Springbootdemo</artifactId>
    <version>1.0-SNAPSHOT</version>

    <parent>
        <groupId>org.springframework.boot</groupId>
        <artifactId>spring-boot-starter-parent</artifactId>
        <version>2.1.7.RELEASE</version>
    </parent>

    <dependencies>
        <dependency>
            <groupId>org.springframework.boot</groupId>
            <artifactId>spring-boot-starter-web</artifactId>
        </dependency>
    </dependencies>

</project>
引导类:
package com.leery.springbootdemo;

import org.springframework.boot.SpringApplication;
import org.springframework.boot.autoconfigure.SpringBootApplication;

@SpringBootApplication
public class Application {

    public static void main(String[] args) {
        SpringApplication.run(Application.class);
    }
}
SpringbootdemoController:
package com.leery.springbootdemo.controller;

import org.springframework.web.bind.annotation.GetMapping;
import org.springframework.web.bind.annotation.RequestMapping;
import org.springframework.web.bind.annotation.RestController;

@RestController
@RequestMapping
public class SpringbootdemoController {

    @GetMapping("show")
    public String test(){
        return "hello Spring Boot!";
    }

}
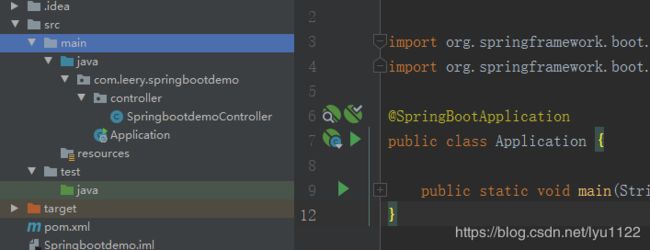
启动Application:

整合SpringMVC:
1、修改端口
添加全局配置文件:application.yml
server:
  port: 80
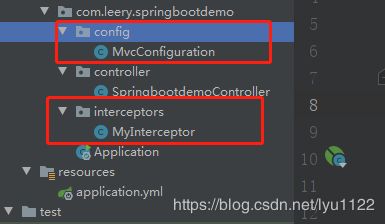
package com.leery.springbootdemo.config;

import org.springframework.beans.factory.annotation.Autowired;
import org.springframework.context.annotation.Configuration;
import org.springframework.web.servlet.HandlerInterceptor;
import org.springframework.web.servlet.config.annotation.InterceptorRegistry;
import org.springframework.web.servlet.config.annotation.WebMvcConfigurer;

@Configuration
public class MvcConfiguration implements WebMvcConfigurer {

    @Autowired
    private HandlerInterceptor myInterceptor;

    /**
     * 重写接口中的addInterceptors方法,添加自定义拦截器
     * @param registry
     */
    @Override
    public void addInterceptors(InterceptorRegistry registry) {
        registry.addInterceptor(myInterceptor).addPathPatterns("/**");
    }
}
package com.leery.springbootdemo.interceptors;

import org.springframework.stereotype.Component;
import org.springframework.web.servlet.HandlerInterceptor;
import org.springframework.web.servlet.ModelAndView;

import javax.servlet.http.HttpServletRequest;
import javax.servlet.http.HttpServletResponse;

@Component
public class MyInterceptor implements HandlerInterceptor {
    @Override
    public boolean preHandle(HttpServletRequest request, HttpServletResponse response, Object handler) throws Exception {
        System.out.println("preHandle method is running!");
        return true;
    }

    @Override
    public void postHandle(HttpServletRequest request, HttpServletResponse response, Object handler, ModelAndView modelAndView) throws Exception {
        System.out.println("postHandle method is running!");
    }

    @Override
    public void afterCompletion(HttpServletRequest request, HttpServletResponse response, Object handler, Exception ex) throws Exception {
        System.out.println("afterCompletion method is running!");
    }
}
server:
  port: 80
  # 设置org.springframework包的日志级别为debug
logging:
  level:
    org.springframework: debug
整合连接池
 <!--Mysql数据库驱动-->

            mysql
            mysql-connector-java
            8.0.16


        <!--集成druid连接池-->

            com.alibaba
            druid-spring-boot-starter
            1.1.10
配置数据库:
server:
  port: 80
spring:
  datasource:
    url: jdbc:mysql://127.0.0.1:3306/mybatis?useUnicode=true&characterEncoding=utf8&useSSL=true&serverTimezone=UTC
    username: root
    password: root
整合mybatis
pom.xml:
<!--mybatis -->
<dependency>
    <groupId>org.mybatis.spring.boot</groupId>
    <artifactId>mybatis-spring-boot-starter</artifactId>
    <version>1.3.2</version>
</dependency>
application.yml:
# mybatis 别名扫描
mybatis.type-aliases-package=com.leery.springbootdemo.pojo
# mapper.xml文件位置,如果没有映射文件,请注释掉
mybatis.mapper-locations=classpath:mappers/*.xml
通用mapper:
  <!-- 通用mapper -->
        <dependency>
            <groupId>tk.mybatis</groupId>
            <artifactId>mapper-spring-boot-starter</artifactId>
            <version>2.0.4</version>
        </dependency>
package com.leery.springbootdemo.mapper;

import com.leery.springbootdemo.pojo.User;
import org.apache.ibatis.annotations.Mapper;

@Mapper
public interface UserMapper extends tk.mybatis.mapper.common.Mapper<User>{
}
package com.leery.springbootdemo.service;

import com.leery.springbootdemo.mapper.UserMapper;
import com.leery.springbootdemo.pojo.User;
import org.springframework.beans.factory.annotation.Autowired;
import org.springframework.stereotype.Service;

@Service
public class UserService {

    @Autowired
    private UserMapper userMapper;

    public User queryById(Long id){
        return this.userMapper.selectByPrimaryKey(id);
    }

}
SpringbootdemoController :
package com.leery.springbootdemo.controller;

import com.leery.springbootdemo.pojo.User;
import com.leery.springbootdemo.service.UserService;
import org.springframework.beans.factory.annotation.Autowired;
import org.springframework.web.bind.annotation.GetMapping;
import org.springframework.web.bind.annotation.PathVariable;
import org.springframework.web.bind.annotation.RequestMapping;
import org.springframework.web.bind.annotation.RestController;

@RestController
@RequestMapping
public class SpringbootdemoController {

    @GetMapping("show")
    public String test(){
        return "hello Spring Boot!";
    }

    @Autowired
    private UserService userService;

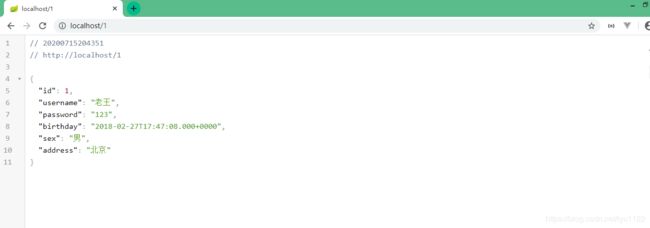
    @GetMapping("{id}")
    public User queryUserById(@PathVariable("id")Long id){
        return this.userService.queryById(id);
    }

}
