Flume-分布式日志采集
一.Flume的概述
1)Flume是什么
1.flume能做什么
Flume是一种分布式(各司其职),可靠且可用的服务,用于有效地收集,聚合(比如某一个应用搭建集群,在做数据分析的时候,将集群中的数据汇总在一起)和移动大量日志数据。Flume构建在日志流之上一个简单灵活的架构。
2.flume的特性
①它具有可靠的可靠性机制和许多故障转移和恢复机制,具有强大的容错性。使用Flume这套架构实现对日志流数据的实时在线分析。
②Flume支持在日志系统中定制各类数据发送方(可以从不同地方取数据),用于收集数据;同时,Flume提供对数据进行简单处理,并写到各种数据接受方(可定制)的能力。
注意:当前Flume有两个版本Flume 0.9X版本的统称Flume-og,Flume1.X版本的统称Flume-ng。由于Flume-ng经过重大重构,与Flume-og有很大不同,使用时请注意区分。这里使用的是apache-flume-1.9.0-bin.tar.gz。
链接:http://flume.apache.org/download.html
apache-flume-1.9.0-bin.tar.gz:是编译过的文件,可运行文件,文件大,含有第三方依赖。
apache-flume-1.9.0-src.tar.gz:项目的源码文件,想使用需要编译。
2)Flume架构
①Agent:最小日志采集单元,所谓的Flume的日志采集是通过拼装若干个Agent完成的。
②Event:原生的日志流封装成event对象,包含EventHeader:Map,EventBody:字节数组内容。
③Source:负责采集数据,通过网络方式读取外围应用的数据,将event数据push到Channel队列中。
④Channel 通道-队列结构:event事件队列起到缓冲的作用。
⑤Sink:负责从Channel中take数据,并将原生日志流数据输送出去给外围系统。
⑥复制:source收集到一则消息后,同时发送给这两个通道,这一个消息存在两个通道中。
⑦分流:根据信息的特点发送给不同的通道。
⑧拦截器:拦截或者装饰event。
⑨通道选择器:复制,分流由通道选择器决定。
⑩SinkGroup:逻辑的Sink,里边有多个sink。
两种工作模式:负载均衡,两个小sink轮流从通道中取数据,轮流把数据写出去。
故障转移,只有当其中的一个sink宕机,另一个sink才工作。
一般情况下,一个通道对应一个SinkGroup,一个SinkGroup可以有多个sink。
3)Agent配置模板说明
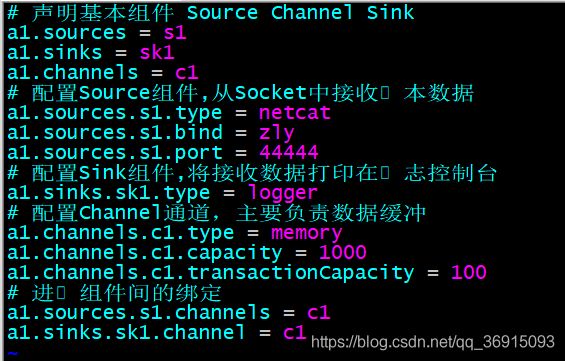
①example1.properties 单个Agent的配置,将该配置⽂件放置在flume安装⽬录下的conf⽬录下,需要自己建文件。
cd /usr/soft/apache-flume-1.9.0-bin/
vim conf/example1.properties
a1:agent的名字
netcat:通常用于测试
 ②启动a1采集组件前,需要安装插件,并测试确保指令可以用
yum -y install nmap-ncat
yum -y install telnet
nc - help
③监听端口
l:监听端口
k:允许多个人连接这个端口
nc -lk 44444
④启动a1组件
./bin/flume-ng agent --conf conf/ --name a1 --conf-file conf/example1.properties -Dflume.root.logger=INFO,console
–conf:配置文件存放在哪里。
–name:agent的名字。
–conf-file:启动的是哪个配置文件。
-Dflume.root.logger=INFO,console:覆盖系统配置属性。
⑤发送数据
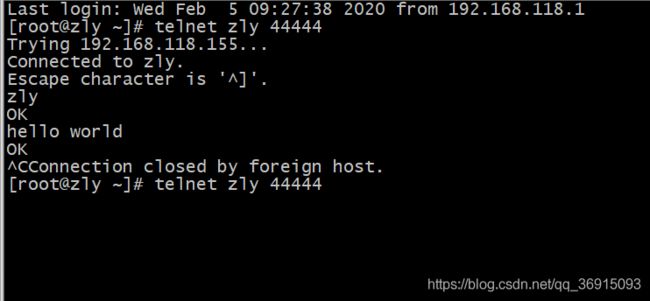
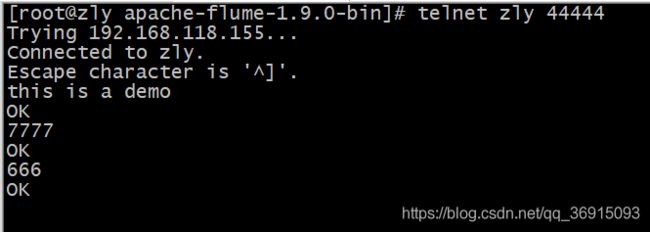
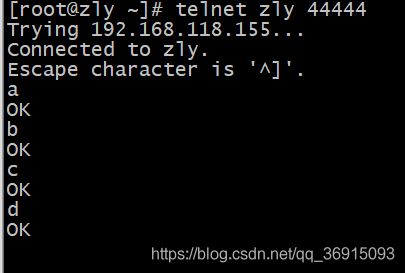
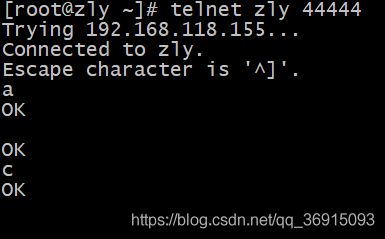
telnet zly 44444
二.Flume的组件概述
1)Source-输入源
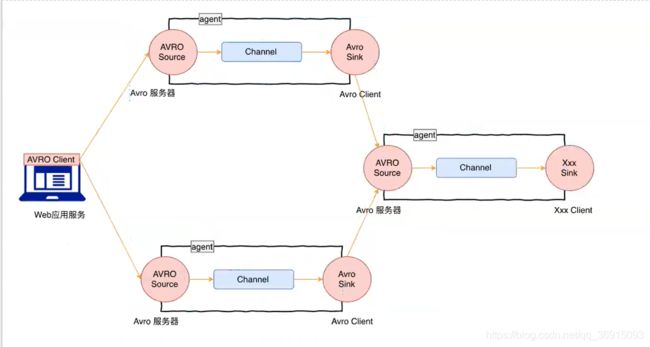
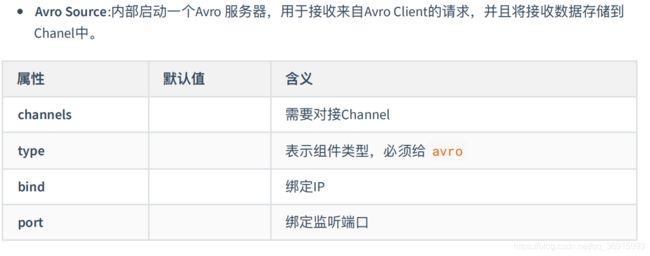
①Avro:用于RPC/序列化,用于机器间通讯的通讯协议,底层使用Avro序列化协议,用在内部系统通信,效率比http效率高。
httpclient:调用其他web服务的客户端工具。
可以设计一个拓补结构,Avro为首选
# 声明基本组件 Source Channel Sink example2.properties
a1.sources = s1
a1.sinks = sk1
a1.channels = c1
# 配置Source组件,从Socket中接收⽂本数据
a1.sources.s1.type = avro
a1.sources.s1.bind = zly
a1.sources.s1.port = 44444
# 配置Sink组件,将接收数据打印在⽇志控制台
a1.sinks.sk1.type = logger
# 配置Channel通道,主要负责数据缓冲
a1.channels.c1.type = memory
a1.channels.c1.capacity = 1000
a1.channels.c1.transactionCapacity = 100
# 进⾏组件间的绑定
a1.sources.s1.channels = c1
a1.sinks.sk1.channel = c1
./bin/flume-ng agent --conf conf/ --name a1 --conf-file conf/example2.properties -Dflume.root.logger=INFO,console
模拟客户端发送
./bin/flume-ng avro-client --host zly --port 44444 --filename /root/t_emp
②Exec:可以将指令在控制台的输出采集过来,如果进程退出,source也会退出,满足实时性,但是会重新采集。

# 声明基本组件 Source Channel Sink example3.properties
a1.sources = s1
a1.sinks = sk1
a1.channels = c1
# 配置Source组件,从Socket中接收⽂本数据
a1.sources.s1.type = exec
a1.sources.s1.command = tail -F /root/t_emp
# 配置Sink组件,将接收数据打印在⽇志控制台
a1.sinks.sk1.type = logger
# 配置Channel通道,主要负责数据缓冲
a1.channels.c1.type = memory
a1.channels.c1.capacity = 1000
a1.channels.c1.transactionCapacity = 100
# 进⾏组件间的绑定
a1.sources.s1.channels = c1
a1.sinks.sk1.channel = c1
./bin/flume-ng agent --conf conf/ --name a1 --conf-file conf/example3.properties -Dflume.root.logger=INFO,console
运行之后直接可以采集到的数据。
检测是否可以动态采集,结果:可以
echo zl >> /root/t_emp
 ③
③Spooling Directory:采集静态目录下,新增的文本文件,采集完成后回去修改文件后缀,但是不会删除采集的源文件,如果用户只想采集一次,可以修改改source的默认行为,一般用于批处理。
 ^匹配开头
^匹配开头
.匹配任意字符
*匹配0-多个
$匹配结尾
^ $:表示无
# 声明基本组件 Source Channel Sink example4.properties
a1.sources = s1
a1.sinks = sk1
a1.channels = c1
# 配置Source组件,从Socket中接收⽂本数据
a1.sources.s1.type = spooldir
a1.sources.s1.spoolDir = /root/spooldir
a1.sources.s1.fileHeader = true
# 配置Sink组件,将接收数据打印在⽇志控制台
a1.sinks.sk1.type = logger
# 配置Channel通道,主要负责数据缓冲
a1.channels.c1.type = memory
a1.channels.c1.capacity = 1000
a1.channels.c1.transactionCapacity = 100
# 进⾏组件间的绑定
a1.sources.s1.channels = c1
a1.sinks.sk1.channel = c1
./bin/flume-ng agent --conf conf/ --name a1 --conf-file conf/example4.properties -Dflume.root.logger=INFO,console
将文件拷贝到指定目录下
cp /root/t_emp /root/spooldir/
 查看采集目录,发现后缀名改了,这时再修改文件内容,就不会再采集了,除非修改文件后缀名。
 ④
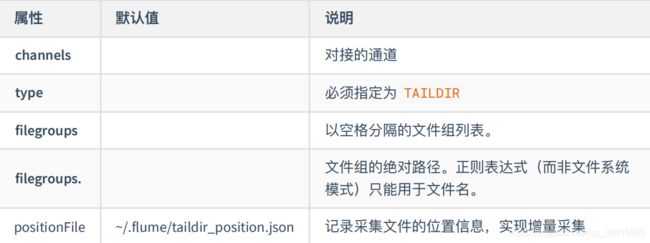
④Taildir :可以实时监测动态文本行的追加,并且会记录采集的文件读取位置偏移量,即使下一次再次采集,可以实现增量采集,如果存放偏移量的隐藏文件被删除了就会重新读取数据。
能够一下采集多个目录
# 声明基本组件 Source Channel Sink example5.properties
a1.sources = s1
a1.sinks = sk1
a1.channels = c1
# 配置Source组件,从Socket中接收⽂本数据
a1.sources.s1.type = TAILDIR
a1.sources.s1.filegroups = g1 g2
a1.sources.s1.filegroups.g1 = /root/taildir/.*\.log$
a1.sources.s1.filegroups.g2 = /root/taildir/.*\.java$
a1.sources.s1.headers.g1.type = log
a1.sources.s1.headers.g2.type = java
# 配置Sink组件,将接收数据打印在⽇志控制台
a1.sinks.sk1.type = logger
# 配置Channel通道,主要负责数据缓冲
a1.channels.c1.type = memory
a1.channels.c1.capacity = 1000
a1.channels.c1.transactionCapacity = 100
# 进⾏组件间的绑定
a1.sources.s1.channels = c1
a1.sinks.sk1.channel = c1
测试:
1)拷贝以并命名以.log结尾和.java结尾的文件
mkdir /root/taildir
cp t_emp taildir/t_emp.log
cp t_emp taildir/t_emp.java
2)启动a1采集组件,会直接加载数据,之后重启a1采集组件,发现实现了增量采集,并不会重复加载数据。
./bin/flume-ng agent --conf conf/ --name a1 --conf-file conf/example5.properties -Dflume.root.logger=INFO,console
3)查看隐藏目录,发现文件记录这偏移量
cat .flume/taildir_position.json
![]() ⑤Kafka
⑤Kafka
# 声明基本组件 Source Channel Sink example9.properties
a1.sources = s1
a1.sinks = sk1
a1.channels = c1
# 配置Source组件,从Socket中接收⽂本数据
a1.sources.s1.type = org.apache.flume.source.kafka.KafkaSource
a1.sources.s1.batchSize = 100
a1.sources.s1.batchDurationMillis = 2000
a1.sources.s1.kafka.bootstrap.servers = zly:9092
a1.sources.s1.kafka.topics = topic01
a1.sources.s1.kafka.consumer.group.id = g1
# 配置Sink组件,将接收数据打印在⽇志控制台
a1.sinks.sk1.type = logger
# 配置Channel通道,主要负责数据缓冲
a1.channels.c1.type = memory
a1.channels.c1.capacity = 1000
a1.channels.c1.transactionCapacity = 100
# 进⾏组件间的绑定
a1.sources.s1.channels = c1
a1.sinks.sk1.channel = c1
从Kafka读数据push到channel的最大数量为100
最多一次写入100
channel内存队列的容量
batchSize <= transactionCapacity <= capacity
测试:
1)启动a1采集组件
./bin/flume-ng agent --conf conf/ --name a1 --conf-file conf/example9.properties -Dflume.root.logger=INFO,console
2)发数据
./bin/kafka-console-producer.sh --broker-list zly:9092 --topic topic01
2)Sink-输出
①logger:通常用于测试/调试目的。
②File-Roll Sink:可以将采集的数据写入到本地文件。
# 声明基本组件 Source Channel Sink example6.properties
a1.sources = s1
a1.sinks = sk1
a1.channels = c1
# 配置Source组件,从Socket中接收⽂本数据
a1.sources.s1.type = netcat
a1.sources.s1.bind = zly
a1.sources.s1.port = 44444
# 配置Sink组件,将接收数据打印在⽇志控制台
a1.sinks.sk1.type = file_roll
a1.sinks.sk1.sink.directory = /root/file_roll
a1.sinks.sk1.sink.rollInterval = 0
# 配置Channel通道,主要负责数据缓冲
a1.channels.c1.type = memory
a1.channels.c1.capacity = 1000
a1.channels.c1.transactionCapacity = 100
# 进⾏组件间的绑定
a1.sources.s1.channels = c1
a1.sinks.sk1.channel = c1
rollInterval :0表示不滚动,单位秒。
测试:
1)创建写入的目录
vim conf/example6.properties
mkdir /root/file_roll
2)启动a1采集组件,不再是logger类型,所以不需要写-D后的内容
./bin/flume-ng agent --conf conf/ --name a1 --conf-file conf/example6.properties
3)查看输出文件目录,并实时监视
ls file_roll/
tail -f file_roll/1580947315558-1
telnet zly 44444


③HDFS Sink:可以将数据写入到HDFS文件系统。
1)
# 声明基本组件 Source Channel Sink example7.properties
a1.sources = s1
a1.sinks = sk1
a1.channels = c1
# 配置Source组件,从Socket中接收⽂本数据
a1.sources.s1.type = netcat
a1.sources.s1.bind = zly
a1.sources.s1.port = 44444
# 配置Sink组件,将接收数据打印在⽇志控制台
a1.sinks.sk1.type = hdfs
a1.sinks.sk1.hdfs.path = /flume-hdfs/%y-%m-%d
a1.sinks.sk1.hdfs.rollInterval = 0
a1.sinks.sk1.hdfs.rollSize = 0
a1.sinks.sk1.hdfs.rollCount = 0
a1.sinks.sk1.hdfs.useLocalTimeStamp = true
a1.sinks.sk1.hdfs.fileType = DataStream
# 配置Channel通道,主要负责数据缓冲
a1.channels.c1.type = memory
a1.channels.c1.capacity = 1000
a1.channels.c1.transactionCapacity = 100
# 进⾏组件间的绑定
a1.sources.s1.channels = c1
a1.sinks.sk1.channel = c1
/%y-%m-%d/%H%M%S /年月日/时分秒
rollInterval:不基于时间做滚动,单位秒
rollSize:基于大小做滚动,单位bytes
rollCount :不会根据记录数做滚动
useLocalTimeStamp :不然在event头里加时间,不然就加这个属性,不然报错。
fileType :hadoop中显示hadoop中默认显示二进制文件,在hadoop显示文本文件。
④Kafka Sink:可以将数据写入到Kafka的Topic中。
# 声明基本组件 Source Channel Sink example8.properties
a1.sources = s1
a1.sinks = sk1
a1.channels = c1
# 配置Source组件,从Socket中接收⽂本数据
a1.sources.s1.type = netcat
a1.sources.s1.bind = zly
a1.sources.s1.port = 44444
# 配置Sink组件,将接收数据打印在⽇志控制台
a1.sinks.sk1.type = org.apache.flume.sink.kafka.KafkaSink
a1.sinks.sk1.kafka.bootstrap.servers = zly:9092
a1.sinks.sk1.kafka.topic = topic01
a1.sinks.sk1.kafka.flumeBatchSize = 20
a1.sinks.sk1.kafka.producer.acks = 1
a1.sinks.sk1.kafka.producer.linger.ms = 1
a1.sinks.sk1.kafka.producer.compression.type = snappy
# 配置Channel通道,主要负责数据缓冲
a1.channels.c1.type = memory
a1.channels.c1.capacity = 1000
a1.channels.c1.transactionCapacity = 100
# 进⾏组件间的绑定
a1.sources.s1.channels = c1
a1.sinks.sk1.channel = c1
测试:
1)在保证启动了zookeeper的情况下,创建topic01
./bin/kafka-topics.sh --bootstrap-server zly:9092 --create --topic topic01 --partitions 1 --replication-factor 1
2)启动消费者去监听
./bin/kafka-console-consumer.sh --bootstrap-server zly:9092 --topic topic01
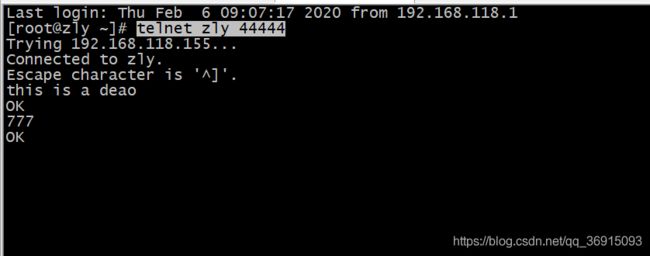
3)发送信息
telnet zly 44444

⑤Avro Sink:相当于Avro Client,可以将数据写出给Avro Source。

# 声明基本组件 Source Channel Sink example9.properties
a1.sources = s1
a1.sinks = sk1
a1.channels = c1
# 配置Source组件,从Socket中接收⽂本数据
a1.sources.s1.type = org.apache.flume.source.kafka.KafkaSource
a1.sources.s1.batchSize = 100
a1.sources.s1.batchDurationMillis = 2000
a1.sources.s1.kafka.bootstrap.servers = zly:9092
a1.sources.s1.kafka.topics = topic01
a1.sources.s1.kafka.consumer.group.id = g1
# 配置Sink组件,将接收数据打印在⽇志控制台
a1.sinks.sk1.type = avro
a1.sinks.sk1.hostname = zly
a1.sinks.sk1.port = 44444
# 配置Channel通道,主要负责数据缓冲
a1.channels.c1.type = memory
a1.channels.c1.capacity = 1000
a1.channels.c1.transactionCapacity = 100
# 进⾏组件间的绑定
a1.sources.s1.channels = c1
a1.sinks.sk1.channel = c1
# 声明基本组件 Source Channel Sink example9.properties
a2.sources = s1
a2.sinks = sk1
a2.channels = c1
# 配置Source组件,从Socket中接收⽂本数据
a2.sources.s1.type = avro
a2.sources.s1.bind = zly
a2.sources.s1.port = 44444
# 配置Sink组件,将接收数据打印在⽇志控制台
a2.sinks.sk1.type = file_roll
a2.sinks.sk1.sink.directory = /root/file_roll
a2.sinks.sk1.sink.rollInterval = 0
# 配置Channel通道,主要负责数据缓冲
a2.channels.c1.type = memory
a2.channels.c1.capacity = 1000
a2.channels.c1.transactionCapacity = 100
# 进⾏组件间的绑定
a2.sources.s1.channels = c1
a2.sinks.sk1.channel = c1
测试:
1)必须先启动a2采集组件,再启动a1
a2
./bin/flume-ng agent --conf conf/ --name a2 --conf-file conf/example9.properties -Dflume.root.logger=INFO,console
a1
./bin/flume-ng agent --conf conf/ --name a1 --conf-file conf/example9.properties
2)监视输出结果的文件
tail -f file_roll/1580969732681-1
3)模拟kafka发送文件
./bin/kafka-console-producer.sh --broker-list zly:9092 --topic topic01
3)Channel-通道
①Memory Channel:快,将Source数据直接写入内存,数据不安全。

注意:transactionCapacity <= capacity
a1.channels.c1.type = memory
a1.channels.c1.capacity = 1000
a1.channels.c1.transactionCapacity = 100
②JDBC Channel:事件存储在数据库支持的持久性存储中。JDBC通道当前支持嵌入式Derby。这是一种持久通道,非常适合可恢复性很重要的流程。存储非常重要的数据时候可以使用此通道,数据安全。JDBC Channel支持事务,当Source写入失败,数据回滚,Sink就读不到数据。
a1.channels.c1.type = jdbc
③Kafka Channel:将Source采集的数据写入外围系统的Kafka集群,如果agent宕了,Sink依然可以从Kafka Source中读数据,Kafka是高可用的。
# 声明基本组件 Source Channel Sink example10.properties
a1.sources = s1
a1.sinks = sk1
a1.channels = c1
# 配置Source组件,从Socket中接收⽂本数据
a1.sources.s1.type = netcat
a1.sources.s1.bind = zly
a1.sources.s1.port = 44444
# 配置Sink组件,将接收数据打印在⽇志控制台
a1.sinks.sk1.type = logger
# 配置Channel通道,主要负责数据缓冲
a1.channels.c1.type = org.apache.flume.channel.kafka.KafkaChannel
a1.channels.c1.kafka.bootstrap.servers = zly:9092
a1.channels.c1.kafka.topic = topic_channel
a1.channels.c1.kafka.consumer.group.id = g1
# 进⾏组件间的绑定
a1.sources.s1.channels = c1
a1.sinks.sk1.channel = c1
测试:
1)启动a1采集组件
./bin/flume-ng agent --conf conf/ --name a1 --conf-file conf/example10.properties -Dflume.root.logger=INFO,console
2)发送数据
telnet zly 44444
 3)监听到日志打印
![]() 也可以使用消费者去测试
也可以使用消费者去测试
1)订阅topic topic_channel 监听数据
./bin/kafka-console-consumer.sh --bootstrap-server zly:9092 --topic topic_channel --group g2
a1.channels.c1.type = file
a1.channels.c1.checkpointDir = /root/flume/checkpoint
a1.channels.c1.dataDirs = /root/flume/data
checkpointDir :检查点文件所存储的目录,如果宕机,这个检查点可以加快数据宕机前状态的回复时间。
dataDirs :文件夹中存储channel中的数据信息。
面试:日志采集时,用的Channel是什么?
生产环境下,一般用的是JDBC Channel,支持事务,支持故障恢复,避免数据丢失。
4)Flume的高级组件
拦截器
作用于Source组件,对Source组件封装的Event组件进行拦截或者装饰,Flume内建了许多的拦截器。
①Timestamp Interceptor:装饰类型,负责在Event header中添加时间信息。
②Host Interceptor:装饰类型,负责在Event header中添加主机信息(Source主机)。
③Static Interceptor:装饰类型,负责在Event header中添加自定义key和value。
④Remove Interceptor:装饰类型,负责删除Event header中指定的key。
⑤UUID Interceptor:装饰类型,负责在Event header中添加UUID的随机唯一字符串。
⑥Search and Replace Interceptor:装饰类型,负责搜索EventBody的内容,并且将匹配的内容进行替换。
⑦Regex Filtering Interveptor:拦截类型,将满足正则表达式的EventBody内容进行过滤或者匹配。
⑧Regex Extractor Interveptor:装饰类型,负责搜索EventBody的内容,且将匹配的内容添加到Event Haeder里面。
测试:①②③⑤
1)
# 声明基本组件 Source Channel Sink example11.properties
a1.sources = s1
a1.sinks = sk1
a1.channels = c1
# 配置Source组件,从Socket中接收⽂本数据
a1.sources.s1.type = netcat
a1.sources.s1.bind = zly
a1.sources.s1.port = 44444
# 添加拦截器
a1.sources.s1.interceptors = i1 i2 i3 i4
a1.sources.s1.interceptors.i1.type = timestamp
a1.sources.s1.interceptors.i2.type = host
a1.sources.s1.interceptors.i3.type = static
a1.sources.s1.interceptors.i3.key = from
a1.sources.s1.interceptors.i3.value = baizhi
a1.sources.s1.interceptors.i4.type =org.apache.flume.sink.solr.morphline.UUIDInterceptor$Builder
a1.sources.s1.interceptors.i4.headerName = uuid
# 配置Sink组件,将接收数据打印在⽇志控制台
a1.sinks.sk1.type = logger
# 配置Channel通道,主要负责数据缓冲
a1.channels.c1.type = memory
a1.channels.c1.capacity = 1000
a1.channels.c1.transactionCapacity = 100
# 进⾏组件间的绑定
a1.sources.s1.channels = c1
a1.sinks.sk1.channel = c1
2)
./bin/flume-ng agent --conf conf/ --name a1 --conf-file conf/example11.properties -Dflume.root.logger=INFO,console
3)
telnet zly 44444
测试 Remove Interceptor:
./bin/flume-ng agent --conf conf/ --name a1 --conf-file conf/example11.properties -Dflume.root.logger=INFO,console
3)发现Static Interceptor装饰的Event header没了
telnet zly 44444
测试:Search and Replace Interceptor
./bin/flume-ng agent --conf conf/ --name a1 --conf-file conf/example11.properties -Dflume.root.logger=INFO,console
3)发现以zly开头的EventBody的内容被替换成baizhi了
telnet zly 44444
测试⑦⑧
1)
# 声明基本组件 Source Channel Sink example12.properties
a1.sources = s1
a1.sinks = sk1
a1.channels = c1
# 配置Source组件,从Socket中接收⽂本数据
a1.sources.s1.type = netcat
a1.sources.s1.bind = zly
a1.sources.s1.port = 44444
# 添加拦截器
a1.sources.s1.interceptors = i1 i2
a1.sources.s1.interceptors.i1.type = regex_extractor
a1.sources.s1.interceptors.i1.regex = ^(INFO|ERROR)
a1.sources.s1.interceptors.i1.serializers = s1
a1.sources.s1.interceptors.i1.serializers.s1.name = loglevel
a1.sources.s1.interceptors.i2.type = regex_filter
a1.sources.s1.interceptors.i2.regex = .*baizhi.*
a1.sources.s1.interceptors.i2.excludeEvents = false
# 配置Sink组件,将接收数据打印在⽇志控制台
a1.sinks.sk1.type = logger
# 配置Channel通道,主要负责数据缓冲
a1.channels.c1.type = memory
a1.channels.c1.capacity = 1000
a1.channels.c1.transactionCapacity = 100
# 进⾏组件间的绑定
a1.sources.s1.channels = c1
a1.sinks.sk1.channel = c1
regex :正则表达式,有几个()就有几个抽取项。
serializers :根据抽取项来看。命名为s1。
serializers.s1.name:把Event Body中正则匹配的内容添加到Event Header中,匹配之后loglevel=INFO或loglevel=ERROR。
regex :正则表达式匹配EventBody内容中存在baizhi。
excludeEvents :设为false表示匹配,否则是排除。
2)
telnet zly 44444
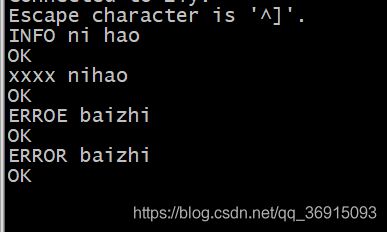
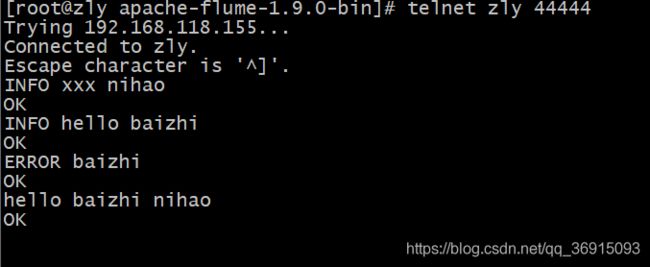 3)内容中不带baizhi的数据都会过滤掉,如果匹配到,看内容中是否有匹配的头信息,有的话就显示Event header,否则Header为空。

通道选择器
当一个Source组件对接对个Channel组件时,通道选择器决定了Source的数据如何路由到Channel中,如果用户不指定通道选择器,默认系统会将Source的数据广播给所有的Channel。
①replicating 复制
# 声明基本组件 Source Channel Sink example13.properties
a1.sources = s1
a1.sinks = sk1 sk2
a1.channels = c1 c2
# 配置Source组件,从Socket中接收⽂本数据
a1.sources.s1.type = netcat
a1.sources.s1.bind = zly
a1.sources.s1.port = 44444
# 配置Sink组件,将接收数据打印在⽇志控制台
a1.sinks.sk1.type = file_roll
a1.sinks.sk1.sink.directory = /root/file_roll_1
a1.sinks.sk1.sink.rollInterval = 0
a1.sinks.sk2.type = file_roll
a1.sinks.sk2.sink.directory = /root/file_roll_2
a1.sinks.sk2.sink.rollInterval = 0
# 配置Channel通道,主要负责数据缓冲
a1.channels.c1.type = memory
a1.channels.c1.capacity = 1000
a1.channels.c1.transactionCapacity = 100
a1.channels.c2.type = jdbc
# 进⾏组件间的绑定
a1.sources.s1.channels = c1 c2
a1.sinks.sk1.channel = c1
a1.sinks.sk2.channel = c2
2)由于jar包冲突,所以运行前选执行此步骤
cd /usr/soft/apache-flume-1.9.0-bin/
mv lib/derby-10.14.1.0.jar /root/
3)运行
./bin/flume-ng agent --conf conf/ --name a1 --conf-file conf/example13.properties -Dflume.root.logger=INFO,console
注意:
1、如果⽤户配置HIVE_HOME环境,需要⽤户移除hive的lib下的derby或者flume的lib下的derby(仅仅删除⼀⽅即可),不然会有驱动jar冲突。
2、默认情况下,flume使⽤的是复制|⼴播模式的通道选择器。
另一种写法,直接加上这段配置:
# 声明基本组件 Source Channel Sink example14.properties
a1.sources = s1
a1.sinks = sk1 sk2
a1.channels = c1 c2
# 通道选择器 复制模式
a1.sources.s1.selector.type = replicating
a1.sources.s1.channels = c1 c2
后边省略...
比较一下官方给的案例:
a1.sources.s1.selector.type = replicating
a1.sources.s1.channels = c1 c2 c3
a1.sources.s1.selector.optional = c3
selector.optional:设置c3位可选项,如果c3写失败会忽略掉,由于c1,c2没有标记为可选项,如果任何一个写失败了,会导致写的事务失败。
② Multiplexing 分流
通过拦截器对Event头信息进行装饰,再根据通道选择器根据头信息的映射,将不同的EventHeader发送给不同的Channel。

# 声明基本组件 Source Channel Sink example15.properties
a1.sources = s1
a1.sinks = sk1 sk2
a1.channels = c1 c2
# 通道选择器 分流模式
a1.sources.s1.selector.type = multiplexing
a1.sources.s1.channels = c1 c2
a1.sources.s1.selector.header = level
a1.sources.s1.selector.mapping.INFO = c1
a1.sources.s1.selector.mapping.ERROR = c2
a1.sources.s1.selector.default = c1
# 配置Source组件,从Socket中接收⽂本数据
a1.sources.s1.type = netcat
a1.sources.s1.bind = zly
a1.sources.s1.port = 44444
a1.sources.s1.interceptors = i1
a1.sources.s1.interceptors.i1.type = regex_extractor
a1.sources.s1.interceptors.i1.regex = ^(INFO|ERROR)
a1.sources.s1.interceptors.i1.serializers = s1
a1.sources.s1.interceptors.i1.serializers.s1.name = level
# 配置Sink组件,将接收数据打印在⽇志控制台
a1.sinks.sk1.type = file_roll
a1.sinks.sk1.sink.directory = /root/file_roll_1
a1.sinks.sk1.sink.rollInterval = 0
a1.sinks.sk2.type = file_roll
a1.sinks.sk2.sink.directory = /root/file_roll_2
a1.sinks.sk2.sink.rollInterval = 0
# 配置Channel通道,主要负责数据缓冲
a1.channels.c1.type = memory
a1.channels.c1.capacity = 1000
a1.channels.c1.transactionCapacity = 100
a1.channels.c2.type = jdbc
# 进⾏组件间的绑定
a1.sources.s1.channels = c1 c2
a1.sinks.sk1.channel = c1
a1.sinks.sk2.channel = c2
selector.header:设置头的key为level。
selector.mapping.INFO:进行映射,如果EventHeader的level=INFO,纠结传到c1通道。
selector.default:除了上边映射之后的信息。
测试:
1)
./bin/flume-ng agent --conf conf/ --name a1 --conf-file conf/example15.properties -Dflume.root.logger=INFO,console
2)
tail -f file_roll_1/1581035039276-1
tail -f file_roll_2/1581035039277-1
3)发送数据
telnet zly 44444
SinkGroup
Flume使⽤Sink Group将多个Sink实例封装成⼀个逻辑的Sink组件,内部通过Sink Processors实现SinkGroup的故障转移和负载均衡。
Load balancing Sink Processor 负载均衡
# 声明基本组件 Source Channel Sink example16.properties
a1.sources = s1
a1.sinks = sk1 sk2
a1.channels = c1
# 配置Source组件,从Socket中接收⽂本数据
a1.sources.s1.type = netcat
a1.sources.s1.bind = zly
a1.sources.s1.port = 44444
# 配置Sink组件,将接收数据打印在⽇志控制台
a1.sinks.sk1.type = file_roll
a1.sinks.sk1.sink.directory = /root/file_roll_1
a1.sinks.sk1.sink.rollInterval = 0
a1.sinks.sk1.sink.batchSize = 1
a1.sinks.sk2.type = file_roll
a1.sinks.sk2.sink.directory = /root/file_roll_2
a1.sinks.sk2.sink.rollInterval = 0
a1.sinks.sk2.sink.batchSize = 1
# 配置Sink Porcessors
a1.sinkgroups = g1
a1.sinkgroups.g1.sinks = sk1 sk2
a1.sinkgroups.g1.processor.type = load_balance
a1.sinkgroups.g1.processor.backoff = true
a1.sinkgroups.g1.processor.selector = round_robin
# 配置Channel通道,主要负责数据缓冲
a1.channels.c1.type = memory
a1.channels.c1.capacity = 1000
a1.channels.c1.transactionCapacity = 1
# 进⾏组件间的绑定
a1.sources.s1.channels = c1
a1.sinks.sk1.channel = c1
a1.sinks.sk2.channel = c1
processor.selector:有random和round_robin两种模式,默认为轮询。
processor.backoff:true,逻辑SinkGroup如果有一个Sink挂掉,就将此Sink从轮询列表中移除。
注意:如果想看到负载均衡效果, sink.batchSize 和 transactionCapacity 必须配置成1。
测试:
1)
./bin/flume-ng agent --conf conf/ --name a1 --conf-file conf/example16.properties -Dflume.root.logger=INFO,console
2)监测文件内容
tail -f file_roll_1/1581153666810-1
tail -f file_roll_2/1581153666818-1
Failover Sink Processor 故障转移
只有其中一个sink宕掉后。才使用其他sink。
 processor.priority.sk1:权重越大,越优先使用。
g1.processor.maxpenalty:宕机后,30s后移除故障转移列表。
# 声明基本组件 Source Channel Sink example17.properties
a1.sources = s1
a1.sinks = sk1 sk2
a1.channels = c1
# 配置Source组件,从Socket中接收⽂本数据
a1.sources.s1.type = netcat
a1.sources.s1.bind = zly
a1.sources.s1.port = 44444
# 配置Sink组件,将接收数据打印在⽇志控制台
a1.sinks.sk1.type = file_roll
a1.sinks.sk1.sink.directory = /root/file_roll_1
a1.sinks.sk1.sink.rollInterval = 0
a1.sinks.sk1.sink.batchSize = 1
a1.sinks.sk2.type = file_roll
a1.sinks.sk2.sink.directory = /root/file_roll_2
a1.sinks.sk2.sink.rollInterval = 0
a1.sinks.sk2.sink.batchSize = 1
# 配置Sink Porcessors
a1.sinkgroups = g1
a1.sinkgroups.g1.sinks = sk1 sk2
a1.sinkgroups.g1.processor.type = failover
a1.sinkgroups.g1.processor.priority.sk1 = 20
a1.sinkgroups.g1.processor.priority.sk2 = 10
a1.sinkgroups.g1.processor.maxpenalty = 10000
# 配置Channel通道,主要负责数据缓冲
a1.channels.c1.type = memory
a1.channels.c1.capacity = 1000
a1.channels.c1.transactionCapacity = 1
# 进⾏组件间的绑定
a1.sources.s1.channels = c1
a1.sinks.sk1.channel = c1
a1.sinks.sk2.channel = c1
测试:
1)
./bin/flume-ng agent --conf conf/ --name a1 --conf-file conf/example17.properties -Dflume.root.logger=INFO,console
2)监听文件,发现file_roll_2中并没有文件,所以说宕机之后才会创建。
tail -f file_roll_1/1581154632966-1
3)发送数据
三.应用集成-API
1)原生API集成
依赖
<!--必须提前搭建AVRO Source-->
	<dependency>
		 <groupId>org.apache.flume</groupId>
		 <artifactId>flume-ng-sdk</artifactId>
		 <version>1.9.0</version>
	</dependency>
	<dependency>
	 	<groupId>junit</groupId>
		<artifactId>junit</artifactId>
		<version>4.12</version>
		<scope>test</scope>
	</dependency>
单击链接
1)在虚拟机中运行
./bin/flume-ng agent --conf conf/ --name a1 --conf-file conf/example2.properties -Dflume.root.logger=INFO,console
2)在idea中模拟发数据
public class RpcClientTests {
    private RpcClient client;
    @Before
    public void before(){
        //默认连接Avro
        client= RpcClientFactory.getDefaultInstance("zly",44444);
    }
    //模拟发数据
    @Test
    public void testSend() throws EventDeliveryException {
        Event event= EventBuilder.withBody("this is body".getBytes());
        HashMap<String, String> header = new HashMap<String, String>();
        header.put("zly","成功");
        event.setHeaders(header);
        client.append(event);
    }
    @After
    public void after(){
        client.close();
    }
}
3)测试结果
![]()
集群链接
① 故障转移
public class RpcClientTests02_FailoverClient {
    private RpcClient client;
    @Before
    public void before(){
        Properties props = new Properties();
        //default_failover是故障恢复机制
        props.put("client.type", "default_failover");

        // List of hosts (space-separated list of user-chosen host aliases)
        props.put("hosts", "h1 h2 h3");

        // host/port pair for each host alias
        props.put("hosts.h1", "zly:44444");
        props.put("hosts.h2","zly:44444");
        props.put("hosts.h3", "zly:44444");

        client= RpcClientFactory.getInstance(props);
    }
    @Test
    public void testSend() throws EventDeliveryException {
        Event event= EventBuilder.withBody("this is body".getBytes());
        HashMap<String, String> header = new HashMap<String, String>();
        header.put("from","zhangsan");
        event.setHeaders(header);
        client.append(event);
    }
    @After
    public void after(){
        client.close();
    }
}
② 负载均衡
public class RpcClientTests02_LoadBalancing {
    private RpcClient client;
    @Before
    public void before(){
        Properties props = new Properties();
        props.put("client.type", "default_loadbalance");
        // List of hosts (space-separated list of user-chosen host aliases)
        props.put("hosts", "h1 h2 h3");
        // host/port pair for each host alias
        props.put("hosts.h1", "zly:44444");
        props.put("hosts.h2", "zly:44444");
        props.put("hosts.h3", "zly:44444");
        props.put("host-selector", "random"); // For random host selection
        // props.put("host-selector", "round_robin"); // For round-robin host
        // // selection
        props.put("backoff", "true"); // Disabled by default.
        props.put("maxBackoff", "10000"); // Defaults 0, which effectively
        // becomes 30000 ms
        client= RpcClientFactory.getInstance(props);
    }
    @Test
    public void testSend() throws EventDeliveryException {
        Event event= EventBuilder.withBody("this is body".getBytes());
        HashMap<String, String> header = new HashMap<String, String>();
        header.put("from","lisi");
        event.setHeaders(header);
        client.append(event);
    }
    @After
    public void after(){
        client.close();
    }
}
2)log4j集成
依赖
<dependency>
	 <groupId>org.apache.flume</groupId>
	 <artifactId>flume-ng-sdk</artifactId>
	 <version>1.9.0</version>
</dependency>
<dependency>
	 <groupId>org.apache.flume.flume-ng-clients</groupId>
	 <artifactId>flume-ng-log4jappender</artifactId>
	 <version>1.9.0</version>
</dependency>
<dependency>
	 <groupId>org.slf4j</groupId>
	 <artifactId>slf4j-log4j12</artifactId>
	 <version>1.7.5</version>
</dependency>
<dependency>
	 <groupId>junit</groupId>
	 <artifactId>junit</artifactId>
	 <version>4.12</version>
	 <scope>test</scope>
</dependency>
public class TestLog {
    private static Log log= LogFactory.getLog(TestLog.class);
    public static void main(String[] args) {
        log.debug("你好!_debug");
        log.info("你好!_info");
        log.warn("你好!_warn");
        log.error("你好!_error");
    }
}
3)SpringBoot 集成
依赖
在这里插入代码片

