Android Facebook登录、分享;ins分享
Facebook开发者平台:传送门
**
Facebook登录
**
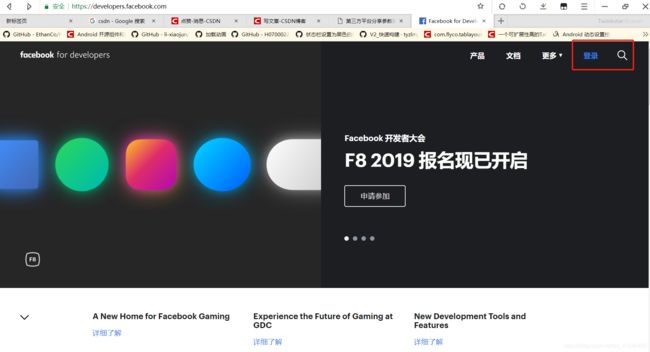
## 1.在Facebook开发者平台上新建或登录Facebook账号

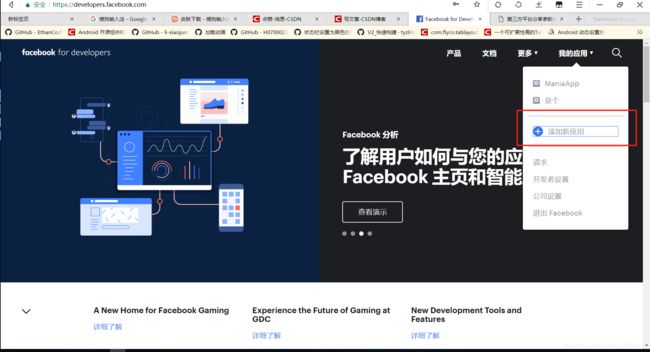
2.添加新应用,创建应用成功后,留意上面的应用编号,等会需要用到

3.添加依赖
(1)在您的项目中,打开 your_app > Gradle Scripts > build.gradle (Project),确保下列存储库都添加到 buildscript { repositories {}} 中:
jcenter()
(2)在您的项目中,打开 your_app > Gradle Scripts > build.gradle (Module: app) 并将下列执行语句添加到 dependencies{} 部分,以便依赖于最新版的 Facebook 登录 SDK:
implementation 'com.facebook.android:facebook-login:[4,5)'
4.其他配置
(1)打开您的 /app/res/values/strings.xml 文件。添加如下所示的代码:
APP_ID就是上面提到的应用编号(记得去除中括号)
[APP_ID]
fb[APP_ID]
(2)打开 /app/manifest/AndroidManifest.xml 文件。在 application 元素后添加以下 uses-permission 元素:
(3)在 application 元素中添加以下 meta-data 元素、一个针对 Facebook 的 activity 元素以及一个针对 Chrome 自定义选项卡的 activity 元素和意向筛选条件:
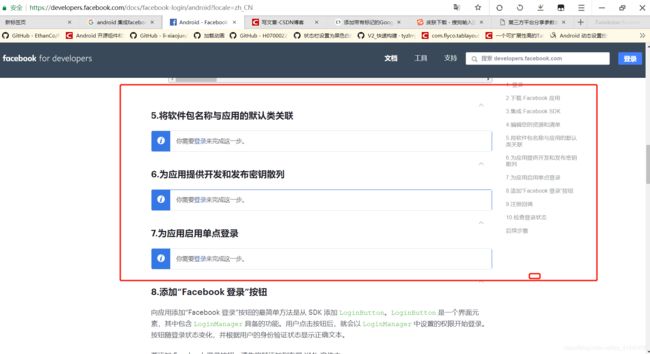
5.将软件包名称与应用的默认类关联
打开关联链接,看到第5点,如图(因为我没有登录,所以不能输入):

PS:散列的获取方式
比较直接的方式,在你的项目输入以下代码,然后运行,查看log,然后复制上去
 //获取密钥散列
        try {
            PackageInfo info = getPackageManager().getPackageInfo(
                    "com.facebook.samples.hellofacebook",
                    PackageManager.GET_SIGNATURES);
            for (Signature signature : info.signatures) {
                MessageDigest md = MessageDigest.getInstance("SHA");
                md.update(signature.toByteArray());
                Log.d("KeyHash:", Base64.encodeToString(md.digest(), Base64.DEFAULT));
            }
        } catch (PackageManager.NameNotFoundException e) {
        } catch (NoSuchAlgorithmException e) {
        }
6.添加登录按钮,打开XML文件:
7.注册回调
CallbackManager callbackManager = CallbackManager.Factory.create();
    loginButton = (LoginButton) findViewById(R.id.login_button);
    loginButton.setReadPermissions("email");
    // 在fragment中使用
    loginButton.setFragment(this);
    // 回调
    loginButton.registerCallback(callbackManager, new FacebookCallback() {
        @Override
        public void onSuccess(LoginResult loginResult) {
            // App code
        }

        @Override
        public void onCancel() {
            // App code
        }

        @Override
        public void onError(FacebookException exception) {
            // App code
        }
    });
8.最后一步,在 onActivityResult 方法中调用 callbackManager.onActivityResult,通过 callbackManager 将登录结果传递至 LoginManager。
      @Override
    protected void onActivityResult(int requestCode, int resultCode, Intent data) {
        callbackManager.onActivityResult(requestCode, resultCode, data);
        super.onActivityResult(requestCode, resultCode, data);
    }
**
Facebook分享
**
1.添加依赖
build.gradle (Project)下buildscript { repositories {}}添加
mavenCentral()
build.gradle (Module: app)下dependencies{}添加
implementation 'com.facebook.android:facebook-share:[4,5)'
2.添加散列,散列获取参考上面登录的散列获取方式
生成 Android 密钥散列并添加到开发者资料页
3.在 AndroidManifest.xml 中设置 ContentProvider,其中 {APP_ID} 是您的应用编号
4.分享链接
ShareLinkContent content = new ShareLinkContent.Builder()
        .setContentUrl(Uri.parse("https://developers.facebook.com"))
        .build();
 button.setOnClickListener(new View.OnClickListener() {
   @Override
   public void onClick(View v) {
   		//调用分享弹窗
       ShareDialog.show(MainActivity.this, content);
   }
});
5.分享图片
Bitmap image = ...
SharePhoto photo = new SharePhoto.Builder()
        .setBitmap(image)
        .build();
SharePhotoContent content = new SharePhotoContent.Builder()
        .addPhoto(photo)
        .build();
6.分享视频
Uri videoFileUri = ...
ShareVideo = new ShareVideo.Builder()
        .setLocalUrl(videoUrl)
        .build();
ShareVideoContent content = new ShareVideoContent.Builder()
        .setVideo(video)
        .build();
7.多媒体
SharePhoto sharePhoto1 = new SharePhoto.Builder()
    .setBitmap(...)
    .build();
SharePhoto sharePhoto2 = new SharePhoto.Builder()
    .setBitmap(...)
    .build();
ShareVideo shareVideo1 = new ShareVideo.Builder()
    .setLocalUrl(...)
    .build();
ShareVideo shareVideo2 = new ShareVideo.Builder()
    .setLocalUrl(...)
    .build();

ShareContent shareContent = new ShareMediaContent.Builder()
    .addMedium(sharePhoto1)
    .addMedium(sharePhoto2)
    .addMedium(shareVideo1)
    .addMedium(shareVideo2)
    .build();

ShareDialog shareDialog = new ShareDialog(...);
shareDialog.show(shareContent, Mode.AUTOMATIC);
其他更加丰富的用法可参考Facebook分享文档:https://developers.facebook.com/docs/sharing/android
ins分享
ins分享不需要添加SDK,但是目前只能分享drawable下图片,网络图片分享会出现无法加载图片的Toast
Uri file = Uri.parse("android.resource://com.example.newfacebook/"+R.drawable.aaa);
   btn_ins.setOnClickListener(new View.OnClickListener() {
            @Override
            public void onClick(View v) {
            Intent shareIntent = new Intent(android.content.Intent.ACTION_SEND);
	        shareIntent.setType("image/*");
	        shareIntent.putExtra(Intent.EXTRA_STREAM,file);
	        shareIntent.putExtra(Intent.EXTRA_TITLE, "YOUR TEXT HERE");
	        shareIntent.setPackage("com.instagram.android");
	        startActivity(shareIntent);
            }
        });