SpringBoot实现Excel文件上传至数据库及下载数据库数据为Excel
SpringBoot整合poi实现Excel的导入导出
这里是整合poi实现的,后来发现poi有一些缺陷,但这些缺陷被阿里的EasyExcel解决了,于是又写了篇整合EasyExcel的。
小飞机----》SpringBoot整合EasyExcel实现excel导入导出
首先创建一个SpringBoot项目

选择依赖,这里我使用的是mysql数据库和MyBatis做持久层,选用别的也可以

项目创建完成之后再pom.xml中加入操作Excel需要的jar包
    org.apache.poi
    poi
    3.14


    org.apache.poi
    poi-ooxml
    3.14
在maven下包的时候我们创建一下数据库

修改applocation.properties配置文件
server.port=8088
#database
spring.datasource.url=jdbc:mysql://127.0.0.1:3306/excl_test?characterEncoding=UTF-8
spring.datasource.username=root
spring.datasource.password=151415
spring.datasource.driver-class-name=com.mysql.jdbc.Driver
#mybatis
mybatis.mapper-locations=classpath:mapper/*.xml
mybatis.type-aliases-package=com.thz.excl_upload.entity
然后我使用IDEA的插件easy code生成了entity、mapper、dao、service及serviceImpl,这里也贴一下吧(自己编写或使用别的工具类生成也是一样的)
先安装插件,我这里是已经安装好了


在安装完成之后右击我们需要帮助生成代码的表,就会多出一个EasyCode的选项

在弹出的对话框中选择我们需要生成的东西及放置位置点击OK就行了

在Controller层中新建一个UserController
/**
 * (User)表控制层
 *
 * @author makejava
 * @since 2020-07-22 09:57:55
 */
@RestController
@RequestMapping("user")
public class UserController {
    /**
     * 服务对象
     */
    @Resource
    private UserService userService;

    /**
     * 通过主键查询单条数据
     *
     * @param id 主键
     * @return 单条数据
     */
    @GetMapping("selectOne")
    public User selectOne(Integer id) {
        return this.userService.queryById(id);
    }


    @RequestMapping(value = "/uploadExcl")
    public @ResponseBody
    Map<String ,Object> uploadExcl(HttpServletRequest request, @RequestParam("file") MultipartFile file){
        Map<String ,Object> result = new HashMap<>();
        String path = request.getSession().getServletContext().getRealPath("/");
        try{
            // 如果文件不为空,写入上传路径
            if(!file.isEmpty()){
                result = userService.uploadExcl(file);
            }else {
                result.put("code","1");
                result.put("message","上传文件为空!");
            }
        }catch (Exception e){
            e.printStackTrace();
        }
        if (result.get("code").equals("0")){
            //根据时间戳创建新的文件名,这样即便是第二次上传相同名称的文件,也不会把第一次的文件覆盖了
            //也可以用UUID创建
            String fileName = System.currentTimeMillis() + file.getOriginalFilename();
            //通过req.getServletContext().getRealPath("") 获取当前项目的真实路径,然后拼接前面的文件名
            String destFileName = request.getContextPath()+ "uploaded" + File.separator + fileName;
            System.out.println(request.getServletPath());
            System.out.println(request.getServletContext());
            System.out.println(request.getServletContext().getRealPath(""));
            System.out.println(request.getServletContext().getRealPath("/"));
            System.out.println(request.getContextPath());
            System.out.println(destFileName);
            //第一次运行的时候,这个文件所在的目录往往是不存在的,这里需要创建一下目录
            File destFile = new File(destFileName);
            destFile.getParentFile().mkdirs();
            System.out.println(destFile);
            //把浏览器上传的文件复制到希望的位置
            try {
                file.transferTo(destFile);
            } catch (IOException e) {
                e.printStackTrace();
            }
            System.out.println(fileName);
        }
        return result;
    }


}
在UserService中新增一个接口
public Map<String,Object> uploadExcl(MultipartFile file);
实现该接口
/**
* 读取excl并插入到数据中
* @param file
* @return
*/
@Override
public Map<String,Object> uploadExcl(MultipartFile file) {
    Map<String,Object> ruslt = new HashMap<>();
    try {
        String fileName = file.getOriginalFilename();
        //判断文件格式并获取工作簿
        Workbook workbook;
        if(fileName.endsWith("xls")){
            workbook = new HSSFWorkbook(file.getInputStream());
        }else if(fileName.endsWith("xlsx")){
            workbook = new XSSFWorkbook(file.getInputStream());
        } else {
            ruslt.put("code","1");
            ruslt.put("message","文件格式非excl");
            return ruslt;
        }
        //判断第一页不为空
        if(null != workbook.getSheetAt(0)){
            //读取excl第二行,从1开始
            for(int rowNumofSheet = 1;rowNumofSheet <=workbook.getSheetAt(0).getLastRowNum();rowNumofSheet++){
                if (null != workbook.getSheetAt(0).getRow(rowNumofSheet)) {
                    //定义行,并赋值
                    Row aRow = workbook.getSheetAt(0).getRow(rowNumofSheet);
                    User user = new User();
                    System.out.println(aRow.getLastCellNum());
                    for(int cellNumofRow=0;cellNumofRow<aRow.getLastCellNum();cellNumofRow++){
                        //读取rowNumOfSheet值所对应行的数据
                        //获得行的列数
                        Cell xCell = aRow.getCell(cellNumofRow);
                        Object cell_val;
                        if(cellNumofRow == 0){
                            if(xCell != null && !xCell.toString().trim().isEmpty()){
                                cell_val = xCell.getStringCellValue();
                                if(cell_val != null){
                                    String temp = (String)cell_val;
                                    user.setName(temp);
                                }
                            }
                        }
                        if(cellNumofRow == 1){
                            if(xCell != null && !xCell.toString().trim().isEmpty()){
                                cell_val = xCell.getStringCellValue();
                                if(cell_val != null){
                                    String temp = (String)cell_val;
                                    if("男".equals(temp)){
                                        user.setSex("1");
                                    } else {
                                        user.setSex("0");
                                    }
                                    user.setCreateTime(new Date());
                                    userDao.insert(user);
                                }
                            }
                        }
                    }

                }
            }
            ruslt.put("code","0");
            ruslt.put("message","成功插入数据库!");
        }else {
            ruslt.put("code","1");
            ruslt.put("message","第一页EXCL无数据!");
        }
    }catch (Exception e){
        e.printStackTrace();
        ruslt.put("code","1");
        ruslt.put("message",e.getMessage());
    }
    return ruslt;
}
在resource/static下新建一个index.html页面作为前端上传Excel上传页面
<!DOCTYPE html>
<html lang="en">
<head>
<meta charset="UTF-8">
<title>上传excl</title>
<script src="https://apps.bdimg.com/libs/jquery/2.1.4/jquery.min.js">
</script>
</head>
<body>
<div class="panel panel-primary">
<!-- .panel-heading 面板头信息。 -->
<div class="panel-heading">
<!-- .panel-title 面板标题。 -->
<h1 class="panel-title">上传excl并插入到数据库</h1>
</div>
</div>
<form class="form-horizontal" action="/user/uploadExcl" enctype="multipart/form-data" method="post">
<div class="form-group">
<div class="input-group col-md-4">
<span class="input-group-addon">
<i class="glyphicon glyphicon-search"></i>
</span>
<input class="form-control" placeholder="请选择文件" type="file" name="file"/>
</div>
</div>
<div class="form-group">
<div class="col-md-4">
<div class="btn-group btn-group-justified" >
<div class="btn-group" >
<button type="submit" class="btn btn-success" id="submitbtn">
<span class="glyphicon glyphicon-share"></span> 文件上传</button>
</div>
</div>
</div>
</div>
</form>
<table border="0" style="margin-top:4px; margin-left: 18px">
<tr>
<td><a href="#" class="easyui-linkbutton" onclick="downloadfile();">数据导出</a></td>
</tr>
</table>
<script>
function downloadfile(){
window.location.href="/user/UserExcelDownloads";
}
</script>
</body>
</html>
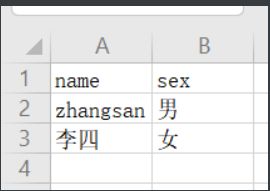
启动服务,输入下面网址上传文件,再去数据库中查看,数据是成功插入了
http://localhost:8088/
Excel文件内容如下
接下来编写下载数据库数据为Excel的代码,easycode生成的代码动态查询所有数据在mapper中的sql和dao层的接口是编写了,但是在service层确没有编写接口及实现类,这里先补一下
UserService
public List<User> queryAll(User user);
UserServiceImpl
@Override
public List<User> queryAll(User user) {
    return this.userDao.queryAll(user);
}
在UserController中添加下载方法
/**
 * 下载数据库数据为exles
 *
 * @param response
 * @throws IOException
 */
@RequestMapping(value = "UserExcelDownloads", method = RequestMethod.GET)
public void downloadAllClassmate(HttpServletResponse response) throws IOException {
    HSSFWorkbook workbook = new HSSFWorkbook();
    HSSFSheet sheet = workbook.createSheet("信息表");

    List<User> userList = userService.queryAll(new User());

    String fileName = "userinf"  + ".xls";//设置要导出的文件的名字
    //新增数据行,并且设置单元格数据

    int rowNum = 1;

    String[] headers = { "id", "name", "sex", "create_time"};
    //headers表示excel表中第一行的表头

    HSSFRow row = sheet.createRow(0);
    //在excel表中添加表头

    for(int i=0;i<headers.length;i++){
        HSSFCell cell = row.createCell(i);
        HSSFRichTextString text = new HSSFRichTextString(headers[i]);
        cell.setCellValue(text);
    }

    //在表中存放查询到的数据放入对应的列
    for (User user : userList) {
        HSSFRow row1 = sheet.createRow(rowNum);
        row1.createCell(0).setCellValue(user.getId());
        row1.createCell(1).setCellValue(user.getName());
        row1.createCell(2).setCellValue(user.getSex());
        SimpleDateFormat formatter = new SimpleDateFormat("yyyy-MM-dd HH:mm:ss");
        String dateString = formatter.format(user.getCreateTime());
        row1.createCell(3).setCellValue(dateString);
        System.out.println(dateString);
        rowNum++;
    }

    response.setContentType("application/octet-stream");
    response.setHeader("Content-disposition", "attachment;filename=" + fileName);
    response.flushBuffer();
    workbook.write(response.getOutputStream());
}
下载按钮已经在之前的html页面中添加过了,重启服务,进入localhost:8088点击数据导出,应该是会默认下载到浏览器默认的下载路径中去的,我这里用的是google浏览器,是这样的

打开之后文件内容如下(因为我之前测试反复上传过很多次,所以都是重复的数据)
