图像处理-采用光流法进行运动目标检测
目录
- 简介
- 什么是光流
- 光流分类
- 光流的实现运动目标检测
- 环境搭建
- 稀疏光流的实现运动目标检测
- 主要实现代码
- 运行结果
- 稠密光流的实现运动目标检测
- 主要实现代码
- 运行结果
简介
什么是光流
光流也就是optical flow,首先我们谈谈什么是光流。
在目标和相机之间相对运动时, 两个连续图像帧之间,目标的移动就称之为光流。
光流分类
目前的光流主要是两种:
- 稀疏的 (sparse)
主要是基于图像中目标的边缘或者角点等特征 - 稠密的 (dense)
主要是像素级别的了, 可能是整幅图像的像素,目前很多语义分割的方法可以获得稠密的光流。
可以明显看出,稠密的光流具有更高的精度,但是速度慢并且计算消耗大。
光流的实现运动目标检测
环境搭建
pip install opencv-python
稀疏光流的实现运动目标检测
这个过程,opencv其实已经提供了很多支持,大概的流程是
当前帧图像输入
提取某种稀疏特征
上一帧图像输入
提取某种稀疏特征
某种光流计算方法
目标运动
如果想要使用光流跟踪具体某个物体,则需要采用和目标检测结合的方式。
主要实现代码
import time
import cv2 as cv
import numpy as np

# 1. 稀疏特征选择及参数设定,Shi-Tomasi corner特征
feature_params = dict(maxCorners = 300, qualityLevel = 0.2, minDistance = 2, blockSize = 7)
# 2. 光流跟踪算法选择及参数设定, Lucas-Kanade optical flow
lk_params = dict(winSize = (15,15), maxLevel = 2, criteria = (cv.TERM_CRITERIA_EPS | cv.TERM_CRITERIA_COUNT, 10, 0.03))
# 3. 摄像头调用
cap = cv.VideoCapture(0)
color = (0, 255, 0)
ret, first_frame = cap.read()
# 4. 图像灰度转换,检测只需要亮度信息,可以减少计算量
prev_gray = cv.cvtColor(first_frame, cv.COLOR_BGR2GRAY)
# 5. 获取Shi-Tomasi corner特征中比较强的特征用于跟踪
prev = cv.goodFeaturesToTrack(prev_gray, mask = None, **feature_params)
mask = np.zeros_like(first_frame)

while(cap.isOpened()):
    ret, frame = cap.read()
    start = time.time()
    gray = cv.cvtColor(frame, cv.COLOR_BGR2GRAY)
    # 6. 使用 Lucas-Kanade optical flow 方式跟踪光流
    next, status, error = cv.calcOpticalFlowPyrLK(prev_gray, gray, prev, None, **lk_params)
    # 7. 选取上一帧中好的特征点
    good_old = prev[status == 1]
    # 8. 选取下一帧中好的特征点
    good_new = next[status == 1]
    # 9. 画出光流跟踪轨迹
    for i, (new, old) in enumerate(zip(good_new, good_old)):
        a, b = new.ravel()
        c, d = old.ravel()
        mask = cv.line(mask, (a, b), (c, d), color, 2)
        frame = cv.circle(frame, (a, b), 3, color, -1)
    # 10. 将轨迹图叠加到原始图中作为输出
    output = cv.add(frame, mask)
    prev_gray = gray.copy()
    prev = good_new.reshape(-1, 1, 2)
    end = time.time()
    print("Sparse Optical Flow Tracking Time: %.5f"%(end - start))
    cv.imshow("sparse optical flow", output)
    if cv.waitKey(10) & 0xFF == ord('q'):
        break
cap.release()
cv.destroyAllWindows()
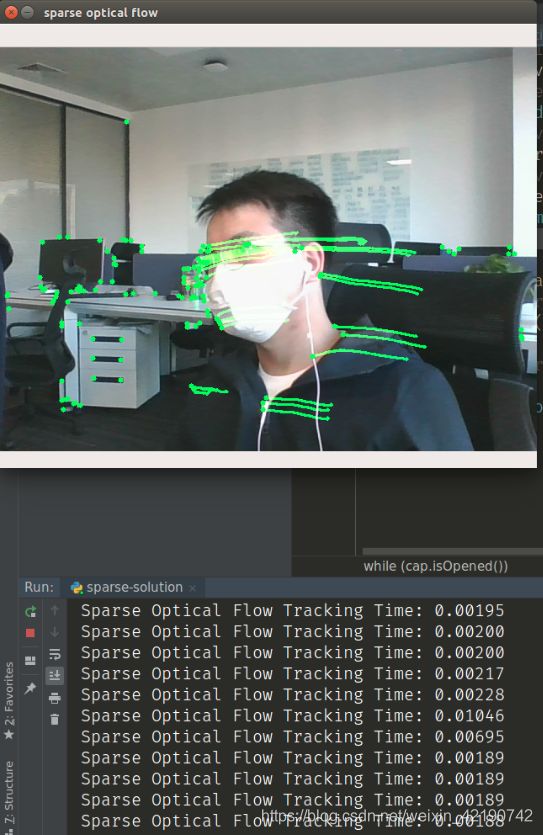
运行结果
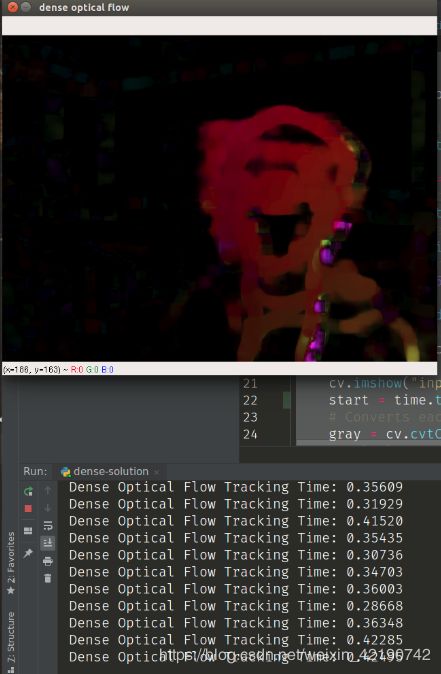
稠密光流的实现运动目标检测
主要实现代码
import time
import cv2 as cv
import numpy as np

cap = cv.VideoCapture(0)
ret, first_frame = cap.read()
prev_gray = cv.cvtColor(first_frame, cv.COLOR_BGR2GRAY)
mask = np.zeros_like(first_frame)
# Sets image saturation to maximum
mask[..., 1] = 255

while(cap.isOpened()):
    ret, frame = cap.read()
    # Opens a new window and displays the input frame
    cv.imshow("input", frame)
    start = time.time()
    gray = cv.cvtColor(frame, cv.COLOR_BGR2GRAY)
    flow = cv.calcOpticalFlowFarneback(prev_gray, gray, None, 0.5, 3, 15, 3, 5, 1.2, 0)
    # Computes the magnitude and angle of the 2D vectors
    magnitude, angle = cv.cartToPolar(flow[..., 0], flow[..., 1])
    # Sets image hue according to the optical flow direction
    mask[..., 0] = angle * 180 / np.pi / 2
    # Sets image value according to the optical flow magnitude (normalized)
    mask[..., 2] = cv.normalize(magnitude, None, 0, 255, cv.NORM_MINMAX)
    # Converts HSV to RGB (BGR) color representation
    rgb = cv.cvtColor(mask, cv.COLOR_HSV2BGR)
    end = time.time()
    print("Dense Optical Flow Tracking Time: %.5f" % (end - start))
    cv.imshow("dense optical flow", rgb)
    prev_gray = gray
    if cv.waitKey(1) & 0xFF == ord('q'):
        break
cap.release()
cv.destroyAllWindows()
运行结果